
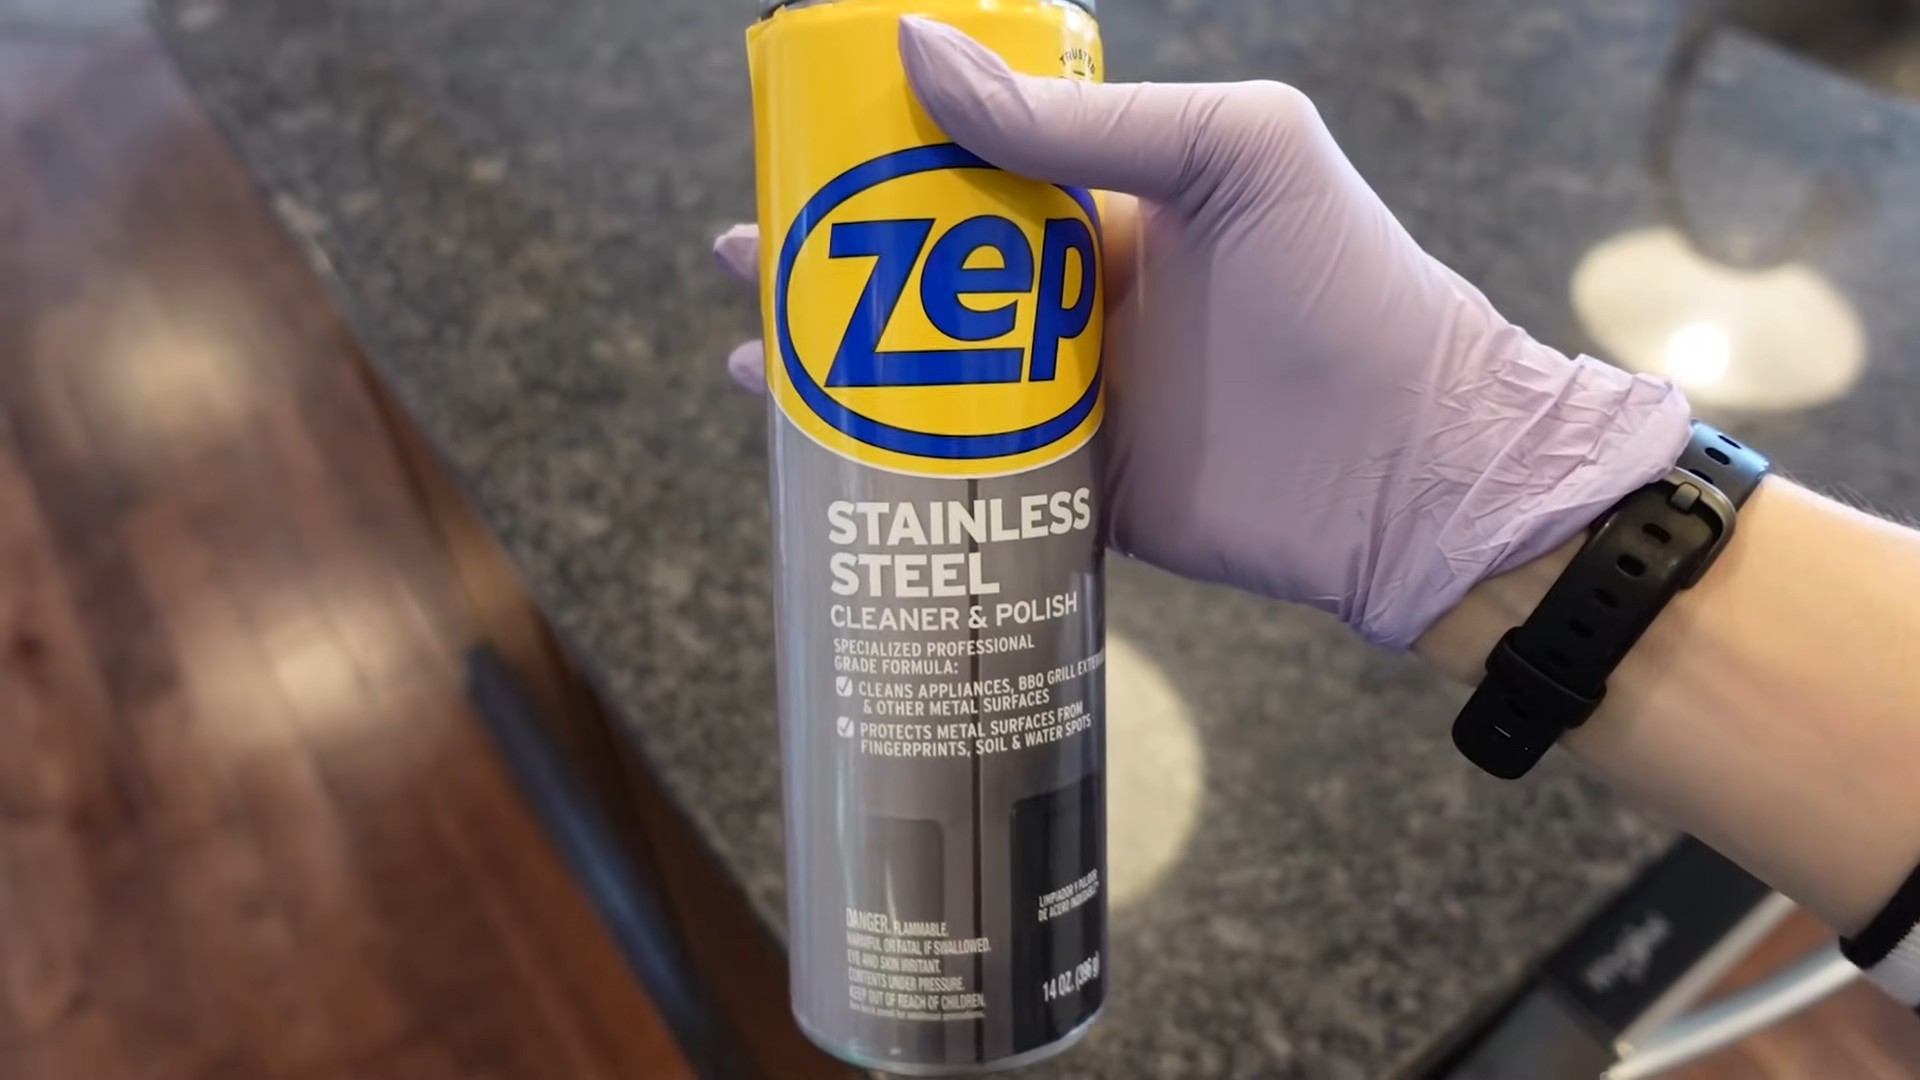
ZEP Stainless Steel Cleaner: Are you tired of battling fingerprints, smudges, and water spots on your beautiful stainless steel appliances? I know I was! It felt like a never-ending cycle of wiping and buffing, only to have them reappear moments later. But what if I told you there’s a simple, DIY solution that can leave your stainless steel sparkling and protected, without breaking the bank?
For generations, maintaining a gleaming home has been a source of pride. Think about the polished silver of Victorian England or the meticulously cleaned copper pots of a French farmhouse. While stainless steel is a relatively modern material, the desire to keep it looking its best is timeless. However, many commercial cleaners are filled with harsh chemicals and can be quite expensive. That’s where this DIY trick comes in!
This article will guide you through creating your own effective ZEP stainless steel cleaner alternative using ingredients you likely already have in your pantry. Not only will you save money, but you’ll also have the satisfaction of knowing exactly what’s going onto your appliances. Say goodbye to stubborn stains and hello to a streak-free shine! I’m excited to share this easy and affordable method with you, so let’s get started!
DIY Stainless Steel Cleaner and Polisher: The Ultimate Guide
Hey there, fellow DIY enthusiasts! Are you tired of those expensive stainless steel cleaners that promise the world but leave streaks and smudges behind? I know I was! That’s why I embarked on a mission to create my own effective and affordable stainless steel cleaner and polisher. And guess what? I succeeded! This recipe is not only budget-friendly but also uses ingredients you probably already have in your pantry. Get ready to say goodbye to fingerprints and hello to sparkling stainless steel!
What You’ll Need
Before we dive in, let’s gather our supplies. This is a pretty simple recipe, so you won’t need anything too fancy.
* **White Vinegar:** This is our main cleaning agent. Vinegar’s acidity helps cut through grease and grime.
* **Dish Soap:** A mild dish soap will help lift dirt and leave a clean surface. I prefer using a clear, unscented dish soap to avoid any residue or unwanted smells.
* **Olive Oil (or Mineral Oil):** This is the secret ingredient for that beautiful shine! It acts as a polisher and protectant.
* **Spray Bottle:** A clean, empty spray bottle is essential for easy application.
* **Microfiber Cloths:** These are the best for cleaning and polishing stainless steel without scratching. You’ll need at least two: one for cleaning and one for polishing.
* **Optional: Essential Oil (Lemon or Orange):** If you want to add a pleasant scent, a few drops of lemon or orange essential oil will do the trick.
Mixing the Cleaning Solution
This is where the magic happens! We’re going to create a powerful cleaning solution that will tackle even the toughest stains.
1. **Prepare the Spray Bottle:** Make sure your spray bottle is clean and dry. Any residue inside could affect the performance of the cleaner.
2. **Add Vinegar:** Pour 1 cup of white vinegar into the spray bottle.
3. **Add Dish Soap:** Add 1 teaspoon of dish soap to the vinegar. Be careful not to add too much, as it can create excessive suds.
4. **Optional: Add Essential Oil:** If you’re using essential oil, add 5-10 drops to the mixture.
5. **Add Water:** Fill the rest of the spray bottle with water. This will dilute the vinegar and dish soap, making it safe for most stainless steel surfaces.
6. **Shake Well:** Secure the spray bottle lid and shake the mixture thoroughly to combine all the ingredients.
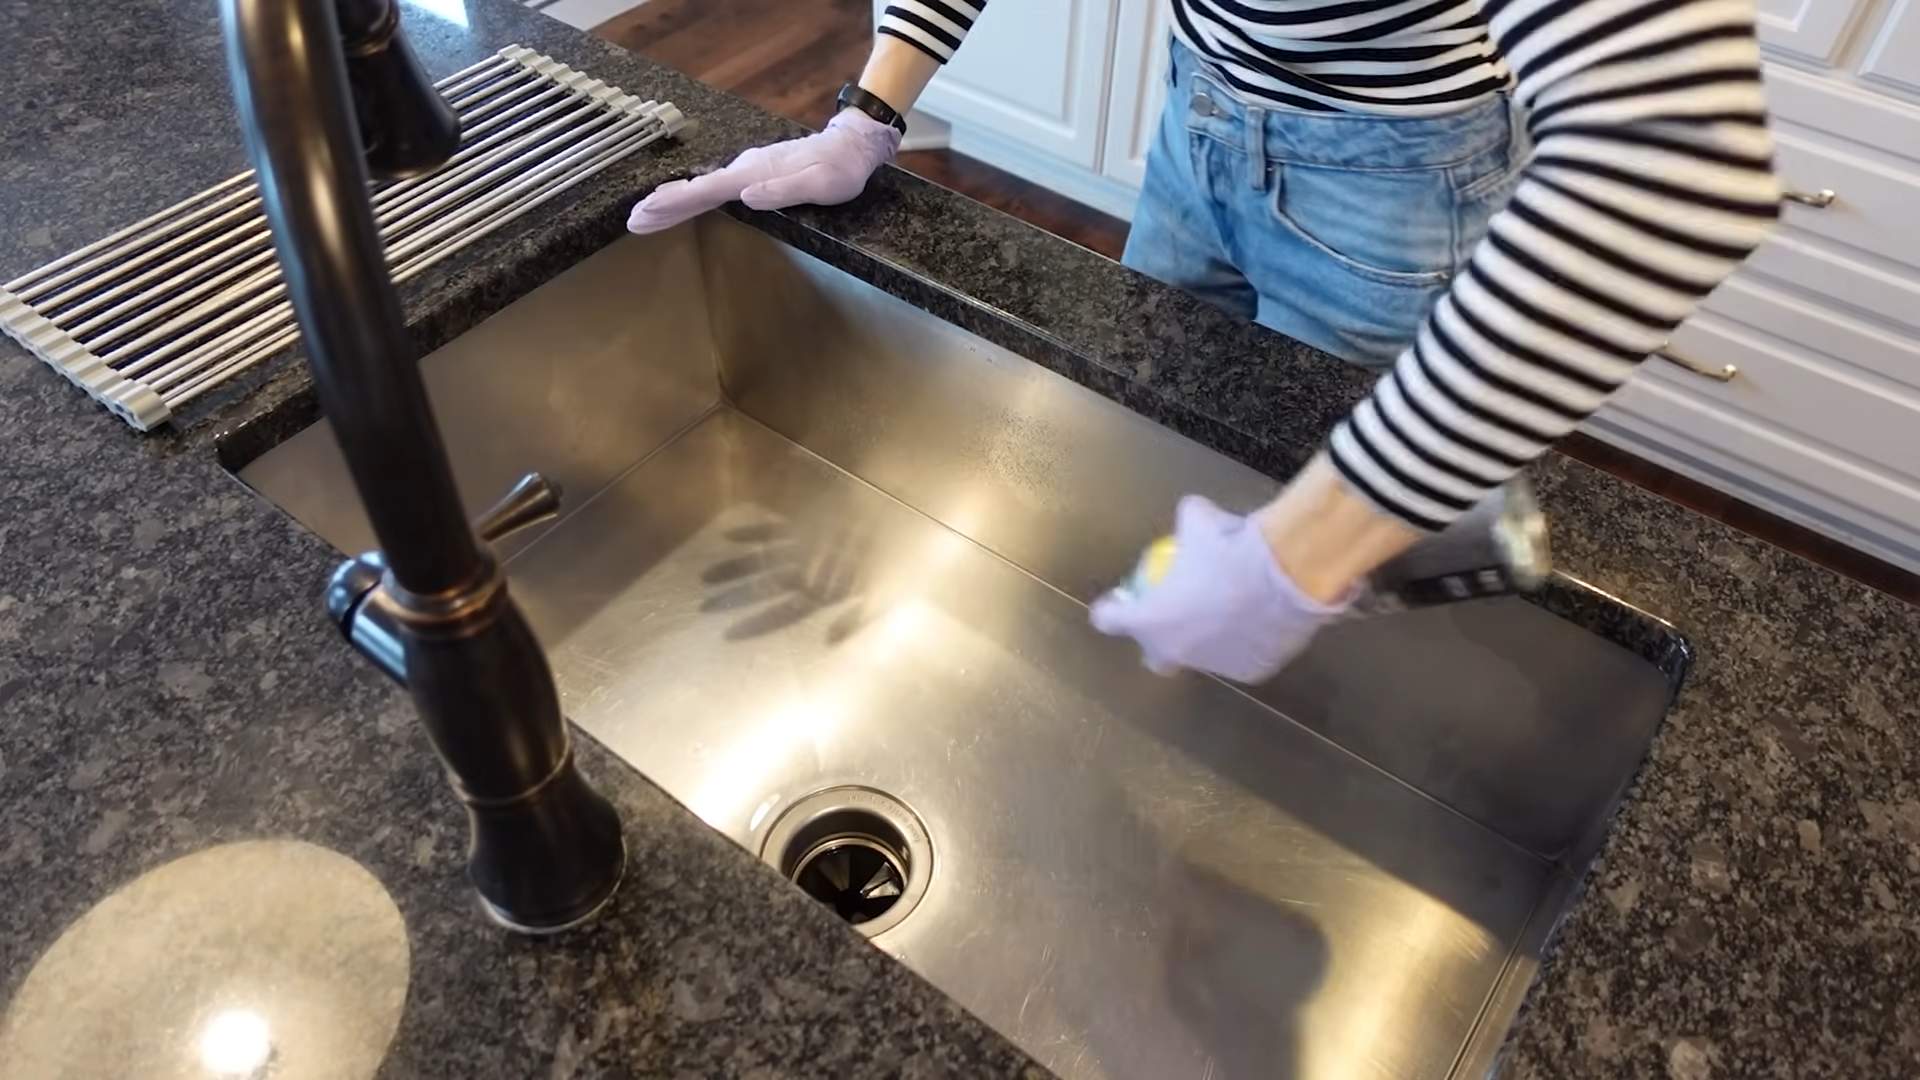
Cleaning Your Stainless Steel
Now that we have our cleaning solution, let’s get to work! This process is straightforward, but following these steps will ensure the best results.
1. **Spray the Surface:** Lightly spray the stainless steel surface with the cleaning solution. Don’t over-saturate it; a light mist is all you need.
2. **Wipe with a Damp Microfiber Cloth:** Using a clean, damp microfiber cloth, wipe the surface in the direction of the grain. This is crucial to avoid streaks. Always wipe *with* the grain, not against it.
3. **Rinse (If Necessary):** If the surface is particularly dirty or greasy, you may need to rinse it with clean water after wiping. Use a separate damp microfiber cloth to rinse.
4. **Dry Thoroughly:** Use a clean, dry microfiber cloth to dry the surface completely. Again, wipe in the direction of the grain.
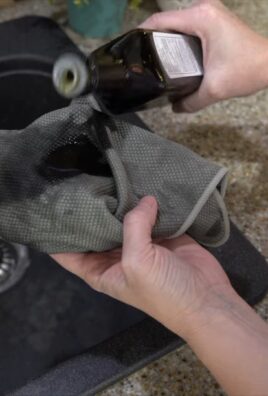
Polishing for a Brilliant Shine
This is where the olive oil (or mineral oil) comes in. It’s the key to achieving that showroom-worthy shine!
1. **Apply a Small Amount of Oil:** Pour a very small amount of olive oil (or mineral oil) onto a clean, dry microfiber cloth. A little goes a long way! Start with about a teaspoon and add more if needed.
2. **Buff the Surface:** Gently buff the stainless steel surface with the oil-infused cloth. Use circular motions and apply light pressure. Again, work *with* the grain.
3. **Remove Excess Oil:** Use a clean, dry section of the microfiber cloth to remove any excess oil. Continue buffing until the surface is shiny and streak-free.
4. **Admire Your Work:** Step back and admire your sparkling stainless steel! The oil will not only enhance the shine but also help protect the surface from future fingerprints and smudges.
Dealing with Stubborn Stains
Sometimes, you’ll encounter stubborn stains that require a little extra effort. Here are a few tips for tackling those tough spots:
* **Baking Soda Paste:** For burnt-on food or stubborn stains, make a paste of baking soda and water. Apply the paste to the stain, let it sit for a few minutes, and then gently scrub with a soft cloth or sponge. Rinse thoroughly and dry.
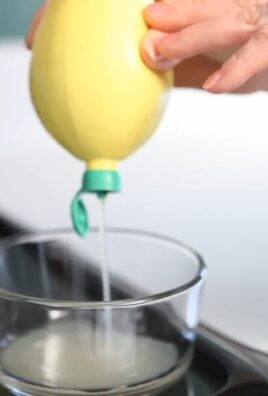
* **Lemon Juice:** Lemon juice is a natural acid that can help dissolve hard water stains and rust. Apply lemon juice to the stain, let it sit for a few minutes, and then wipe clean. Rinse thoroughly and dry.
* **Club Soda:** Club soda can be surprisingly effective at removing water spots and streaks. Simply spray the surface with club soda and wipe clean with a microfiber cloth.
* Always test any cleaning solution in an inconspicuous area first to ensure it doesn’t damage the surface.
Maintaining Your Stainless Steel
Prevention is key to keeping your stainless steel looking its best. Here are a few tips for maintaining its shine:
* **Wipe Up Spills Immediately:** The sooner you wipe up spills, the less likely they are to stain.
* **Avoid Abrasive Cleaners:** Abrasive cleaners can scratch the surface of stainless steel. Stick to gentle cleaners and microfiber cloths.
* **Regular Cleaning:** Clean your stainless steel surfaces regularly to prevent dirt and grime from building up. A quick wipe-down with the cleaning solution once a week is usually sufficient.
* Apply a thin coat of olive oil or mineral oil every few weeks to maintain the shine and protect the surface.
Safety Precautions
While this DIY cleaner is generally safe, it’s always a good idea to take a few precautions:
* **Wear Gloves:** If you have sensitive skin, wear gloves to protect your hands from the vinegar and dish soap.
* **Avoid Contact with Eyes:** Avoid getting the cleaning solution in your eyes. If contact occurs, rinse thoroughly with water.
* **Keep Out of Reach of Children:** Store the cleaning solution in a safe place, out of reach of children and pets.
* **Ventilation:** Ensure adequate ventilation when cleaning, especially if you’re using essential oils.
Troubleshooting
Sometimes, things don’t go exactly as planned. Here are a few common problems and how to fix them:
* **Streaks:** If you’re getting streaks, make sure you’re wiping in the direction of the grain and using a clean, dry microfiber cloth. You may also be using too much oil.
* **Residue:** If you’re seeing residue, you may be using too much dish soap. Reduce the amount of dish soap in the cleaning solution.
* **Dullness:** If your stainless steel is looking dull, try polishing it with a little more olive oil or mineral oil.
* Cloudiness: If the surface appears cloudy after cleaning, it could be due to hard water. Try using distilled water in your cleaning solution.
Why This Recipe Works
So, what makes this DIY cleaner so effective? It’s all about the combination of ingredients:
* **Vinegar:** The acetic acid in vinegar breaks down grease, grime, and hard water stains.
* **Dish Soap:** Dish soap helps lift dirt and debris from the surface.
* **Olive Oil (or Mineral Oil):** The oil creates a protective barrier and adds a beautiful shine.
This recipe is a simple, affordable, and effective way to keep your stainless steel looking its best. I’ve been using it for years, and I’m always amazed at the results. Give it a try, and I’m confident you’ll be just as impressed!
Alternative Recipes and Variations
Want to experiment a little? Here are a few variations on the basic recipe:
* **Lemon Vinegar Cleaner:** Infuse your vinegar with lemon peels for a citrusy boost. Simply add lemon peels to a jar of vinegar and let it sit for a few weeks. Then, strain the vinegar and use it in the cleaning solution.
* **Baking Soda and Vinegar Paste:** For extra cleaning power, make a paste of baking soda and vinegar. Apply the paste to stubborn stains, let it sit for a few minutes, and then scrub gently.
* **Castile Soap Cleaner:** Replace the dish soap with castile soap for a more natural cleaning solution.
* Essential Oil Blends: Experiment with different essential oil blends to create your own custom scent. Lavender and tea tree oil are also great options.
Where to Use This Cleaner
This DIY stainless steel cleaner is perfect for a variety of surfaces, including:
* **Kitchen Appliances:** Refrigerators, dishwashers, ovens, microwaves
* **Sinks and Faucets:** Stainless steel sinks and faucets
*
Conclusion
So, there you have it! This simple, yet incredibly effective DIY stainless steel cleaner using ZEP stainless steel cleaner is a game-changer for anyone battling stubborn smudges, fingerprints, and water spots on their appliances and surfaces. We’ve shown you how to unlock the full potential of a readily available product, transforming it into a powerhouse cleaning solution that rivals expensive, specialized cleaners.
Why is this DIY trick a must-try? Because it’s economical, efficient, and delivers professional-grade results without the professional-grade price tag. You’re not just cleaning; you’re restoring the luster and shine to your stainless steel, making it look brand new again. Think about the time and money you’ll save by not constantly purchasing pre-made cleaners that often fall short of expectations. This method empowers you to take control of your cleaning routine and achieve consistently sparkling results.
But the benefits don’t stop there. This DIY approach is also about understanding the products you use and tailoring them to your specific needs. While the core recipe is simple, there’s room for customization. For instance, if you’re dealing with particularly stubborn grease, you can slightly increase the concentration of ZEP stainless steel cleaner in your solution. Alternatively, for lighter cleaning or maintenance, you can dilute the solution further.
Consider adding a few drops of essential oil, like lemon or orange, for a subtle, refreshing scent. Just be sure to test the solution in an inconspicuous area first to ensure it doesn’t react negatively with your stainless steel. Another variation involves using a microfiber cloth specifically designed for stainless steel. These cloths have a unique weave that helps to lift dirt and grime without scratching the surface. Experiment with different application techniques, such as spraying directly onto the surface versus spraying onto the cloth first, to find what works best for you.
Ultimately, the key to success with this DIY stainless steel cleaner is experimentation and adaptation. Don’t be afraid to tweak the recipe and technique to suit your specific needs and preferences. The goal is to achieve that streak-free, dazzling shine that makes your stainless steel surfaces the envy of all.
We are confident that once you try this DIY trick, you’ll be amazed by the results. It’s a simple, cost-effective way to keep your stainless steel looking its best. We encourage you to give it a try and share your experience with us! Let us know what variations you’ve tried, what worked best for you, and any tips or tricks you’ve discovered along the way. Your feedback will help us refine this recipe and make it even better for everyone. Share your before-and-after photos on social media using #DIYStainlessSteelCleaner and inspire others to embrace the power of DIY cleaning! We can’t wait to see your sparkling results!
FAQ
What exactly is ZEP Stainless Steel Cleaner, and why is it so effective in this DIY recipe?
ZEP Stainless Steel Cleaner is a commercially available cleaning product specifically formulated to clean and protect stainless steel surfaces. Its effectiveness stems from its unique blend of solvents, detergents, and oils that work together to dissolve grease, remove fingerprints, and leave behind a protective barrier that resists future smudges and stains. In this DIY recipe, we’re leveraging the cleaning power of ZEP, but optimizing its application and dilution for even better results and cost-effectiveness.
Can I use a different brand of stainless steel cleaner instead of ZEP?
While ZEP Stainless Steel Cleaner is the recommended product for this DIY recipe due to its proven effectiveness and availability, you can experiment with other brands. However, it’s crucial to choose a cleaner specifically designed for stainless steel and to test it in an inconspicuous area first to ensure it doesn’t damage or discolor the surface. Be aware that the results may vary depending on the specific formulation of the alternative cleaner. Always read and follow the manufacturer’s instructions for any cleaning product you use.
What type of cloth is best for applying this DIY stainless steel cleaner?
Microfiber cloths are generally considered the best choice for cleaning stainless steel. Their fine fibers are gentle on the surface and effectively lift dirt and grime without scratching. Look for microfiber cloths specifically designed for stainless steel cleaning, as they often have a unique weave that enhances their cleaning power. Avoid using abrasive cloths or sponges, as they can scratch the stainless steel. You can also use a soft cotton cloth, but microfiber will generally yield better results.
How often should I use this DIY stainless steel cleaner?
The frequency of cleaning depends on how often your stainless steel surfaces are used and how quickly they accumulate dirt and fingerprints. For high-traffic areas like kitchen appliances, you may want to clean them once or twice a week. For less frequently used surfaces, such as stainless steel trim or decorative items, cleaning once a month may be sufficient. Regular cleaning will help prevent the buildup of stubborn stains and keep your stainless steel looking its best.
Is this DIY stainless steel cleaner safe for all types of stainless steel finishes?
While this DIY cleaner is generally safe for most stainless steel finishes, it’s always a good idea to test it in an inconspicuous area first, especially if you have a brushed or textured finish. Some finishes may be more sensitive to certain cleaning agents, and testing will help you avoid any potential damage or discoloration. If you notice any adverse effects, discontinue use immediately.
Can I use this cleaner on other surfaces besides stainless steel?
This DIY cleaner is specifically formulated for stainless steel and may not be suitable for other surfaces. Using it on other materials could potentially damage or discolor them. It’s always best to use cleaning products specifically designed for the type of surface you’re cleaning.
What if I accidentally get the cleaner in my eyes or on my skin?
If the cleaner comes into contact with your eyes, rinse them immediately with plenty of water for at least 15 minutes. If irritation persists, seek medical attention. If the cleaner comes into contact with your skin, wash the affected area with soap and water. If you experience any skin irritation, discontinue use and consult a doctor. Always wear gloves when cleaning to protect your hands from potential irritants.
How should I store the leftover DIY stainless steel cleaner?
Store the leftover cleaner in a tightly sealed spray bottle or container in a cool, dry place away from direct sunlight and heat. Keep it out of reach of children and pets. Label the container clearly to avoid accidental misuse. The cleaner should remain effective for several months if stored properly.
What are some common mistakes to avoid when cleaning stainless steel?
Some common mistakes to avoid when cleaning stainless steel include using abrasive cleaners or cloths, cleaning against the grain of the metal, and leaving the cleaner on the surface for too long. Always use gentle cleaning products and techniques, clean with the grain of the metal, and wipe the surface dry immediately after cleaning to prevent water spots.
My stainless steel has stubborn water spots. Will this DIY cleaner remove them?
Yes, this DIY cleaner is effective at removing water spots from stainless steel. The combination of ZEP stainless steel cleaner and the proper application technique helps to dissolve the mineral deposits that cause water spots. For particularly stubborn water spots, you may need to apply the cleaner and let it sit for a few minutes before wiping it away. You can also try using a slightly more concentrated solution of ZEP stainless steel cleaner.

Leave a Comment