
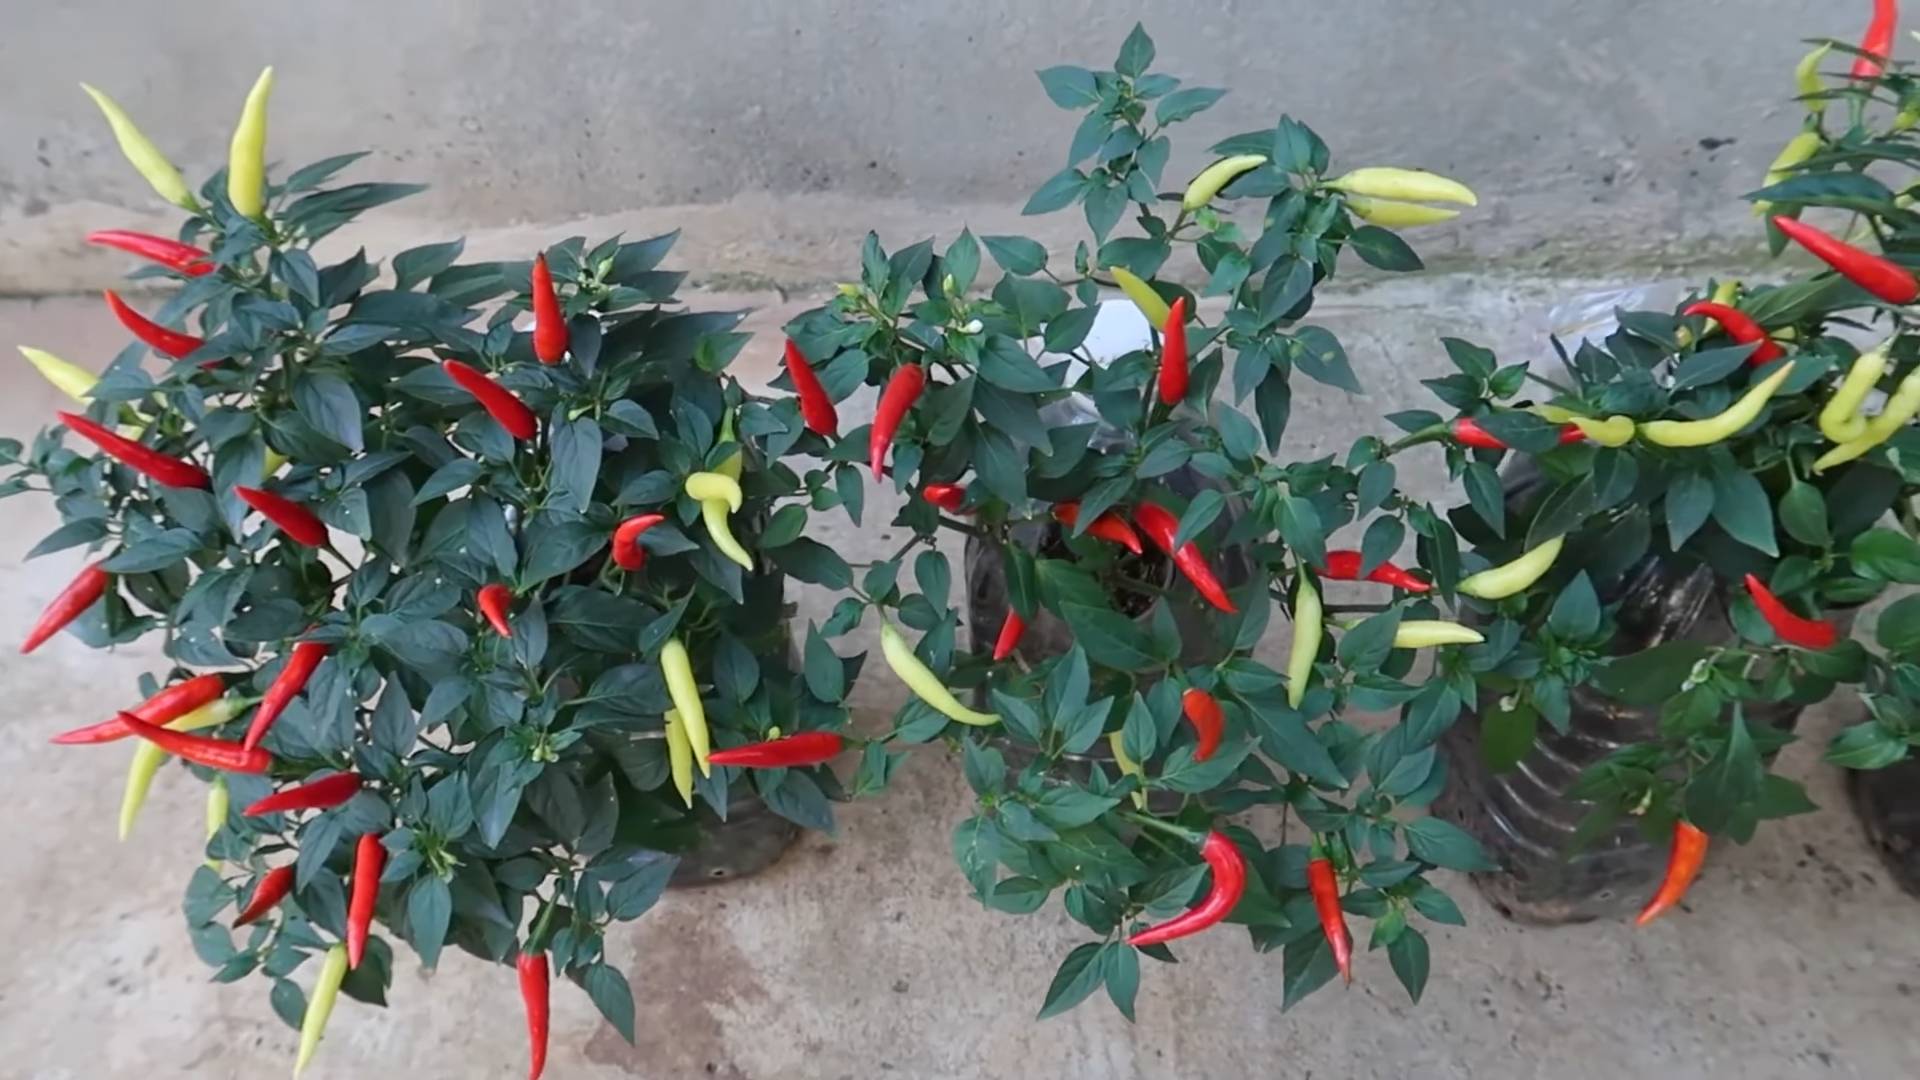
Chili Peppers Recycled Bottle: Who knew growing fiery chili peppers could be so eco-friendly and fun? I’m excited to share some amazing home gardening tricks and DIY ideas that will transform your used plastic bottles into thriving chili pepper planters!
For centuries, chili peppers have added zest to cuisines around the globe, with roots tracing back to South America. But you don’t need a sprawling garden to enjoy the fresh, spicy flavor of homegrown chilies. In fact, you can cultivate them right on your windowsill using materials you already have at home.
Why should you try this DIY hack? Well, for starters, it’s a fantastic way to reduce plastic waste and give those empty bottles a new lease on life. Plus, growing your own chili peppers recycled bottle style is incredibly rewarding. Imagine the satisfaction of harvesting your own peppers, knowing you nurtured them from seed to table using a simple, sustainable method. Not only that, but it’s also a cost-effective way to enjoy fresh produce, saving you money at the grocery store. So, let’s dive in and discover how to create your own mini chili pepper paradise, one recycled bottle at a time!
DIY: Spicy Chili Pepper Infused Oil from Recycled Bottles
Hey there, fellow DIY enthusiasts! Today, I’m super excited to share a fantastic way to upcycle those empty bottles lying around and create something delicious and useful: chili pepper infused oil! This stuff is liquid gold in the kitchen, adding a fiery kick to everything from pasta and pizza to stir-fries and grilled veggies. Plus, it makes a fantastic homemade gift!
This project is relatively simple, but it requires patience and attention to detail to ensure safety and prevent spoilage. We’ll be focusing on using recycled bottles, so we’ll also cover proper cleaning and sterilization techniques. Let’s get started!
Materials You’ll Need:
* Empty glass bottles (wine bottles, olive oil bottles, or any other food-grade glass bottle will work)
* Fresh chili peppers (any variety you like – I’m using a mix of red Thai chilies and some jalapeños for a balanced heat)
* High-quality olive oil (extra virgin is best for flavor, but a lighter olive oil works too)
* White vinegar or bleach (for sterilizing bottles)
* Dish soap
* Bottle brush
* Large pot
* Tongs
* Funnel
* Labels (optional, but great for gifting!)
* Gloves (optional, but recommended when handling chilies)
* Cutting board
* Knife
Safety First!
Before we dive in, let’s talk safety. Working with chili peppers can be irritating to your skin and eyes. Wearing gloves is highly recommended, especially if you’re using hotter varieties. Avoid touching your face while handling the peppers, and wash your hands thoroughly with soap and water afterward.
Phase 1: Preparing the Bottles
This is arguably the most crucial step. A clean and sterile bottle is essential to prevent bacteria growth and ensure your infused oil stays fresh for longer.
1. Empty and Rinse: Make sure your bottles are completely empty. Rinse them thoroughly with hot water to remove any residue.
2. Wash with Soap and Water: Use a bottle brush and dish soap to scrub the inside of each bottle. Pay close attention to the bottom and any hard-to-reach areas. Rinse thoroughly until all traces of soap are gone.
3. Sterilize with Vinegar (My Preferred Method):
* Fill a large pot with enough water to completely submerge your bottles.
* Add 1 cup of white vinegar to the water. The vinegar acts as a natural disinfectant.
* Place the bottles in the pot, ensuring they are completely submerged. You might need to weigh them down with something heavy.
* Bring the water to a boil and let it simmer for 10 minutes.
* Carefully remove the bottles from the pot using tongs. Be extremely careful, as they will be very hot!
* Place the bottles upside down on a clean towel to air dry completely. Do not dry them with a towel, as this can introduce lint and bacteria.
4. Alternative Sterilization with Bleach (Use with Caution):
* Important: Bleach is a strong chemical and should be handled with extreme care. Wear gloves and eye protection.
* In a large pot, mix 1 tablespoon of unscented bleach with 1 gallon of water.
* Submerge the bottles in the bleach solution for at least 10 minutes.
* Remove the bottles and rinse them thoroughly with hot, clean water. Rinse, rinse, rinse! You want to make sure all traces of bleach are gone.
* Place the bottles upside down on a clean towel to air dry completely.
5. Drying is Key: Make absolutely sure the bottles are completely dry before moving on to the next step. Any moisture can promote bacterial growth. This might take several hours, or even overnight.
Phase 2: Preparing the Chili Peppers
The type and amount of chili peppers you use will determine the heat level of your infused oil. Experiment and find what you like best!
1. Wash and Dry: Wash the chili peppers thoroughly under cold water to remove any dirt or debris. Pat them dry with a clean towel.
2. Prep the Peppers: This is where you decide how much heat you want.
* For milder heat: Leave the peppers whole and simply pierce them a few times with a fork or knife. This allows the oil to infuse with the flavor without releasing too much heat.
* For medium heat: Slice the peppers in half lengthwise. This exposes more of the seeds and membranes, which contain most of the capsaicin (the compound that makes peppers hot).
* For intense heat: Chop the peppers into smaller pieces. This maximizes the surface area exposed to the oil, resulting in a very spicy infusion.
* Optional: Remove the seeds and membranes for a slightly milder flavor. I usually leave them in for extra heat!
3. Drying the Peppers (Important for Safety): This step is crucial to prevent botulism, a rare but serious illness that can occur in improperly preserved foods. Drying the peppers reduces their water content, making them less susceptible to bacterial growth.
* Oven Drying (My Preferred Method): Preheat your oven to the lowest possible setting (ideally around 170°F or 77°C). Spread the prepared chili peppers in a single layer on a baking sheet lined with parchment paper. Bake for 2-4 hours, or until the peppers are visibly dried and slightly shriveled. Check them frequently to make sure they don’t burn. You want them dried, not roasted.
* Dehydrator: If you have a food dehydrator, follow the manufacturer’s instructions for drying chili peppers. This is often the most efficient and consistent method.
* Air Drying (Less Recommended): In a very dry climate, you can air dry the peppers by stringing them together and hanging them in a well-ventilated area. This can take several days or even weeks, and it’s not as reliable as oven drying or using a dehydrator.
4. Cool Completely: Let the dried chili peppers cool completely before moving on to the next step.
Phase 3: Infusing the Oil
Now for the fun part!
1. Arrange the Peppers in the Bottles: Using your fingers (or tongs, if you prefer), carefully place the dried chili peppers into the sterilized bottles. Don’t overcrowd the bottles; you want the oil to be able to circulate freely. A good rule of thumb is to fill the bottle about one-third to halfway with peppers.
2. Heat the Olive Oil (Optional, but Recommended): Gently heating the olive oil before pouring it over the peppers can help to speed up the infusion process. Don’t boil the oil! You just want to warm it slightly. I usually heat it in a saucepan over low heat until it’s just warm to the touch. Alternatively, you can skip this step and use room-temperature olive oil.
3. Pour the Oil: Using a funnel, carefully pour the warmed (or room-temperature) olive oil over the chili peppers in the bottles. Make sure the peppers are completely submerged in the oil. Leave about ½ inch of headspace at the top of the bottle.
4. Remove Air Bubbles: Gently tap the bottles on a countertop to release any trapped air bubbles. You can also use a clean skewer or chopstick to poke around and dislodge any bubbles.
5. Seal the Bottles: Securely seal the bottles with their original caps or new corks.
Phase 4: Infusion and Storage
Patience is key here! The longer you let the oil infuse, the more flavorful it will become.
1. Infuse in a Cool, Dark Place: Store the bottles of infused oil in a cool, dark place, such as a pantry or cupboard. Avoid direct sunlight, as this can degrade the quality of the oil.
2. Infusion Time: Let the oil infuse for at least 2 weeks, or even longer for a more intense flavor. I usually let mine infuse for 4-6 weeks.
3. Taste Test: After a couple of weeks, give the oil a taste test. Dip a piece of bread into the oil and see if it’s spicy enough for your liking. If not, let it infuse for longer.
4. Strain (Optional): Some people prefer to strain the oil after it has infused to remove the chili peppers. This can help to prevent the oil from becoming too spicy over time. To strain, simply pour the oil through a fine-mesh sieve lined with cheesecloth.
5. Storage: Store the infused oil in a cool, dark place. Properly stored, it should last for several months. Watch for any signs of spoilage, such as cloudiness, off odors, or mold growth. If you notice any of these, discard the oil immediately.
Tips and Variations:
* Add other flavorings: Get creative and add other herbs and spices to your infused oil. Garlic cloves, rosemary sprigs

Conclusion
So, there you have it! Transforming a simple recycled bottle into a self-watering planter for your chili peppers is not just a fun project; it’s a game-changer for your gardening experience. We’ve walked you through the steps, highlighting how easy and cost-effective it is to create a sustainable system that keeps your precious chili peppers thriving.
Why is this DIY trick a must-try? Because it addresses some of the most common challenges faced by chili pepper growers: inconsistent watering, nutrient leaching, and the dreaded overwatering. This ingenious method provides a consistent supply of moisture directly to the roots, promoting healthy growth and abundant yields. Plus, you’re giving a discarded plastic bottle a new lease on life, contributing to a more sustainable lifestyle. It’s a win-win!
But the beauty of this project lies in its adaptability. Feel free to experiment with different bottle sizes depending on the size of your chili pepper plant. For smaller seedlings, a standard water bottle will suffice, while larger, more established plants might benefit from a larger soda bottle or even a juice container. You can also adjust the type of soil mix you use based on the specific needs of your chili pepper variety. Some varieties prefer a well-draining mix with plenty of perlite, while others thrive in a richer, more moisture-retentive soil.
Consider adding a slow-release fertilizer to the water reservoir to provide your chili peppers with a continuous supply of nutrients. This is especially beneficial during the fruiting stage when the plants require more energy. You can also experiment with different wicking materials. While cotton rope is a reliable option, you could also try strips of felt or even old t-shirts. The key is to find a material that effectively draws water from the reservoir to the soil.
Another variation is to create a multi-bottle system for larger plants. By connecting several bottles together, you can increase the water reservoir capacity and reduce the frequency of refills. This is particularly useful if you’re going on vacation or simply don’t have the time to water your plants every day.
Don’t be afraid to get creative and personalize your self-watering planters. Decorate the bottles with paint, stickers, or even decoupage to add a touch of personality to your garden. You can also use different colored bottles to create a visually appealing display.
This DIY chili pepper self-watering bottle is more than just a gardening hack; it’s a testament to the power of resourcefulness and sustainability. It’s a simple yet effective way to improve your gardening success while reducing your environmental impact.
So, what are you waiting for? Gather your supplies, grab a recycled bottle, and get ready to transform your chili pepper growing experience. We’re confident that you’ll be amazed by the results.
We encourage you to try this DIY trick and share your experience with us. Post photos of your creations on social media using the hashtag #ChiliPepperBottleHack. We can’t wait to see what you come up with! Let’s build a community of resourceful gardeners who are passionate about growing delicious chili peppers in a sustainable way. Share your tips, tricks, and variations in the comments below. Your insights could help other gardeners achieve even greater success. Happy growing!
Frequently Asked Questions (FAQ)
What type of plastic bottle is best for this project?
Ideally, you should use a food-grade plastic bottle, such as those used for water, soda, or juice. These bottles are typically made from PET (polyethylene terephthalate) or HDPE (high-density polyethylene), which are considered safe for contact with food and plants. Avoid using bottles that have contained harsh chemicals or cleaning products, as these could contaminate the soil and harm your chili peppers. Make sure to thoroughly clean the bottle before using it.
How often do I need to refill the water reservoir?
The frequency of refills will depend on several factors, including the size of the bottle, the size of the plant, the type of soil, and the weather conditions. In general, you’ll need to check the water level every few days and refill it when it gets low. During hot, dry weather, you may need to refill it more frequently. A good rule of thumb is to check the soil moisture level regularly. If the soil feels dry to the touch, it’s time to refill the reservoir.
What type of soil should I use for my chili peppers?
Chili peppers thrive in well-draining soil that is rich in organic matter. A good potting mix for chili peppers should contain a blend of peat moss, perlite, and vermiculite. You can also add compost or other organic amendments to improve the soil’s fertility and drainage. Avoid using heavy clay soil, as it can retain too much moisture and lead to root rot. Consider a soil mix specifically formulated for vegetables or peppers for optimal results.
Can I use this self-watering system for other plants besides chili peppers?
Yes, this self-watering system can be used for a variety of other plants, especially those that prefer consistent moisture levels. Some good candidates include tomatoes, herbs (such as basil and mint), and leafy greens (such as lettuce and spinach). However, it’s important to consider the specific needs of each plant. Some plants prefer drier conditions, so you may need to adjust the watering frequency accordingly.
How do I prevent algae growth in the water reservoir?
Algae growth can be a common problem in self-watering systems, especially if the reservoir is exposed to sunlight. To prevent algae growth, you can try a few different strategies. First, use an opaque bottle to block out sunlight. You can also add a small amount of hydrogen peroxide to the water reservoir. Hydrogen peroxide is a natural disinfectant that can help to kill algae. Another option is to add a copper penny to the reservoir. Copper is a natural algaecide.
What if the wick doesn’t seem to be drawing water effectively?
If the wick isn’t drawing water effectively, there are a few things you can try. First, make sure that the wick is making good contact with both the water in the reservoir and the soil in the upper portion of the bottle. You may need to adjust the length of the wick or reposition it slightly. You can also try using a thicker wick or multiple wicks to increase the water flow. Another option is to pre-soak the wick in water before inserting it into the bottle. This will help to prime the wick and ensure that it starts drawing water immediately.
How do I fertilize my chili peppers when using this self-watering system?
You can fertilize your chili peppers by adding a liquid fertilizer to the water reservoir. Choose a fertilizer that is specifically formulated for vegetables or peppers. Follow the instructions on the fertilizer label for the correct dosage. It’s best to use a slow-release fertilizer to provide a continuous supply of nutrients to your plants. Avoid over-fertilizing, as this can damage the roots and harm the plants.
What do I do if my chili pepper plant starts to show signs of nutrient deficiency?
If your chili pepper plant starts to show signs of nutrient deficiency, such as yellowing leaves or stunted growth, you may need to adjust your fertilization strategy. First, make sure that you are using a balanced fertilizer that contains all of the essential nutrients for chili peppers. You can also supplement with additional nutrients, such as Epsom salts (for magnesium deficiency) or bone meal (for phosphorus deficiency). It’s important to diagnose the specific nutrient deficiency before adding any supplements. A soil test can help you to determine which nutrients are lacking.
Can I use this system indoors and outdoors?
Yes, this self-watering system can be used both indoors and outdoors. However, there are a few things to consider. If you’re using it indoors, make sure that your chili pepper plant is getting enough light. Chili peppers need at least 6-8 hours of sunlight per day. You may need to supplement with artificial lighting if you’re growing them indoors. If you’re using it outdoors, make sure that the bottle is protected from strong winds, which could knock it over. You may also need to adjust the watering frequency depending on the weather conditions.
Is this method suitable for all varieties of chili peppers?
Generally, yes. The self-watering bottle method is suitable for most varieties of chili peppers. However, some varieties may have slightly different watering needs. Observe your plants closely and adjust the watering frequency as needed. For example, some super-hot varieties might benefit from slightly drier conditions to encourage capsaicin production.
Leave a Comment