
Grow Strawberries Fast and enjoy the sweet taste of summer right from your own backyard! Imagine plucking juicy, red strawberries, still warm from the sun, and popping them straight into your mouth. Sounds idyllic, right? Well, it doesn’t have to be just a dream. For centuries, strawberries have been cherished not only for their delicious flavor but also for their vibrant color and nutritional benefits. From ancient Roman gardens to medieval monastery plots, these little berries have a rich history, symbolizing love, purity, and healing.
But let’s be honest, waiting for strawberries to ripen can feel like an eternity! That’s where these DIY tricks and hacks come in. I’m going to share some simple, yet effective methods to help you grow strawberries fast, even if you’re a complete beginner. Whether you’re short on space, time, or patience, these tips will help you maximize your strawberry yield and enjoy a bountiful harvest sooner than you ever thought possible. So, grab your gardening gloves, and let’s get started on the path to strawberry success!

Grow Strawberries Faster: My Secret DIY Hack!
Hey there, fellow gardening enthusiasts! I’m so excited to share my tried-and-true method for getting a jumpstart on strawberry season. Forget waiting ages for those delicious red berries – with this DIY hack, you’ll be enjoying homegrown strawberries weeks earlier than you thought possible. I’m talking about a simple, affordable, and incredibly effective way to create a mini-greenhouse effect right in your garden. Let’s get started!
What You’ll Need: The Essential Supplies
Before we dive into the step-by-step instructions, let’s gather all the necessary materials. This will save you time and frustration later on. Trust me, being prepared is half the battle!
* **Strawberry Plants:** Obviously! Choose healthy, vigorous plants from a reputable nursery. Bare-root or potted plants both work well. I personally prefer everbearing varieties because they produce fruit throughout the season, but June-bearing varieties are great too if you want a big harvest all at once.
* **Clear Plastic Cloches or Large Plastic Bottles:** This is the key to our mini-greenhouse. You can use commercially available plastic cloches (the clear dome-shaped covers you often see in garden centers), or you can recycle large plastic bottles. Think 2-liter soda bottles or gallon-sized water jugs. I’ll show you how to modify the bottles in the instructions below.
* **Sharp Utility Knife or Scissors:** For cutting the plastic bottles. Safety first!
* **Well-Draining Potting Mix:** If you’re starting with bare-root plants or transplanting potted plants.
* **Gardening Gloves:** To protect your hands.
* **Watering Can or Hose:** For keeping your strawberry plants hydrated.
* **Optional: Row Cover Fabric:** For added protection against frost, especially during those early spring nights.
* **Optional: Plant Labels:** To keep track of your strawberry varieties.
Step-by-Step Instructions: Creating Your Strawberry Mini-Greenhouse
Okay, now for the fun part! Follow these steps carefully, and you’ll be well on your way to enjoying early-season strawberries.
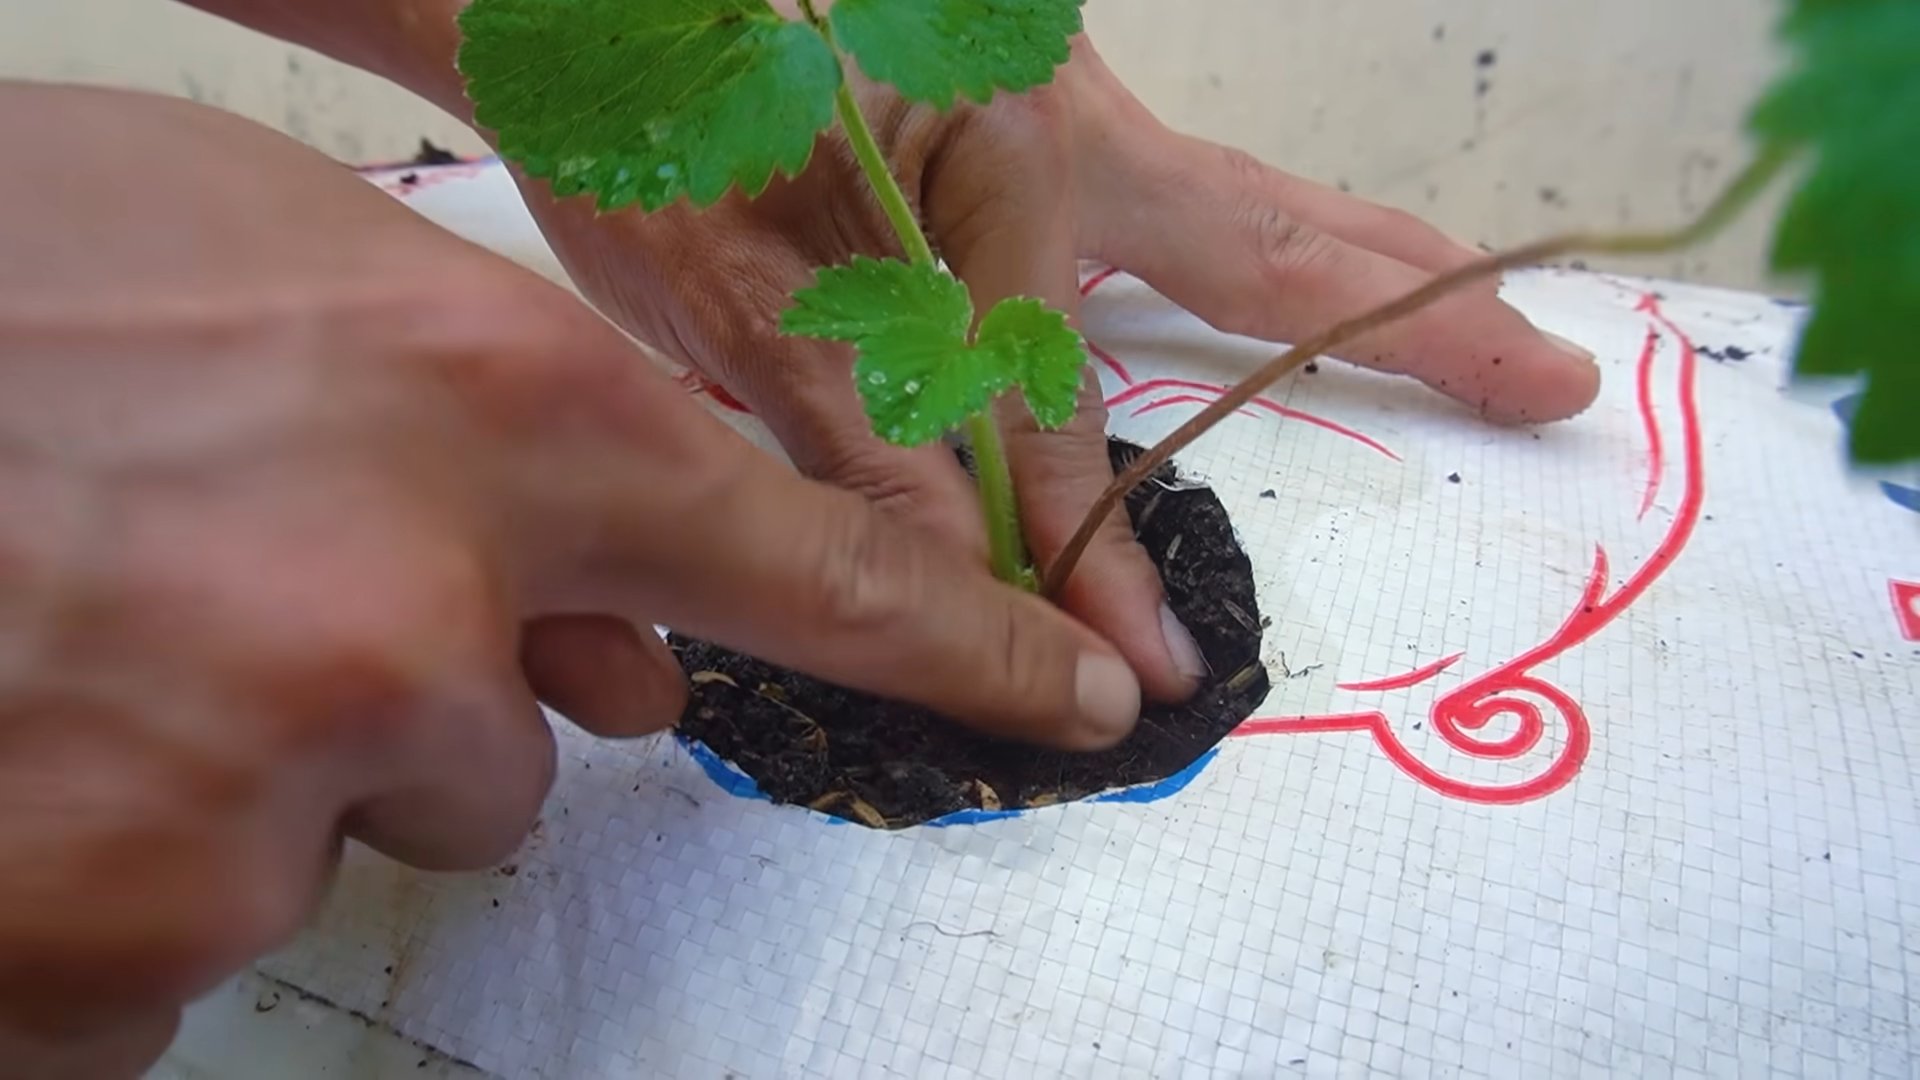
Section 1: Preparing Your Strawberry Plants
1. **Inspect Your Plants:** Carefully examine your strawberry plants for any signs of disease or pests. Remove any dead or damaged leaves. This will help ensure that your plants get off to a healthy start.
2. **Prepare the Planting Area:** If you’re planting directly in the ground, choose a sunny spot with well-draining soil. Amend the soil with compost or other organic matter to improve its fertility and drainage. If you’re using pots, fill them with a high-quality potting mix.
3. **Plant Your Strawberries:** Plant your strawberry plants at the correct depth. The crown of the plant (where the roots meet the stem) should be level with the soil surface. Space the plants about 12-18 inches apart to allow for good air circulation. If you are using bare-root plants, soak the roots in water for about 30 minutes before planting. This will help rehydrate them.
Section 2: Modifying Plastic Bottles (If Using)
If you’re using plastic bottles instead of commercial cloches, here’s how to prepare them:
1. **Clean the Bottles:** Thoroughly wash and dry the plastic bottles. Remove any labels or sticky residue.
2. **Cut Off the Bottom:** Using a sharp utility knife or scissors, carefully cut off the bottom of the bottle. Leave about 2-3 inches of the bottom intact to create a rim. This rim will help anchor the cloche in the soil.
3. **Remove the Cap (Optional):** You can remove the cap from the bottle to provide ventilation, or you can leave it on and drill a few small holes in the cap for ventilation. I prefer to remove the cap completely, as it provides better airflow.
4. **Smooth the Edges:** If the cut edges of the bottle are sharp, use sandpaper or a file to smooth them down. This will prevent you from accidentally cutting yourself.
Section 3: Installing the Cloches
1. **Place the Cloches Over the Plants:** Carefully place the plastic cloches or modified plastic bottles over your strawberry plants. Make sure the cloche completely covers the plant.
2. **Secure the Cloches:** Gently press the rim of the cloche into the soil to secure it in place. If you’re using plastic bottles, the rim you left at the bottom will help anchor it. You can also use garden staples or small rocks to further secure the cloches, especially in windy areas.
3. **Water Your Plants:** Water your strawberry plants thoroughly after installing the cloches. This will help settle the soil and provide the plants with the moisture they need to thrive.
Section 4: Ongoing Care and Maintenance
1. **Monitor the Temperature:** Keep an eye on the temperature inside the cloches. On sunny days, the temperature can rise quickly, which can damage your plants. If the temperature gets too high, remove the cloches for a few hours to allow for ventilation. You can also prop them up slightly to allow for airflow.
2. **Water Regularly:** Strawberry plants need consistent moisture, especially when they’re growing under cloches. Check the soil moisture regularly and water as needed. Avoid overwatering, as this can lead to root rot.
3. **Ventilate as Needed:** As the weather warms up, you’ll need to ventilate the cloches more frequently to prevent overheating. You can do this by removing the cloches for longer periods of time or by propping them up slightly.
4. **Fertilize Your Plants:** Feed your strawberry plants with a balanced fertilizer every few weeks to promote healthy growth and abundant fruit production. Follow the instructions on the fertilizer package.
5. **Protect from Frost:** Even with the cloches, your strawberry plants may still be vulnerable to frost. If a frost is predicted, cover the cloches with row cover fabric or blankets to provide extra protection.
6. **Remove the Cloches:** Once the weather has warmed up consistently and the risk of frost has passed, you can remove the cloches completely. Your strawberry plants should now be well-established and ready to produce a bountiful harvest.
Troubleshooting Tips: Common Issues and Solutions
Even with the best planning, you might encounter a few challenges along the way. Here are some common issues and how to address them:
* **Overheating:** If the leaves of your strawberry plants are wilting or turning brown, it’s likely that they’re overheating. Remove the cloches immediately and provide shade. Make sure to ventilate the cloches more frequently in the future.
* **Mold or Mildew:** If you notice mold or mildew growing on your strawberry plants, it’s likely due to excessive moisture and poor ventilation. Remove any affected leaves and improve air circulation by removing the cloches for longer periods of time. You can also spray your plants with a fungicide if necessary.
* **Pests:** Keep an eye out for common strawberry pests, such as slugs, snails, and aphids. Handpick any pests you find or use organic pest control methods.
* **Lack of Fruit Production:** If your strawberry plants are not producing fruit, it could be due to a variety of factors, such as lack of sunlight, poor soil fertility, or inadequate watering. Make sure your plants are getting at least 6 hours of sunlight per day, fertilize them regularly, and water them consistently.
Extra Tips for Strawberry Success!
* Choose the Right Variety: Different strawberry varieties have different growing requirements and fruiting times. Research which varieties are best suited for your climate and growing conditions.
* Consider Raised Beds: If you have poor soil drainage, consider growing your strawberries in raised beds. This will help improve drainage and prevent root rot.
* Use Straw Mulch: Mulch around your strawberry plants with straw to help retain moisture, suppress weeds, and keep the berries clean.
* Netting for Birds: Once your strawberries start to ripen, you may need to protect them from birds. Cover your plants with netting to prevent birds from eating your precious berries.
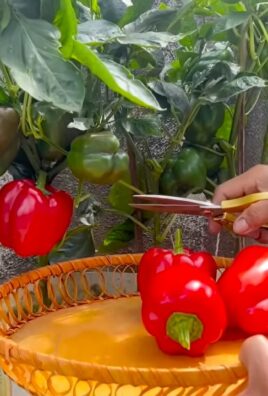
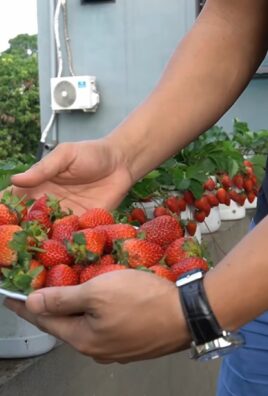
* Enjoy Your Harvest! The best part of growing your own strawberries is enjoying the delicious, homegrown fruit. Pick your strawberries when they are fully ripe and enjoy them fresh, in pies, jams, or smoothies.
I hope this guide helps you grow strawberries faster and enjoy a bountiful harvest! Happy gardening!
Conclusion
So, there you have it! Growing strawberries fast doesn’t require magic, just a little know-how and the right approach. We’ve explored a simple yet effective DIY trick that can significantly accelerate your strawberry harvest. Forget waiting endlessly for those first juicy berries; with this method, you’ll be enjoying homegrown sweetness much sooner than you thought possible.
This isn’t just about speed, though. It’s about maximizing your yield, ensuring healthier plants, and ultimately, savoring the unparalleled flavor of freshly picked strawberries. Imagine the satisfaction of biting into a sun-ripened strawberry you nurtured from start to finish, knowing you played a key role in its deliciousness. That’s the power of this DIY trick.
But don’t just take our word for it. The beauty of this method lies in its adaptability. Feel free to experiment with different types of containers. While we suggested specific materials, you can adapt based on what you have readily available. Consider using repurposed items like old buckets or even fabric grow bags. The key is ensuring proper drainage and adequate sunlight exposure.
Another variation to consider is the type of fertilizer you use. While a balanced fertilizer is generally recommended, you can tailor it to your specific soil conditions and the needs of your strawberry plants. Research the best fertilizer options for strawberries in your region and adjust accordingly. You can also experiment with organic fertilizers like compost tea or worm castings for a more natural approach.
Furthermore, think about companion planting. Certain plants, like basil, marigolds, and borage, can deter pests and attract beneficial insects to your strawberry patch. Incorporating these companion plants can further enhance the health and productivity of your strawberry plants.
This DIY trick to grow strawberries fast is a game-changer for any gardener, regardless of experience level. It’s cost-effective, environmentally friendly, and yields impressive results. It’s a fantastic way to connect with nature, enjoy the fruits (literally!) of your labor, and impress your friends and family with your gardening prowess.
We wholeheartedly encourage you to give this DIY trick a try. Don’t be afraid to get your hands dirty and experiment. Gardening is a journey of learning and discovery, and every attempt, successful or not, provides valuable insights.
Most importantly, we want to hear about your experience! Did this DIY trick work for you? What variations did you try? What challenges did you encounter? Share your stories, tips, and photos in the comments section below. Let’s create a community of strawberry enthusiasts who are passionate about growing their own delicious berries. Your feedback will not only help other readers but also contribute to refining and improving this method for everyone. Let’s unlock the secrets to growing strawberries fast, together!
Frequently Asked Questions (FAQ)
Q: What type of strawberries work best with this DIY trick?
A: This DIY trick is generally effective for all types of strawberries, including June-bearing, everbearing, and day-neutral varieties. However, everbearing and day-neutral varieties might show the most noticeable acceleration in fruit production, as they are naturally inclined to produce fruit throughout the growing season. June-bearing varieties, which typically produce one large crop per year, may still benefit from the improved growing conditions and potentially yield a slightly earlier and more abundant harvest. Ultimately, the best type of strawberry to use depends on your personal preference and the climate in your region. Research which varieties thrive in your area and choose accordingly.
Q: How much sunlight do my strawberries need when using this method?
A: Strawberries thrive in full sun, which means they need at least 6-8 hours of direct sunlight per day. When using this DIY trick, ensure that your container is placed in a location that receives ample sunlight. If you live in a particularly hot climate, you might consider providing some afternoon shade to prevent the plants from overheating. Insufficient sunlight can lead to leggy growth, reduced fruit production, and less flavorful berries. Observe your plants closely and adjust their location as needed to ensure they are receiving optimal sunlight exposure.
Q: What kind of soil should I use for growing strawberries in containers?
A: The ideal soil for growing strawberries in containers is a well-draining, slightly acidic potting mix. Avoid using garden soil, as it can be too heavy and compact, hindering drainage and root development. A good potting mix will retain moisture while allowing excess water to drain away, preventing root rot. You can also amend your potting mix with compost or other organic matter to improve its fertility and drainage. A pH level between 5.5 and 6.5 is ideal for strawberries. You can test the pH of your soil using a soil testing kit and adjust it accordingly if necessary.
Q: How often should I water my strawberries when using this DIY trick?
A: The watering frequency for strawberries grown in containers depends on several factors, including the weather, the type of container, and the soil mix. Generally, you should water your strawberries when the top inch of soil feels dry to the touch. Avoid overwatering, as this can lead to root rot. During hot, dry weather, you may need to water your plants daily. In cooler, wetter weather, you may only need to water them every few days. Use a watering can or a hose with a gentle spray nozzle to avoid damaging the plants. Water deeply, ensuring that the entire root ball is moistened.
Q: What kind of fertilizer should I use, and how often should I fertilize?
A: A balanced fertilizer, such as a 10-10-10 or a 14-14-14, is generally recommended for strawberries. You can also use a fertilizer specifically formulated for berries. Fertilize your strawberries every 2-4 weeks during the growing season, following the instructions on the fertilizer package. Avoid over-fertilizing, as this can burn the roots and damage the plants. You can also supplement with organic fertilizers like compost tea or worm castings. These provide a slow-release source of nutrients and improve the overall health of the soil.
Q: How do I protect my strawberries from pests and diseases?
A: Strawberries can be susceptible to various pests and diseases, including aphids, spider mites, slugs, and fungal infections. To protect your plants, inspect them regularly for signs of infestation or disease. Remove any affected leaves or fruit promptly. You can also use organic pest control methods, such as insecticidal soap or neem oil, to control aphids and spider mites. Slugs can be controlled by handpicking them or using slug bait. To prevent fungal infections, ensure good air circulation around your plants and avoid overwatering. You can also use a fungicide if necessary. Companion planting with herbs like basil and marigolds can also help deter pests.
Q: Can I use this DIY trick indoors?
A: While this DIY trick is primarily designed for outdoor use, you can potentially adapt it for indoor growing if you provide adequate lighting. Strawberries require at least 6-8 hours of direct sunlight per day, which can be difficult to achieve indoors without supplemental lighting. If you plan to grow strawberries indoors, invest in a high-quality grow light and ensure that your plants receive sufficient light exposure. You will also need to pay close attention to watering and fertilization, as indoor growing conditions can be different from outdoor conditions.
Q: What do I do with my strawberry plants after the growing season?
A: The care of your strawberry plants after the growing season depends on the type of strawberry you are growing and the climate in your region. June-bearing strawberries typically produce runners, which are horizontal stems that develop into new plants. You can allow these runners to root and establish new plants, or you can remove them to encourage the mother plant to focus its energy on fruit production. Everbearing and day-neutral strawberries may not produce as many runners. In colder climates, you may need to protect your strawberry plants from frost by covering them with mulch or bringing them indoors. In warmer climates, you can simply prune away any dead or damaged foliage and allow the plants to rest until the next growing season.
Leave a Comment