
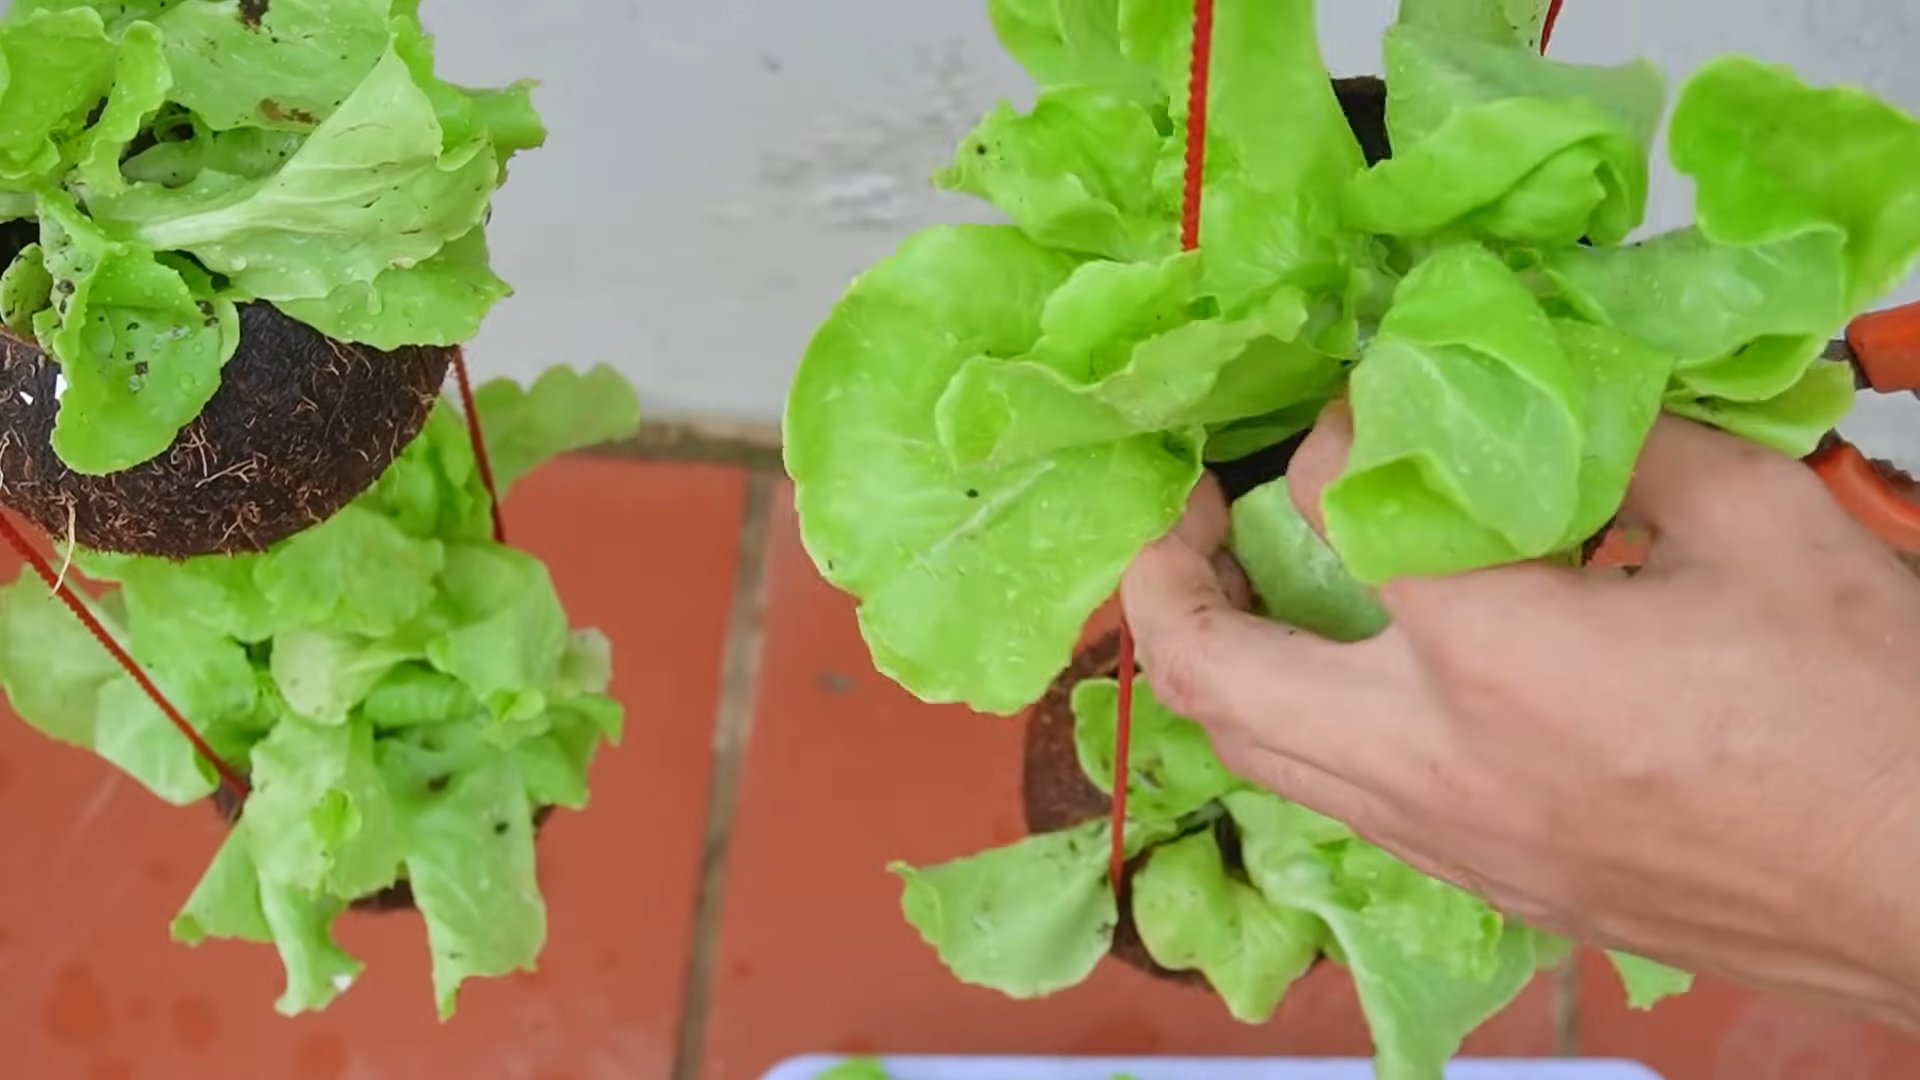
Coconut shell lettuce garden: Sounds intriguing, right? I’m so excited to share this incredibly fun and resourceful DIY project with you! Forget those boring plastic pots – we’re going tropical and eco-friendly all at once. For centuries, coconuts have been a staple in tropical cultures, providing food, drink, and even building materials. Now, we’re adding “garden container” to that impressive list!
But why a coconut shell lettuce garden, you ask? Well, let’s be honest, store-bought lettuce can be expensive, and sometimes it feels like it wilts the moment you get it home. Plus, who doesn’t love the satisfaction of growing their own food? This DIY project is not only a fantastic way to recycle those coconut shells you might otherwise toss, but it also allows you to have fresh, organic lettuce right at your fingertips. Imagine stepping outside and snipping off exactly what you need for a salad or sandwich – talk about farm-to-table freshness!
This coconut shell lettuce garden trick is perfect for small spaces, balconies, or even just a sunny windowsill. It’s a simple, budget-friendly way to add a touch of green to your life and enjoy the delicious rewards of homegrown lettuce. So, grab your coconut shells, and let’s get gardening!
DIY Coconut Shell Lettuce Garden: A Tropical Twist on Fresh Greens
Hey there, fellow plant enthusiasts! I’m super excited to share this fun and eco-friendly DIY project with you: creating a miniature lettuce garden inside coconut shells! It’s a fantastic way to upcycle those leftover coconut shells from your tropical smoothies, add a touch of bohemian charm to your space, and, most importantly, grow your own fresh, delicious lettuce. Let’s get started!
Materials You’ll Need
Before we dive in, let’s gather all the necessary supplies. Trust me, having everything ready beforehand will make the process so much smoother.
* **Coconut Shells:** Obviously! You’ll need at least one, but the more, the merrier. Make sure they’re clean and dry. I usually save mine after enjoying fresh coconut water.
* **Potting Soil:** Choose a good quality potting mix that’s well-draining. Lettuce likes soil that retains moisture but doesn’t get waterlogged.
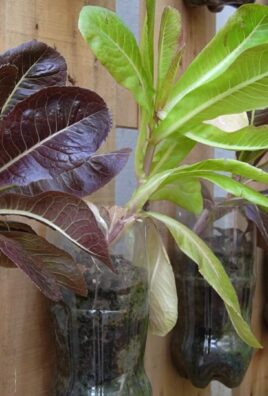
* **Lettuce Seeds:** Pick your favorite varieties! I personally love a mix of Romaine, Butterhead, and loose-leaf lettuce for variety.
* **Drill (Optional):** If your coconut shells don’t already have drainage holes, you’ll need a drill with a small drill bit.
* **Small Rocks or Gravel:** For drainage at the bottom of the shells.
* **Spray Bottle:** For misting the seedlings.
* **Gloves (Optional):** To keep your hands clean.
* **Small Trowel or Spoon:** For scooping soil.
* **Sandpaper (Optional):** To smooth any rough edges on the coconut shells.
* **Coconut Coir (Optional):** To line the inside of the shell and help retain moisture.
* **Decorative Elements (Optional):** Think paint, twine, beads – anything to personalize your coconut shell planters!
Preparing the Coconut Shells
This is a crucial step to ensure your lettuce thrives. We need to make sure the shells are clean, have proper drainage, and are ready to house our little green friends.
1. **Cleaning the Shells:** If you’re using leftover coconut shells, give them a good scrub with soap and water to remove any remaining coconut flesh or residue. Let them dry completely.
2. **Sanding (Optional):** If the edges of the shells are rough, use sandpaper to smooth them down. This will prevent any accidental cuts.
3. **Drilling Drainage Holes (If Needed):** This is super important! Lettuce needs well-draining soil to prevent root rot. If your shells don’t have holes, use a drill with a small drill bit (about ¼ inch) to create 2-3 holes in the bottom of each shell. Be careful not to crack the shell.
4. **Lining with Coconut Coir (Optional):** This step is optional, but I highly recommend it. Lining the inside of the shell with coconut coir helps retain moisture and prevents the soil from drying out too quickly. Simply cut the coir to fit the inside of the shell and press it firmly against the sides.
Planting the Lettuce Seeds
Now for the fun part – planting the seeds! This is where we bring our coconut shell planters to life.
1. **Adding Drainage Layer:** Place a layer of small rocks or gravel at the bottom of each coconut shell. This will further improve drainage and prevent the soil from becoming waterlogged.
2. **Filling with Potting Soil:** Fill the coconut shells with potting soil, leaving about an inch of space at the top. Gently press down on the soil to compact it slightly.
3. **Sowing the Seeds:** Sprinkle the lettuce seeds evenly over the surface of the soil. Don’t overcrowd them – give them enough space to grow. A good rule of thumb is to space them about ½ inch apart.
4. **Covering the Seeds:** Lightly cover the seeds with a thin layer of potting soil (about ¼ inch).
5. **Watering:** Gently water the soil using a spray bottle. You want to moisten the soil without disturbing the seeds. Avoid pouring water directly onto the soil, as this can wash the seeds away.
Caring for Your Coconut Shell Lettuce Garden
Congratulations! You’ve planted your lettuce seeds. Now, it’s time to nurture them and watch them grow.
1. **Location:** Place your coconut shell planters in a location that receives at least 6 hours of sunlight per day. A sunny windowsill or a bright patio is ideal. If you don’t have enough natural light, you can supplement with a grow light.
2. **Watering:** Keep the soil consistently moist, but not soggy. Water when the top inch of soil feels dry to the touch. Use a spray bottle to mist the seedlings regularly. Avoid overwatering, as this can lead to root rot.
3. **Thinning (If Needed):** Once the seedlings have sprouted and have a few sets of true leaves, you may need to thin them out. This means removing some of the seedlings to give the remaining ones more space to grow. Choose the strongest and healthiest seedlings and gently pull out the weaker ones.
4. **Fertilizing (Optional):** Lettuce doesn’t require a lot of fertilizer, but you can give it a boost by feeding it with a diluted liquid fertilizer every few weeks. Follow the instructions on the fertilizer packaging.
5. **Pest Control:** Keep an eye out for pests such as aphids or slugs. If you spot any, you can try removing them by hand or using an organic pest control spray.
6. **Harvesting:** You can start harvesting your lettuce leaves once they are large enough to eat. Simply snip off the outer leaves with scissors, leaving the inner leaves to continue growing. This is known as “cut-and-come-again” harvesting, and it allows you to enjoy fresh lettuce for weeks.
Adding a Personal Touch: Decorating Your Coconut Shells
This is where you can really let your creativity shine! Decorating your coconut shells is a fun way to personalize your lettuce garden and make it a unique addition to your home.
1. **Painting:** Use acrylic paints to paint the outside of the coconut shells. You can create intricate designs, simple patterns, or even just paint them in your favorite colors.
2. **Twine Wrapping:** Wrap twine around the coconut shells to create a rustic, bohemian look. Secure the twine with hot glue or craft glue.
3. **Beads and Embellishments:** Glue beads, shells, or other embellishments onto the coconut shells to add a touch of sparkle and personality.
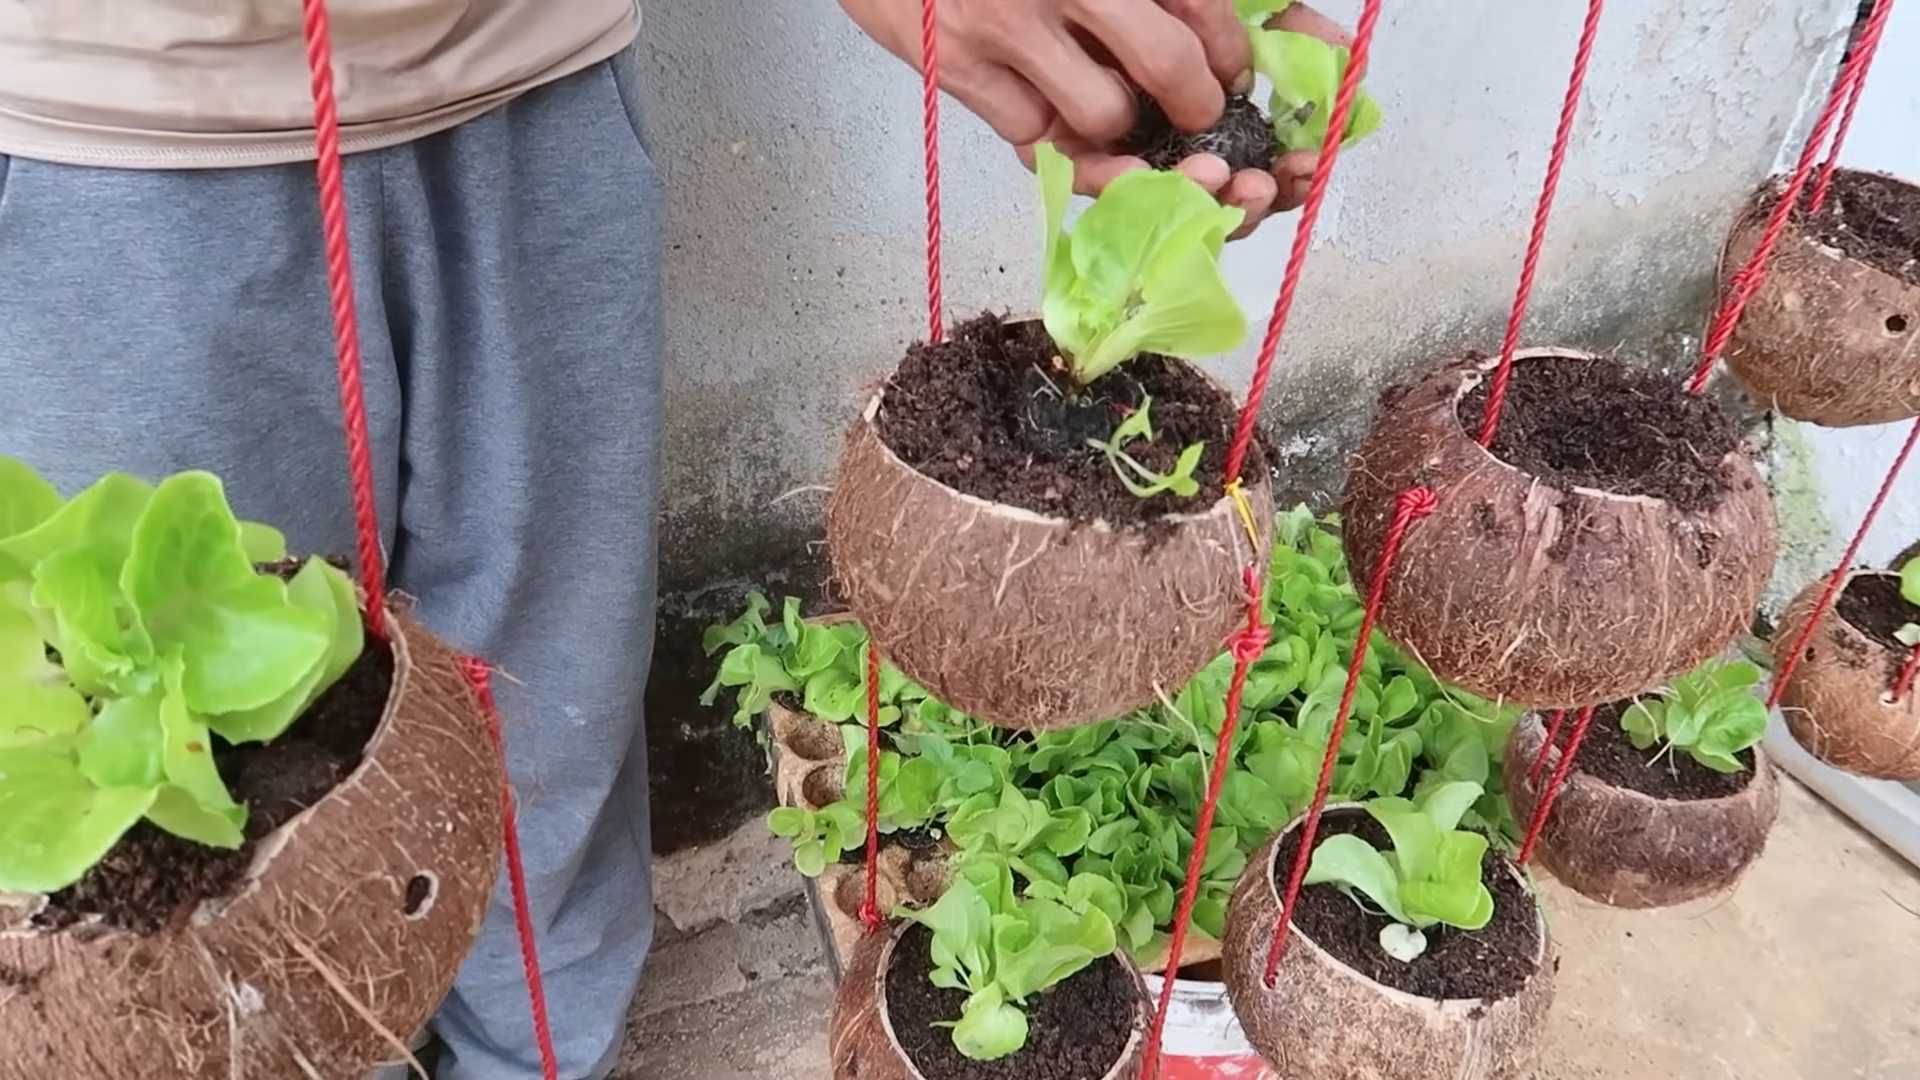
4. **Hanging Planters:** Drill holes near the top of the coconut shells and thread twine or rope through them to create hanging planters. This is a great way to display your lettuce garden if you’re short on space.
5. **Labeling:** Use paint pens or labels to write the names of the lettuce varieties on the coconut shells. This will help you keep track of what you’ve planted.
Troubleshooting Tips
Even with the best planning, sometimes things don’t go exactly as expected. Here are a few common issues you might encounter and how to fix them:
* **Seeds Not Germinating:** Make sure the soil is consistently moist and that the seeds are receiving enough light. If the temperature is too cold, germination may be delayed.
* **Seedlings Leggy and Weak:** This usually indicates that the seedlings aren’t getting enough light. Move them to a sunnier location or supplement with a grow light.
* **Leaves Turning Yellow:** This could be a sign of overwatering or nutrient deficiency. Make sure the soil is well-draining and consider fertilizing with a diluted liquid fertilizer.
* **Root Rot:** This is caused by overwatering and poor drainage. Make sure the coconut shells have drainage holes and that the soil is not waterlogged.
* **Pests:** Regularly inspect your lettuce plants for pests and take action immediately if you spot any.
Enjoying Your Homegrown Lettuce
The best part of this project is, of course, enjoying the fruits (or rather, vegetables!) of your labor. There’s nothing quite like the taste of fresh, homegrown lettuce. Use it in salads, sandwiches, wraps, or as a garnish for your favorite dishes. Knowing you grew it yourself makes it even more delicious!
I hope you enjoyed this DIY tutorial. I had a blast creating my own coconut shell lettuce garden, and I’m confident you will too. Happy gardening!
Conclusion
So, there you have it! Transforming humble coconut shells into charming and functional lettuce gardens is more than just a quirky DIY project; it’s a sustainable, space-saving, and aesthetically pleasing way to bring fresh greens right to your doorstep. We’ve explored how to repurpose these readily available materials into miniature ecosystems perfect for nurturing your favorite lettuce varieties.
Why is this a must-try? Because it’s a win-win-win! You’re reducing waste by giving coconut shells a new life, you’re creating a beautiful and unique garden feature, and you’re enjoying the unparalleled flavor of homegrown lettuce. Store-bought lettuce simply can’t compare to the crispness and freshness you’ll achieve with your own coconut shell lettuce garden. Plus, it’s incredibly rewarding to watch your tiny seedlings flourish in their eco-friendly containers.
But the fun doesn’t stop there! Feel free to experiment with different types of lettuce. Romaine, butterhead, and loose-leaf varieties all thrive in small containers. You can also add companion plants like herbs (basil, chives, or parsley) to create a miniature herb and lettuce garden. Consider painting or decorating your coconut shells to match your personal style and garden aesthetic. A splash of color can really elevate the visual appeal of your DIY project. You can also try different potting mixes to see what works best for your climate and lettuce varieties. Some gardeners prefer a mix of coco coir, perlite, and compost, while others opt for a standard potting soil.
For a more advanced project, you could even create a vertical coconut shell lettuce garden by hanging the shells from a wall or fence. This is a fantastic option for those with limited space. Just be sure to use sturdy hooks or rope to support the weight of the shells and soil. Another variation is to create a self-watering system by adding a reservoir at the bottom of the coconut shell. This will help to keep the soil consistently moist, especially during hot weather.
We truly believe that this DIY coconut shell lettuce garden is a project that anyone can enjoy, regardless of their gardening experience. It’s a simple, affordable, and incredibly satisfying way to connect with nature and enjoy the fruits (or rather, the leaves!) of your labor.
So, what are you waiting for? Gather your coconut shells, grab some potting mix, and get ready to embark on this exciting gardening adventure. We’re confident that you’ll be amazed at the results.
And most importantly, we want to hear about your experience! Share your photos and stories with us on social media using #CoconutShellLettuceGarden. We can’t wait to see your creative creations and learn from your successes (and even your challenges!). Let’s build a community of coconut shell gardeners and inspire others to embrace sustainable and delicious gardening practices. Happy gardening!
Frequently Asked Questions (FAQ)
What kind of lettuce grows best in coconut shells?
Almost any type of lettuce can be grown in coconut shells, but some varieties are better suited than others due to their size and growth habits. Loose-leaf lettuces like Black Seeded Simpson, Red Sails, and Oakleaf are excellent choices because they don’t form large heads and can be harvested continuously. Butterhead lettuces like Buttercrunch and Tom Thumb are also good options, as they remain relatively compact. Romaine lettuce can be grown, but you may need to harvest it earlier to prevent it from becoming too large for the coconut shell. Avoid head lettuces like iceberg, as they require more space and nutrients than a coconut shell can provide. Experiment with different varieties to see what thrives best in your local climate and growing conditions.
How often should I water my coconut shell lettuce garden?
The frequency of watering depends on several factors, including the weather, the type of potting mix you’re using, and the size of the coconut shell. Generally, you should water your lettuce garden when the top inch of soil feels dry to the touch. During hot, sunny weather, you may need to water daily, or even twice a day. In cooler, cloudier weather, you may only need to water every other day. Be careful not to overwater, as this can lead to root rot. Ensure that the coconut shell has adequate drainage to prevent water from pooling at the bottom. A good way to check if your lettuce needs water is to lift the coconut shell. If it feels light, it’s likely time to water.
What kind of soil should I use for my coconut shell lettuce garden?
A well-draining potting mix is essential for growing healthy lettuce in coconut shells. Avoid using garden soil, as it can be too heavy and compact, hindering drainage and root growth. A good potting mix should be lightweight and contain ingredients like peat moss, perlite, vermiculite, and compost. You can also create your own potting mix by combining equal parts coco coir, perlite, and compost. Coco coir is a sustainable alternative to peat moss and helps to retain moisture. Perlite and vermiculite improve drainage and aeration. Compost provides essential nutrients for your lettuce plants. Consider adding a slow-release fertilizer to the potting mix to provide a steady supply of nutrients throughout the growing season.
How much sunlight does my coconut shell lettuce garden need?
Lettuce thrives in full sun to partial shade. Ideally, your coconut shell lettuce garden should receive at least 6 hours of direct sunlight per day. However, in hot climates, afternoon shade can help to prevent the lettuce from bolting (going to seed). If you’re growing your lettuce indoors, you’ll need to provide supplemental lighting. Grow lights are a great option for indoor gardening, as they provide the necessary light spectrum for plant growth. Position the grow lights about 6-12 inches above the lettuce plants and keep them on for 12-16 hours per day. Rotate the coconut shells regularly to ensure that all sides of the lettuce plants receive adequate light.
How do I prevent pests and diseases in my coconut shell lettuce garden?
Prevention is key when it comes to pests and diseases in your lettuce garden. Start by using healthy, disease-free seedlings or seeds. Choose lettuce varieties that are resistant to common diseases like downy mildew and powdery mildew. Regularly inspect your lettuce plants for signs of pests or diseases. Aphids, slugs, and snails are common pests that can attack lettuce. You can control aphids by spraying them with a strong stream of water or by using insecticidal soap. Slugs and snails can be handpicked or trapped using beer traps. To prevent fungal diseases, ensure that your lettuce plants have good air circulation and avoid overwatering. Remove any dead or diseased leaves promptly. Consider using organic fungicides if necessary.
How do I harvest lettuce from my coconut shell garden?
Harvesting lettuce from your coconut shell garden is easy and rewarding. You can harvest loose-leaf lettuce by simply snipping off the outer leaves as needed. This allows the plant to continue producing new leaves. For butterhead and romaine lettuce, you can harvest the entire head when it reaches the desired size. To harvest the entire head, cut it off at the base of the plant with a sharp knife. Harvest lettuce in the morning when the leaves are crisp and cool. Avoid harvesting during the heat of the day, as the leaves can wilt quickly. Store harvested lettuce in the refrigerator in a plastic bag or container.
Can I reuse the coconut shells for planting other things after the lettuce is done?
Absolutely! Coconut shells are incredibly versatile and can be reused for planting a variety of other plants after your lettuce has finished growing. You can use them to start seedlings for other vegetables, herbs, or flowers. They’re also great for growing succulents, cacti, and other small plants. Before reusing the coconut shells, be sure to clean them thoroughly to remove any remaining soil or plant debris. You can sterilize them by soaking them in a solution of water and bleach (1 part bleach to 9 parts water) for 30 minutes. Rinse them well with clean water before reusing. You can also add fresh potting mix to replenish nutrients for the next planting. The possibilities are endless!
Leave a Comment