
Growing Kale in Soil Bags: Unlock the secrets to a bountiful harvest, even without a traditional garden! Have you ever dreamed of fresh, vibrant kale gracing your table, but felt limited by space or soil conditions? I understand completely! Many of us yearn for the taste of homegrown goodness, but face challenges that seem insurmountable. That’s where the magic of soil bag gardening comes in, and I’m so excited to share this simple, effective DIY trick with you.
The concept of container gardening, including using soil bags, isn’t new. Throughout history, people have ingeniously adapted to their environments, cultivating food in pots, baskets, and repurposed containers. From the hanging gardens of Babylon to the modern urban farmer, the desire to nurture life and enjoy fresh produce has always driven innovation.
But why growing kale in soil bags specifically? Well, it’s a game-changer for several reasons. Firstly, it’s incredibly space-efficient, perfect for balconies, patios, or even a sunny windowsill. Secondly, you have complete control over the soil quality, ensuring your kale gets the nutrients it needs to thrive. And thirdly, it’s a fantastic way to recycle those empty soil bags, reducing waste and giving them a new lease on life. Plus, who doesn’t love a good DIY project that yields delicious results? So, let’s dive in and discover how easy it is to cultivate your own kale oasis, one soil bag at a time!
Growing Kale in Soil Bags: A Beginner’s Guide
Hey there, fellow gardening enthusiasts! I’m so excited to share my experience with growing kale in soil bags. It’s a fantastic method, especially if you’re short on space, have poor soil quality, or just want a super easy and convenient way to grow this nutritional powerhouse. Trust me, even if you’ve never gardened before, you can totally nail this!
Why Soil Bags?
Before we dive in, let’s quickly chat about why I love using soil bags for kale:
* Space-Saving: Perfect for balconies, patios, or small yards. You don’t need a traditional garden bed.
* Improved Drainage: Soil bags naturally provide excellent drainage, which kale loves. Soggy roots are a no-no!
* Easy to Move: Need to chase the sun? No problem! Soil bags are relatively easy to relocate.
* Weed Control: Less weeding compared to in-ground gardening. Hallelujah!
* Soil Quality Control: You get to choose the perfect soil mix for your kale.
Materials You’ll Need
Alright, let’s gather our supplies. Here’s what you’ll need to get started:
* Soil Bags: I recommend using heavy-duty polypropylene bags. You can find these at most garden centers or online. Look for bags that are at least 15-20 gallons in size. The bigger, the better, as kale can get quite large.
* Potting Mix: Don’t skimp on the potting mix! Use a high-quality, well-draining mix specifically designed for vegetables. I like to use a mix that contains compost, peat moss (or coco coir), and perlite.
* Kale Seeds or Seedlings: You can start from seed or buy seedlings from a local nursery. Starting from seed is more economical, but seedlings will give you a head start. I personally prefer seedlings for a quicker harvest.
* Fertilizer: A slow-release, balanced fertilizer is ideal. Look for something like a 10-10-10 or an organic fertilizer specifically formulated for leafy greens.
* Watering Can or Hose: For, well, watering! A gentle watering can is best for seedlings.
* Utility Knife or Scissors: To make drainage holes in the bags.
* Gloves: To keep your hands clean.
* Trowel or Small Shovel: For planting.
* Optional: Mulch (straw, wood chips, or shredded leaves) to help retain moisture and suppress weeds.
Step-by-Step Instructions: Planting Your Kale
Okay, let’s get our hands dirty! Here’s how to plant your kale in soil bags:
1. Prepare the Soil Bags:
* First, find a sunny spot that gets at least 6 hours of direct sunlight per day. Kale thrives in sunshine!
* Lay the soil bags flat on the ground in your chosen location.
* Using your utility knife or scissors, carefully cut several drainage holes in the bottom of each bag. I usually make about 6-8 holes, spaced evenly apart. This is crucial for preventing waterlogging.
* Now, open the top of the bag and fold down the edges a few inches. This will create a nice, sturdy rim and make it easier to work with the soil.
2. Fill the Bags with Potting Mix:
* Gradually fill the soil bags with your potting mix, leaving about 4-6 inches of space at the top. Don’t pack the soil down too tightly; you want it to be loose and airy.
* As you’re filling the bags, mix in your slow-release fertilizer according to the package directions. This will provide your kale with a steady supply of nutrients.
3. Plant Your Kale Seeds or Seedlings:
* If planting seeds: Sow the seeds about ½ inch deep and 1-2 inches apart. Gently cover them with soil and water thoroughly. You’ll need to thin the seedlings later, keeping the strongest ones.
* If planting seedlings: Dig a small hole in the soil that’s large enough to accommodate the root ball of the seedling. Gently remove the seedling from its container and loosen the roots slightly. Place the seedling in the hole and backfill with soil, making sure the top of the root ball is level with the surrounding soil. Space the seedlings about 12-18 inches apart.
* Water the newly planted seedlings gently but thoroughly.
4. Mulch (Optional but Recommended):
* Apply a layer of mulch around the base of the kale plants. This will help retain moisture, suppress weeds, and keep the soil cool. I like to use straw, but wood chips or shredded leaves work well too.
Caring for Your Kale
Now that your kale is planted, it’s time to give it some TLC! Here’s what you need to do to keep it happy and healthy:
1. Watering:
* Water your kale regularly, especially during hot, dry weather. The soil should be consistently moist but not soggy. Check the soil moisture by sticking your finger into the soil about an inch deep. If it feels dry, it’s time to water.
* Water deeply, allowing the water to soak into the soil. Avoid overhead watering, as this can lead to fungal diseases.
2. Fertilizing:
* Even with the slow-release fertilizer, your kale will benefit from occasional supplemental feedings. I like to use a liquid fertilizer, such as fish emulsion or seaweed extract, every 2-3 weeks. Follow the package directions for application.
3. Pest Control:
* Keep an eye out for common kale pests, such as aphids, cabbage worms, and flea beetles.
* Aphids: These tiny pests can suck the sap from your kale leaves. You can control them by spraying them with a strong stream of water or by using insecticidal soap.
* Cabbage Worms: These green caterpillars can devour your kale leaves. Handpicking them off the plants is an effective method. You can also use Bacillus thuringiensis (Bt), a natural insecticide that’s safe for humans and pets.
* Flea Beetles: These tiny beetles can create small holes in your kale leaves. You can control them by using row covers or by spraying them with insecticidal soap.
* Regularly inspect your plants for pests and take action as soon as you notice them.
4. Weed Control:
* Even with mulch, you may still get some weeds popping up in your soil bags. Remove them promptly to prevent them from competing with your kale for nutrients and water.
5. Sunlight:
* Make sure your kale is getting at least 6 hours of direct sunlight per day. If it’s not getting enough sun, the leaves may become pale and leggy.
Harvesting Your Kale
The best part! You can start harvesting kale leaves as soon as they’re large enough to eat, usually about 6-8 inches long.
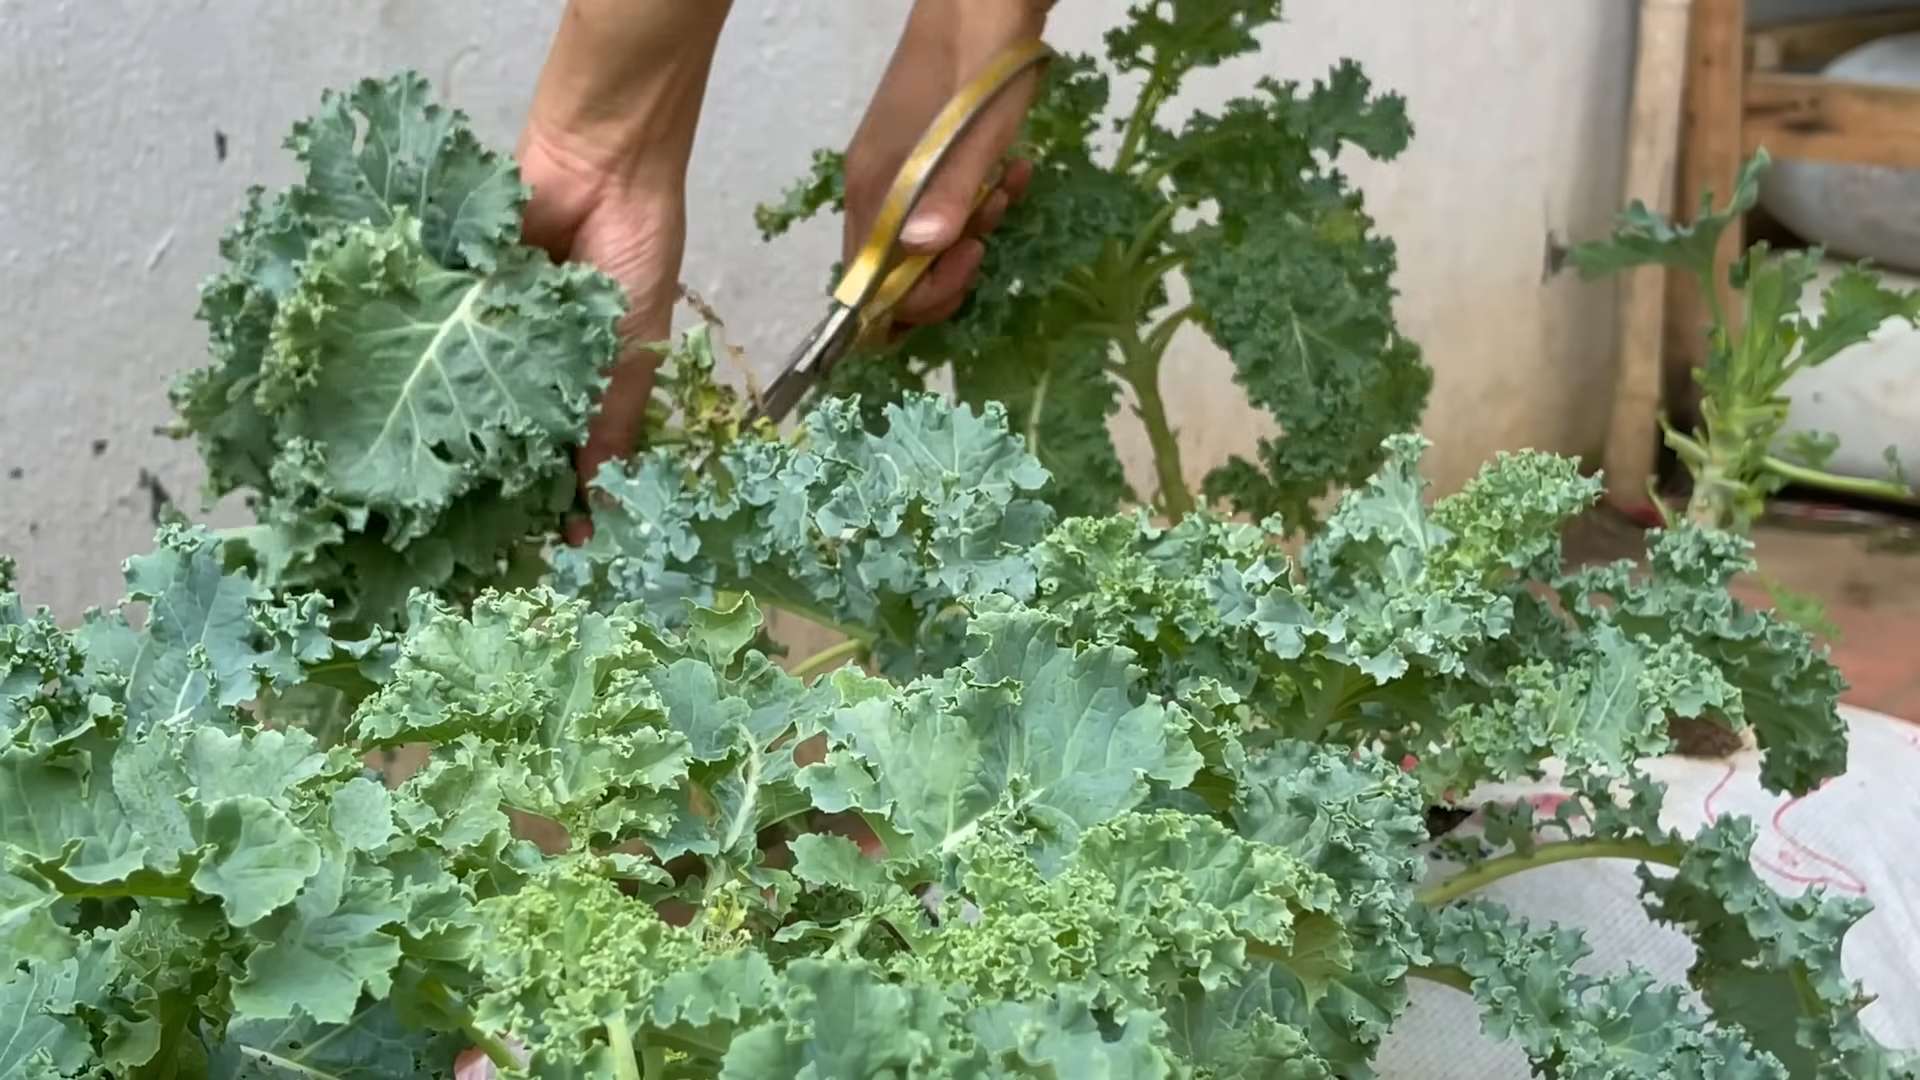
1. Harvesting Technique:
* Harvest the outer leaves first, leaving the inner leaves to continue growing. This will allow you to harvest kale continuously throughout the growing season.
* Use a sharp knife or scissors to cut the leaves off at the base of the stem.
* Avoid harvesting more than one-third of the plant at a time, as this can stress the plant.
2. When to Harvest:
* Kale tastes best when harvested in the morning, after the dew has dried.
* You can harvest kale throughout the growing season, even after a light frost. In fact, some people believe that frost actually improves the flavor of kale.
3. Storing Your Kale:
* Store freshly harvested kale in the refrigerator in a plastic bag. It will keep for about a week.
* You can also freeze kale for longer storage. Blanch the kale leaves in boiling water for 2-3 minutes, then plunge them into ice water. Drain well and freeze in freezer bags.
Troubleshooting
Even with the best care, you might encounter some problems while growing kale. Here are a few common issues and how to address them:
* Yellowing Leaves: This could be a sign of nutrient deficiency, overwatering, or underwatering. Check the soil moisture and fertilize if necessary.
* Stunted Growth: This could be caused by poor soil quality, lack of sunlight, or pest infestation. Amend the soil, move the plant to a sunnier location, and check for pests.
* Holes in Leaves: This is usually caused by pests, such as cabbage worms or flea beetles. Inspect the plants and take appropriate action.
* Bolting (Flowering): Kale can bolt (go to seed) in hot weather. This will make the leaves bitter. To prevent bolting, try

Conclusion
So, there you have it! Growing kale in soil bags is not just a gardening trend; it’s a game-changer for anyone looking to enjoy fresh, nutritious greens with minimal effort and maximum yield. We’ve walked you through the simple steps, highlighting the benefits of this method – from its space-saving nature and improved drainage to its portability and ability to control the soil environment.
Why is this DIY trick a must-try? Because it democratizes gardening. You don’t need acres of land or a green thumb passed down through generations. All you need are a few soil bags, some kale seeds or seedlings, and a sunny spot. It’s an accessible, affordable, and incredibly rewarding way to connect with your food and enjoy the unparalleled taste of homegrown kale.
But the beauty of this method lies in its adaptability. Feel free to experiment!
* Variations on a Theme: Try different varieties of kale. Curly kale, Lacinato kale (also known as dinosaur kale), and Red Russian kale all thrive in soil bags. Each offers a unique flavor and texture, adding variety to your salads and dishes.
* Companion Planting: Consider planting companion herbs like rosemary, thyme, or sage alongside your kale. These herbs can help deter pests and enhance the flavor of your kale. Marigolds are also excellent companions, adding a splash of color and further deterring unwanted insects.
* Vertical Gardening: If space is truly limited, consider creating a vertical kale garden by stacking or hanging your soil bags. This not only maximizes space but also adds a visually appealing element to your garden.
* Fertilizer Options: While we recommended a balanced slow-release fertilizer, you can also use organic options like compost tea or fish emulsion to feed your kale. Just be sure to follow the instructions on the product label.
* Season Extension: In colder climates, you can extend your kale growing season by moving your soil bags indoors or into a greenhouse during the winter months. This allows you to enjoy fresh kale even when the weather outside is frightful.
Ultimately, the best way to discover the full potential of growing kale in soil bags is to try it yourself. Don’t be afraid to experiment, adapt, and learn from your experiences. This method is forgiving and adaptable, making it perfect for both beginner and experienced gardeners alike.
We are confident that you’ll be amazed by the results. Imagine stepping outside your door and harvesting fresh, vibrant kale for your next meal. It’s a simple pleasure that can transform your relationship with food and connect you to the natural world.
So, grab your soil bags, seeds, and get ready to embark on a rewarding gardening adventure. And most importantly, we want to hear about your experience! Share your tips, successes, and challenges in the comments below. Let’s build a community of soil bag kale growers and inspire others to discover the joys of homegrown food. Happy gardening! Let us know how your kale growing journey goes!
Frequently Asked Questions (FAQ)
Q: How often should I water my kale plants in soil bags?
A: Watering frequency depends on several factors, including the weather, the size of your plants, and the type of soil you’re using. As a general rule, check the soil moisture daily. If the top inch of soil feels dry to the touch, it’s time to water. Water deeply until you see water draining from the bottom of the bag. Avoid overwatering, as this can lead to root rot. During hot, dry weather, you may need to water daily, while during cooler, wetter periods, you may only need to water every few days. A good moisture meter can be a valuable tool for determining when to water.
Q: What kind of soil should I use for growing kale in soil bags?
A: The best soil for growing kale in soil bags is a well-draining, nutrient-rich potting mix. Avoid using garden soil, as it can be too heavy and compact, leading to drainage problems. Look for a potting mix that contains a blend of peat moss, perlite, and vermiculite. You can also amend your potting mix with compost or other organic matter to improve its fertility and drainage. A slightly acidic to neutral pH (around 6.0 to 7.0) is ideal for kale.
Q: How much sunlight does kale need when grown in soil bags?
A: Kale thrives in full sun, which means at least 6 hours of direct sunlight per day. However, it can also tolerate partial shade, especially in hot climates. If you live in an area with intense summer heat, providing some afternoon shade can help prevent your kale from bolting (going to seed prematurely). When positioning your soil bags, choose a location that receives ample sunlight throughout the day. If you’re growing kale indoors, use grow lights to supplement natural sunlight.
Q: How do I fertilize kale grown in soil bags?
A: Kale is a heavy feeder, so it’s important to provide it with adequate nutrients. When planting, incorporate a slow-release fertilizer into the soil bag. This will provide a steady supply of nutrients for several weeks. After that, you can supplement with liquid fertilizer every 2-3 weeks. Use a balanced fertilizer with an NPK ratio of around 10-10-10 or 20-20-20. Organic options like compost tea or fish emulsion are also excellent choices. Be sure to follow the instructions on the fertilizer label to avoid over-fertilizing.
Q: How do I protect my kale plants from pests and diseases?
A: Kale is susceptible to a variety of pests and diseases, including aphids, cabbage worms, flea beetles, and powdery mildew. To prevent problems, start with healthy plants and provide them with optimal growing conditions. Regularly inspect your plants for signs of pests or diseases. If you spot any problems, take action immediately.
* Pest Control: For aphids, spray your plants with a strong stream of water or use insecticidal soap. For cabbage worms, handpick them off the plants or use Bacillus thuringiensis (Bt), a natural insecticide. For flea beetles, use row covers to protect your plants or apply diatomaceous earth to the soil.
* Disease Control: To prevent powdery mildew, ensure good air circulation around your plants and avoid overhead watering. If you see signs of powdery mildew, spray your plants with a fungicide.
Q: How long does it take for kale to grow in soil bags?
A: Kale typically takes 55 to 75 days to mature from seed, but you can start harvesting leaves as soon as they are large enough to eat. If you’re starting with seedlings, you can expect to harvest leaves in about 30 to 40 days. The exact time will depend on the variety of kale, the growing conditions, and your personal preferences.
Q: Can I grow kale in soil bags during the winter?
A: Yes, you can grow kale in soil bags during the winter, especially in mild climates. Kale is a cold-hardy vegetable that can tolerate temperatures as low as 20°F (-6°C). In colder climates, you can protect your kale plants by moving them indoors or into a greenhouse. You can also use row covers or cold frames to provide extra insulation.
Q: How do I harvest kale from soil bags?
A: To harvest kale, simply cut off the outer leaves with a sharp knife or scissors. Leave the inner leaves intact, as they will continue to grow. Harvest regularly to encourage new growth. Avoid harvesting more than one-third of the plant at a time, as this can stress the plant.
Q: Can I reuse the soil bags for growing kale again?
A: Yes, you can reuse the soil bags for growing kale again, but it’s important to replenish the nutrients in the soil. After harvesting your kale, amend the soil with compost or other organic matter. You may also need to add fertilizer to provide the plants with the nutrients they need. If you notice any signs of disease, it’s best to replace the soil to prevent the disease from spreading.
Leave a Comment