
Effort saving cleaning tricks – who doesn’t want those, right? Let’s be honest, cleaning isn’t exactly anyone’s favorite pastime. We all dream of sparkling homes without spending hours scrubbing and sweating. For centuries, people have sought clever ways to lighten the load, from ancient Roman bathhouses utilizing ingenious drainage systems to Victorian-era housewives employing innovative cleaning solutions. The desire for efficiency is deeply ingrained in our history!
But in today’s fast-paced world, time is more precious than ever. Juggling work, family, and social life leaves little room for tedious chores. That’s where these DIY cleaning hacks come in. I’m going to share some game-changing effort saving cleaning tricks that will revolutionize your cleaning routine. Imagine spending less time cleaning and more time doing the things you love.
This article is packed with simple, yet effective, DIY solutions that will not only save you time and energy but also money. Forget expensive cleaning products filled with harsh chemicals. We’re talking about using everyday household items to achieve sparkling results. Get ready to unlock the secrets to a cleaner, happier home with minimal effort!
Effort-Saving Cleaning Tricks: Work Smarter, Not Harder!
Hey there, fellow cleaning enthusiasts (or, you know, people who just want to spend less time cleaning!). I’m always on the lookout for ways to make my cleaning routine faster, easier, and, dare I say, even a little bit enjoyable. So, I’m sharing some of my favorite effort-saving cleaning tricks that have seriously changed the game for me. Get ready to reclaim your weekends!
Tackling the Kitchen: Grease and Grime Be Gone!
The kitchen, the heart of the home, and often the dirtiest place too! But fear not, I’ve got some tricks up my sleeve to make cleaning it a breeze.
Cleaning the Microwave with Steam Power
This is one of my absolute favorite tricks because it’s so simple and effective. No more scrubbing for ages!
What you’ll need:
* 1 cup of water
* 1/4 cup of white vinegar (or lemon juice)
* Microwave-safe bowl
Step-by-step instructions:
1. Mix it up: In your microwave-safe bowl, combine the water and vinegar (or lemon juice). The vinegar helps to loosen grease and grime, while the lemon juice adds a fresh scent.
2. Microwave magic: Place the bowl in the microwave and heat on high for 5-7 minutes. You want the mixture to boil and create steam inside the microwave.
3. Let it sit: Once the timer goes off, don’t open the microwave door immediately! Let it sit for another 3-5 minutes. This allows the steam to really work its magic, loosening all the stuck-on food particles.
4. Wipe it clean: Carefully remove the bowl (it will be hot!). Use a damp cloth or sponge to easily wipe away all the loosened grime. You’ll be amazed at how easily it comes off!
5. Final touches: For any stubborn spots, you can use a little baking soda on your damp cloth. Rinse and dry. Voila! A sparkling clean microwave with minimal effort.
De-Greasing Your Stovetop with Baking Soda Paste
Burnt-on grease on the stovetop is a common kitchen woe. But don’t worry, baking soda is here to save the day!
What you’ll need:
* Baking soda
* Water
* Sponge or cloth
* Old toothbrush (optional, for stubborn areas)
Step-by-step instructions:
1. Make a paste: Mix baking soda with a little water to form a thick paste. The consistency should be similar to toothpaste.
2. Apply the paste: Generously apply the baking soda paste to the greasy areas of your stovetop.
3. Let it sit: Allow the paste to sit for at least 15-20 minutes. For really tough grease, you can let it sit for even longer, up to an hour.
4. Scrub gently: Use a sponge or cloth to gently scrub the stovetop. For stubborn areas, an old toothbrush can be really helpful for getting into those nooks and crannies.
5. Rinse and dry: Rinse the stovetop thoroughly with water to remove all traces of baking soda. Dry with a clean cloth. Your stovetop will be looking shiny and new!
Cleaning the Oven with Ammonia (Use with Caution!)
Important Note: Ammonia fumes can be strong and irritating. Make sure to ventilate your kitchen well by opening windows and wearing gloves. Never mix ammonia with bleach, as this can create dangerous fumes.
What you’ll need:
* 1/2 cup of ammonia
* Oven-safe bowl
* Large plastic bag (garbage bag works well)
* Water
* Sponge or cloth
* Gloves
Step-by-step instructions:
1. Prepare the ammonia: Pour the ammonia into the oven-safe bowl.
2. Place in oven: Place the bowl of ammonia in the cold oven.
3. Seal the oven: Place the large plastic bag over the entire oven, sealing it as best as possible with tape or clips. This will trap the ammonia fumes inside.
4. Let it sit overnight: Leave the ammonia in the oven overnight (at least 12 hours). The ammonia fumes will loosen the baked-on grease and grime.
5. Ventilate and remove: The next day, carefully remove the plastic bag and ventilate your kitchen thoroughly. Remove the bowl of ammonia.
6. Wipe it clean: Use a damp sponge or cloth to easily wipe away the loosened grime. You may need to scrub a little for stubborn areas, but it should come off much easier than before.
7. Rinse and dry: Rinse the oven thoroughly with water to remove any remaining ammonia residue. Dry with a clean cloth.
Bathroom Bliss: Sparkling Clean with Minimal Effort
The bathroom can be a breeding ground for germs and grime, but these tricks will help you keep it sparkling clean without spending hours scrubbing.
Cleaning Showerheads with Vinegar
Hard water deposits can clog showerheads and reduce water pressure. Here’s how to easily clean them with vinegar:
What you’ll need:
* White vinegar
* Plastic bag (sandwich bag or larger, depending on the size of your showerhead)
* Rubber band or twist tie
Step-by-step instructions:
1. Fill the bag: Fill the plastic bag with white vinegar.
2. Attach to showerhead: Place the bag over the showerhead, ensuring that the showerhead is completely submerged in the vinegar.
3. Secure the bag: Use a rubber band or twist tie to secure the bag tightly around the showerhead.
4. Let it soak: Let the showerhead soak in the vinegar for at least 30 minutes, or even better, overnight.
5. Remove and rinse: Remove the bag and discard the vinegar. Run the shower for a few minutes to flush out any remaining vinegar and loosened deposits.
6. Wipe clean: Wipe the showerhead clean with a cloth. Your showerhead will be sparkling clean and your water pressure will be back to normal!
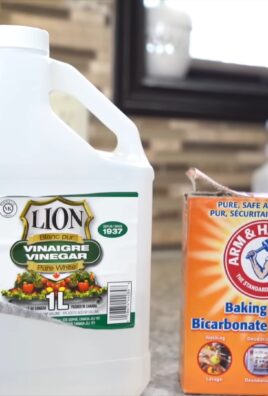
Cleaning Grout with Baking Soda and Vinegar
Dirty grout can make your bathroom look dingy, even if everything else is clean. This simple trick will brighten your grout lines in no time.
What you’ll need:
* Baking soda
* White vinegar
* Spray bottle
* Old toothbrush or grout brush
Step-by-step instructions:
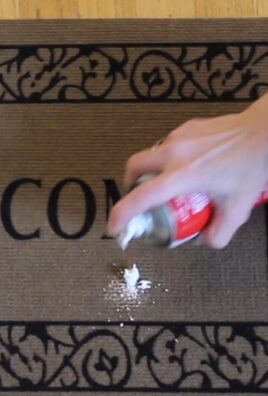
1. Sprinkle baking soda: Sprinkle baking soda generously over the grout lines you want to clean.
2. Spray with vinegar: Fill a spray bottle with white vinegar and spray it over the baking soda. The mixture will fizz, which is a good sign that it’s working!
3. Let it sit: Let the mixture sit for 5-10 minutes.
4. Scrub the grout: Use an old toothbrush or grout brush to scrub the grout lines. The baking soda and vinegar will help to loosen the dirt and grime.
5. Rinse and dry: Rinse the area thoroughly with water and dry with a clean cloth. Your grout will be noticeably brighter!
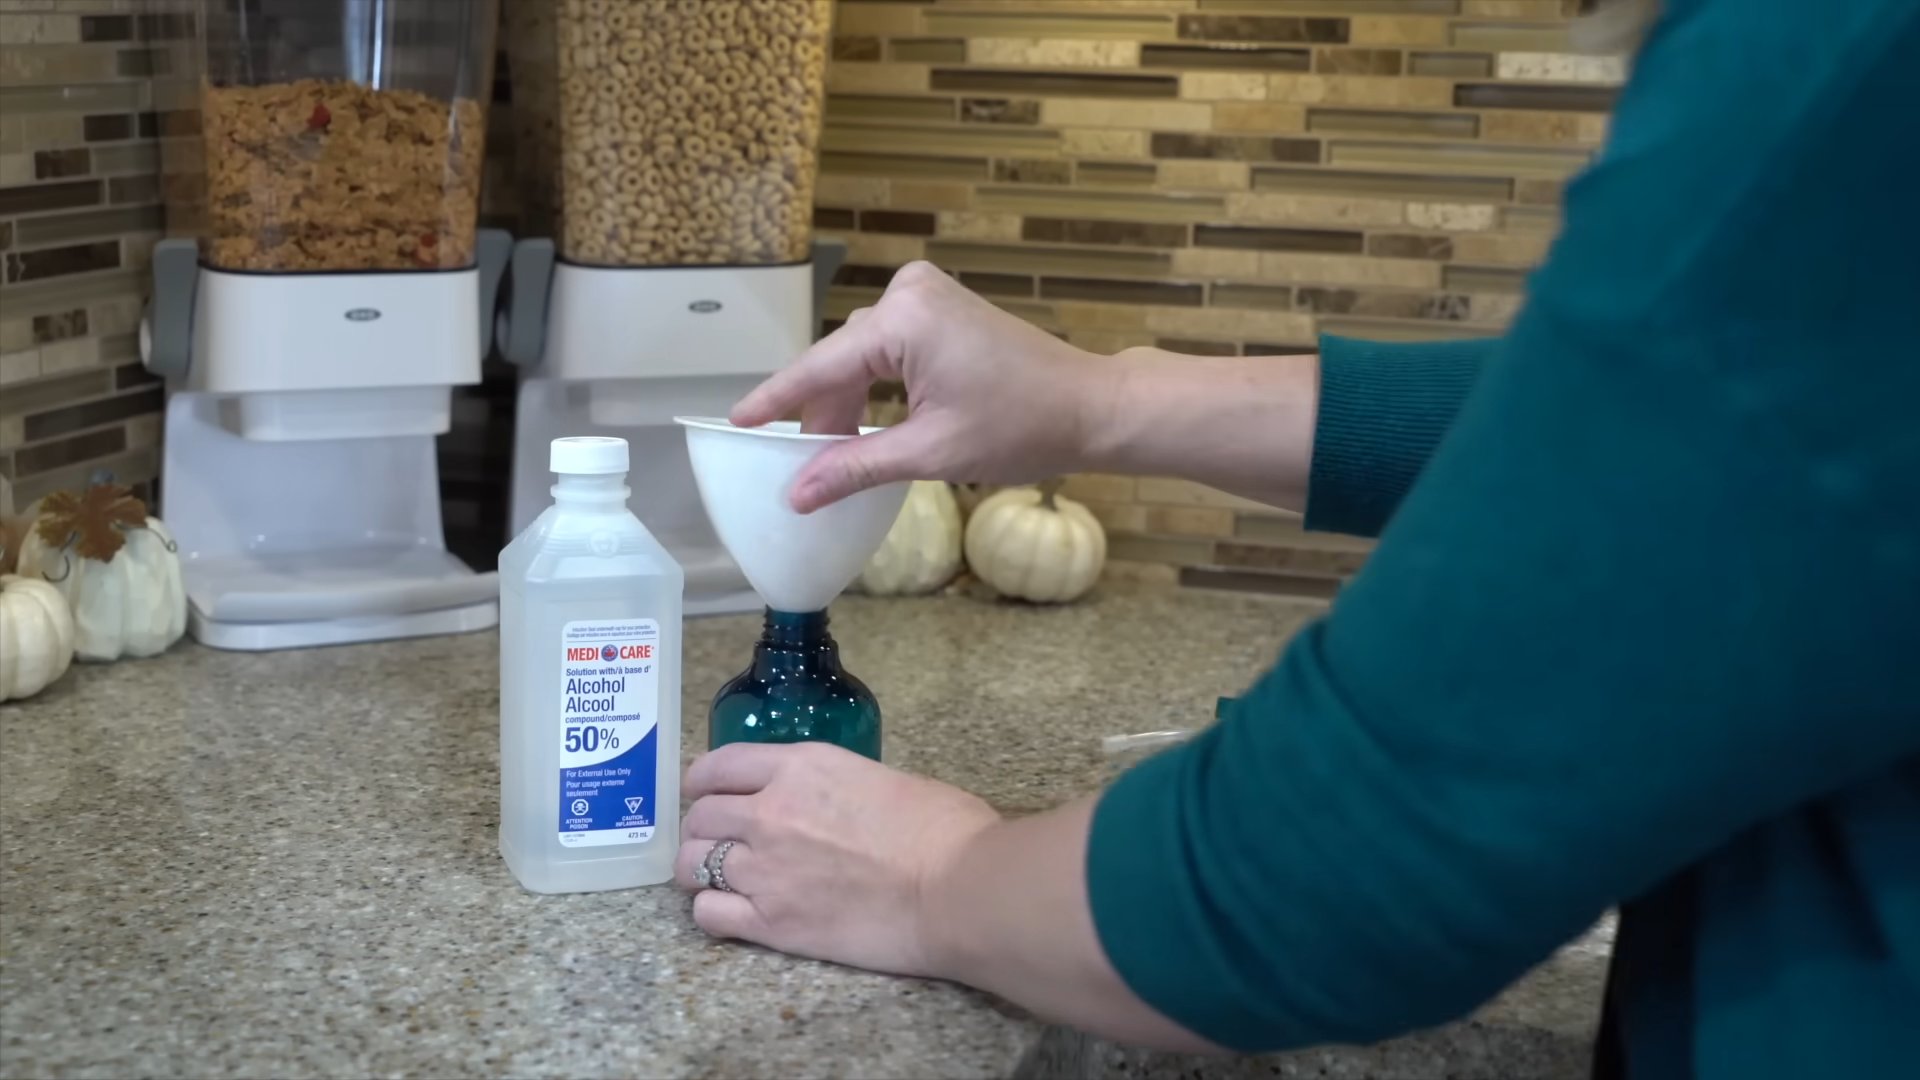
Toilet Bowl Cleaning with Cola
Yes, you read that right! Cola can actually be used to clean your toilet bowl. The acids in cola help to break down stains and mineral deposits.
What you’ll need:
* Cola (any brand will do)
Step-by-step instructions:
1. Pour in cola: Pour a can or bottle of cola into the toilet bowl, making sure to coat the entire surface.
2. Let it sit: Let the cola sit for at least an hour, or even better, overnight.
3. Flush and scrub: Flush the toilet and use a toilet brush to scrub any remaining stains. The cola will have loosened the stains, making them much easier to remove.
Living Room Refresh: Dusting and Polishing Made Easy
The living room is where we relax and entertain, so keeping it clean and tidy is important. Here are some quick and easy ways to refresh your living room.
Dusting with Microfiber Cloths
Microfiber cloths are a game-changer when it comes to dusting. They attract and trap dust much more effectively than traditional cloths, and they’re reusable and washable.
What you’ll need:
* Microfiber cloths
Step-by-step instructions:
1. Dampen the cloth: Lightly dampen the microfiber cloth with water.
2. Dust surfaces: Wipe down all surfaces, including furniture, shelves, and electronics. The microfiber cloth will pick up dust and dirt without scratching the surfaces.
3. Wash and reuse: Wash the microfiber cloth after each use to keep it clean and effective.
Conclusion
So, there you have it! This simple yet incredibly effective DIY cleaning trick is a game-changer for anyone looking to save time and effort while maintaining a sparkling clean home. We’ve all been there, staring down a mountain of chores, feeling overwhelmed and wishing for a magic wand. While we can’t promise actual magic, this method comes pretty darn close. The beauty of this approach lies in its simplicity and adaptability. You’re not chained to expensive, store-bought cleaners filled with harsh chemicals. Instead, you’re harnessing the power of readily available ingredients to create a solution that’s both effective and gentle on your surfaces.
Why is this a must-try? Because it addresses the core issues that make cleaning a dreaded task: time consumption and physical exertion. By streamlining the process and utilizing a proactive approach, you’re minimizing the amount of scrubbing and elbow grease required. Think of all the things you could do with the extra time you’ll gain – spend it with loved ones, pursue a hobby, or simply relax and recharge. This isn’t just about cleaning; it’s about reclaiming your time and energy.
But the benefits don’t stop there. This DIY cleaning trick is also incredibly versatile. Feel free to experiment with different essential oils to create a scent that you love. Lavender, lemon, and eucalyptus are all excellent choices for their cleaning properties and refreshing aromas. You can also adjust the concentration of ingredients to suit your specific needs. For tougher stains, try adding a bit more vinegar or baking soda. Remember to always test in an inconspicuous area first to ensure compatibility with the surface you’re cleaning.
Consider these variations to tailor the trick to your specific cleaning needs:
* For bathroom grime: Add a few drops of tea tree oil to your solution for its antibacterial and antifungal properties.
* For kitchen grease: Increase the amount of dish soap in your mixture to help cut through stubborn grease.
* For stainless steel appliances: Use a microfiber cloth to apply the solution and buff the surface for a streak-free shine.
We are confident that once you try this DIY cleaning trick, you’ll wonder how you ever lived without it. It’s a cost-effective, eco-friendly, and time-saving solution that will transform your cleaning routine. It’s a true effort saving cleaning trick that will change your life.
So, what are you waiting for? Gather your supplies, mix up a batch of this amazing cleaner, and experience the difference for yourself. We encourage you to share your results and any variations you discover in the comments below. Let’s create a community of clean-home enthusiasts who are all about saving time and effort! We can’t wait to hear about your experiences and learn from your insights. Happy cleaning!
Frequently Asked Questions (FAQ)
What exactly is the DIY cleaning trick you’re referring to?
The DIY cleaning trick we’re highlighting involves creating your own cleaning solution using common household ingredients like vinegar, baking soda, dish soap, and water. The specific ratios and application methods can vary depending on the surface you’re cleaning, but the core principle remains the same: leveraging the natural cleaning power of these ingredients to create an effective and affordable alternative to commercial cleaners. This is a great effort saving cleaning trick.
Is this DIY cleaning solution safe for all surfaces?
While the ingredients are generally safe, it’s always best to test the solution in an inconspicuous area before applying it to the entire surface. Certain materials, such as marble or granite, can be sensitive to acidic solutions like vinegar. Similarly, some wood finishes may be affected by excessive moisture. Always err on the side of caution and test first. If you are unsure, consult the manufacturer’s recommendations for cleaning specific surfaces.
How long does the DIY cleaning solution last?
The shelf life of your DIY cleaning solution will depend on the ingredients you use. Solutions containing water are susceptible to bacterial growth over time. It’s generally recommended to use the solution within a week or two for optimal effectiveness and to prevent any potential issues. If you notice any discoloration, cloudiness, or unusual odors, discard the solution and make a fresh batch. Solutions without water, such as those using only essential oils and dry ingredients, may last longer.
Can I use different essential oils in the cleaning solution?
Absolutely! Essential oils not only add a pleasant scent but also offer additional cleaning and disinfecting properties. Lavender, lemon, tea tree, eucalyptus, and peppermint are all popular choices for their antibacterial, antifungal, and antiviral benefits. Experiment with different combinations to find your favorite scent and cleaning power. Just be sure to use pure, high-quality essential oils for the best results.
What if I don’t have vinegar or baking soda? Are there alternatives?
While vinegar and baking soda are key ingredients in many DIY cleaning solutions, there are alternatives you can use. Lemon juice can be used in place of vinegar for its acidic cleaning properties. Borax can be used as a substitute for baking soda for its cleaning and deodorizing abilities. However, always research the properties of any alternative ingredients and ensure they are safe for the surfaces you intend to clean.
How do I deal with stubborn stains using this DIY cleaning trick?
For stubborn stains, you may need to pre-treat the area before applying the general cleaning solution. Create a paste of baking soda and water and apply it to the stain. Let it sit for several minutes or even overnight before scrubbing gently with a soft cloth or brush. For grease stains, try using a stronger concentration of dish soap in your cleaning solution. You can also try using a specialized stain remover in conjunction with your DIY cleaning solution.
Is this DIY cleaning trick environmentally friendly?
Yes, one of the major benefits of using DIY cleaning solutions is that they are generally more environmentally friendly than commercial cleaners. By using natural ingredients and avoiding harsh chemicals, you’re reducing your impact on the environment. You’re also reducing the amount of plastic waste generated by purchasing single-use cleaning bottles. Consider using reusable spray bottles and containers to further minimize your environmental footprint.
How can I make my own reusable cleaning wipes using this DIY solution?
To make reusable cleaning wipes, cut up old t-shirts or towels into squares. Place the squares in a container and pour your DIY cleaning solution over them until they are damp but not soaking wet. Store the container in a cool, dry place. When you need a cleaning wipe, simply grab one from the container and use it to wipe down surfaces. After use, wash the wipes and reuse them. This is a great way to reduce waste and save money.
What are some other effort saving cleaning tricks I can use in conjunction with this DIY solution?
Besides using this DIY cleaning solution, there are many other effort saving cleaning tricks you can incorporate into your routine. These include:
* Cleaning as you go: Wipe up spills immediately and clean up messes as they happen to prevent them from becoming bigger problems.
* Decluttering regularly: A cluttered space is harder to clean, so declutter regularly to make cleaning easier.
* Using cleaning tools effectively: Invest in good quality cleaning tools, such as microfiber cloths and scrub brushes, to make cleaning more efficient.
* Creating a cleaning schedule: Break down your cleaning tasks into smaller, manageable chunks and schedule them throughout the week to avoid feeling overwhelmed.
* Enlisting help: Don’t be afraid to ask for help from family members or hire a cleaning service if needed.
Where can I find more information and recipes for DIY cleaning solutions?
There are many online resources available that offer a wealth of information and recipes for DIY cleaning solutions. Websites, blogs, and social media platforms dedicated to eco-friendly living and natural cleaning are great places to start. You can also find books and articles on the topic in libraries and bookstores. Remember to always research and verify the safety and effectiveness of any DIY cleaning recipe before using it.

Leave a Comment