
DIY Floor Cleaning Solution: Tired of spending a fortune on store-bought cleaners that promise the world but often leave your floors streaky and smelling artificial? I hear you! I’ve been there, scrubbing away with little to show for it except aching knees and an empty wallet. But what if I told you that the secret to sparkling, fresh-smelling floors is probably already hiding in your pantry?
For generations, resourceful homemakers have relied on simple, natural ingredients to keep their homes clean. Think back to your grandmother’s era – harsh chemicals weren’t the norm. Instead, they used vinegar, baking soda, and essential oils, harnessing the power of nature to create effective and eco-friendly cleaning solutions. This tradition isn’t just about saving money; it’s about creating a healthier living environment for ourselves and our families.
In today’s world, we’re becoming increasingly aware of the impact of harsh chemicals on our health and the environment. That’s why learning how to make your own DIY floor cleaning solution is more important than ever. Not only will you save money and reduce your exposure to harmful toxins, but you’ll also gain a sense of satisfaction knowing you’re creating a cleaner, healthier home with your own two hands. Plus, you can customize the scent to your liking! So, let’s ditch the expensive, chemical-laden cleaners and dive into the world of natural floor cleaning. I’m excited to share some of my favorite recipes and tips with you!
DIY Floor Cleaning Solution: Sparkling Floors on a Budget!
Hey there, fellow DIY enthusiasts! I’m so excited to share my go-to recipe for a homemade floor cleaning solution that will leave your floors sparkling clean without breaking the bank or exposing your family to harsh chemicals. I’ve been using this method for years, and I swear, my floors have never looked better! Plus, it’s incredibly easy to customize based on your floor type and preferences. Let’s get started!
Understanding Your Floor Type
Before we dive into the recipe, it’s crucial to understand what kind of floors you have. Different materials require different cleaning approaches. Using the wrong solution can damage your floors, and nobody wants that!
* **Hardwood Floors:** These are beautiful but sensitive. Avoid excessive water and harsh chemicals.
* **Tile Floors:** Tile is generally more durable and can handle stronger cleaning solutions.
* **Laminate Floors:** Similar to hardwood, laminate needs a gentle touch. Avoid excessive moisture.
* **Vinyl Floors:** Vinyl is pretty resilient and can handle a variety of cleaning solutions.
* **Stone Floors (Marble, Granite, etc.):** These require pH-neutral cleaners to prevent etching.
The All-Purpose Floor Cleaning Solution Recipe
This recipe is a great starting point and can be adjusted to suit your specific needs.
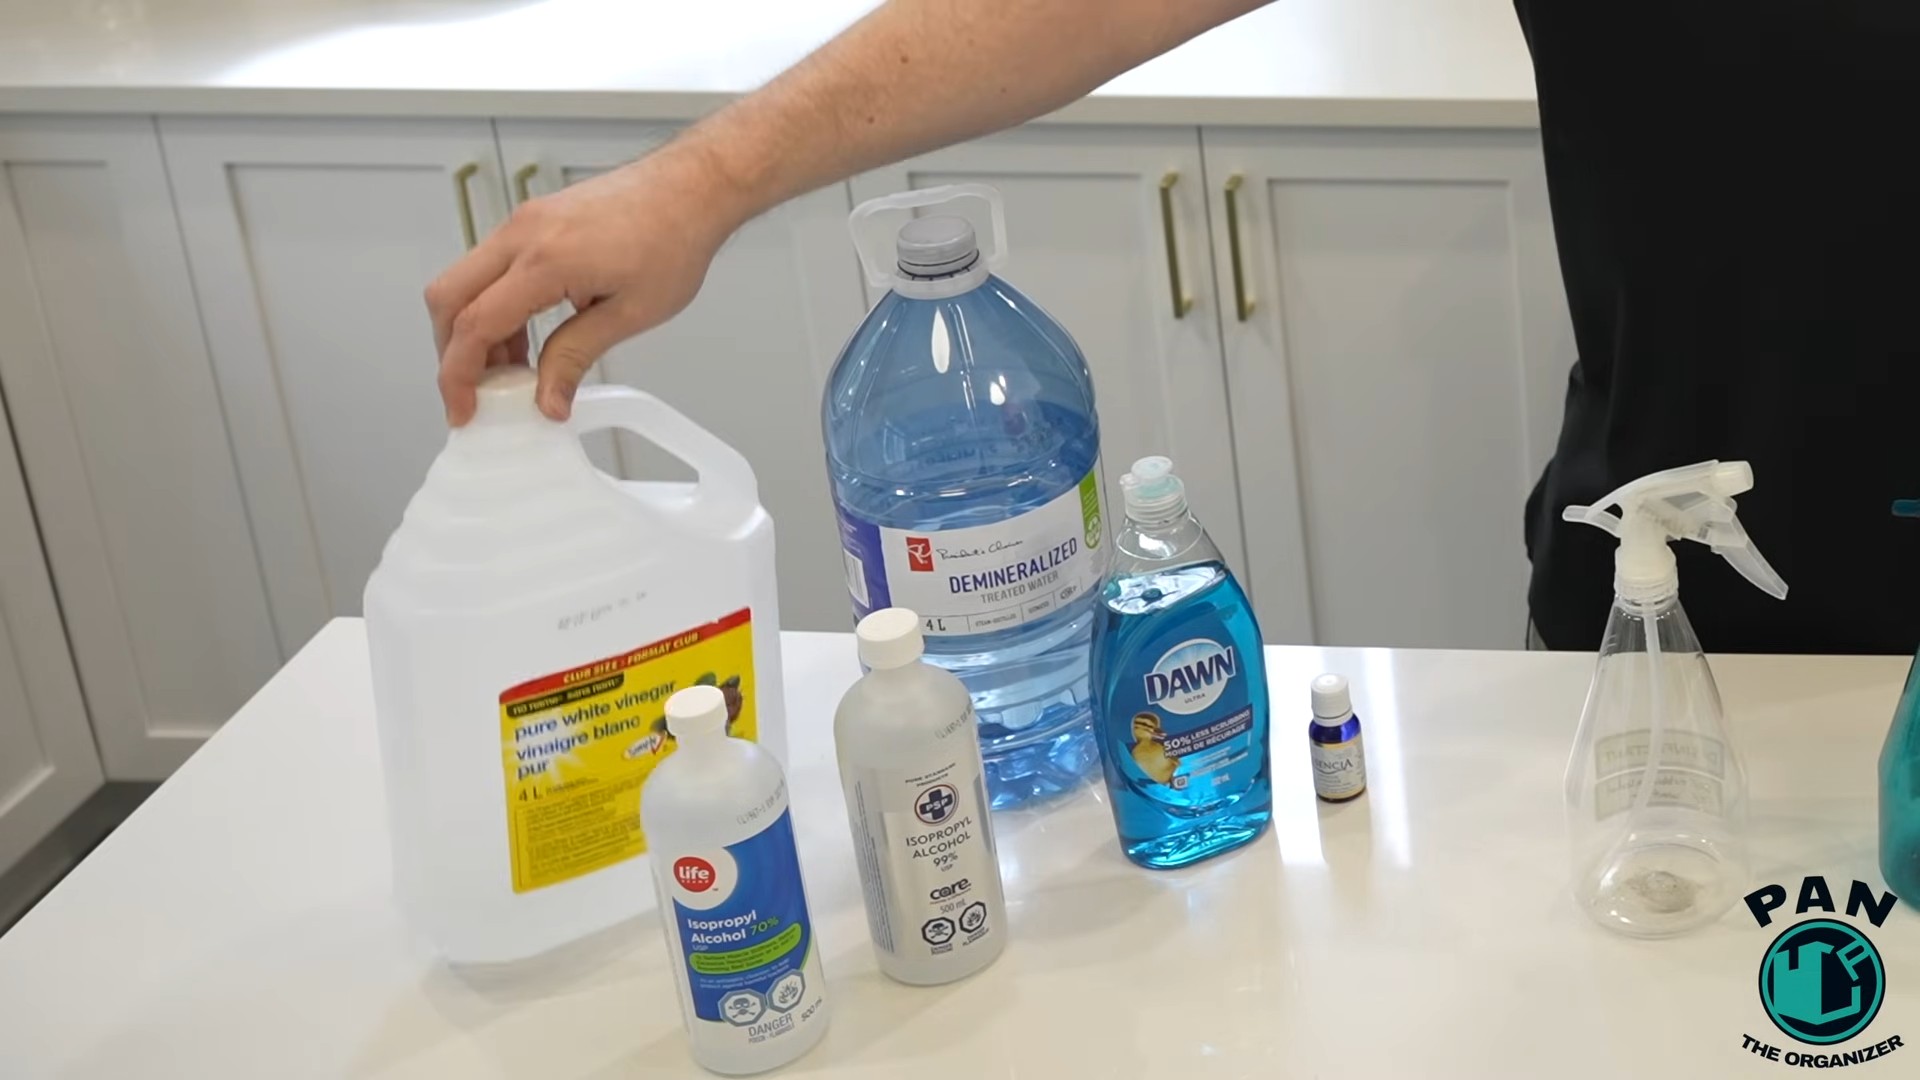
**Ingredients:**
* 1/2 cup White Vinegar: This is a natural disinfectant and deodorizer.
* 1 gallon Warm Water: Warm water helps dissolve dirt and grime.
* 1 tablespoon Dish Soap (Mild, like Dawn): Cuts through grease and grime.
* Optional: 10-20 drops Essential Oil (Lemon, Lavender, Tea Tree): Adds a pleasant scent and can provide additional cleaning benefits.
**Equipment:**
* Bucket
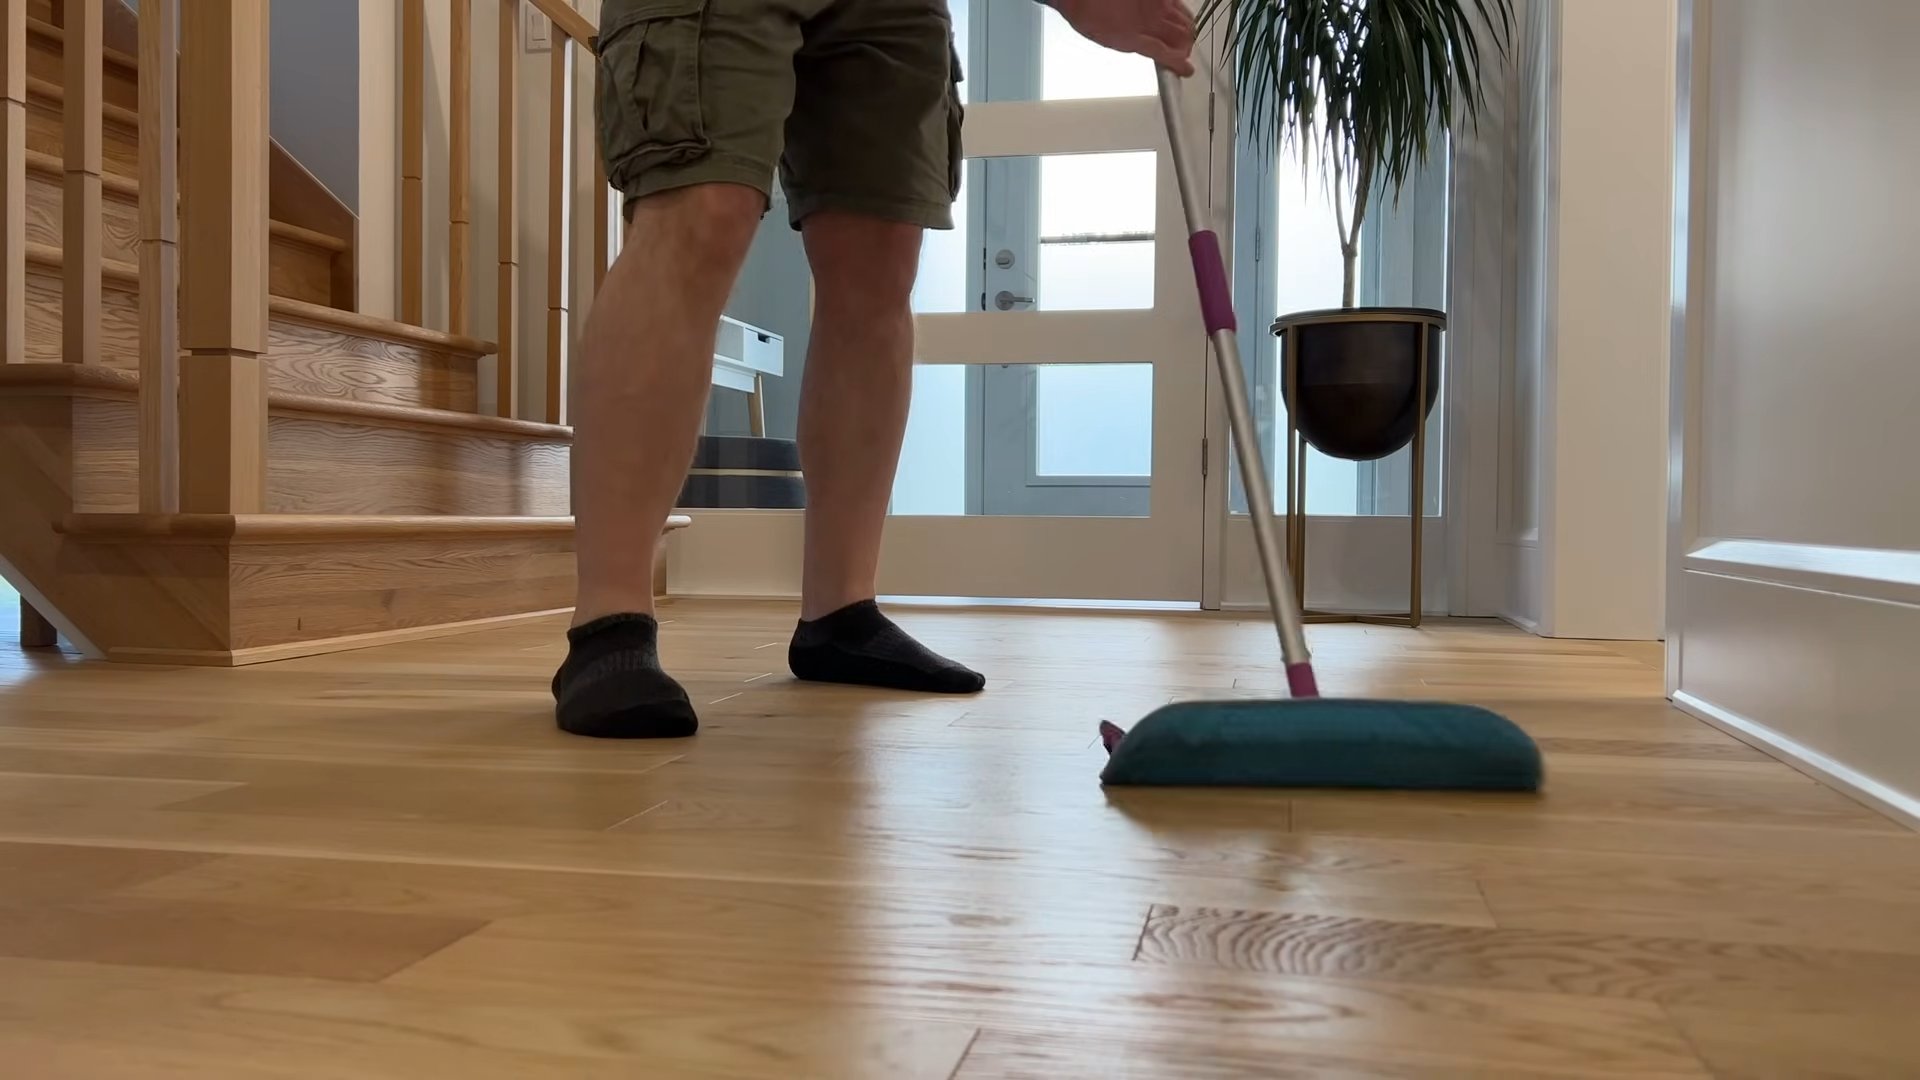
* Mop (Microfiber is best!)
* Spray Bottle (Optional, for spot cleaning)
* Measuring Cups and Spoons
Step-by-Step Instructions: Getting Your Floors Gleaming
1. **Gather Your Supplies:** Before you start, make sure you have everything you need within reach. This will save you time and prevent interruptions. I like to lay everything out on the counter so I can easily grab what I need.
2. **Prepare the Cleaning Solution:** In your bucket, combine the warm water, white vinegar, and dish soap. Stir gently to mix. If you’re using essential oils, add them now. Remember, a little goes a long way! I usually start with 10 drops and add more if I want a stronger scent.
3. **Test in an Inconspicuous Area:** Before you clean your entire floor, test the solution in a small, hidden area to ensure it doesn’t damage the finish. This is especially important for hardwood and stone floors. Apply a small amount of the solution, let it sit for a minute or two, and then wipe it away. Check for any discoloration or damage.
4. **Prepare Your Floors:** Sweep or vacuum your floors thoroughly to remove any loose dirt, dust, and debris. This is a crucial step because you don’t want to be pushing dirt around with your mop. I sometimes even use a damp cloth to pre-clean heavily soiled areas.
5. **Mop Your Floors:** Dip your mop into the cleaning solution and wring it out well. You want the mop to be damp, not soaking wet. Mop your floors in overlapping strokes, working in small sections.
6. **Rinse (Optional):** For some floor types, especially hardwood and laminate, rinsing with clean water is recommended to remove any soap residue. If you choose to rinse, use a separate bucket of clean water and a clean mop. Wring the mop out very well to avoid excessive moisture.
7. **Dry Your Floors:** Allow your floors to air dry completely. You can speed up the drying process by opening windows or using a fan. For hardwood floors, I sometimes use a soft cloth to dry them manually.
Specific Floor Type Adjustments
Here’s how to tweak the recipe for different floor types:
* **Hardwood Floors:** Use less water and vinegar. Try 1/4 cup of vinegar per gallon of water. Make sure your mop is only slightly damp. Avoid leaving standing water on the floor. I also recommend adding a few drops of olive oil to the solution for extra shine.
* **Tile Floors:** You can use the standard recipe or even increase the amount of vinegar for a stronger cleaning action. Tile can handle more moisture, but still avoid flooding the floor.
* **Laminate Floors:** Similar to hardwood, use less water and vinegar. Make sure your mop is well-wrung out. You can also add a few drops of baby oil to the solution for extra shine.
* **Vinyl Floors:** Vinyl is pretty forgiving, so you can use the standard recipe. You can also add a little bit of baking soda to the solution for extra cleaning power.
* **Stone Floors (Marble, Granite, etc.):** It’s crucial to use a pH-neutral cleaner on stone floors to prevent etching. Instead of vinegar, use a mild dish soap specifically designed for stone floors. You can also find pH-neutral stone cleaners at most home improvement stores.
Tackling Stubborn Stains
Sometimes, you’ll encounter stubborn stains that require a little extra attention. Here are a few tips for dealing with common floor stains:
* **Grease Stains:** Sprinkle baking soda on the stain and let it sit for 30 minutes. Then, vacuum up the baking soda and mop the area with your regular cleaning solution.
* **Water Stains:** For hardwood floors, try rubbing the stain with a soft cloth and a little bit of mayonnaise. Let it sit for a few hours, then wipe it away.
* **Scuff Marks:** Use a pencil eraser to gently rub away scuff marks.
* **Pet Stains:** Clean the area with an enzymatic cleaner specifically designed for pet stains. These cleaners break down the enzymes in pet urine and feces, eliminating odors and preventing repeat offenses.
Essential Oil Blends for Cleaning
Essential oils not only add a pleasant scent to your cleaning solution but also offer additional cleaning benefits. Here are a few of my favorite essential oil blends for floor cleaning:
* **Lemon and Tea Tree:** This blend is great for disinfecting and deodorizing. Lemon oil has a bright, citrusy scent, while tea tree oil is a powerful antibacterial and antifungal agent.
* **Lavender and Eucalyptus:** This blend is calming and refreshing. Lavender oil has a relaxing scent, while eucalyptus oil is a natural antiseptic and decongestant.
* **Peppermint and Rosemary:** This blend is invigorating and energizing. Peppermint oil has a cooling effect, while rosemary oil is a natural stimulant and antiseptic.
Tips for Maintaining Sparkling Floors
* **Sweep or vacuum regularly:** This will prevent dirt and debris from building up on your floors. I try to sweep or vacuum at least once a week, and more often in high-traffic areas.
* **Use doormats:** Place doormats at all entrances to trap dirt and moisture before they get onto your floors.
* **Clean up spills immediately:** The longer a spill sits, the harder it will be to clean.
* **Avoid wearing shoes indoors:** This will help prevent dirt and grime from being tracked onto your floors.
* **Protect your floors from furniture:** Use furniture pads under the legs of your furniture to prevent scratches and dents.
Troubleshooting
* **Streaky Floors:** If your floors are streaky after cleaning, you may be using too much soap. Try reducing the amount of soap in your cleaning solution or rinsing your floors with clean water.
* **Dull Floors:** If your floors are looking dull, you may need to polish them. You can use a commercial floor polish or make your own by mixing equal parts olive oil and lemon juice.
* **Sticky Floors:** If your floors are sticky after cleaning, you may have soap residue buildup. Try rinsing your floors with clean water and a little bit of vinegar.
Safety Precautions
* Always test your cleaning solution in an inconspicuous area before cleaning your entire floor.
* Wear gloves to protect your hands from the cleaning solution.
* Keep cleaning solutions out of reach of children and pets.
* Never mix vinegar with bleach, as this can create toxic fumes.
* If you experience any irritation or allergic reaction, discontinue use immediately.
I hope you found this guide helpful! With a little bit of effort and this simple DIY floor cleaning solution, you can have sparkling clean floors without spending a fortune or exposing your family to harsh chemicals. Happy cleaning!
Conclusion
So, there you have it! Ditching those expensive, chemical-laden store-bought cleaners and embracing this simple, effective, and eco-friendly DIY floor cleaning solution is a game-changer for your home and your wallet. We’ve walked you through the process, highlighting just how easy it is to whip up a batch of this powerful cleaner using ingredients you likely already have in your pantry.
But why is this DIY trick a must-try? Beyond the cost savings, you’re gaining complete control over what you’re introducing into your living space. No more harsh chemicals lingering in the air, no more worrying about the impact on your family’s health, and no more contributing to plastic waste. This solution is gentle on your floors, tough on grime, and kind to the environment – a winning combination in our book!
The beauty of this recipe also lies in its adaptability. Feel free to experiment with different essential oils to create a scent that truly resonates with you. A few drops of lavender can promote relaxation, while lemon or orange can invigorate your senses. For extra cleaning power on particularly stubborn stains, consider adding a tablespoon of borax to the mix (always test in an inconspicuous area first!). If you have hardwood floors, be extra cautious with the amount of water you use; a slightly drier mop is always best to prevent warping or damage. You can also add a teaspoon of olive oil to the solution for extra shine and to help protect the wood.
Remember, the key to a sparkling clean home doesn’t always lie in the most expensive or complicated products. Sometimes, the simplest solutions are the most effective. This DIY floor cleaner is a testament to that. It’s a practical, sustainable, and satisfying way to keep your floors looking their best.
We wholeheartedly encourage you to give this DIY floor cleaning solution a try. We’re confident that you’ll be amazed by the results. Once you’ve experienced the difference, we’d love to hear about it! Share your experiences, variations, and any tips you discover in the comments below. Let’s build a community of clean-living enthusiasts who are passionate about creating healthy and happy homes. Your feedback will not only help others but also inspire us to continue sharing valuable DIY solutions. So, grab your ingredients, mix up a batch, and get ready to say goodbye to dirty floors and hello to a cleaner, greener, and more affordable way to clean!
Frequently Asked Questions (FAQ)
What types of floors can I use this DIY floor cleaning solution on?
This DIY floor cleaning solution is generally safe for most sealed floor types, including tile, linoleum, vinyl, and laminate. However, it’s crucial to exercise caution when using it on hardwood floors. Hardwood is more susceptible to water damage, so it’s essential to use a very well-wrung mop and avoid excessive moisture. Always test the solution in an inconspicuous area first, regardless of your floor type, to ensure it doesn’t cause any discoloration or damage. For unsealed floors, it’s best to consult with a flooring professional before using any cleaning solution.
Can I use this solution on my hardwood floors?
Yes, you can use this DIY floor cleaning solution on hardwood floors, but with extra care. The key is to minimize the amount of water that comes into contact with the wood. Use a microfiber mop that has been wrung out thoroughly, almost to the point of being dry. Avoid letting the solution pool on the floor, and dry any excess moisture immediately with a clean, dry cloth. As mentioned before, testing in an inconspicuous area is always recommended. Consider adding a teaspoon of olive oil to the solution for added shine and protection for your hardwood floors.
What essential oils are best to use in this DIY floor cleaning solution?
The best essential oils to use are those that have both cleaning and aromatic properties. Lemon, orange, and tea tree oil are excellent choices due to their antibacterial and antifungal properties. Lavender is a great option for its calming scent, while peppermint can provide a refreshing and invigorating aroma. Eucalyptus oil is known for its disinfectant properties and can be particularly helpful during cold and flu season. Ultimately, the best essential oil is the one you enjoy the most! Just be sure to use pure, high-quality essential oils for the best results.
How often should I use this DIY floor cleaning solution?
The frequency of cleaning depends on the amount of foot traffic and the type of floor you have. For high-traffic areas, you may need to clean your floors once or twice a week. For less frequently used areas, once every two weeks may be sufficient. Observe your floors and adjust the cleaning schedule accordingly. Remember, regular cleaning with this gentle solution can help prevent the buildup of dirt and grime, making your floors easier to maintain in the long run.
Can I store the leftover DIY floor cleaning solution?
Yes, you can store the leftover solution in a sealed container. A glass jar or a plastic spray bottle works well. Be sure to label the container clearly with the contents and the date it was made. Store the solution in a cool, dark place to preserve its effectiveness. It’s generally best to use the solution within a few weeks, as the essential oils may lose their potency over time.
Is this DIY floor cleaning solution safe for pets and children?
This DIY floor cleaning solution is generally safer for pets and children than commercial cleaners, as it doesn’t contain harsh chemicals. However, it’s still important to exercise caution. Keep pets and children away from the area while you’re cleaning, and allow the floors to dry completely before allowing them back in. Some essential oils can be harmful to pets if ingested, so be sure to research the safety of any essential oils you choose to use. If you have any concerns, consult with your veterinarian or pediatrician.
What if I don’t have vinegar? Can I substitute it with something else?
Vinegar is a key ingredient in this DIY floor cleaning solution due to its acidity, which helps to cut through grease and grime. However, if you don’t have vinegar on hand, you can try substituting it with lemon juice. Lemon juice also has acidic properties and can provide a similar cleaning effect. Use the same amount of lemon juice as you would vinegar. Keep in mind that lemon juice may have a stronger scent than vinegar, so you may want to adjust the amount of essential oils you use accordingly.
My floors are still streaky after using this solution. What am I doing wrong?
Streaky floors can be caused by a few different factors. First, make sure you’re using a clean mop head. A dirty mop head will simply spread the dirt around, leaving streaks behind. Second, ensure that you’re wringing out your mop thoroughly. Too much water can leave streaks on your floors. Third, try using a microfiber mop, as these are known for their ability to pick up dirt and grime effectively. Finally, if you’re using too much of the cleaning solution, it can leave a residue that causes streaks. Try reducing the amount of solution you’re using and see if that helps.
Can I add borax to this DIY floor cleaning solution?
Yes, you can add a tablespoon of borax to this DIY floor cleaning solution for extra cleaning power, especially for tackling stubborn stains. However, it’s crucial to use borax with caution. Borax can be irritating to the skin and eyes, so wear gloves when handling it and avoid direct contact. Also, be sure to test the solution in an inconspicuous area first, as borax can potentially damage certain floor types. If you have pets or small children, consider the potential risks before using borax and ensure that the floors are thoroughly rinsed and dried after cleaning.
Leave a Comment