
Growing Basil from Seed can feel like a daunting task, but trust me, it’s easier than you think! Have you ever dreamt of plucking fresh, fragrant basil leaves straight from your garden to add to your pasta sauce or Caprese salad? Imagine the burst of flavor, the vibrant green color, and the satisfaction of knowing you grew it yourself. This DIY guide will unlock the secrets to successfully cultivating your own basil plants from tiny seeds, transforming your kitchen windowsill or garden patch into a thriving herb haven.
Basil, with its rich history dating back thousands of years, has been revered not only for its culinary uses but also for its medicinal and even spiritual significance. In some cultures, it’s considered a symbol of love and good fortune. But beyond its historical charm, growing your own basil offers practical benefits. Store-bought basil can be expensive and often wilts quickly. By growing basil from seed, you’ll have a constant supply of fresh, flavorful leaves at your fingertips, saving you money and reducing food waste. Plus, gardening is a fantastic way to relieve stress and connect with nature.
This DIY article is packed with simple, step-by-step instructions and helpful tips to guide you through the entire process, from selecting the right seeds to nurturing your seedlings into healthy, productive plants. I’ll share my favorite hacks for ensuring successful germination, preventing common problems, and maximizing your basil harvest. So, grab your gardening gloves, and let’s get started on this exciting journey of growing your own delicious basil!
Growing Basil from Seed: A Beginner’s Guide to Aromatic Success
Hey there, fellow plant enthusiasts! I’m so excited you’re diving into the wonderful world of growing basil from seed. It’s incredibly rewarding to nurture these little guys from tiny specks into fragrant, flavorful plants that you can use in all your culinary creations. Trust me, once you taste homegrown basil, you’ll never go back to the store-bought stuff! This guide will walk you through every step, from choosing the right seeds to harvesting your bountiful basil crop.
Choosing Your Basil Seeds
Before we get our hands dirty, let’s talk about seeds. There are so many different varieties of basil, each with its own unique flavor and aroma. Here’s a quick rundown of some popular choices:
* Sweet Basil: This is the classic Italian basil, perfect for pesto, pasta sauces, and salads. It’s probably what you picture when you think of basil.
* Genovese Basil: Similar to sweet basil, but with a slightly stronger, more intense flavor. Many consider it the *true* pesto basil.
* Lemon Basil: As the name suggests, this basil has a delightful citrusy aroma and flavor. It’s great in teas, salads, and seafood dishes.
* Thai Basil: With its anise-like flavor, Thai basil is a staple in Southeast Asian cuisine. It’s delicious in stir-fries, curries, and pho.
* Purple Basil: Not only does purple basil add a beautiful pop of color to your garden, but it also has a slightly spicier flavor than sweet basil.
When choosing your seeds, make sure to buy them from a reputable source. Look for seeds that are labeled as “organic” or “untreated” to avoid any unwanted chemicals.
Gathering Your Supplies
Okay, now that we’ve chosen our seeds, let’s gather our supplies. You’ll need:
* Basil Seeds: Of course!
* Seed Starting Trays or Small Pots: These will be your basil’s first home. Make sure they have drainage holes.
* Seed Starting Mix: This is a light, fluffy soil specifically formulated for starting seeds. Don’t use regular garden soil, as it can be too heavy and compact.
* Watering Can or Spray Bottle: For gentle watering.
* Clear Plastic Wrap or a Humidity Dome: To create a humid environment for germination.
* Grow Lights (Optional): If you don’t have a sunny windowsill, grow lights can provide the necessary light for your seedlings.
* Heat Mat (Optional): Basil seeds germinate best in warm soil, so a heat mat can help speed up the process.
* Small Labels and a Pen: To keep track of which variety you’re growing.
Sowing Your Basil Seeds
Alright, let’s get planting! This is the fun part.
1. Moisten the Seed Starting Mix: Before filling your trays or pots, moisten the seed starting mix with water. You want it to be damp, but not soggy. I usually do this in a large bowl, mixing the water in until the soil is evenly moist.
2. Fill the Trays or Pots: Fill your seed starting trays or pots with the moistened seed starting mix, leaving about half an inch of space at the top. Gently pat the soil down to remove any air pockets.
3. Sow the Seeds: Basil seeds are tiny, so you only need to sow a few seeds per cell or pot. I usually aim for 2-3 seeds per cell. Sprinkle the seeds evenly over the surface of the soil.
4. Cover the Seeds Lightly: Gently cover the seeds with a thin layer of seed starting mix. You don’t want to bury them too deep, as they need light to germinate. A very light dusting is all you need.
5. Water Gently: Use a watering can or spray bottle to gently water the soil. Be careful not to dislodge the seeds. You want to moisten the soil without washing the seeds away.
6. Cover with Plastic Wrap or a Humidity Dome: Cover the trays or pots with clear plastic wrap or a humidity dome to create a humid environment. This will help the seeds germinate.
7. Place in a Warm Location: Place the trays or pots in a warm location, such as on top of a refrigerator or near a sunny window. If you’re using a heat mat, place the trays or pots on the heat mat.
8. Provide Light: If you’re using grow lights, turn them on for 14-16 hours per day. If you’re using a sunny windowsill, make sure the seedlings get at least 6 hours of direct sunlight per day.
Caring for Your Basil Seedlings
Now that your seeds are sown, it’s time to play the waiting game. But don’t worry, it won’t be long before you see those little green sprouts emerge!
1. Monitor Moisture Levels: Check the soil moisture levels daily. The soil should be consistently moist, but not soggy. If the soil is dry, water gently with a watering can or spray bottle.
2. Ventilate: Once the seeds have germinated (usually within 5-10 days), remove the plastic wrap or humidity dome for a few hours each day to allow for ventilation. This will help prevent fungal diseases.
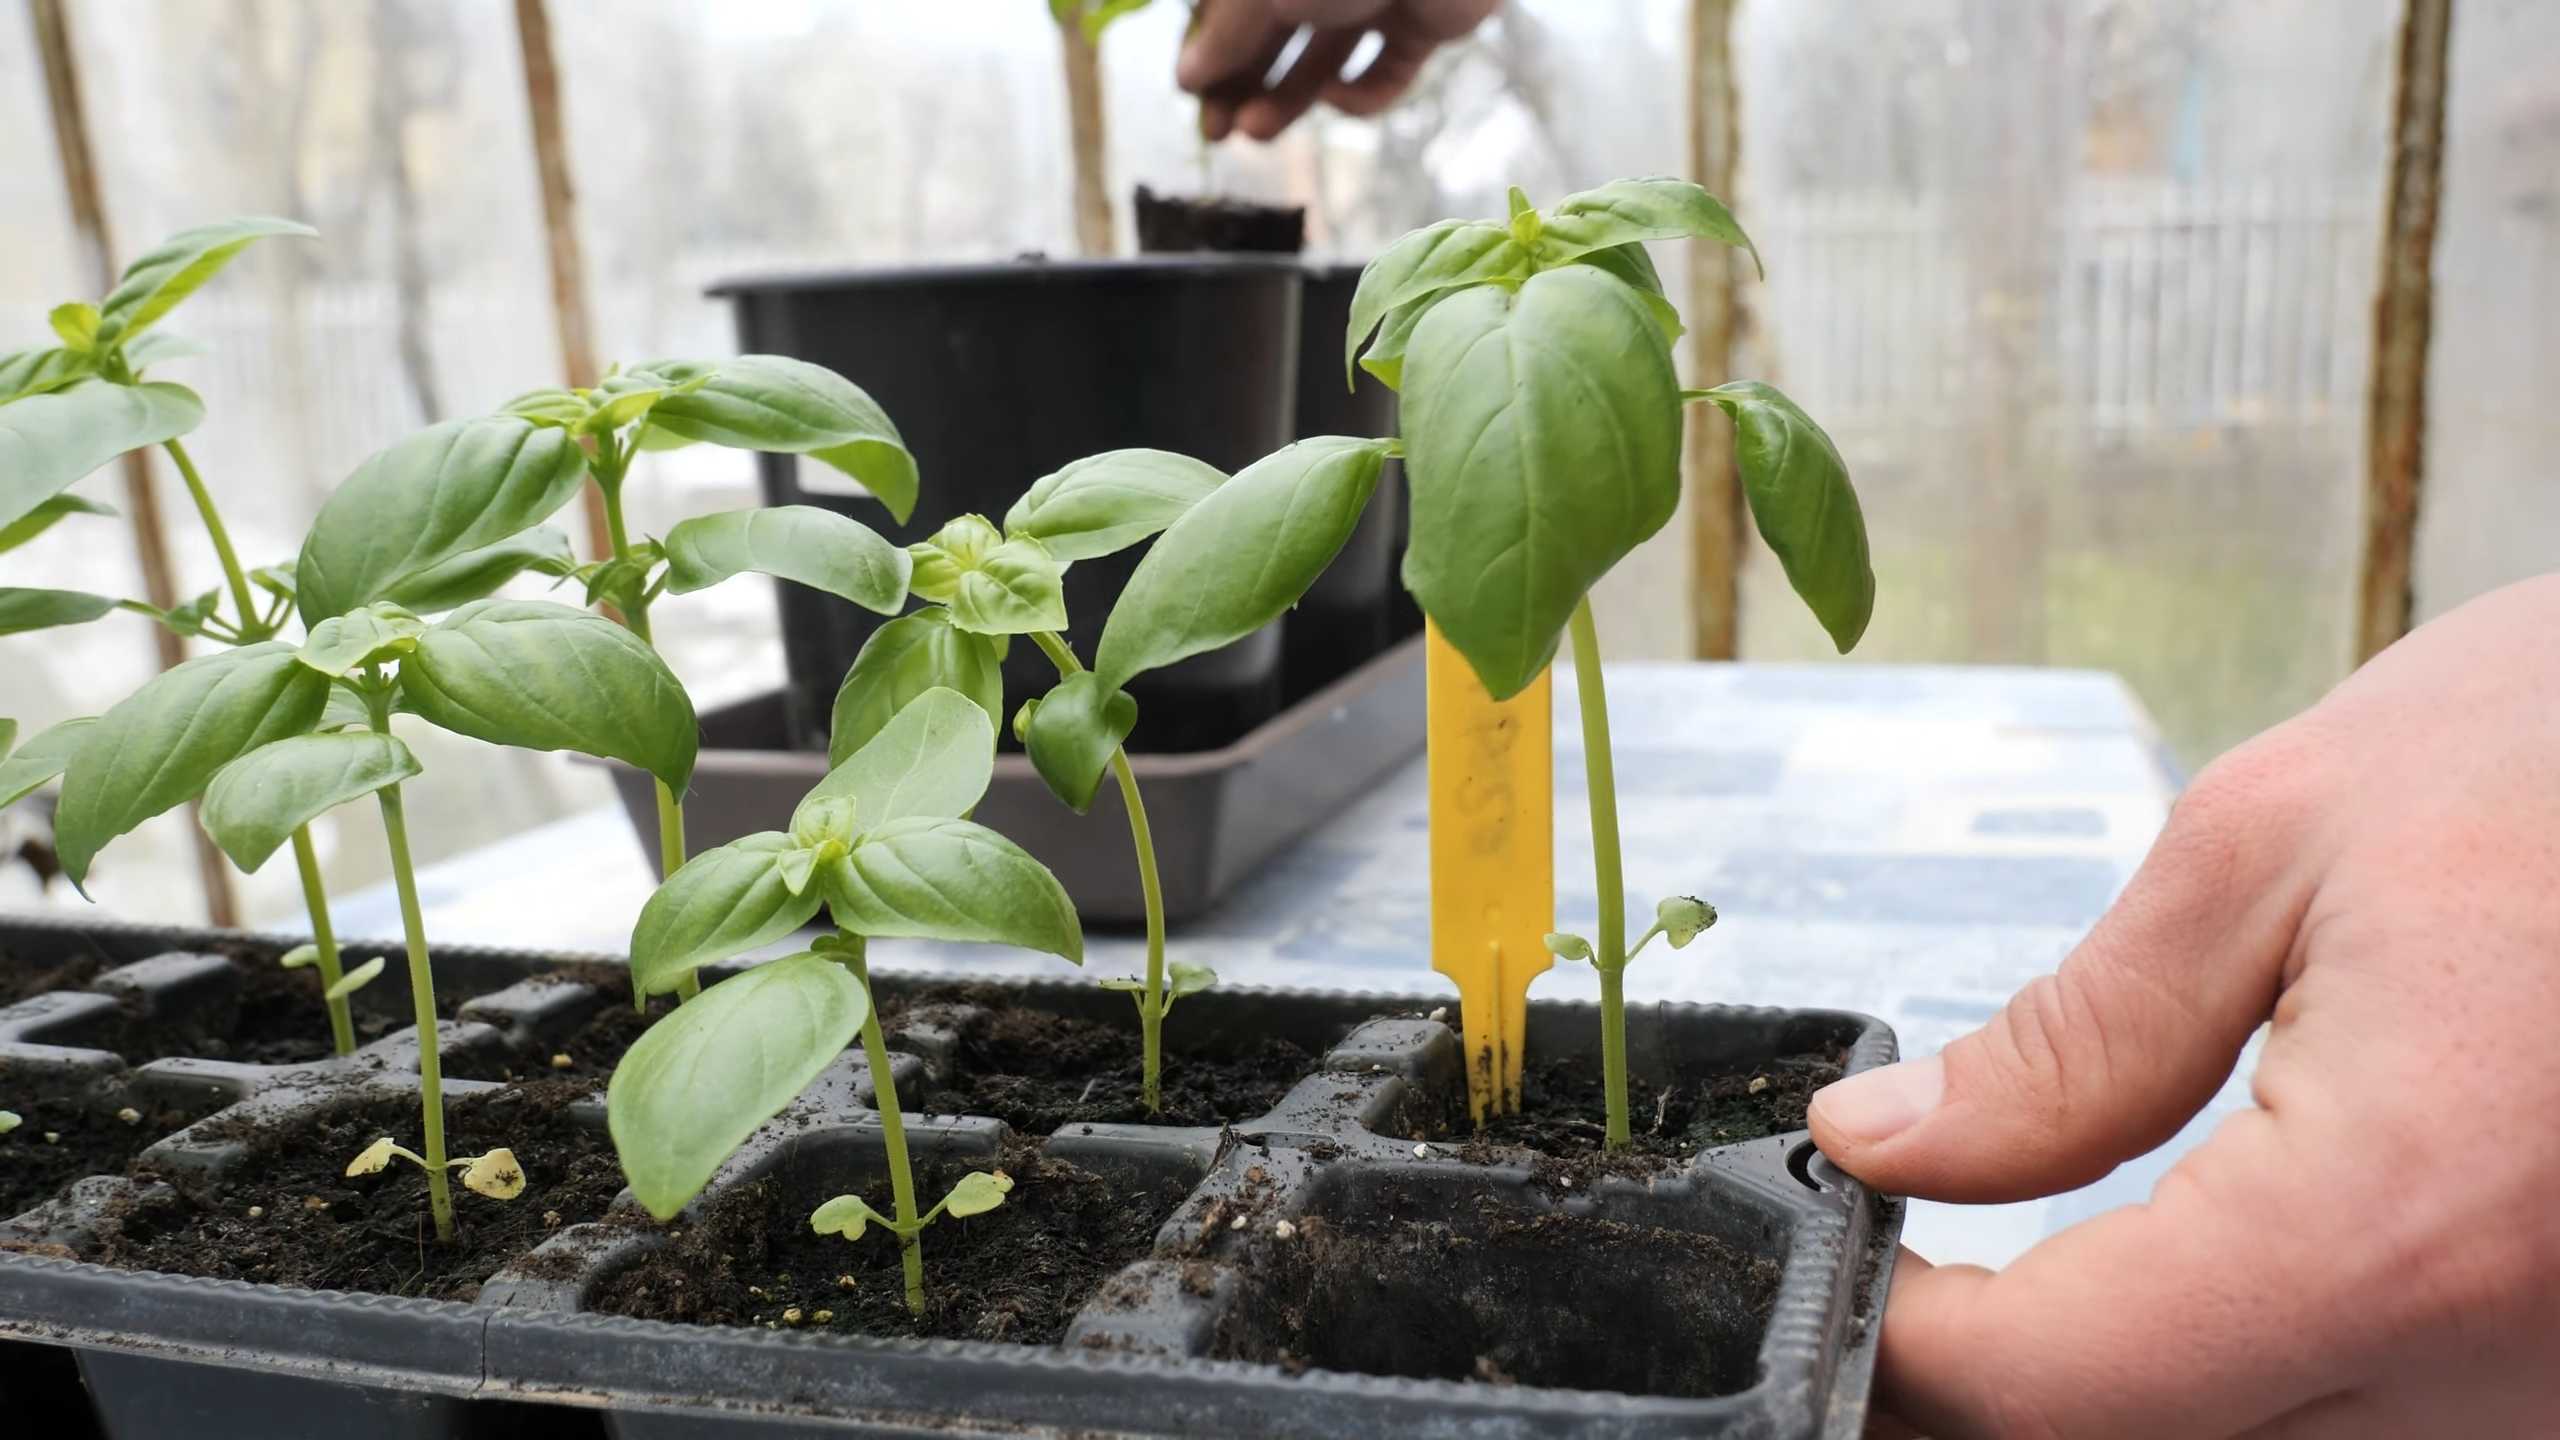
3. Thin the Seedlings: Once the seedlings have developed their first set of true leaves (the leaves that look like miniature basil leaves), thin them out so that only one seedling remains per cell or pot. Use a small pair of scissors to snip off the weaker seedlings at the soil line. Don’t pull them out, as this can disturb the roots of the remaining seedling.
4. Fertilize: Once the seedlings have developed their second set of true leaves, start fertilizing them with a diluted liquid fertilizer. I like to use a balanced organic fertilizer, diluted to half strength. Fertilize every 2-3 weeks.
5. Harden Off: Before transplanting your basil seedlings outdoors, you’ll need to “harden them off.” This means gradually exposing them to outdoor conditions over a period of 7-10 days. Start by placing the seedlings outdoors in a sheltered location for a few hours each day, gradually increasing the amount of time they spend outdoors. This will help them acclimate to the sun, wind, and temperature changes.
Transplanting Your Basil Seedlings
Once your basil seedlings are about 4-6 inches tall and the danger of frost has passed, it’s time to transplant them outdoors.
1. Choose a Sunny Location: Basil thrives in full sun, so choose a location that gets at least 6 hours of direct sunlight per day.
2. Prepare the Soil: Basil prefers well-drained soil that is rich in organic matter. Amend the soil with compost or other organic matter before planting.
3. Dig Holes: Dig holes that are slightly larger than the root balls of your basil seedlings. Space the holes about 12-18 inches apart.
4. Remove the Seedlings from Their Pots: Gently remove the seedlings from their pots, being careful not to damage the roots. If the roots are tightly bound, gently loosen them with your fingers.
5. Plant the Seedlings: Place the seedlings in the holes and backfill with soil. Gently pat the soil down around the base of the plants.
6. Water Thoroughly: Water the seedlings thoroughly after planting.
7. Mulch: Apply a layer of mulch around the base of the plants to help retain moisture and suppress weeds.
Caring for Your Basil Plants
Now that your basil plants are in the ground, it’s time to provide them with the care they need to thrive.
1. Water Regularly: Basil needs consistent moisture, especially during hot, dry weather. Water deeply whenever the top inch of soil feels dry to the touch.
2. Fertilize: Fertilize your basil plants every 4-6 weeks with a balanced organic fertilizer.
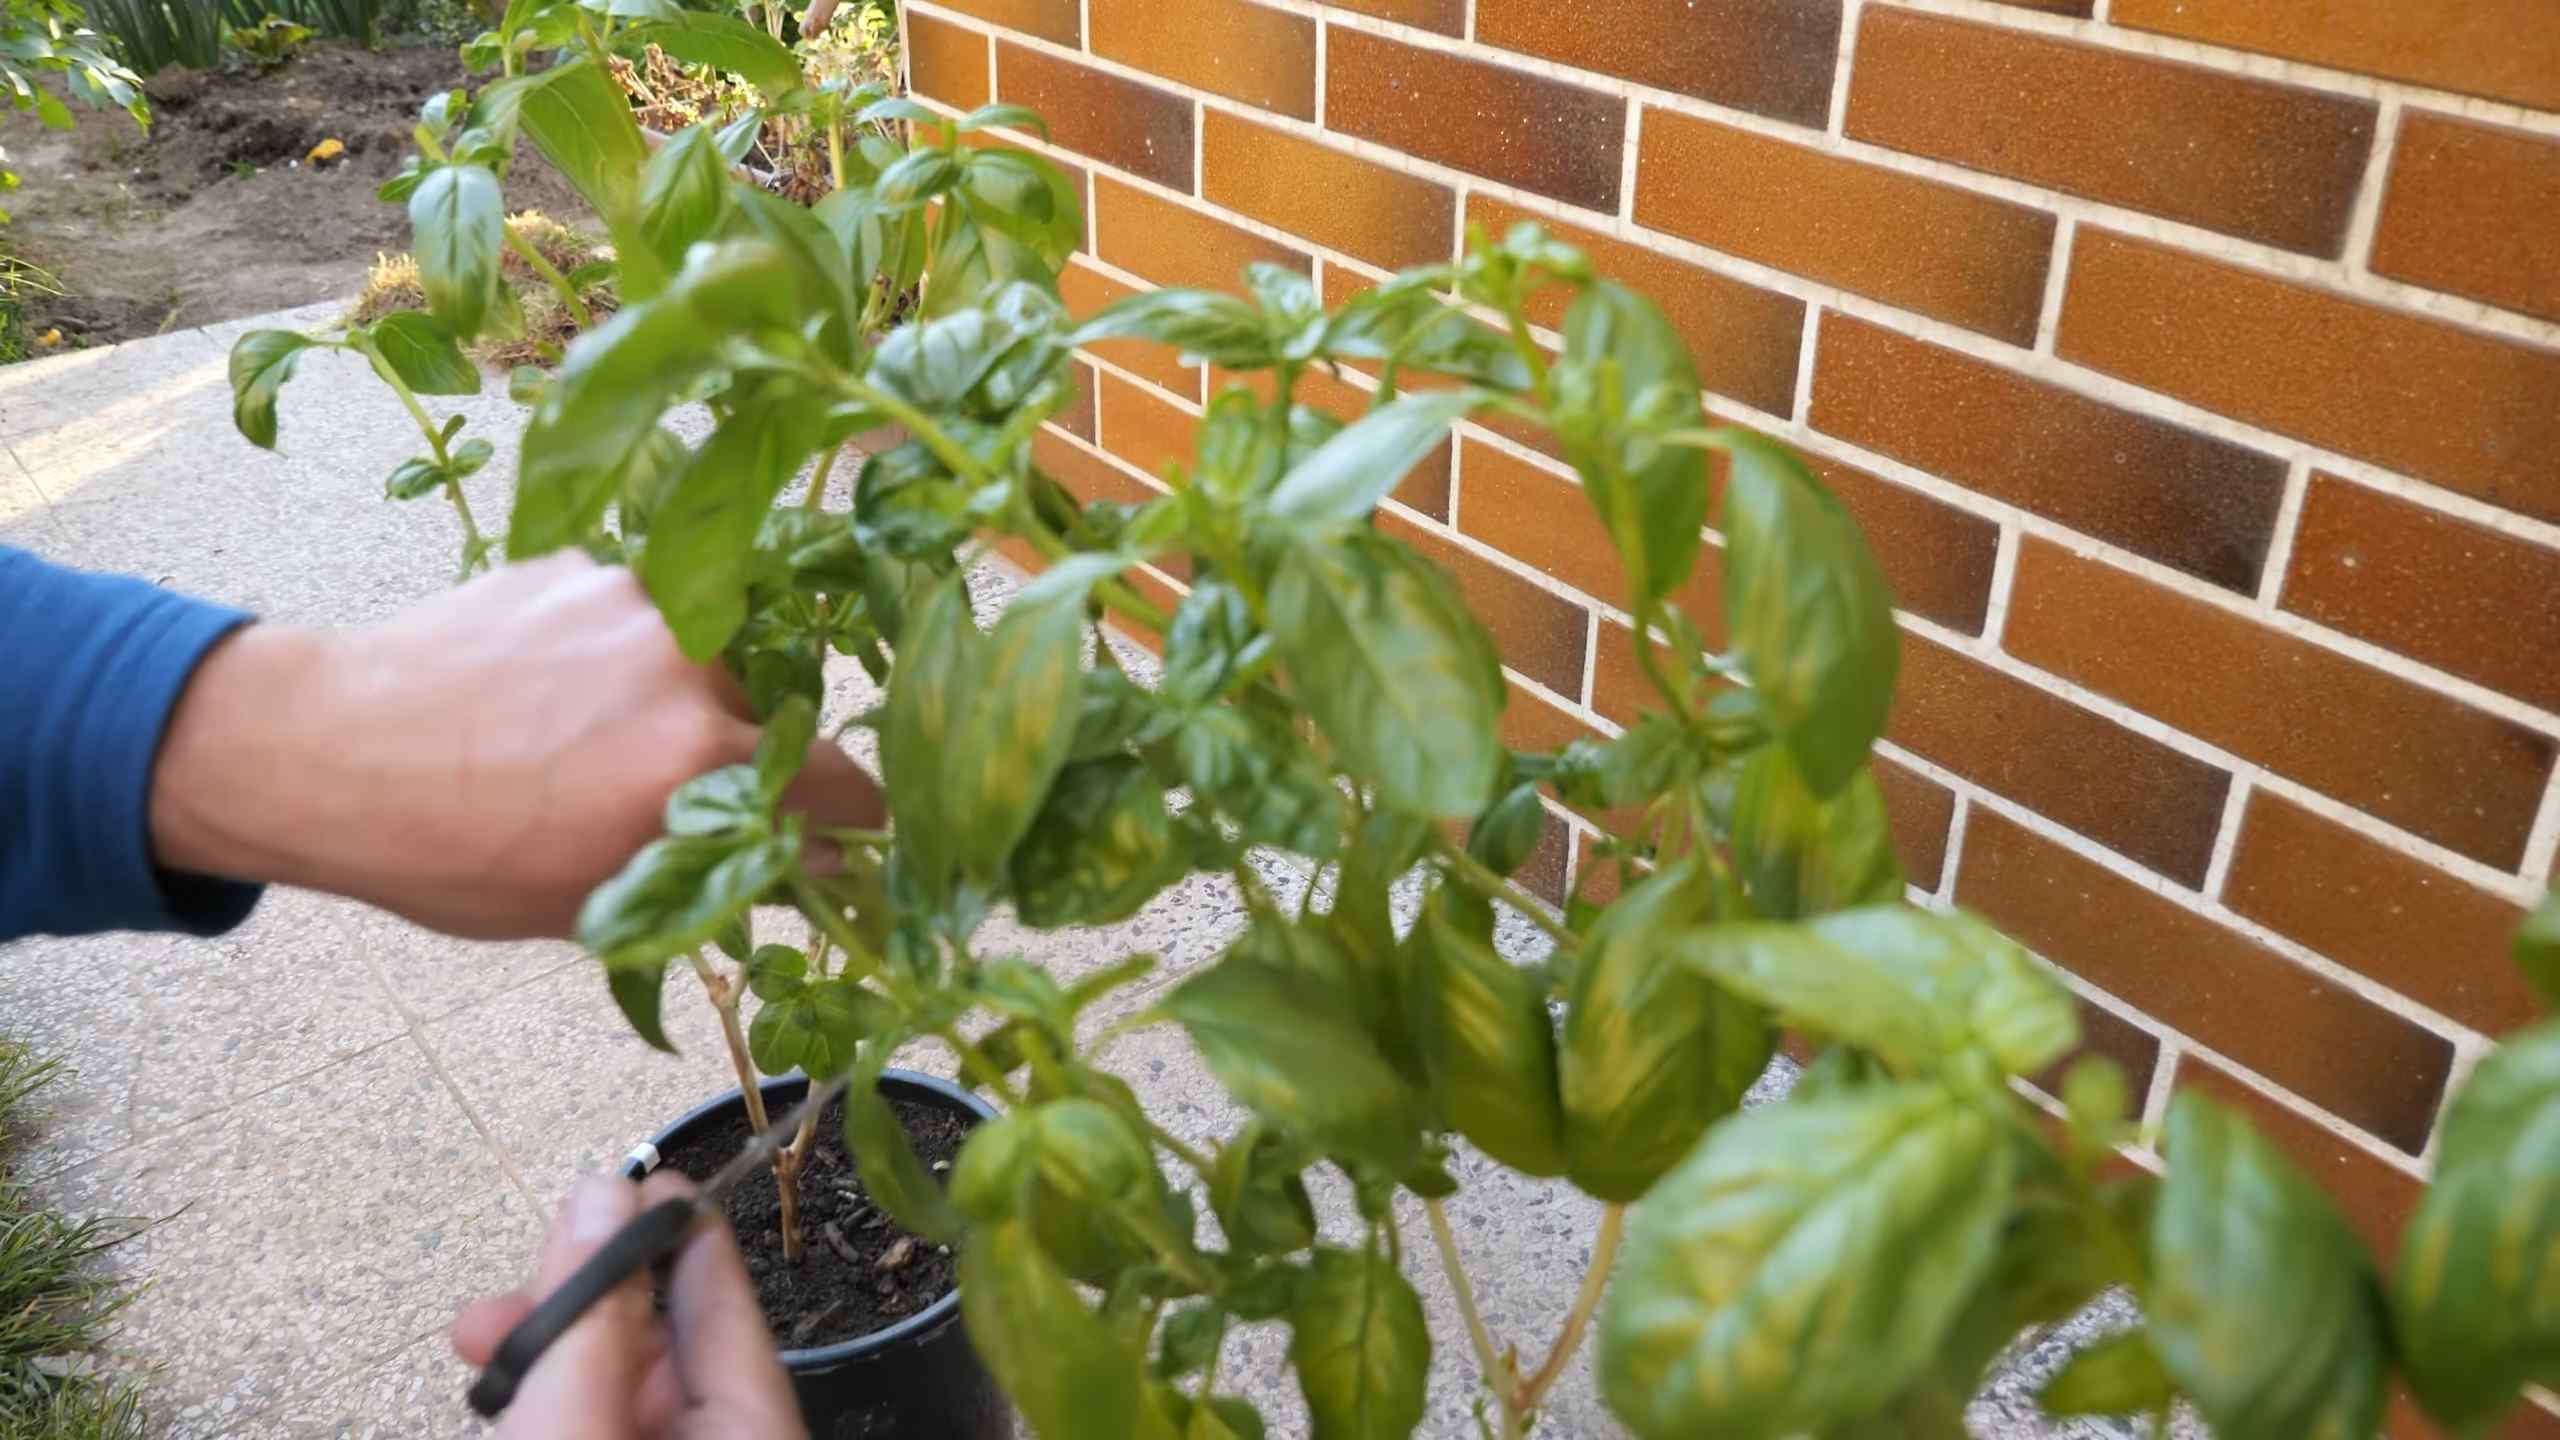
3. Pinch Back: Pinch back the tips of the stems regularly to encourage bushier growth and prevent the plants from flowering. Flowering will cause the leaves to become bitter.
4. Watch for Pests and Diseases: Keep an eye out for pests and diseases, such as aphids, spider mites, and fungal diseases. Treat any problems promptly with organic pest control methods.
Harvesting Your Basil
The best part of growing basil is, of course, harvesting it! You can start harvesting basil leaves as soon as the plants are about 6-8 inches tall.
1. Harvest in the Morning: Harvest basil leaves in the morning, after the dew has dried but before the sun gets too hot. This is when the leaves are at their most flavorful.
2. Pinch or Cut: Pinch or cut the leaves off the stems, just above a set of leaves. This will encourage the plant to produce more leaves.
3. Use Fresh or
Conclusion
So, there you have it! Growing basil from seed isn’t just a way to save money; it’s a deeply rewarding experience that connects you to the food you eat. Imagine the satisfaction of snipping fresh, fragrant basil leaves from your own plant, knowing you nurtured it from a tiny seed. It’s a culinary superpower, giving you access to the freshest possible ingredient whenever you need it.
This DIY trick is a must-try for several reasons. First, the flavor of homegrown basil is simply unmatched. Store-bought basil, even when fresh, often lacks the intensity and complexity of flavor that comes from a plant grown with love and care. Second, you have complete control over the growing process. You can choose organic seeds, use organic soil, and avoid harmful pesticides, ensuring that your basil is as healthy and natural as possible. Third, it’s incredibly cost-effective. A packet of basil seeds costs just a few dollars and can yield dozens of plants, saving you a significant amount of money compared to buying basil from the grocery store.
But the benefits don’t stop there. Growing basil from seed is also a fantastic learning experience. It teaches you about plant life cycles, the importance of sunlight and water, and the delicate balance of nature. It’s a great project to do with children, fostering their curiosity and appreciation for the natural world.
Ready to take your basil game to the next level? Consider these variations:
* Experiment with different basil varieties: From sweet basil to Thai basil to lemon basil, there’s a whole world of basil flavors to explore. Try growing a few different varieties side-by-side to compare their tastes and aromas.
* Use different containers: While starting seeds in seed trays is a great option, you can also use recycled containers like yogurt cups or egg cartons. Just make sure they have drainage holes.
* Try hydroponics: For a more advanced approach, consider growing basil hydroponically. This method involves growing plants without soil, using nutrient-rich water solutions.
* Extend the growing season: If you live in a colder climate, you can extend the basil growing season by starting seeds indoors and transplanting them outdoors after the last frost. You can also bring your basil plants indoors during the winter months to enjoy fresh basil year-round.
Don’t be intimidated if you’ve never grown anything from seed before. Growing basil from seed is surprisingly easy, and even if you make a few mistakes along the way, you’ll still learn something valuable. The most important thing is to get started and have fun!
We’re confident that you’ll love the experience of growing your own basil from seed. So, grab a packet of seeds, some soil, and a sunny spot, and get ready to embark on a delicious and rewarding journey.
We can’t wait to hear about your experiences! Share your photos and stories with us on social media using #HomegrownBasil. Let’s inspire others to discover the joy of growing their own food. Happy gardening!
Frequently Asked Questions (FAQ)
Q: How long does it take for basil seeds to germinate?
A: Basil seeds typically germinate within 5-14 days, depending on the temperature and moisture levels. Keep the soil consistently moist but not waterlogged, and maintain a temperature between 70-80°F (21-27°C) for optimal germination. Using a heat mat can help speed up the process, especially in cooler climates.
Q: What kind of soil should I use for growing basil from seed?
A: A well-draining potting mix is ideal for starting basil seeds. You can use a commercially available seed starting mix or make your own by combining equal parts peat moss, perlite, and vermiculite. Avoid using garden soil, as it can be too heavy and may contain pathogens that can harm young seedlings.
Q: How much sunlight does basil need?
A: Basil thrives in full sun, which means it needs at least 6-8 hours of direct sunlight per day. If you’re growing basil indoors, place it near a sunny window or use grow lights to provide adequate light. Insufficient sunlight can result in leggy, weak plants with poor flavor.
Q: When should I transplant my basil seedlings outdoors?
A: Transplant your basil seedlings outdoors after the last frost, when the soil has warmed up to at least 60°F (15°C). Harden off the seedlings by gradually exposing them to outdoor conditions for a week or two before transplanting. This will help them adjust to the change in environment and prevent transplant shock.
Q: How often should I water my basil plants?
A: Water your basil plants regularly, keeping the soil consistently moist but not waterlogged. Water deeply when the top inch of soil feels dry to the touch. Avoid overhead watering, as this can promote fungal diseases. Instead, water at the base of the plant.
Q: How do I harvest basil leaves?
A: Harvest basil leaves by pinching or cutting them off just above a leaf node (the point where leaves grow from the stem). This will encourage the plant to branch out and produce more leaves. Avoid harvesting more than one-third of the plant at a time, as this can stress the plant. Regular harvesting will also prevent the plant from flowering, which can reduce the flavor of the leaves.
Q: Why is my basil plant turning yellow?
A: Yellowing basil leaves can be caused by several factors, including overwatering, underwatering, nutrient deficiencies, or pests. Check the soil moisture and adjust your watering accordingly. If the soil is consistently wet, allow it to dry out slightly before watering again. If the soil is dry, water deeply. You can also fertilize your basil plants with a balanced fertilizer to provide them with the nutrients they need. Inspect the plants for pests, such as aphids or spider mites, and treat them accordingly.
Q: Can I grow basil indoors year-round?
A: Yes, you can grow basil indoors year-round, provided you give it enough light, water, and nutrients. Place the plant near a sunny window or use grow lights to supplement natural light. Water regularly, keeping the soil consistently moist but not waterlogged. Fertilize every few weeks with a balanced fertilizer.
Q: How do I prevent basil from flowering?
A: To prevent basil from flowering, pinch off the flower buds as soon as you see them. Flowering can reduce the flavor of the leaves, so it’s best to keep the plant in a vegetative state. Regular harvesting of the leaves will also help prevent flowering.
Q: What are some common pests and diseases that affect basil?
A: Some common pests that affect basil include aphids, spider mites, and whiteflies. These pests can be controlled with insecticidal soap or neem oil. Common diseases that affect basil include fungal diseases such as downy mildew and fusarium wilt. These diseases can be prevented by providing good air circulation, avoiding overhead watering, and using disease-resistant varieties.
Q: Can I propagate basil from cuttings?
A: Yes, basil can be easily propagated from cuttings. Simply take a 4-6 inch cutting from a healthy basil plant, remove the lower leaves, and place the cutting in a glass of water. Roots will typically develop within a week or two. Once the roots are about an inch long, you can transplant the cutting into a pot of soil.
Q: How do I store fresh basil leaves?
A: Fresh basil leaves can be stored in several ways. You can wrap them in a damp paper towel and store them in a plastic bag in the refrigerator for a few days. You can also freeze basil leaves by blanching them in boiling water for a few seconds, then plunging them into ice water. Drain the leaves and freeze them in a single layer on a baking sheet. Once frozen, transfer them to a freezer bag. Another option is to make basil pesto and freeze it in ice cube trays.
Q: Is growing basil from seed worth it?
A: Absolutely! Growing basil from seed is a rewarding and cost-effective way to enjoy fresh, flavorful basil. It gives you control over the growing process, allows you to choose organic options, and provides a connection to the food you eat. Plus, it’s a fun and educational activity for the whole family. The superior taste of homegrown basil makes the small effort involved in growing basil from seed completely worthwhile.

Leave a Comment