
Oven Cleaner Spray Hacks: Who knew that the secret to a sparkling home and garden could be lurking right under your kitchen sink? I’m always on the lookout for clever ways to simplify my life and save a few bucks, and let me tell you, I’ve stumbled upon something truly amazing. We’re diving deep into the world of oven cleaner spray hacks, and trust me, you’ll be amazed at the unexpected uses for this powerful cleaning agent beyond just degreasing your oven!
While oven cleaner might seem like a modern invention, the desire for effective cleaning solutions has been around for centuries. Historically, people have used everything from lye to wood ash to tackle stubborn grime. But today, we have the convenience of readily available, powerful formulas. However, the real magic happens when we think outside the box and discover alternative applications.
Why do you need these oven cleaner spray hacks? Because life is busy! We’re all juggling work, family, and everything in between. Spending hours scrubbing stubborn stains or dealing with outdoor messes is simply not an option. These hacks will save you time, money, and a whole lot of elbow grease. From reviving tired garden furniture to tackling tough outdoor stains, I’m going to show you how to use oven cleaner spray hacks to transform your home and garden with minimal effort. Get ready to unlock a world of cleaning possibilities you never knew existed!

Unlock the Cleaning Power of Oven Cleaner: Beyond the Kitchen!
Okay, let’s be honest, oven cleaner isn’t exactly the most glamorous product in your cleaning arsenal. But trust me, this stuff is a secret weapon for tackling all sorts of grime and gunk around the house. I’m going to show you some amazing ways to use oven cleaner that go way beyond just cleaning your oven. Get ready to be amazed!
Safety First!
Before we dive in, let’s talk safety. Oven cleaner is powerful stuff, so you need to protect yourself.
* Ventilation is Key: Always work in a well-ventilated area. Open windows and doors, or even better, work outside if possible.
* Protective Gear: Wear gloves and eye protection. Seriously, don’t skip this step. Oven cleaner can irritate your skin and eyes. I learned that the hard way once!
* Test in an Inconspicuous Area: Before applying oven cleaner to a large surface, test it on a small, hidden area to make sure it doesn’t damage the material.
* Keep Away from Kids and Pets: This should be a no-brainer, but keep oven cleaner out of reach of children and pets.
* Read the Label: Always read and follow the manufacturer’s instructions on the oven cleaner can.
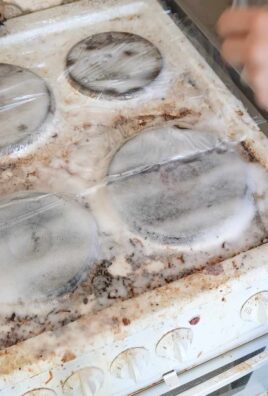
Cleaning Burnt Food off Pots and Pans
This is one of my favorite oven cleaner hacks. It’s a lifesaver for those stubborn burnt-on messes that seem impossible to remove.
Materials You’ll Need:
* Oven cleaner spray
* Gloves
* Eye protection
* Trash bag (large enough to fit the pot or pan)
* Water
* Scrub brush or sponge
Step-by-Step Instructions:
1. Prepare the Pot or Pan: Make sure the pot or pan is completely cool. Remove any loose debris or food particles.
2. Spray the Oven Cleaner: Generously spray the burnt areas of the pot or pan with oven cleaner. Make sure to cover all the affected areas.
3. Bag It Up: Place the pot or pan inside the trash bag. This helps to contain the fumes and keeps the oven cleaner from drying out too quickly.
4. Wait Patiently: Seal the bag tightly and let the oven cleaner work its magic. The amount of time you need to wait will depend on how severe the burning is. For light burning, 30 minutes might be enough. For really stubborn messes, you might need to wait several hours or even overnight. I usually check it after a few hours and see how it’s doing.
5. Rinse Thoroughly: After the waiting period, carefully remove the pot or pan from the bag. Rinse it thoroughly with water.
6. Scrub Away: Use a scrub brush or sponge to scrub away the loosened burnt food. You should find that it comes off much easier than it would have before.
7. Wash with Soap and Water: After scrubbing, wash the pot or pan with soap and water to remove any remaining oven cleaner residue.
8. Dry Completely: Dry the pot or pan thoroughly before storing it.
Reviving Your Grill Grates
Grill grates can get incredibly grimy and greasy. Oven cleaner is a fantastic way to get them looking like new again.
Materials You’ll Need:
* Oven cleaner spray
* Gloves
* Eye protection
* Trash bag (large enough to fit the grill grates)
* Water
* Scrub brush (a wire brush works best)
Step-by-Step Instructions:
1. Remove the Grill Grates: Take the grill grates off your grill.
2. Spray with Oven Cleaner: Generously spray the grill grates with oven cleaner, covering all surfaces.
3. Bag It Up (Again!): Place the grill grates inside the trash bag. Seal the bag tightly.
4. Let it Soak: Let the oven cleaner soak for several hours or overnight. The longer you let it soak, the easier it will be to remove the grime.
5. Rinse Thoroughly: Remove the grill grates from the bag and rinse them thoroughly with water.
6. Scrub Away the Grime: Use a scrub brush (a wire brush is ideal for this) to scrub away the loosened grease and grime.
7. Rinse Again: Rinse the grill grates again to remove any remaining residue.
8. Dry and Replace: Dry the grill grates completely before placing them back on your grill.
Cleaning Stubborn Oven Door Glass
That baked-on grease and grime on your oven door glass can be a real eyesore. Oven cleaner can make it sparkle again.
Materials You’ll Need:
* Oven cleaner spray
* Gloves
* Eye protection
* Paper towels or a clean cloth
* Water
* Razor scraper (optional, for really stubborn spots)
Step-by-Step Instructions:
1. Protect Surrounding Areas: Cover the area around the oven door with paper towels or a cloth to protect it from overspray.
2. Spray the Glass: Spray the oven door glass with oven cleaner.
3. Let it Sit: Let the oven cleaner sit for 15-20 minutes. Don’t let it dry completely.
4. Wipe Away: Wipe away the oven cleaner with paper towels or a clean cloth. You should see the grime coming off easily.
5. Scrape (If Needed): If there are any stubborn spots, use a razor scraper to gently scrape them away. Be careful not to scratch the glass.
6. Rinse and Wipe Clean: Rinse the glass with water and wipe it clean with a fresh paper towel or cloth.
7. Admire Your Sparkling Oven Door: Enjoy your newly cleaned oven door!
Removing Soap Scum from Shower Doors
Soap scum is the bane of every bathroom cleaner’s existence. But guess what? Oven cleaner can tackle it!
Materials You’ll Need:
* Oven cleaner spray
* Gloves
* Eye protection
* Water
* Sponge or cloth
Step-by-Step Instructions:
1. Ventilate the Bathroom: Make sure your bathroom is well-ventilated. Open a window or turn on the exhaust fan.
2. Spray the Shower Door: Spray the shower door with oven cleaner, focusing on the areas with soap scum.
3. Let it Sit (Briefly!): Let the oven cleaner sit for only a few minutes (5-10 minutes max). Don’t let it dry.
4. Rinse Thoroughly: Rinse the shower door thoroughly with water.
5. Wipe Clean: Wipe the shower door clean with a sponge or cloth.
6. Dry the Door: Dry the shower door to prevent water spots.
Important Note: Be extra careful when using oven cleaner in the bathroom. Avoid spraying it on grout, as it can damage it. Also, test a small, inconspicuous area first to make sure it doesn’t damage the shower door material.
Cleaning White Wall Tires
This one might sound a little crazy, but oven cleaner is amazing for cleaning white wall tires. It removes dirt, grime, and brake dust like nothing else.
Materials You’ll Need:
* Oven cleaner spray
* Gloves
* Eye protection
* Water
* Scrub brush
Step-by-Step Instructions:
1. Spray the Tires: Spray the white wall tires with oven cleaner.
2. Let it Sit: Let the oven cleaner sit for a few minutes (5-10 minutes).
3. Scrub the Tires: Use a scrub brush to scrub the tires.
4. Rinse Thoroughly: Rinse the tires thoroughly with water.
5. Dry the Tires: Dry the tires with a clean cloth.
Important Note: Be careful not to get oven cleaner on your car’s paint, as it can damage it. Rinse thoroughly to remove all traces of the cleaner.
Removing Rust Stains
Rust stains can be incredibly difficult to remove. Oven cleaner can help!
Materials You’ll Need:
* Oven cleaner spray
* Gloves
* Eye protection
* Water
* Cloth or sponge
Step-by-Step Instructions:
1. Spray the Rust Stain: Spray the rust stain with oven cleaner.
2. Let it Sit: Let the oven cleaner sit for 10-15 minutes.
3. Wipe Away: Wipe away the oven cleaner with a cloth or sponge.
4. Rinse Thoroughly: Rinse the area thoroughly with water.
5. Repeat if Necessary:

Conclusion
So, there you have it! Transforming your everyday oven cleaner spray into a multi-purpose cleaning powerhouse is not just a clever hack; it’s a game-changer for your cleaning routine. We’ve explored how this readily available product can tackle grime and stains far beyond the oven, saving you money and decluttering your cleaning cabinet.
Why is this DIY trick a must-try? Because it’s incredibly effective, surprisingly versatile, and remarkably simple. Think about it: you’re already likely to have oven cleaner spray on hand. Instead of purchasing a multitude of specialized cleaners for different surfaces, you can leverage the power of this single product to achieve sparkling results throughout your home. From degreasing stovetops and reviving grout to banishing soap scum in the bathroom and even pre-treating stubborn laundry stains, the possibilities are truly impressive.
But the benefits extend beyond mere convenience. This approach also promotes a more sustainable cleaning practice. By reducing the number of different cleaning products you buy, you’re minimizing plastic waste and potentially harmful chemicals entering the environment. It’s a small change that can make a big difference.
Looking for variations? Absolutely! For delicate surfaces, consider diluting the oven cleaner spray with water to reduce its intensity. Always test in an inconspicuous area first to ensure compatibility. You can also experiment with different application methods. For example, using a scrub brush for textured surfaces or a microfiber cloth for smooth surfaces can enhance the cleaning power. For particularly stubborn stains, allow the oven cleaner spray to dwell for a longer period, but never exceed the recommended time on the product label. Remember to always wear gloves and ensure proper ventilation when using oven cleaner spray.
This DIY approach to cleaning with oven cleaner spray is not just about saving time and money; it’s about empowering you to take control of your cleaning routine and achieve professional-level results with minimal effort. It’s about discovering the hidden potential of everyday products and transforming them into valuable tools.
We wholeheartedly encourage you to try these oven cleaner spray hacks and experience the difference for yourself. We’re confident that you’ll be amazed by the results. And most importantly, we want to hear from you! Share your experiences, tips, and variations in the comments below. Let’s create a community of cleaning enthusiasts who are passionate about finding innovative and effective solutions for a sparkling clean home. What surfaces did you try it on? Did you discover any new uses? What were your results? Your feedback is invaluable and will help us refine and expand this guide for the benefit of everyone. So, grab your oven cleaner spray, put on your gloves, and get ready to unlock a world of cleaning possibilities! Let us know how this **oven cleaner spray** hack works for you!
Frequently Asked Questions (FAQ)
Is it safe to use oven cleaner spray on surfaces other than the oven?
While oven cleaner spray is designed for ovens, it can be used on other surfaces with caution. The key is to understand the product’s strength and the surface’s sensitivity. Always test in an inconspicuous area first to ensure it doesn’t damage or discolor the material. Diluting the spray with water is often recommended for more delicate surfaces. Avoid using it on painted surfaces, aluminum, or anything that could be easily damaged by strong chemicals. Always wear gloves and ensure adequate ventilation when using oven cleaner spray, regardless of the surface.
What types of surfaces can I safely clean with oven cleaner spray?
Oven cleaner spray can be effective on a variety of surfaces, including:
* **Stovetops:** It’s excellent for removing baked-on grease and food residue from stovetops (especially gas stovetop grates).
* **Oven Racks:** These can be soaked in a solution of oven cleaner spray and water for easy cleaning.
* **Grills:** Similar to oven racks, grill grates can benefit from a good soak.
* **Grout:** Oven cleaner spray can help remove stubborn stains and mildew from grout lines.
* **Shower Doors:** It can dissolve soap scum and hard water stains on shower doors.
* **Toilet Bowls:** Some people use it to clean toilet bowls, but be extremely careful and avoid prolonged contact with the porcelain.
* **Stainless Steel:** It can remove burnt-on food from stainless steel pots and pans, but rinse thoroughly.
Remember to always test in a hidden area first and rinse thoroughly after cleaning.
What surfaces should I avoid cleaning with oven cleaner spray?
Avoid using oven cleaner spray on the following surfaces:
* **Aluminum:** It can corrode and damage aluminum.
* **Painted Surfaces:** It can strip or discolor paint.
* **Non-Stick Coatings:** It can damage the non-stick surface.
* **Delicate Fabrics:** It can stain or damage delicate fabrics.
* **Mirrors:** It can damage the reflective coating.
* **Plastic:** Some plastics can be damaged by the harsh chemicals.
* **Natural Stone (Granite, Marble):** It can etch and damage these surfaces.
How do I dilute oven cleaner spray for use on more delicate surfaces?
The dilution ratio will depend on the specific product and the sensitivity of the surface. A good starting point is to mix equal parts oven cleaner spray and water. For even more delicate surfaces, you can increase the water ratio. Always test the diluted solution in an inconspicuous area before applying it to the entire surface.
How long should I let the oven cleaner spray sit on a surface before wiping it off?
The dwell time will depend on the severity of the stain and the surface being cleaned. Start with a short dwell time (e.g., 5-10 minutes) and increase it as needed. Never exceed the maximum dwell time recommended on the product label. For delicate surfaces, it’s best to err on the side of caution and use a shorter dwell time.
What safety precautions should I take when using oven cleaner spray?
Always wear gloves and eye protection to protect your skin and eyes from irritation. Ensure adequate ventilation by opening windows or using a fan. Avoid breathing in the fumes. Keep oven cleaner spray out of reach of children and pets. Never mix oven cleaner spray with other cleaning products, as this can create dangerous fumes.
How do I remove the oven cleaner spray residue after cleaning?
Rinse the cleaned surface thoroughly with clean water. Use a clean cloth or sponge to wipe away any remaining residue. For porous surfaces like grout, you may need to use a scrub brush to ensure all the residue is removed.
Can I use oven cleaner spray to remove stains from clothing?
Oven cleaner spray can be used as a pre-treatment for stubborn laundry stains, but with extreme caution. Test it on a hidden area of the fabric first to ensure it doesn’t cause discoloration or damage. Apply a small amount of diluted oven cleaner spray to the stain, let it sit for a few minutes, and then wash the garment as usual. Avoid using it on delicate fabrics or colored clothing.
What should I do if I accidentally get oven cleaner spray on my skin or in my eyes?
If oven cleaner spray gets on your skin, rinse it immediately with plenty of water. If irritation persists, seek medical attention. If oven cleaner spray gets in your eyes, flush them immediately with plenty of water for at least 15 minutes. Seek immediate medical attention.
Is there a natural alternative to oven cleaner spray?
Yes, a mixture of baking soda and vinegar can be used as a natural alternative to oven cleaner spray. Mix baking soda with water to form a paste, apply it to the surface, and then spray with vinegar. Let it fizz for a few minutes, then scrub and rinse. While not as powerful as oven cleaner spray, it’s a safer and more environmentally friendly option.
Leave a Comment