
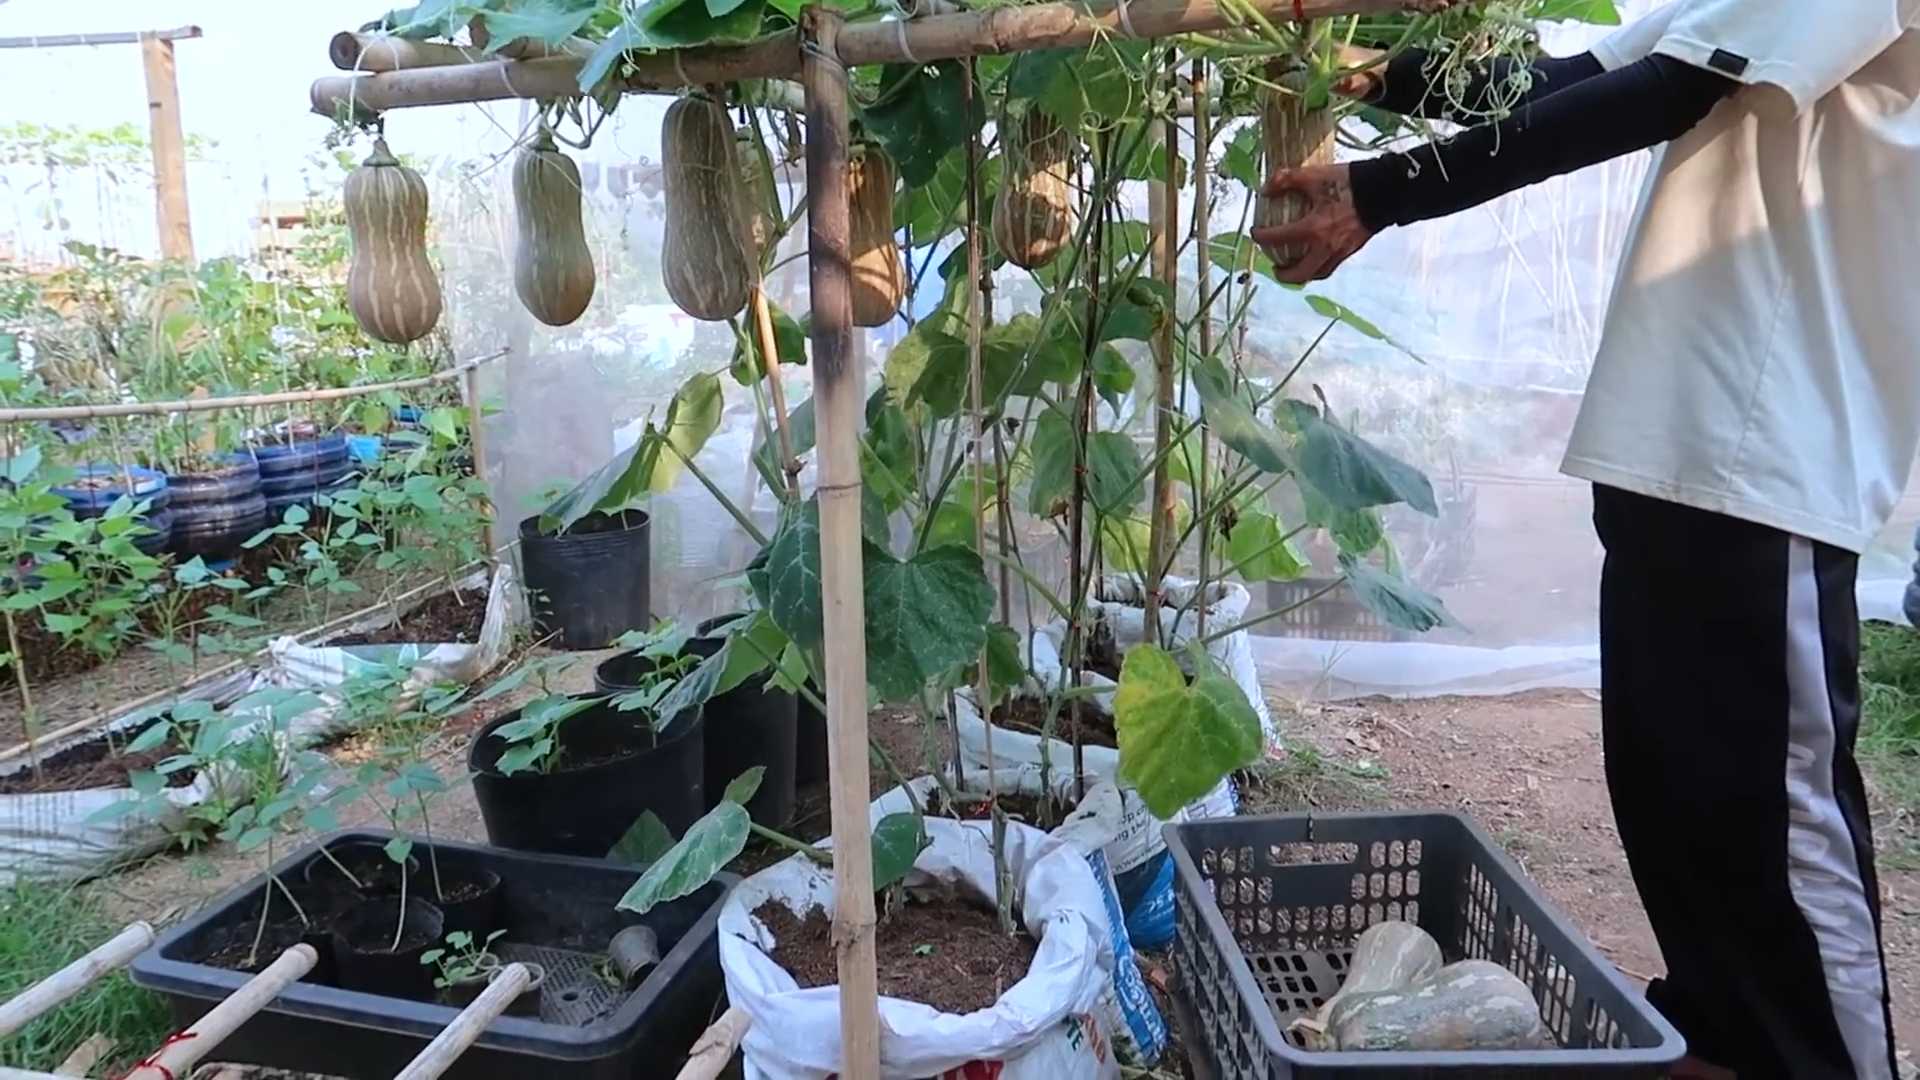
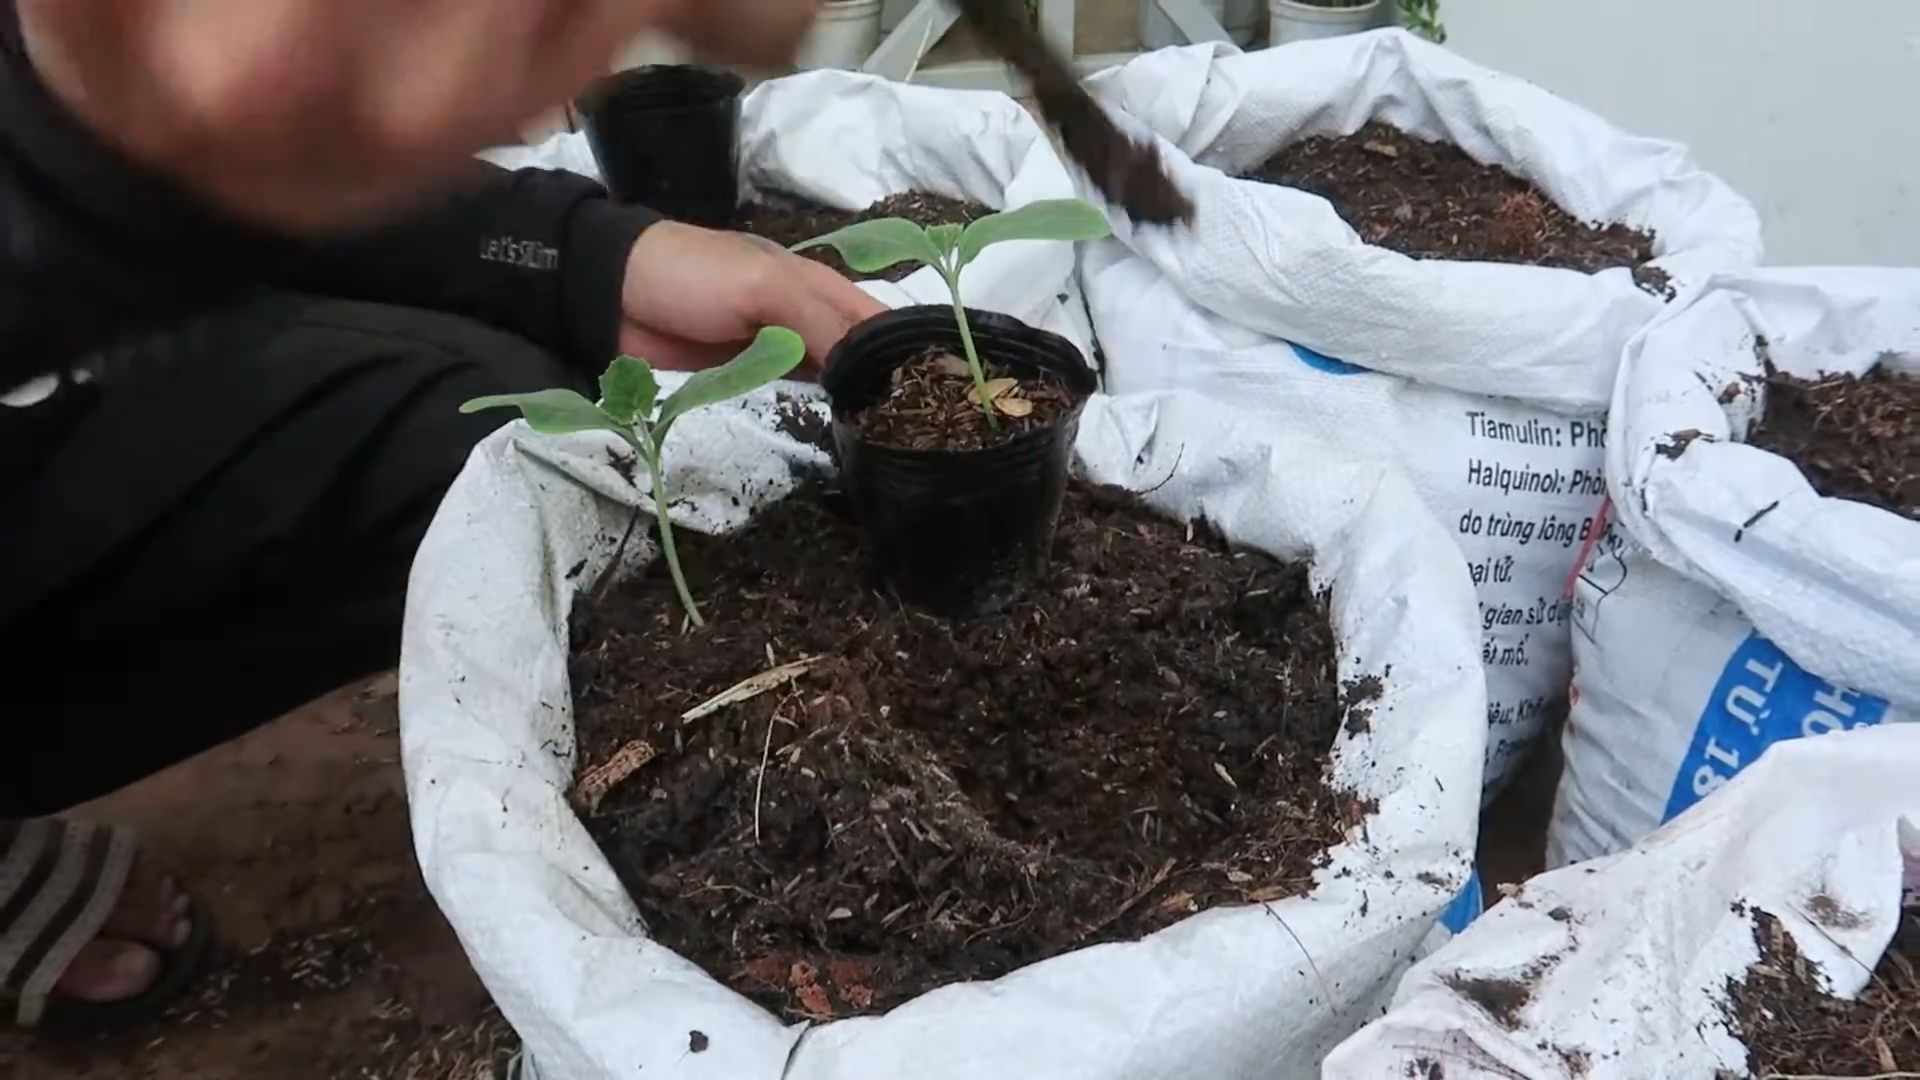
Butternut Squash Growing Hacks: Ever dream of harvesting a bumper crop of beautiful butternut squash right from your own backyard? I know I have! There’s something incredibly satisfying about nurturing a plant from seed to table, and butternut squash, with its sweet, nutty flavor, is a fall favorite for so many reasons. But let’s be honest, sometimes growing these beauties can feel like a real challenge.
For centuries, squash has been a staple crop in many cultures, particularly in the Americas, where it was one of the “Three Sisters” – corn, beans, and squash – grown together for mutual benefit. This ancient tradition highlights the importance of squash as a source of nourishment and sustenance. But even with generations of knowledge, modern gardeners still face hurdles like pests, diseases, and unpredictable weather.
That’s where these butternut squash growing hacks come in! I’m sharing my tried-and-true secrets to help you overcome common obstacles and achieve a bountiful harvest. Whether you’re dealing with powdery mildew, struggling with pollination, or simply want to maximize your yield, these DIY tricks will empower you to grow the best butternut squash you’ve ever tasted. Get ready to roll up your sleeves and transform your garden into a butternut squash paradise!
Unlock the Scrub Daddy’s Full Potential: Amazing Cleaning Hacks You Need to Know!
Okay, friends, let’s talk about the Scrub Daddy. You know, that smiley-faced sponge that’s taken the cleaning world by storm? I’m obsessed! But did you know it can do SO much more than just wash dishes? I’ve been experimenting, and I’ve discovered some seriously amazing cleaning hacks that will make your life easier and your home sparkling. Get ready to be amazed!
Understanding the Scrub Daddy’s Superpower: FlexTexture
Before we dive into the hacks, let’s quickly recap what makes the Scrub Daddy so special. It’s all about the FlexTexture material. In warm water, it becomes soft and pliable, perfect for gentle cleaning. In cold water, it firms up, giving you extra scrubbing power for tough messes. This temperature-activated texture change is the key to its versatility.
Hack #1: Microwave Cleaning Made Easy
Microwaves can get disgusting, fast. Splatters, spills, and baked-on food – it’s a nightmare. But fear not! The Scrub Daddy is here to rescue you.
What you’ll need:
* Scrub Daddy
* Microwave-safe bowl
* 1 cup water
* Lemon juice or vinegar (optional, for extra cleaning power)
Step-by-step instructions:
1. Prepare the cleaning solution: Fill the microwave-safe bowl with 1 cup of water. Add a tablespoon of lemon juice or vinegar if you want to boost the cleaning power and deodorize your microwave. I usually go for lemon juice because it smells so fresh!
2. Soak your Scrub Daddy: Submerge your Scrub Daddy in the water mixture. Make sure it’s fully saturated.
3. Microwave it! Place the bowl with the Scrub Daddy inside the microwave and heat on high for 2-3 minutes. The water will boil and create steam, loosening all the grime.
4. Let it sit: Leave the microwave door closed for another 1-2 minutes to allow the steam to work its magic. This is crucial! Don’t skip this step.
5. Wipe it down: Carefully remove the bowl (it will be hot!). Using the Scrub Daddy (which will now be warm and soft), wipe down the inside of the microwave. The loosened grime should come off easily. The Scrub Daddy’s shape makes it perfect for getting into corners and hard-to-reach spots.
6. Rinse and repeat (if needed): If there are any stubborn spots, rinse the Scrub Daddy and repeat the wiping process.
7. Dry it off: Use a clean cloth or paper towel to dry the inside of the microwave.
Hack #2: Revive Your Grout
Grout is a magnet for dirt and grime, and it can make your entire bathroom or kitchen look dingy. But with the Scrub Daddy, you can bring it back to life!
What you’ll need:
* Scrub Daddy (use the firm side for this!)
* Baking soda
* Water
* Old toothbrush (optional, for extra stubborn areas)
Step-by-step instructions:
1. Make a baking soda paste: In a small bowl, mix baking soda with enough water to form a thick paste. The consistency should be similar to toothpaste.
2. Apply the paste to the grout: Using your finger or an old toothbrush, apply the baking soda paste liberally to the grout lines. Make sure to cover the entire area you want to clean.
3. Let it sit: Allow the baking soda paste to sit on the grout for at least 15-20 minutes. This gives it time to penetrate and loosen the dirt. For really tough stains, you can let it sit for up to an hour.
4. Scrub with the Scrub Daddy: Wet the firm Scrub Daddy with cold water (to keep it firm) and scrub the grout lines vigorously. Use small, circular motions. The textured surface of the Scrub Daddy will help to lift the dirt and grime.
5. Rinse thoroughly: Rinse the area with clean water to remove the baking soda residue. You may need to use a damp cloth to wipe away any remaining paste.
6. Repeat if necessary: If the grout is still stained, repeat the process. For extremely stubborn stains, you can try using a grout brush in addition to the Scrub Daddy.
Hack #3: Sparkling Shower Doors
Soap scum on shower doors is the bane of my existence! But I’ve found a simple and effective way to combat it using the Scrub Daddy.
What you’ll need:
* Scrub Daddy
* White vinegar
* Spray bottle
* Microfiber cloth
Step-by-step instructions:
1. Prepare the vinegar solution: Fill a spray bottle with white vinegar. You can dilute it with a little water if you prefer, but I find that full-strength vinegar works best for tough soap scum.
2. Spray the shower doors: Generously spray the shower doors with the vinegar solution. Make sure to cover the entire surface, especially areas with heavy soap scum buildup.
3. Let it sit: Allow the vinegar to sit on the shower doors for at least 10-15 minutes. This will give it time to break down the soap scum.
4. Scrub with the Scrub Daddy: Wet the Scrub Daddy with warm water (to make it more pliable) and scrub the shower doors thoroughly. Use circular motions and apply a little pressure to remove the soap scum. The Scrub Daddy’s texture will help to lift the grime without scratching the glass.
5. Rinse thoroughly: Rinse the shower doors with clean water to remove the vinegar and soap scum residue.
6. Dry with a microfiber cloth: Use a clean, dry microfiber cloth to dry the shower doors. This will prevent water spots and leave them sparkling clean.
Hack #4: Clean Your Car Wheels Like a Pro
Okay, this one might sound a little crazy, but trust me, it works! The Scrub Daddy is surprisingly effective at cleaning car wheels.
What you’ll need:
* Scrub Daddy (dedicate one specifically for this purpose!)
* Car wheel cleaner
* Hose with a spray nozzle
* Bucket of water
Step-by-step instructions:
1. Rinse the wheels: Use the hose to rinse the car wheels thoroughly, removing any loose dirt and debris.
2. Apply wheel cleaner: Spray the car wheel cleaner onto the wheels, following the instructions on the product label.
3. Let it sit: Allow the wheel cleaner to sit on the wheels for the recommended amount of time. This will give it time to break down the brake dust and grime.
4. Scrub with the Scrub Daddy: Wet the Scrub Daddy with water and scrub the wheels thoroughly. Pay special attention to areas with heavy brake dust buildup. The Scrub Daddy’s shape and texture make it easy to reach into the crevices of the wheels. Use the firm side for stubborn spots.
5. Rinse thoroughly: Rinse the wheels with the hose to remove the wheel cleaner and grime.
6. Dry with a clean cloth: Use a clean, dry cloth to dry the wheels. This will prevent water spots and leave them looking shiny.
Hack #5: De-Gunk Your Kitchen Sink
Kitchen sinks can get pretty gross, filled with food scraps, grease, and other gunk. The Scrub Daddy is perfect for keeping your sink clean and fresh.
What you’ll need:
* Scrub Daddy
* Dish soap
* Baking soda (optional, for extra cleaning power)
* Hot water
Step-by-step instructions:
1. Rinse the sink: Rinse the sink with hot water to remove any loose food scraps.
2. Apply dish soap: Squirt a generous amount of dish soap into the sink.
3. Add baking soda (optional): Sprinkle a layer of baking soda over the dish soap. This will help to scrub away stubborn grime and deodorize the sink.
4. Scrub with the Scrub Daddy: Wet the Scrub Daddy with hot water and scrub the entire sink thoroughly. Pay special attention to the drain, corners, and faucet. The Scrub Daddy’s smiley face is perfect for cleaning around the drain!
5. Rinse thoroughly: Rinse the sink with hot water to remove the dish soap and grime.
6. Dry with a clean cloth: Use a clean, dry cloth to dry the sink. This will prevent water spots and leave it looking shiny.
Hack #6: Clean Your Blinds Like a Pro
Cleaning blinds can be a tedious task, but the Scrub Daddy makes it much easier.
What you’ll need:
* Scrub Daddy
* Bowl of warm water
* Dish soap (optional)
* Old sock or microfiber cloth
Step-by-step instructions:
Conclusion
So, there you have it! These butternut squash growing hacks aren’t just about making your gardening life easier; they’re about unlocking the full potential of your butternut squash plants and reaping a bountiful harvest of delicious, nutritious gourds. We’ve covered everything from optimizing soil conditions and strategic planting to pest control and maximizing sunlight exposure. Each tip, carefully curated and tested, is designed to give you the edge you need to cultivate thriving butternut squash, even if you’re a beginner gardener.
Why is this a must-try? Because store-bought butternut squash simply can’t compare to the flavor and satisfaction of growing your own. Imagine the rich, sweet taste of a squash you nurtured from seed, knowing exactly what went into its growth. Plus, you’ll be reducing your carbon footprint and enjoying a truly sustainable food source. These hacks are about more than just growing squash; they’re about connecting with nature, learning new skills, and enjoying the fruits (or rather, vegetables) of your labor.
But don’t stop there! Feel free to experiment with these techniques and adapt them to your specific climate and garden conditions. For example, if you live in a particularly hot climate, consider providing afternoon shade to your butternut squash plants to prevent sunscald. Or, if you’re dealing with a lot of squash vine borers, try wrapping the base of the stems with aluminum foil to deter them. You could also try companion planting with marigolds to repel other pests.
Consider different varieties of butternut squash too! While we’ve focused on general techniques, some varieties might respond better to certain methods. ‘Waltham Butternut’ is a classic choice, but ‘Honey Nut’ is a smaller, sweeter option that might be perfect for smaller gardens. ‘Butterscotch PMT’ is another great choice, known for its powdery mildew resistance.
The key is to observe your plants closely and adjust your approach as needed. Gardening is a continuous learning process, and every season brings new challenges and opportunities.
We strongly encourage you to put these butternut squash growing hacks into practice this season. Start small, experiment with a few techniques, and see what works best for you. And most importantly, don’t be afraid to get your hands dirty!
Once you’ve experienced the joy of harvesting your own homegrown butternut squash, we’d love to hear about it! Share your successes, challenges, and any variations you’ve tried in the comments below. Let’s build a community of butternut squash enthusiasts and learn from each other’s experiences. Your insights could help other gardeners achieve their own butternut squash growing dreams! So, get out there, get planting, and get ready to enjoy the delicious rewards of your hard work. Happy gardening!
Frequently Asked Questions (FAQ)
Q: How much sun do butternut squash plants need?
A: Butternut squash thrives in full sun, requiring at least 6-8 hours of direct sunlight per day. Insufficient sunlight can lead to weak plants, reduced fruit production, and smaller, less flavorful squash. Choose a planting location that receives ample sunlight throughout the day. If you live in a particularly hot climate, consider providing some afternoon shade to prevent sunscald on the developing fruits.
Q: What kind of soil is best for growing butternut squash?
A: Butternut squash prefers well-drained, fertile soil that is rich in organic matter. Amend your soil with compost or well-rotted manure before planting to improve its structure and nutrient content. A slightly acidic to neutral soil pH (around 6.0 to 7.0) is ideal. Conduct a soil test to determine your soil’s pH and nutrient levels, and amend accordingly. Heavy clay soils can be improved by adding organic matter and coarse sand to improve drainage.
Q: How often should I water my butternut squash plants?
A: Butternut squash plants need consistent moisture, especially during fruit development. Water deeply and regularly, aiming for about 1 inch of water per week. Water at the base of the plants to avoid wetting the foliage, which can increase the risk of fungal diseases. Mulching around the plants can help retain moisture in the soil and suppress weed growth. Check the soil moisture regularly and adjust your watering schedule as needed, depending on the weather conditions.
Q: How do I prevent squash vine borers from attacking my plants?
A: Squash vine borers are a common pest that can devastate butternut squash plants. To prevent them, try these strategies:
* Row covers: Cover your plants with row covers early in the season to prevent the moths from laying their eggs on the stems. Remove the covers when the plants start to flower to allow for pollination.
* Stem wrapping: Wrap the base of the stems with aluminum foil or pantyhose to deter the borers from laying their eggs.
* Regular inspection: Inspect your plants regularly for signs of borer damage, such as small holes in the stems or wilting leaves.
* Borer removal: If you find borers in the stems, you can try to remove them manually by slitting the stem open and extracting the larvae. Cover the wound with soil to encourage rooting.
* Beneficial nematodes: Apply beneficial nematodes to the soil around the plants to kill the borer larvae.
Q: When is the best time to harvest butternut squash?
A: Butternut squash is typically ready to harvest in the fall, about 90-100 days after planting. Look for these signs of maturity:
* Hard rind: The rind should be hard and resistant to scratching with your fingernail.
* Deep tan color: The squash should have a deep tan color, characteristic of the variety.
* Dried stem: The stem should be dry and brown.
Cut the squash from the vine, leaving a few inches of stem attached. Cure the squash in a warm, dry place for 1-2 weeks to harden the rind and improve its storage life.
Q: Can I grow butternut squash in containers?
A: Yes, you can grow butternut squash in containers, but you’ll need a large container (at least 20 gallons) to accommodate the plant’s extensive root system. Choose a bush variety of butternut squash, such as ‘Butterbush’, which is more compact and suitable for container gardening. Use a high-quality potting mix and provide regular watering and fertilization. You may also need to provide support for the vines as they grow.
Q: How do I deal with powdery mildew on my butternut squash plants?
A: Powdery mildew is a common fungal disease that can affect butternut squash plants. To prevent or control powdery mildew:
* Improve air circulation: Space your plants adequately to allow for good air circulation.
* Water properly: Water at the base of the plants to avoid wetting the foliage.
* Fungicides: Apply a fungicide specifically designed for powdery mildew, following the manufacturer’s instructions.
* Milk spray: A mixture of milk and water (1:9 ratio) can be sprayed on the plants to help prevent powdery mildew.
* Resistant varieties: Choose butternut squash varieties that are resistant to powdery mildew, such as ‘Butterscotch PMT’.
Q: How do I pollinate my butternut squash flowers?
A: Butternut squash plants have separate male and female flowers. Pollination is necessary for fruit to develop. If you’re not seeing fruit set, you may need to hand-pollinate the flowers. To do this:
* Identify male and female flowers: Male flowers have a long, thin stem, while female flowers have a small, immature squash at the base.
* Collect pollen: Use a small brush or cotton swab to collect pollen from the male flower.
* Transfer pollen: Gently transfer the pollen to the stigma of the female flower.
* Pollinate in the morning: Pollinate the flowers in the morning, when the pollen is most viable.
Q: How long can I store butternut squash after harvesting?
A: Properly cured butternut squash can be stored for several months in a cool, dry place (around 50-60°F). Avoid storing squash in a humid environment, as this can promote rot. Check the squash regularly for signs of spoilage, such as soft spots or mold. Use the squash before it starts to deteriorate.


Leave a Comment