
Sprouting seeds indoors for beginners can feel like unlocking a secret superpower! Imagine transforming tiny, dormant seeds into vibrant seedlings, ready to burst forth in your garden. It’s not just about gardening; it’s about witnessing the miracle of life unfold right before your eyes, and I’m here to guide you through every step.
For centuries, cultures around the globe have nurtured seeds indoors, extending growing seasons and ensuring bountiful harvests. From ancient Egyptians carefully cultivating herbs to modern-day gardeners starting their tomatoes early, the practice is steeped in tradition and practicality. But why bother bringing the garden inside?
Well, let’s face it, Mother Nature doesn’t always cooperate! Maybe you live in a region with a short growing season, or perhaps you’re eager to get a head start on your favorite vegetables and flowers. Sprouting seeds indoors for beginners allows you to control the environment, protect delicate seedlings from harsh weather, and ultimately, enjoy a more abundant and rewarding garden. Plus, there’s something incredibly satisfying about nurturing life from scratch. This DIY guide will provide you with simple, effective tricks and hacks to ensure your indoor seed-starting journey is a resounding success. Let’s get growing!
Sprouting Seeds Indoors: A Beginner’s Guide to Green Thumb Success!
Hey there, fellow plant enthusiasts! Ever dreamt of having a garden bursting with life, even before the last frost has bid farewell? Well, you’re in the right place! Sprouting seeds indoors is a fantastic way to get a head start on the growing season, and it’s honestly easier than you might think. I’m going to walk you through everything you need to know to successfully sprout seeds indoors, from choosing the right seeds to troubleshooting common problems. Let’s get our hands dirty (figuratively, for now!) and bring some green into our lives!
What You’ll Need: Your Sprouting Starter Kit
Before we dive into the nitty-gritty, let’s gather our supplies. Don’t worry, you probably already have a lot of this stuff lying around!
* Seeds: This might seem obvious, but it’s the most important part! Choose high-quality seeds from a reputable source. Consider what you want to grow and the climate you live in. Some seeds are easier to sprout indoors than others. I’ve had great success with tomatoes, peppers, herbs (like basil and oregano), and leafy greens (like lettuce and spinach).
* Seed Starting Trays or Containers: You can buy seed starting trays with individual cells, which are super convenient. Alternatively, you can repurpose yogurt cups, egg cartons (cardboard, not styrofoam!), or even plastic takeout containers. Just make sure whatever you use has drainage holes!
* Seed Starting Mix: This is different from regular potting soil. Seed starting mix is lighter and finer, allowing delicate seedlings to easily push through. It’s also sterile, which helps prevent diseases. You can find it at any garden center.
* Watering Can or Spray Bottle: Gentle watering is key! You don’t want to blast your tiny seeds with a firehose. A watering can with a fine rose or a spray bottle works perfectly.
* Heat Mat (Optional but Recommended): Many seeds germinate best with bottom heat. A heat mat placed under your seed starting trays can significantly improve germination rates, especially for heat-loving plants like peppers and tomatoes.
* Grow Lights (Highly Recommended): Once your seeds sprout, they’ll need plenty of light to grow strong and healthy. A grow light is much more effective than relying on natural sunlight, especially during the shorter days of early spring.
* Humidity Dome or Plastic Wrap: Creating a humid environment helps seeds germinate. You can use a humidity dome that comes with some seed starting trays, or simply cover your containers with plastic wrap.
* Labels: Trust me, you’ll want to label your seeds! It’s easy to forget what you planted where, especially if you’re starting multiple varieties.
* Small Fan (Optional): Once seedlings emerge, gentle air circulation helps prevent fungal diseases and strengthens stems.
Step-by-Step: The Sprouting Process
Okay, now for the fun part! Let’s get those seeds sprouting!
1. Prepare Your Containers: Fill your seed starting trays or containers with seed starting mix. Gently tap the containers to settle the mix, but don’t pack it down too tightly. Leave about half an inch of space at the top.
2. Moisten the Soil: Water the seed starting mix thoroughly until it’s evenly moist, but not soggy. You want it to feel like a wrung-out sponge.
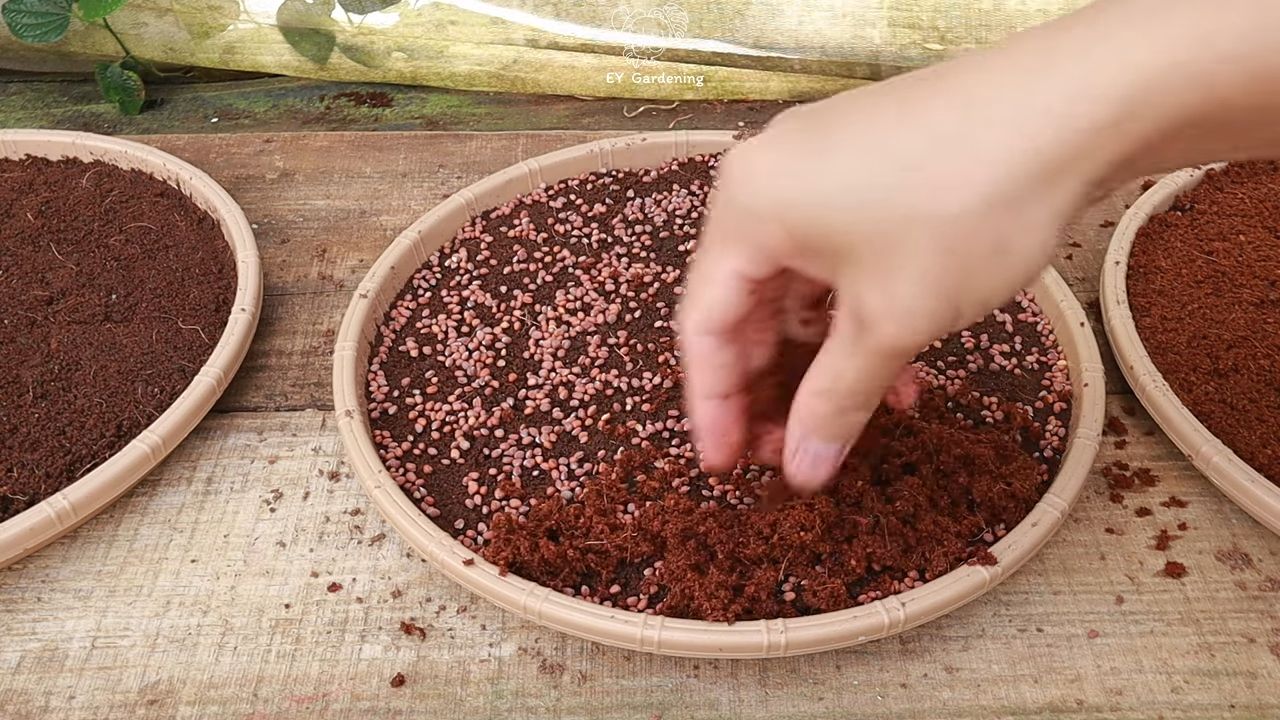
3. Sow the Seeds: This is where the seed packet instructions come in handy. Generally, you’ll want to sow seeds at a depth of about two to three times their diameter. For tiny seeds like lettuce, you can simply sprinkle them on the surface and gently press them into the soil. For larger seeds like tomatoes, make a small indentation with your finger or a pencil and drop the seed in.
4. Cover the Seeds: Gently cover the seeds with a thin layer of seed starting mix.
5. Water Again (Gently!): Lightly water the surface of the soil to settle the seeds in. Use a spray bottle to avoid disturbing the seeds.
6. Create a Humid Environment: Cover your containers with a humidity dome or plastic wrap. This will help retain moisture and create a warm, humid environment that’s ideal for germination.
7. Provide Bottom Heat (Optional but Recommended): Place your seed starting trays on a heat mat. Set the heat mat to the recommended temperature for the seeds you’re sprouting.
8. Place in a Warm Location: Even without a heat mat, place your seed starting trays in a warm location, ideally between 70-75°F (21-24°C).
9. Monitor Moisture Levels: Check the soil moisture daily. The soil should remain consistently moist, but not soggy. If the soil surface feels dry, lightly mist it with water.
10. Wait Patiently: Germination times vary depending on the type of seed. Some seeds may sprout in a few days, while others may take a week or two. Be patient and keep monitoring the moisture levels.
Post-Germination Care: Nurturing Your Seedlings
Congratulations! You’ve got sprouts! Now, the real work begins – nurturing those tiny seedlings into strong, healthy plants.
1. Remove the Humidity Dome or Plastic Wrap: Once the seeds have sprouted, remove the humidity dome or plastic wrap to allow for better air circulation.
2. Provide Adequate Light: This is crucial! Seedlings need at least 14-16 hours of light per day. Place your seedlings under a grow light, positioning the light a few inches above the tops of the plants. Adjust the height of the light as the seedlings grow. If you don’t have a grow light, place your seedlings in a south-facing window, but be aware that they may not get enough light and could become leggy (tall and spindly).
3. Water Carefully: Continue to water your seedlings carefully, keeping the soil consistently moist, but not soggy. Water from the bottom by placing the seed starting tray in a shallow dish of water and allowing the soil to absorb the water. This helps prevent fungal diseases.
4. Provide Air Circulation: Gentle air circulation helps prevent fungal diseases and strengthens stems. Place a small fan near your seedlings and run it for a few hours each day.
5. Fertilize (Optional): Once your seedlings have developed their first set of true leaves (the leaves that look like miniature versions of the adult plant’s leaves), you can start fertilizing them with a diluted liquid fertilizer. Use a fertilizer that’s specifically formulated for seedlings and follow the instructions on the label. I usually start with half the recommended strength.
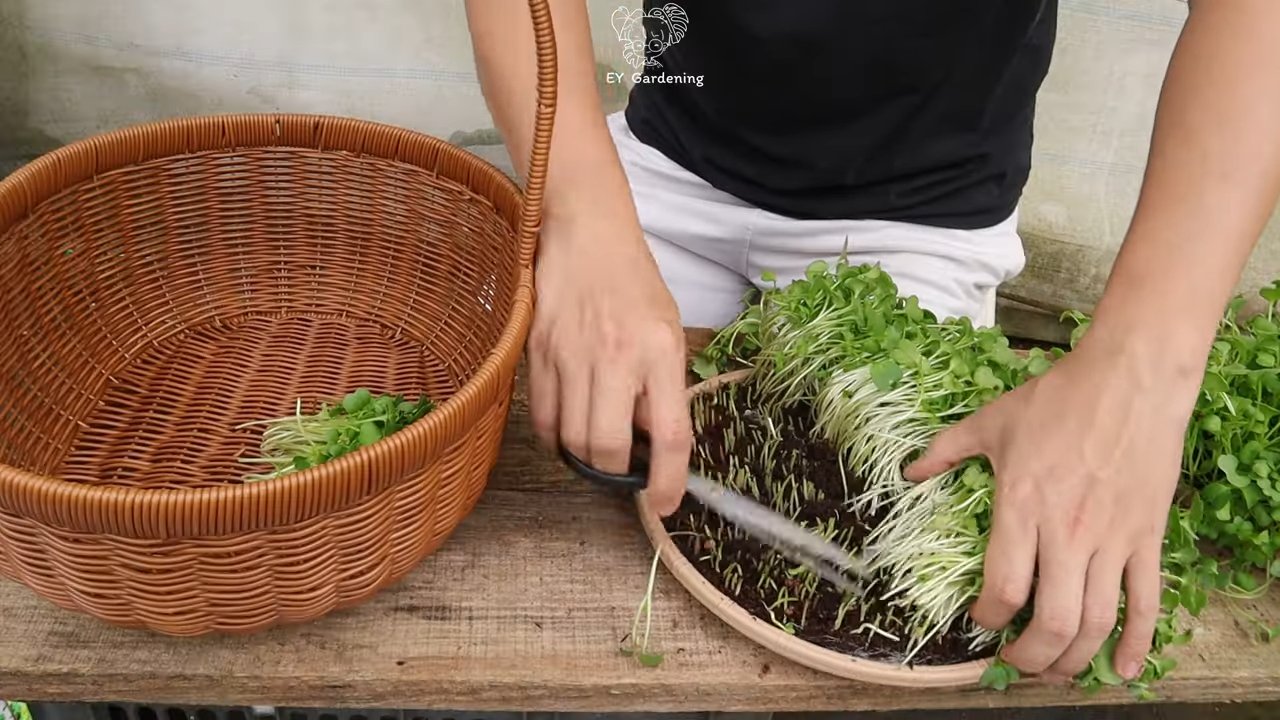
6. Thin Seedlings (If Necessary): If you sowed multiple seeds in each cell or container, you’ll need to thin them out to give the remaining seedlings enough room to grow. Choose the strongest, healthiest-looking seedling in each cell and snip off the others at the soil line with scissors. Don’t try to pull them out, as this could damage the roots of the seedling you want to keep.
7. Harden Off Seedlings: Before transplanting your seedlings outdoors, you’ll need to “harden them off.” This process gradually acclimates them to the outdoor environment. Start by placing your seedlings outdoors in a sheltered location for a few hours each day, gradually increasing the amount of time they spend outdoors over the course of a week or two. Protect them from direct sunlight, strong winds, and frost.
Troubleshooting Common Problems
Even with the best intentions, things can sometimes go wrong. Here are a few common problems you might encounter and how to fix them:
* Seeds Not Germinating:
* Possible Cause: Old seeds, improper soil moisture, incorrect temperature.
* Solution: Use fresh seeds, ensure the soil is consistently moist but not soggy, and provide adequate warmth (using a heat mat can help).
* Leggy Seedlings:
* Possible Cause: Insufficient light.
* Solution: Provide more light! Move your seedlings closer to the grow light or supplement with additional light. You can also gently brush your hand across the tops of the seedlings a few times a day to encourage them to develop stronger stems.
* Damping Off:
* Possible Cause: Fungal disease caused by excessive moisture and poor air circulation.
* Solution: Improve air circulation by using a fan. Avoid overwatering and water from the bottom. You can also use a fungicide specifically formulated for seedlings.
* Yellowing Leaves:
* Possible Cause: Nutrient deficiency.
* Solution: Fertilize your seedlings with a diluted liquid fertilizer.
* Mold on Soil Surface:
* Possible Cause: Excessive moisture and poor air circulation.
* Solution: Improve air circulation by using a fan. Allow the soil surface to dry out slightly between waterings. You can also sprinkle a thin layer of cinnamon on the soil surface, as cinnamon has antifungal properties.
Conclusion
So, there you have it! Sprouting seeds indoors is not only incredibly easy, but it’s also a rewarding way to bring fresh, vibrant greens into your life, regardless of the season. Forget those expensive, pre-packaged sprouts from the grocery store – you can cultivate your own nutrient-packed bounty right on your kitchen counter.
This simple DIY trick transforms ordinary seeds into a powerhouse of vitamins, minerals, and enzymes, offering a significant boost to your diet. Think of the possibilities! Add them to salads for a delightful crunch, sprinkle them on sandwiches for extra flavor and nutrition, or blend them into smoothies for a superfood kick. The versatility of homegrown sprouts is truly remarkable.
But the benefits extend beyond just taste and nutrition. Sprouting seeds indoors is a sustainable and eco-friendly practice. You’re reducing your reliance on commercially grown produce, minimizing packaging waste, and connecting with the natural world in a tangible way. It’s a small act with a big impact.
Don’t be afraid to experiment with different types of seeds. While we’ve focused on the basics, the world of sprouting is vast and exciting. Try sprouting alfalfa, broccoli, radish, or even lentils for a unique flavor profile. You can also explore different sprouting methods, such as using a sprouting jar, a sprouting tray, or even a simple colander. Each method has its own advantages, so find what works best for you.
Consider adding a touch of creativity to your sprouting process. You can enhance the flavor of your sprouts by adding a pinch of sea salt or a squeeze of lemon juice during the rinsing process. You can also experiment with different lighting conditions to influence the color and texture of your sprouts.
We understand that embarking on a new DIY project can sometimes feel daunting, but trust us, sprouting seeds indoors is incredibly forgiving. Even if you make a few mistakes along the way, you’ll still end up with delicious and nutritious sprouts. The key is to be patient, observant, and willing to learn.
This is more than just a recipe; it’s an invitation to connect with the natural world and nourish your body from the inside out.
So, what are you waiting for? Grab a jar, some seeds, and get sprouting! We’re confident that you’ll be amazed by the results. And once you’ve experienced the joy of growing your own sprouts, we encourage you to share your experiences with us. Tell us about your favorite seeds, your preferred sprouting methods, and any tips or tricks you’ve discovered along the way. Let’s build a community of sprout enthusiasts and inspire others to embrace this simple yet powerful DIY trick.
We can’t wait to hear about your sprouting adventures! Happy sprouting!
Frequently Asked Questions (FAQ)
What types of seeds are best for sprouting indoors?
The best seeds for sprouting indoors are those specifically labeled for sprouting or microgreens. These seeds have been tested for germination rates and are less likely to carry harmful bacteria. Popular choices include alfalfa, broccoli, radish, clover, mung beans, lentils, and sunflower seeds. Avoid using seeds intended for planting in the garden, as they may be treated with chemicals that are not safe for consumption. Always purchase your seeds from a reputable source to ensure quality and safety.
How long does it take for seeds to sprout?
The sprouting time varies depending on the type of seed and the environmental conditions. Generally, most seeds will begin to sprout within 2-7 days. Alfalfa and radish sprouts, for example, typically sprout within 3-5 days, while mung beans may take slightly longer. Keep in mind that warmer temperatures and adequate moisture can accelerate the sprouting process. Regularly check your sprouts and rinse them thoroughly to prevent mold growth.
How often should I rinse my sprouts?
Rinsing your sprouts is crucial for preventing mold and bacterial growth. You should rinse your sprouts at least twice a day, preferably in the morning and evening. Use cool, clean water and ensure that all the seeds are thoroughly rinsed. After rinsing, drain the sprouts well to prevent them from becoming waterlogged. Proper rinsing is essential for maintaining the freshness and safety of your sprouts.
What if mold starts to grow on my sprouts?
If you notice mold growing on your sprouts, it’s best to discard the entire batch. Mold can produce harmful toxins that can make you sick. To prevent mold growth, ensure that you are rinsing your sprouts regularly and draining them thoroughly. Avoid overcrowding the sprouting container, as this can restrict airflow and create a favorable environment for mold growth. Using clean sprouting equipment and high-quality seeds can also help minimize the risk of mold contamination.
How do I store my sprouts after they have sprouted?
Once your sprouts have reached your desired length, you can store them in the refrigerator to slow down their growth and extend their shelf life. Rinse the sprouts thoroughly and drain them well. Then, place them in a clean, airtight container lined with a paper towel. The paper towel will help absorb excess moisture and prevent the sprouts from becoming soggy. Store the sprouts in the refrigerator for up to a week, rinsing them every day or two to maintain their freshness.
Can I sprout any type of seed?
While many types of seeds can be sprouted, it’s important to choose seeds that are safe for consumption. Avoid sprouting seeds from the nightshade family, such as tomatoes, potatoes, and eggplants, as they contain toxins that can be harmful. Also, avoid sprouting seeds that have been treated with pesticides or fungicides. Always purchase your seeds from a reputable source and ensure that they are specifically labeled for sprouting or microgreens.
What are the nutritional benefits of eating sprouts?
Sprouts are a nutritional powerhouse, packed with vitamins, minerals, enzymes, and antioxidants. They are a good source of vitamins A, C, and K, as well as folate, iron, and potassium. Sprouts are also rich in fiber, which can aid in digestion and promote gut health. The sprouting process increases the bioavailability of nutrients, making them easier for your body to absorb. Adding sprouts to your diet can boost your immune system, improve your energy levels, and protect against chronic diseases.
Are there any risks associated with eating sprouts?
While sprouts are generally safe to eat, there is a small risk of foodborne illness if they are not properly handled. Sprouts can harbor bacteria such as Salmonella and E. coli, which can cause food poisoning. To minimize the risk, always purchase your seeds from a reputable source, rinse your sprouts thoroughly, and store them properly. Individuals with weakened immune systems, pregnant women, and young children should exercise extra caution when consuming sprouts.
Can I sprout seeds without a special sprouting jar?
Yes, you can sprout seeds without a special sprouting jar. A simple mason jar with a mesh lid or cheesecloth secured with a rubber band works just as well. You can also use a sprouting tray or even a colander lined with cheesecloth. The key is to provide adequate drainage and airflow to prevent mold growth. Experiment with different sprouting methods to find what works best for you.
How do I know when my sprouts are ready to eat?
Your sprouts are ready to eat when they have reached your desired length and have developed small roots and shoots. The exact length will vary depending on the type of seed. Taste a few sprouts to ensure that they are fresh and crunchy. If they taste bitter or have an off odor, discard the batch. Fresh, homegrown sprouts should have a mild, slightly nutty flavor.

Leave a Comment