
Growing Angled Luffa at Home can seem daunting, but trust me, it’s an incredibly rewarding experience! Imagine harvesting your own natural sponges, right from your backyard. For centuries, luffa has been a staple in many cultures, particularly in Asia, where it’s not only used for exfoliating skin but also enjoyed as a delicious vegetable in its young, tender stage.
But why should you bother with growing angled luffa at home? Well, store-bought sponges can be expensive and often contain synthetic materials that aren’t exactly eco-friendly. Plus, there’s nothing quite like the satisfaction of nurturing a plant from seed to harvest. I’ve found that it’s a fantastic way to connect with nature, reduce waste, and even impress your friends with your gardening prowess!
This DIY guide will provide you with all the essential tricks and hacks you need to successfully cultivate these fascinating gourds. From seed starting to harvesting the perfect sponge, I’ll walk you through every step of the process. So, get ready to roll up your sleeves and discover the joy of growing angled luffa at home – it’s easier than you think!
Growing Angled Luffa at Home: A Comprehensive DIY Guide
Hey there, fellow gardening enthusiasts! I’m so excited to share my experience and guide you through growing your very own angled luffa (also known as Chinese okra or ridge gourd) at home. It’s a rewarding experience, and you’ll be amazed at the delicious and versatile vegetable you can harvest. Plus, you can even make your own natural sponges! Let’s dive in!
Choosing the Right Variety and Preparing Your Space
Before we get our hands dirty, let’s talk about selecting the right luffa variety and prepping your garden.
* Variety Selection: While there are different types of luffa, we’re focusing on the angled luffa (Luffa acutangula). Look for seeds at your local garden center or online. Make sure the seeds are from a reputable source to ensure good germination rates.
* Sunlight: Luffa plants are sun-worshippers! They need at least 6-8 hours of direct sunlight each day to thrive. Choose a location in your garden that gets plenty of sunshine.
* Soil: Well-drained, fertile soil is key. Luffa plants are heavy feeders, so amend your soil with plenty of compost or well-rotted manure before planting. This will provide the nutrients they need to grow strong and produce lots of gourds.
* Support Structure: Luffa is a vine, and it needs a strong trellis or fence to climb on. I recommend a sturdy trellis that’s at least 6-8 feet tall. You can also use a chain-link fence or even a pergola. The stronger the support, the better, especially when those luffas start getting heavy!
Starting Your Luffa Seeds
You can directly sow luffa seeds in the ground, but I prefer to start them indoors to get a head start, especially if you live in a cooler climate.
1. Soaking the Seeds: Luffa seeds have a hard outer shell, so soaking them in warm water for 24-48 hours before planting will help them germinate faster. I usually put them in a small bowl of water and leave them on a warm windowsill.
2. Planting Indoors: Fill small pots (about 3-4 inches in diameter) with a good quality seed-starting mix. Plant 2-3 seeds per pot, about 1 inch deep.
3. Watering and Warmth: Gently water the soil until it’s moist but not soggy. Keep the pots in a warm place (around 70-80°F) to encourage germination. A heat mat can be helpful if you live in a colder area.
4. Germination: Be patient! Luffa seeds can take anywhere from 7 to 21 days to germinate. Once the seedlings emerge, move them to a sunny location or under grow lights.
5. Thinning: Once the seedlings have a few true leaves, thin them out, leaving only the strongest seedling in each pot.
Transplanting Your Luffa Seedlings
Once the weather warms up and the danger of frost has passed, it’s time to transplant your luffa seedlings into the garden.
1. Hardening Off: Before transplanting, you need to “harden off” the seedlings. This means gradually exposing them to outdoor conditions over a period of 7-10 days. Start by placing them outside in a sheltered location for a few hours each day, gradually increasing the amount of time they spend outdoors.
2. Preparing the Planting Hole: Dig a hole that’s slightly larger than the root ball of the seedling. Amend the soil in the hole with compost or well-rotted manure.
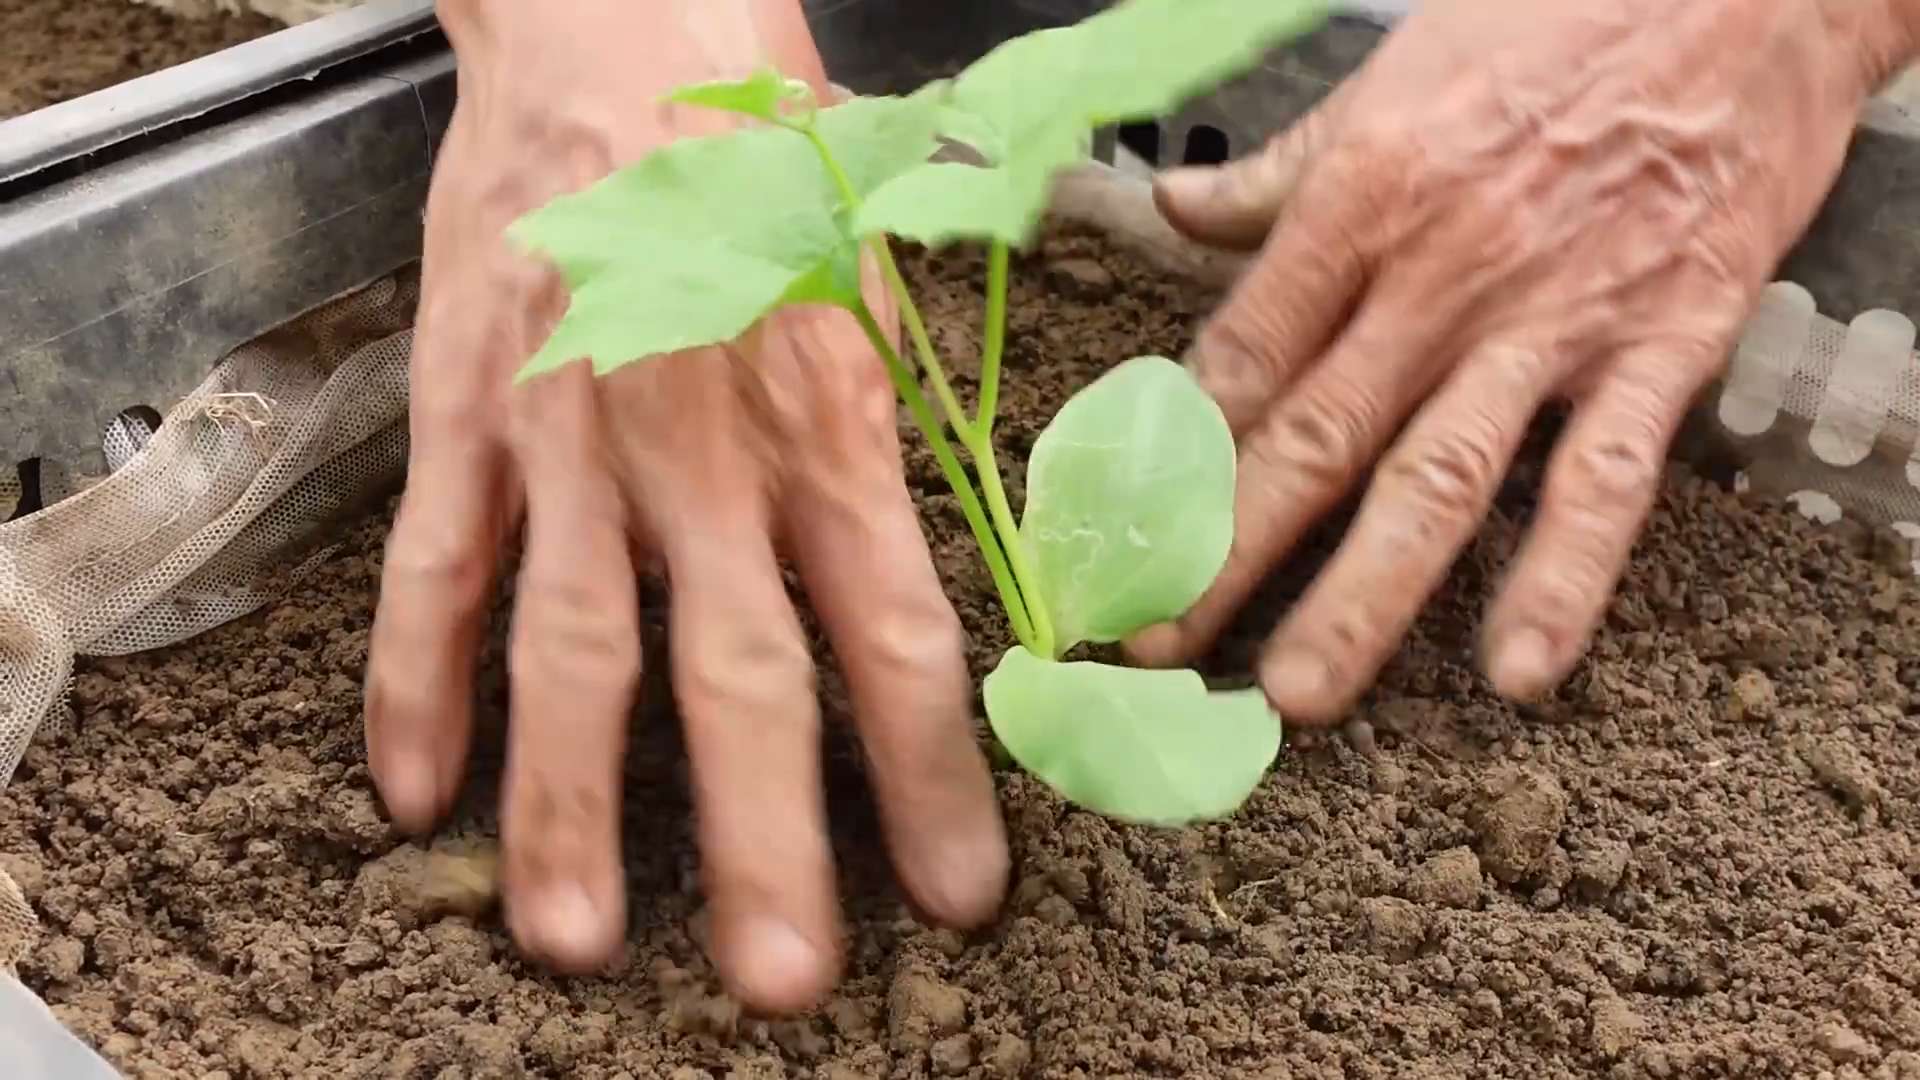
3. Transplanting: Gently remove the seedling from the pot and place it in the hole. Make sure the top of the root ball is level with the surrounding soil.
4. Spacing: Space the luffa plants about 2-3 feet apart. This will give them enough room to grow and spread.
5. Watering: Water the newly transplanted seedlings thoroughly.
6. Mulching: Apply a layer of mulch around the base of the plants to help retain moisture and suppress weeds.
Caring for Your Luffa Plants
Now that your luffa plants are in the ground, it’s important to provide them with the care they need to thrive.
* Watering: Luffa plants need consistent watering, especially during hot, dry weather. Water deeply whenever the soil feels dry to the touch.
* Fertilizing: As I mentioned, luffa plants are heavy feeders. Fertilize them every 2-3 weeks with a balanced fertilizer or compost tea.
* Pruning: Pruning can help improve air circulation and encourage fruit production. Remove any yellowing or dead leaves. You can also pinch off the tips of the vines to encourage branching.
* Pest and Disease Control: Keep an eye out for pests like squash bugs and vine borers. Hand-picking them off the plants is often the best solution. You can also use insecticidal soap or neem oil if necessary. Powdery mildew can also be a problem, especially in humid climates. Improve air circulation by pruning and avoid overhead watering. You can also use a fungicide if needed.
* Training the Vines: As the luffa vines grow, you’ll need to train them to climb the trellis or fence. Gently guide the vines and tie them to the support structure with twine or plant ties.
Pollination
Luffa plants have separate male and female flowers. The female flowers have a small, immature luffa gourd behind them. Pollination is necessary for the female flowers to develop into mature gourds.
* Natural Pollination: Bees and other insects are usually good pollinators. However, if you’re not seeing many bees in your garden, you may need to hand-pollinate the flowers.
* Hand-Pollination: To hand-pollinate, use a small paintbrush to collect pollen from the male flowers and transfer it to the female flowers. Do this in the morning, when the flowers are open.
Harvesting Your Luffa Gourds
The timing of your harvest depends on whether you want to use the luffa for eating or for making sponges.
* For Eating: Harvest the luffa gourds when they are young and tender, about 6-8 inches long. The skin should be smooth and green. You can use them in stir-fries, soups, and other dishes. They taste similar to zucchini.
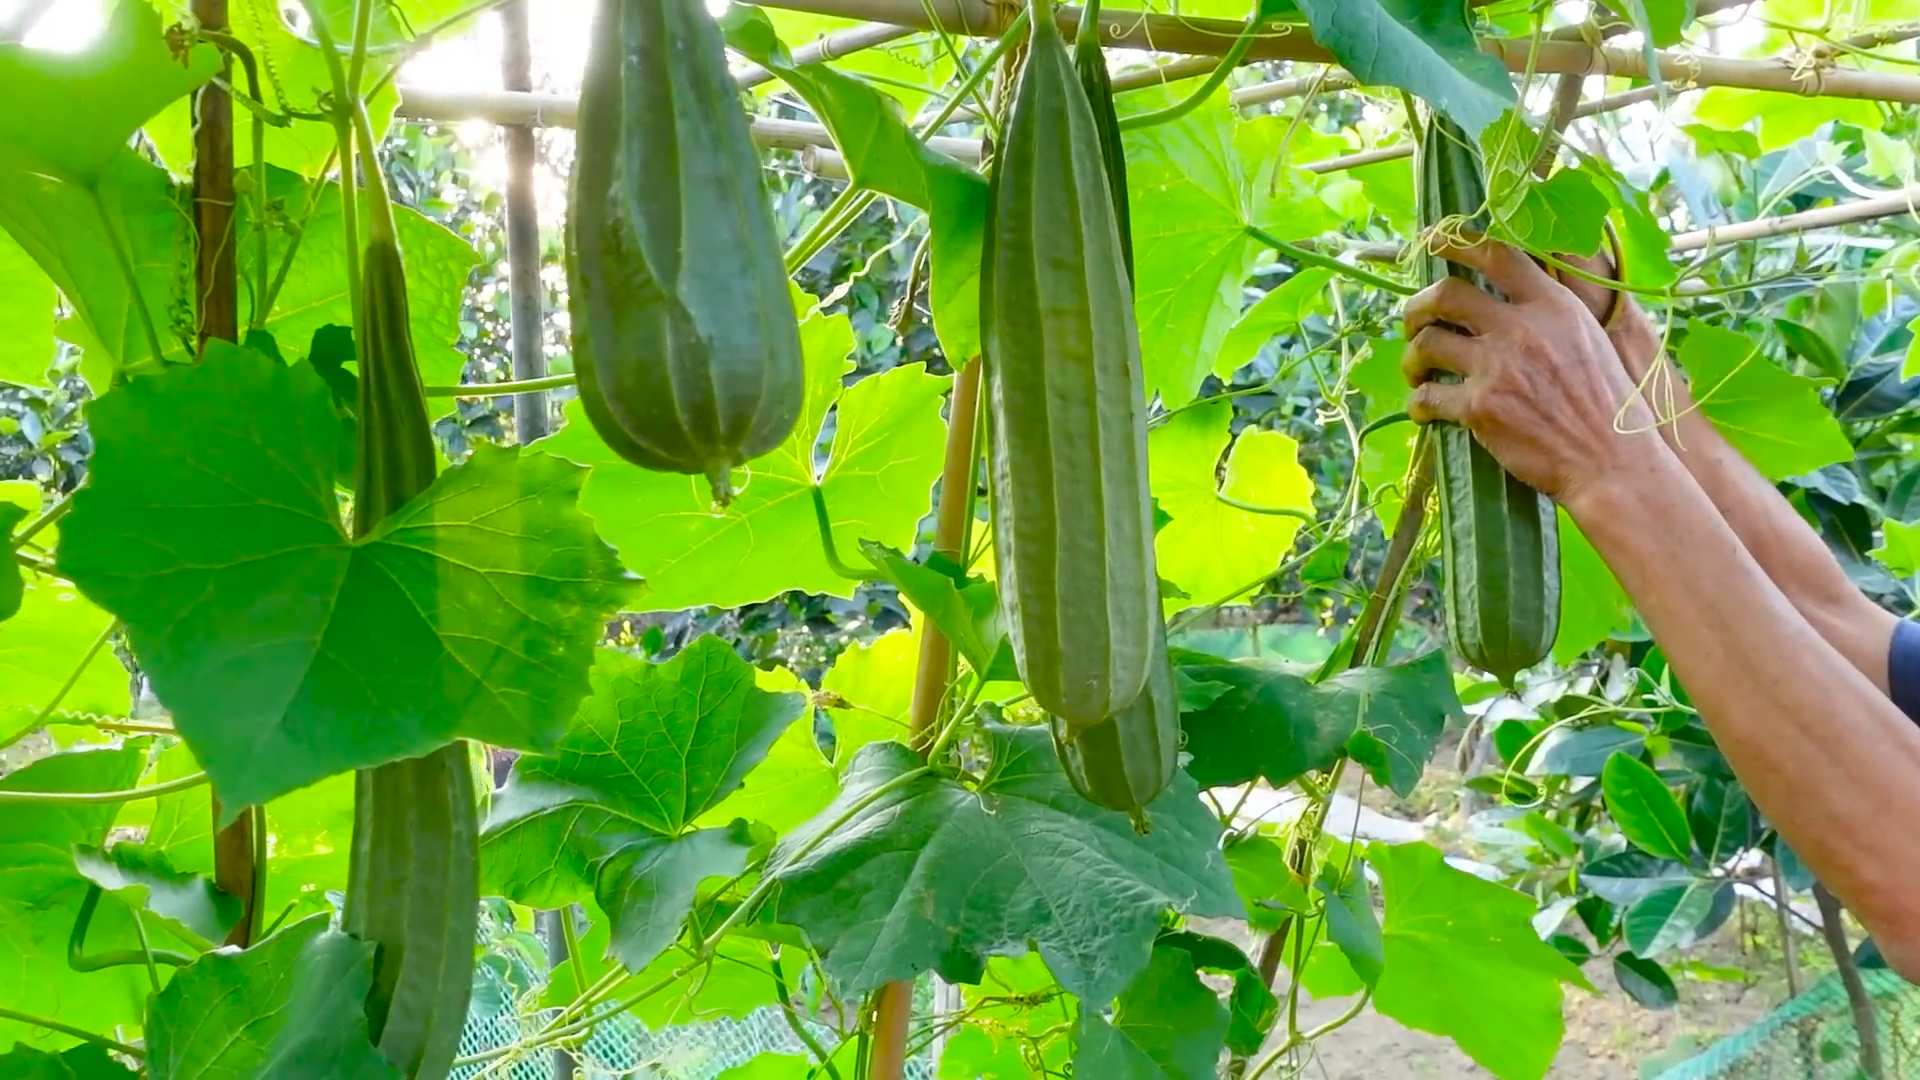
* For Sponges: Allow the luffa gourds to mature on the vine until they turn yellow or brown and the skin becomes hard and dry. This can take several months.
Processing Luffa for Sponges
This is where the magic happens! Turning a mature luffa gourd into a usable sponge is a fun and rewarding process.
1. Harvesting: Once the luffa gourds are completely dry and the skin is brittle, harvest them from the vine.
2. Soaking: Soak the gourds in water for several days to soften the skin. This will make it easier to remove. I usually use a large bucket or tub.
3. Removing the Skin: Once the skin is soft, you can peel it off by hand. It can be a bit messy, so I recommend doing this outdoors or in a well-ventilated area. You might need to use a knife or scraper to help remove stubborn pieces of skin.
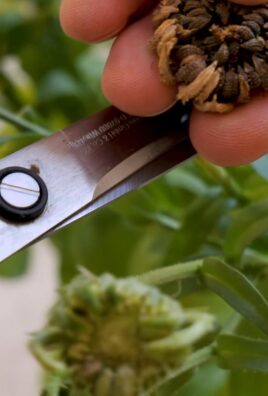
4. Removing the Seeds: After removing the skin, shake out the seeds. You can save these seeds for planting next year!
5. Washing: Rinse the luffa sponge thoroughly with water to remove any remaining pulp or debris.
6. Bleaching (Optional): If you want a whiter sponge, you can soak it in a diluted bleach solution for a few minutes. Be sure to rinse it thoroughly afterwards. I personally prefer to skip this step and keep my sponges natural.
7. Drying: Allow the luffa sponge to dry completely in the sun. This will help prevent mold and mildew.
8. Cutting and Shaping: Once the sponge is dry, you can cut it into smaller pieces and shape it as desired. I like to cut mine into rectangular shapes for use in the shower.
Using Your Homegrown Luffa Sponges
Congratulations! You’ve successfully grown and processed your own luffa sponges. Here are some ways you can use them:
* Exfoliating in the Shower: Luffa sponges are great for exfoliating your skin in the shower. They help remove dead skin cells and leave your skin feeling smooth and refreshed.
* Washing Dishes: Luffa sponges can also be used to wash dishes. They’re gentle enough for delicate items but strong enough to scrub away stubborn food particles.
* Gardening: Use them to scrub dirt off your hands after gardening.
* Crafting: Get
Conclusion
So, there you have it! Growing angled luffa at home is not just a gardening project; it’s an adventure that rewards you with a sustainable and incredibly useful resource. Forget those mass-produced, often chemically treated sponges from the store. Imagine the satisfaction of exfoliating with a luffa you nurtured from seed to shower! This DIY trick is a must-try for anyone seeking a more eco-friendly and rewarding lifestyle.
Why is this method so compelling? First, it’s incredibly cost-effective. Once you have the seeds (which you can even save from your first harvest!), the ongoing expenses are minimal. Second, you’re in complete control of the growing process, ensuring no harmful pesticides or chemicals come into contact with your future sponges. Third, and perhaps most importantly, it’s a deeply satisfying experience to witness the entire lifecycle of this fascinating plant. From the delicate tendrils reaching for support to the mature luffa hanging heavy on the vine, you’ll gain a new appreciation for the natural world.
But the benefits don’t stop there. Angled luffa isn’t just for scrubbing! The young fruits are edible and delicious, offering a unique flavor and texture to your culinary creations. Try them stir-fried, added to soups, or even pickled. The possibilities are endless!
Variations and Suggestions:
* Vertical Gardening: If you’re short on space, consider growing your angled luffa vertically. A sturdy trellis or fence will provide the support it needs to thrive.
* Companion Planting: Plant basil or marigolds near your luffa to deter pests naturally.
* Seed Saving: Allow a few luffas to fully mature and dry on the vine. Then, harvest the seeds for next year’s crop. This ensures a continuous supply of your homegrown sponges.
* Luffa Crafts: Get creative with your mature luffas! Cut them into different shapes and sizes for various uses. You can even dye them with natural plant-based dyes for a pop of color.
* Gifting: Homegrown luffas make thoughtful and unique gifts for friends and family who appreciate sustainable living.
We wholeheartedly encourage you to embark on this rewarding journey of growing angled luffa at home. It’s a project that connects you with nature, provides a sustainable resource, and offers a sense of accomplishment that’s hard to beat. Don’t be intimidated if you’re a beginner gardener; angled luffa is surprisingly resilient and forgiving.
So, grab some seeds, prepare your garden, and get ready to experience the joy of harvesting your own natural sponges. We can’t wait to hear about your experiences! Share your photos, tips, and challenges in the comments below. Let’s build a community of angled luffa enthusiasts and inspire others to embrace this sustainable DIY trick. Happy growing!
Frequently Asked Questions (FAQ)
What is the best time to plant angled luffa seeds?
Angled luffa is a warm-season crop, so it’s best to plant the seeds after the last frost when the soil has warmed up to at least 70°F (21°C). In most regions, this is typically in late spring or early summer. You can also start the seeds indoors 4-6 weeks before the last frost to get a head start.
How much space does an angled luffa plant need?
Angled luffa vines can grow quite long, reaching up to 30 feet (9 meters) or more. Therefore, they need plenty of space to spread out. Provide at least 3-4 feet (0.9-1.2 meters) between plants if growing them in rows. If you’re using a trellis or fence, ensure it’s sturdy enough to support the weight of the mature vines and fruits.
What kind of soil is best for growing angled luffa?
Angled luffa prefers well-drained, fertile soil that is rich in organic matter. Amend your soil with compost or well-rotted manure before planting to improve its fertility and drainage. A slightly acidic to neutral soil pH (6.0-7.0) is ideal.
How often should I water my angled luffa plants?
Angled luffa plants need consistent moisture, especially during hot, dry weather. Water deeply and regularly, ensuring the soil stays moist but not waterlogged. Mulching around the plants can help retain moisture and suppress weeds.
How long does it take for angled luffa to mature?
The time it takes for angled luffa to mature depends on the variety, climate, and growing conditions. Generally, it takes about 90-120 days from planting to harvest. The fruits are ready to harvest when they turn yellow or brown and the skin becomes dry and brittle.
How do I harvest and process angled luffa for use as a sponge?
Harvest the luffa when the skin is dry and brittle. Cut the luffa from the vine, leaving a few inches of stem attached. To remove the skin, you can either soak the luffa in water for a few days to soften the skin or simply peel it off with your hands. Once the skin is removed, shake out the seeds and rinse the luffa thoroughly. Allow the luffa to dry completely in a well-ventilated area before using it.
Are there any pests or diseases that affect angled luffa?
Angled luffa is generally resistant to pests and diseases, but it can be susceptible to squash bugs, vine borers, and powdery mildew. Inspect your plants regularly and take appropriate measures to control any infestations or diseases. Organic pest control methods, such as insecticidal soap or neem oil, can be effective. Ensure good air circulation around the plants to prevent powdery mildew.
Can I eat angled luffa?
Yes, young angled luffa fruits are edible and delicious. They have a mild, slightly sweet flavor and a tender texture. Harvest the fruits when they are young and tender, typically when they are about 6-8 inches (15-20 cm) long. You can use them in stir-fries, soups, stews, or even pickle them.
How do I save seeds from angled luffa?
To save seeds from angled luffa, allow a few fruits to fully mature and dry on the vine. Once the fruits are completely dry, cut them open and remove the seeds. Spread the seeds out on a tray to dry completely before storing them in an airtight container in a cool, dark place.
What are some other uses for angled luffa besides sponges?
Besides sponges, angled luffa can be used for a variety of other purposes. The young fruits can be eaten, as mentioned earlier. The dried luffa fibers can be used for exfoliating scrubs, bath mats, shoe insoles, and even as a natural filter material. The seeds can be used to extract oil for various applications. Get creative and explore the many possibilities of this versatile plant!
Leave a Comment