
DIY plastic bottle planters: Who knew turning trash into treasure could be so rewarding? I’m always on the lookout for ways to be more sustainable and add a personal touch to my home, and that’s where these ingenious planters come in. For generations, resourceful gardeners have found creative ways to repurpose everyday items, and plastic bottles are a perfect example of this thrifty ingenuity. Think about it – instead of those bottles ending up in a landfill, they can become vibrant homes for your herbs, flowers, or even small vegetables!
But why should you bother with DIY plastic bottle planters? Well, for starters, they’re incredibly budget-friendly. Gardening can sometimes feel like an expensive hobby, but this project lets you save money while still enjoying the beauty of nature. Plus, it’s a fantastic way to teach kids about recycling and the importance of environmental responsibility. Imagine the satisfaction of growing your own food or flowers in something you created yourself! This article will guide you through easy-to-follow steps, offering tips and tricks to create stunning and functional planters that will brighten up any space. Let’s get started and transform those discarded bottles into something beautiful and useful!
DIY Adorable Plastic Bottle Planters: A Step-by-Step Guide
Hey there, fellow plant lovers and eco-conscious crafters! I’m super excited to share one of my favorite DIY projects with you: turning those ubiquitous plastic bottles into charming and functional planters. Not only is this a fantastic way to recycle and reduce waste, but it also allows you to add a personal touch to your indoor or outdoor garden. Get ready to unleash your creativity and give those discarded bottles a new lease on life!
Materials You’ll Need
Before we dive in, let’s gather all the necessary materials. Trust me, having everything organized beforehand will make the whole process much smoother and more enjoyable.
* Plastic Bottles: The stars of our show! You can use any size or shape, but I personally prefer 2-liter soda bottles or larger water bottles for bigger plants. Make sure they’re clean and dry.
* Scissors or Utility Knife: For cutting the plastic bottles. A sharp utility knife works best for thicker plastic, but scissors are perfectly fine for thinner bottles. Be careful!
* Acrylic Paints: This is where you can really let your creativity shine! Choose colors that complement your plants and your home decor. I love using a variety of bright and pastel shades.
* Paintbrushes: A set of different sized paintbrushes will come in handy for applying the base coat and adding intricate details.
* Primer (Optional): If you want your paint to adhere better and last longer, especially if you’re using glossy bottles, a plastic primer is a good idea.
* Sealer (Optional): To protect your painted planters from the elements, especially if you’re placing them outdoors, a clear sealant is recommended.
* Potting Soil: Choose a potting mix that’s suitable for the type of plants you’ll be growing.
* Small Stones or Gravel: For drainage. This will prevent your plants from getting waterlogged.
* Waterproof Markers (Optional): For adding fine details, patterns, or plant labels.
* Gloves (Optional): To protect your hands from paint.
* Sandpaper (Optional): For smoothing out rough edges after cutting.
Preparing the Plastic Bottles
This is a crucial step to ensure your planters are safe and aesthetically pleasing.
1. Clean the Bottles: Thoroughly wash the plastic bottles with soap and water to remove any residue or labels. Dry them completely before proceeding.
2. Remove Labels: Peel off any remaining labels. If they’re stubborn, try soaking the bottles in warm, soapy water or using a hairdryer to loosen the adhesive.
3. Cutting the Bottles: This is where you decide on the shape and size of your planters. There are several options:
* Simple Cut: Cut the bottle in half horizontally. You can use either the top or the bottom half as a planter. The bottom half is generally more stable.
* Shaped Cut: Draw a design on the bottle before cutting. You can create scalloped edges, wavy patterns, or even animal shapes. Get creative!
* Hanging Planter: Cut a rectangular opening on one side of the bottle, leaving the top and bottom intact. This will create a trough-like planter that can be hung with string or wire.
Important Safety Tip: When using a utility knife, always cut away from yourself and use a cutting board or mat to protect your work surface.
4. Sanding the Edges (Optional): After cutting, use sandpaper to smooth out any sharp or rough edges. This will prevent you from accidentally cutting yourself and give your planters a more polished look.
Painting and Decorating Your Planters
Now for the fun part! This is where you can really express your personality and create unique planters that reflect your style.
1. Priming (Optional): If you’re using a primer, apply a thin, even coat to the entire surface of the bottle. Let it dry completely according to the manufacturer’s instructions. This will help the paint adhere better and prevent it from peeling or chipping.
2. Base Coat: Choose your base color and apply it evenly to the entire surface of the bottle. You may need to apply two coats for full coverage. Let each coat dry completely before applying the next.
3. Adding Details: Once the base coat is dry, you can start adding details and patterns. Here are some ideas:
* Polka Dots: Use a small paintbrush or a cotton swab to create polka dots in different colors.
* Stripes: Use masking tape to create stripes. Apply the tape carefully and press it down firmly to prevent paint from bleeding underneath.
* Floral Designs: Paint flowers, leaves, or vines using a variety of colors and brushstrokes.
* Geometric Patterns: Create geometric patterns using stencils or freehand.
* Animal Faces: Turn your planters into adorable animal faces by painting on eyes, noses, and whiskers.
* Ombre Effect: Blend different shades of the same color to create a gradient effect.
Pro Tip: Don’t be afraid to experiment! Try different techniques and color combinations until you find something you love.
4. Waterproof Markers (Optional): Use waterproof markers to add fine details, such as outlines, patterns, or plant labels.
5. Sealing (Optional): Once the paint is completely dry, apply a clear sealant to protect your planters from the elements. This is especially important if you’re placing them outdoors. Let the sealant dry completely according to the manufacturer’s instructions.
Planting Your Green Friends
Finally, the moment we’ve all been waiting for! It’s time to bring your planters to life with some beautiful plants.
1. Drainage: Place a layer of small stones or gravel at the bottom of the planter to ensure proper drainage. This will prevent the roots from sitting in water and rotting.
2. Potting Soil: Fill the planter with potting soil, leaving about an inch of space at the top.
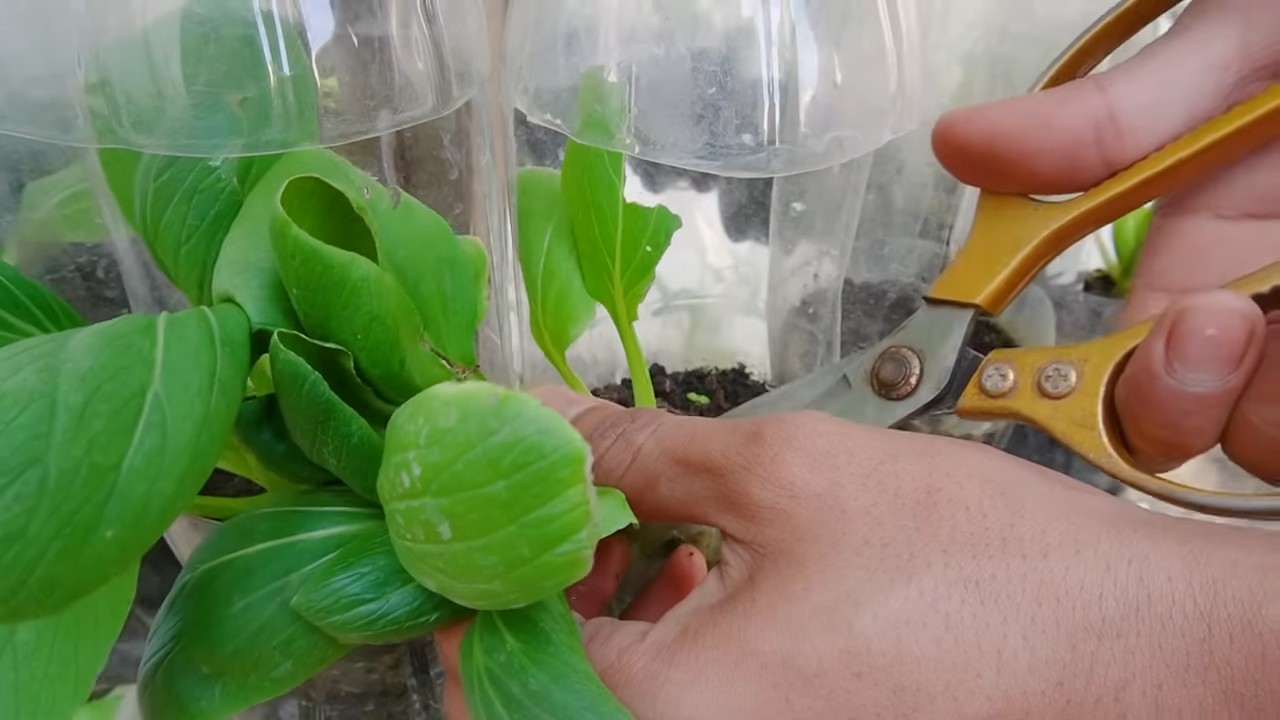
3. Planting: Gently remove your plant from its original container and loosen the roots slightly. Place the plant in the center of the planter and fill in around it with more potting soil.
4. Watering: Water the plant thoroughly until the water drains out of the bottom of the planter.
5. Placement: Place your new planter in a location that provides the appropriate amount of sunlight for your plant.
Creative Ideas and Variations
The possibilities are endless when it comes to DIY plastic bottle planters! Here are a few more ideas to inspire you:
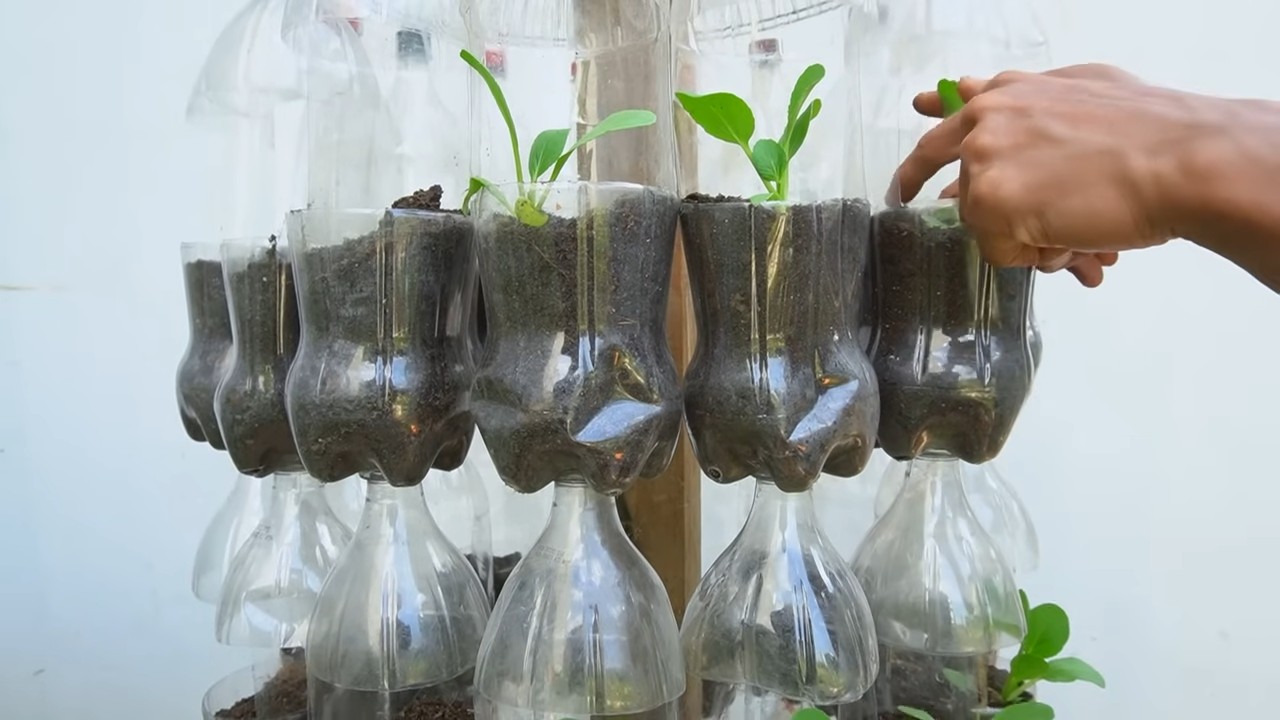
* Self-Watering Planters: Create a self-watering planter by inverting the top half of the bottle into the bottom half, with the neck of the bottle submerged in water. The soil will draw water up from the reservoir as needed.
* Vertical Garden: Create a vertical garden by attaching several plastic bottle planters to a wall or fence. This is a great way to save space and add a touch of greenery to a small balcony or patio.
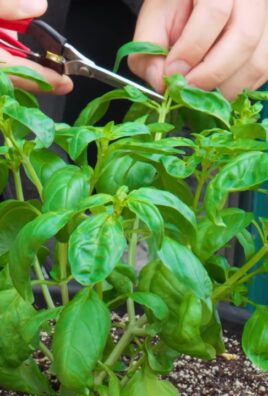
* Herb Garden: Grow your own herbs in plastic bottle planters. Label each planter with the name of the herb.
* Succulent Garden: Create a miniature succulent garden in a large plastic bottle planter. Succulents are drought-tolerant and require very little maintenance.
* Hanging Baskets: Turn your plastic bottle planters into hanging baskets by attaching string or wire to the sides.
* Themed Planters: Create themed planters for different holidays or seasons. For example, you could paint your planters with festive colors and patterns for Christmas or Halloween.
* Kids’ Crafts: This is a great project to do with kids! Let them decorate their own planters and plant their favorite flowers or vegetables.
Troubleshooting Tips
* Paint Peeling: If your paint is peeling, make sure you’re using a primer and sealant. Also, ensure that the bottles are clean and dry before painting.
* Drainage Issues: If your plants are getting waterlogged, add more drainage holes to the bottom of the planter.
* Unstable Planters: If your planters are unstable, add some weight to the bottom, such as rocks or sand.
* Sharp Edges: If you have sharp edges after cutting the bottles, use sandpaper to smooth them out.
I hope you enjoyed this DIY tutorial! Remember, the most important thing is to have fun and let your creativity flow. Happy planting!
Conclusion
So, there you have it! Transforming discarded plastic bottles into charming and functional planters is not just a clever way to recycle; it’s a rewarding project that brings a touch of green into your life while minimizing your environmental footprint. This simple DIY trick offers a multitude of benefits, from saving money on expensive store-bought planters to providing a creative outlet for expressing your personal style.
Why is this a must-try? Because it’s accessible to everyone, regardless of skill level. You don’t need fancy tools or prior crafting experience. All you need are some empty plastic bottles, a pair of scissors or a craft knife, some soil, and your favorite seeds or seedlings. The satisfaction of nurturing new life in a planter you created yourself is truly unparalleled. Plus, you’re actively contributing to a more sustainable future by repurposing waste.
Beyond the basic design, the possibilities for customization are endless. Consider painting your planters with vibrant colors and intricate patterns to match your home décor. Experiment with different bottle sizes and shapes to create a diverse collection of planters for various plants. You can even add drainage holes to the bottom of your planters for optimal plant health. For a more sophisticated look, try covering the plastic with natural materials like twine or burlap. Think vertically! String multiple planters together to create a stunning hanging garden, perfect for balconies or small spaces. Or, if you’re feeling ambitious, explore self-watering planter designs using the bottle’s cap as a water reservoir.
Don’t limit yourself to just flowers and herbs. These DIY plastic bottle planters are also perfect for starting vegetable seedlings indoors before transplanting them to your garden. Imagine growing your own tomatoes, peppers, or lettuce from seed, all nurtured in planters you made yourself. It’s a truly fulfilling experience that connects you to the natural world.
We wholeheartedly encourage you to give this DIY project a try. It’s a fun, affordable, and environmentally friendly way to add a touch of green to your life. Embrace the opportunity to unleash your creativity and transform ordinary plastic bottles into extraordinary planters.
Once you’ve created your own DIY plastic bottle planters, we’d love to hear about your experience! Share your photos and tips on social media using the hashtag #DIYBottlePlanters. Let’s inspire others to join the movement and create a more sustainable world, one planter at a time. We are eager to see your unique creations and learn from your innovative ideas. Your feedback will help us refine this guide and provide even more helpful tips for future DIY enthusiasts. So, grab those empty bottles, get creative, and let’s start planting!
FAQ
What types of plastic bottles are best for making planters?
The best types of plastic bottles for making planters are those that are sturdy and can hold their shape well. Soda bottles, water bottles, and juice bottles are all good options. Avoid using bottles that are too thin or flimsy, as they may not be able to support the weight of the soil and plants. Also, consider the size of the bottle in relation to the type of plant you intend to grow. Larger bottles are suitable for plants with larger root systems, while smaller bottles are ideal for herbs or succulents. Remember to thoroughly clean the bottles before using them to remove any residue that could harm your plants.
How do I ensure proper drainage in my DIY plastic bottle planters?
Proper drainage is crucial for the health of your plants. Without adequate drainage, the roots can become waterlogged and rot. To ensure proper drainage in your DIY plastic bottle planters, you can create drainage holes in the bottom of the bottle. Use a drill, a nail, or a sharp object to carefully poke several holes in the bottom of the bottle. You can also add a layer of gravel or small stones to the bottom of the planter before adding the soil. This will help to improve drainage and prevent the soil from becoming compacted. Another option is to use a self-watering planter design, where the bottle’s cap acts as a water reservoir, allowing the plant to draw water as needed.
What kind of soil should I use for my plastic bottle planters?
The type of soil you use for your plastic bottle planters will depend on the type of plants you are growing. In general, a well-draining potting mix is a good choice for most plants. Avoid using garden soil, as it can be too heavy and may not drain well. You can also amend your potting mix with compost or other organic matter to improve its fertility and drainage. For succulents and cacti, use a potting mix specifically designed for these plants, as they require a well-draining soil that is low in nutrients. Research the specific needs of your plants to determine the best type of soil to use.
How do I decorate my DIY plastic bottle planters?
There are countless ways to decorate your DIY plastic bottle planters and make them your own. You can paint them with acrylic paints, use stencils to create patterns, or cover them with decorative paper or fabric. You can also add embellishments such as beads, buttons, or shells. For a more natural look, try covering the plastic with twine, burlap, or moss. Get creative and experiment with different materials and techniques to create planters that reflect your personal style. Remember to use waterproof materials if you plan to keep your planters outdoors.
Are there any safety precautions I should take when making DIY plastic bottle planters?
Yes, there are a few safety precautions you should take when making DIY plastic bottle planters. When cutting the plastic bottles, use a sharp pair of scissors or a craft knife and be careful not to cut yourself. Always cut away from your body and use a cutting mat to protect your work surface. If you are using a drill to create drainage holes, wear safety glasses to protect your eyes from flying debris. When painting or decorating your planters, use non-toxic materials and work in a well-ventilated area. Supervise children closely when they are participating in this project.
How do I care for plants in plastic bottle planters?
Caring for plants in plastic bottle planters is similar to caring for plants in any other type of container. Water your plants regularly, but be careful not to overwater them. Allow the soil to dry out slightly between waterings. Fertilize your plants regularly with a balanced fertilizer. Place your planters in a location that provides adequate sunlight for your plants. Monitor your plants for pests and diseases and take action promptly if you notice any problems. Repot your plants as needed into larger containers as they grow.
Can I use these planters indoors and outdoors?
Yes, you can use these planters both indoors and outdoors. For indoor use, make sure to place a saucer underneath the planter to catch any excess water. For outdoor use, choose a location that is sheltered from strong winds and direct sunlight, especially during the hottest part of the day. Consider the weight of the planter when placing it outdoors, as it may become heavy when filled with soil and plants. If you live in an area with cold winters, bring your planters indoors to protect them from frost.
How long will these plastic bottle planters last?
The lifespan of your plastic bottle planters will depend on the type of plastic used, the environmental conditions, and how well you care for them. In general, plastic bottles are durable and can last for several years. However, exposure to sunlight and extreme temperatures can cause the plastic to degrade over time. To extend the lifespan of your planters, avoid placing them in direct sunlight for extended periods and protect them from freezing temperatures. You can also apply a UV protectant spray to the plastic to help prevent it from fading and cracking.
Leave a Comment