
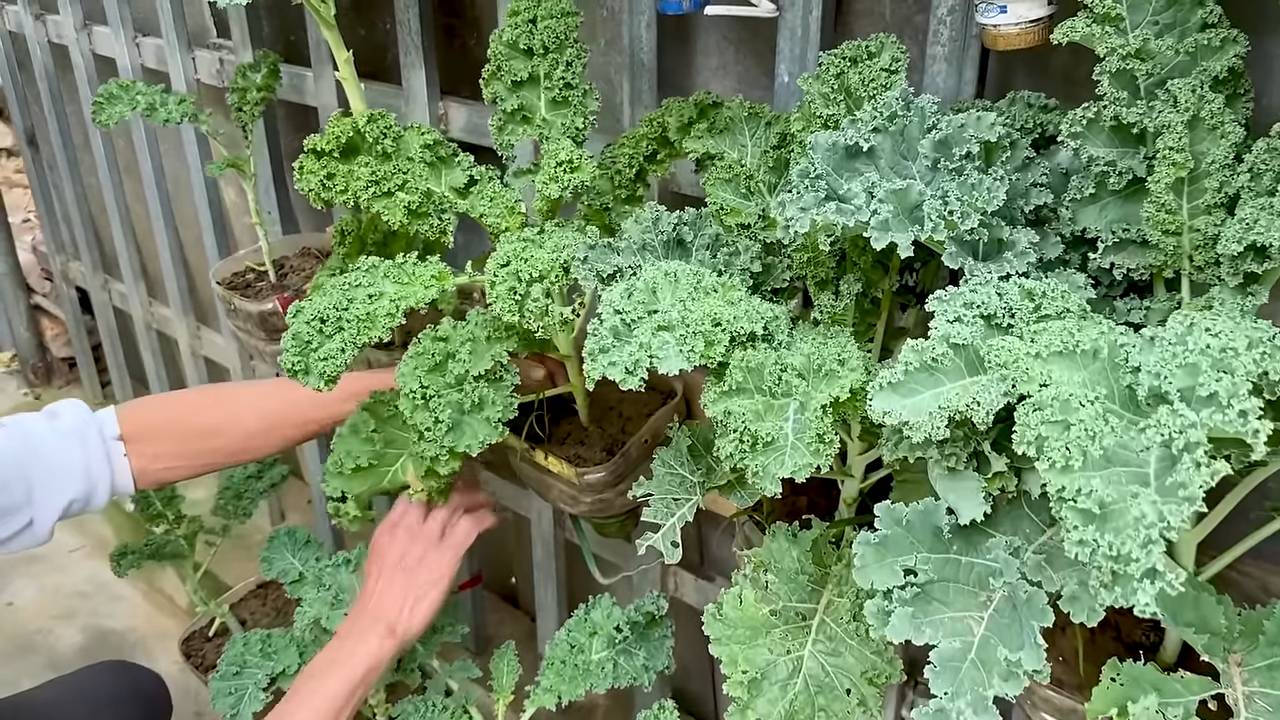
Kale plastic bottle gardening: sounds a bit unconventional, right? But trust me, it’s a game-changer! I’m so excited to share this incredibly easy and rewarding DIY project that will have you harvesting fresh, delicious kale even if you’re short on space or time.
For centuries, humans have cultivated kale, tracing its origins back to wild cabbage varieties. From ancient Greece to medieval Europe, kale has been a staple, prized for its nutritional value and resilience. Now, we’re taking this ancient veggie into the modern age with a clever upcycling twist!
Let’s face it, not everyone has a sprawling backyard perfect for a traditional garden. Apartment dwellers, busy professionals, and those with limited mobility often miss out on the joy of growing their own food. That’s where this kale plastic bottle gardening hack comes in. It’s a fantastic way to repurpose those plastic bottles cluttering your recycling bin, reduce waste, and create a thriving mini-garden on your balcony, windowsill, or even indoors. Plus, who doesn’t love the satisfaction of nurturing something from seed to table? This DIY project is not only eco-friendly and budget-friendly, but it also provides you with fresh, healthy kale right at your fingertips. So, grab those plastic bottles, and let’s get started!
Upcycled Kale Garden: Turning Plastic Bottles into a Bountiful Harvest!
Hey there, fellow gardening enthusiasts! Are you looking for a fun, eco-friendly, and budget-friendly way to grow your own kale? Well, you’ve come to the right place! I’m going to walk you through how to create a thriving kale garden using nothing but recycled plastic bottles. It’s a fantastic project for beginners, kids, and anyone who wants to reduce waste while enjoying fresh, homegrown greens. Let’s get started!
What You’ll Need:
Before we dive in, let’s gather our supplies. This is a super accessible project, so you probably already have most of these items lying around:
* Plastic Bottles: The star of the show! I recommend using bottles that are at least 2 liters in size. The more, the merrier, depending on how much kale you want to grow. Clear or slightly tinted bottles work best.
* Kale Seeds: Choose your favorite variety! Curly kale, Tuscan kale (also known as Lacinato or dinosaur kale), or Red Russian kale are all great options.
* Potting Soil: A good quality potting mix is essential for healthy kale growth.
* Scissors or a Utility Knife: For cutting the plastic bottles. Be careful!
* Drill or Nail and Hammer: To create drainage holes.
* Watering Can or Spray Bottle: For watering your kale seedlings.
* Optional: Twine or Rope: If you want to hang your bottle planters.
* Optional: Spray Paint: To decorate your bottle planters (use non-toxic paint).
* Optional: Landscape Fabric or Gravel: To line the bottom of the bottles for better drainage.
Preparing the Plastic Bottles:
This is where we transform those discarded bottles into mini-gardens!
1. Clean the Bottles: Thoroughly wash the plastic bottles with soap and water to remove any residue. Rinse them well and let them dry completely. This helps prevent mold and bacteria growth.
2. Cut the Bottles: There are a few ways you can cut the bottles, depending on the type of planter you want to create:
* Horizontal Planters: This is the simplest method. Using your scissors or utility knife, carefully cut the bottle horizontally, about halfway down. You’ll be using the bottom half as the planter. The top half can be discarded or used for another project (like a mini-greenhouse cover!).
* Vertical Planters: For a hanging garden, cut a rectangular opening on one side of the bottle, leaving the top and bottom intact. This creates a “window” for your kale to grow out of. You can also cut multiple openings on different sides of the bottle.
* Stacked Planters: Cut the bottom off several bottles. Then, cut a hole in the cap of each bottle (except the bottom one). Stack the bottles on top of each other, threading them together with a rope or sturdy wire. This creates a tiered planter system.
Safety First! Always be extremely careful when using sharp tools. If you’re working with children, make sure they are supervised by an adult.
3. Create Drainage Holes: Drainage is crucial for healthy kale growth. Use a drill or a nail and hammer to create several drainage holes in the bottom of each bottle planter. I usually make about 4-5 holes, depending on the size of the bottle.
4. Optional: Decorate the Bottles: This is where you can get creative! Use spray paint (make sure it’s non-toxic and suitable for plastic) to decorate the bottles. You can paint them solid colors, add patterns, or even create fun designs. Let the paint dry completely before moving on to the next step. You can also use permanent markers to draw on the bottles.
5. Optional: Add Drainage Layer: To improve drainage and prevent soil from washing out, you can line the bottom of the bottles with a layer of landscape fabric or gravel. This will help keep the soil moist but not waterlogged.
Planting the Kale Seeds:
Now for the fun part – planting the kale!
1. Fill the Bottles with Potting Soil: Fill each bottle planter with high-quality potting soil, leaving about an inch of space at the top. Gently pat down the soil to remove any air pockets.
2. Sow the Kale Seeds: Sprinkle the kale seeds evenly over the surface of the soil. Follow the instructions on your seed packet for spacing recommendations. Generally, you’ll want to space the seeds about 1/2 inch apart.
3. Cover the Seeds: Lightly cover the seeds with a thin layer of potting soil (about 1/4 inch).
4. Water Gently: Use a watering can or spray bottle to gently water the soil. Be careful not to overwater, as this can cause the seeds to rot. The soil should be moist but not soggy.
5. Provide Sunlight: Place the bottle planters in a sunny location that receives at least 6 hours of sunlight per day. Kale thrives in full sun. If you don’t have a sunny spot, you can use grow lights.
Caring for Your Kale Plants:
Consistent care is key to a successful kale harvest!
1. Water Regularly: Water your kale plants regularly, especially during hot, dry weather. Check the soil moisture by sticking your finger into the soil. If the top inch of soil feels dry, it’s time to water. Avoid overwatering, as this can lead to root rot.
2. Fertilize: Kale is a heavy feeder, so it needs regular fertilization. Use a balanced liquid fertilizer every 2-3 weeks, following the instructions on the fertilizer label. You can also amend the soil with compost or other organic matter.
3. Thin Seedlings: Once the seedlings have emerged and have a few sets of true leaves, thin them out so that they are spaced about 4-6 inches apart. This will give the plants enough room to grow and prevent overcrowding.
4. Pest Control: Keep an eye out for pests such as aphids, cabbage worms, and flea beetles. You can control these pests by handpicking them off the plants, using insecticidal soap, or applying neem oil.
5. Harvesting: You can start harvesting kale leaves when they are about 4-6 inches long. Simply cut off the outer leaves, leaving the inner leaves to continue growing. This will allow you to harvest kale continuously throughout the growing season.
Hanging Your Bottle Planters (Optional):
If you’ve created vertical planters, you can hang them to create a beautiful and space-saving garden.
1. Drill Hanging Holes: Drill two small holes near the top of each bottle planter.
2. Thread Twine or Rope: Thread twine or rope through the holes, creating a loop for hanging.
3. Hang the Planters: Hang the planters from a fence, balcony railing, or any other sturdy structure. Make sure the planters are securely attached and won’t fall.
Troubleshooting:
Even with the best care, you might encounter some challenges. Here are a few common problems and how to address them:
* Yellowing Leaves: This could be a sign of overwatering, underwatering, or nutrient deficiency. Adjust your watering schedule and fertilize your plants.
* Pests: As mentioned earlier, keep an eye out for pests and take action as soon as you spot them.
* Slow Growth: This could be due to lack of sunlight, poor soil, or overcrowding. Make sure your plants are getting enough sunlight, use high-quality potting soil, and thin out the seedlings if necessary.
* Root Rot: This is caused by overwatering. Make sure your bottle planters have adequate drainage and avoid watering too frequently.
Enjoy Your Homegrown Kale!
And there you have it! You’ve successfully created a thriving kale garden using recycled plastic bottles. Now you can enjoy fresh, delicious, and nutritious kale right from your own backyard (or balcony!). This is a rewarding project that not only provides you with healthy food but also helps reduce waste and promote sustainability. Happy gardening!

Conclusion
So, there you have it! Transforming a simple plastic bottle into a thriving kale garden is not just a fun project; it’s a sustainable, space-saving, and incredibly rewarding way to enjoy fresh, homegrown greens. We’ve walked you through the process, highlighting the ease and accessibility of this DIY trick. But why is this method a must-try?
Firstly, it’s about reclaiming and repurposing. In a world grappling with plastic waste, finding creative ways to reuse these materials is crucial. This project turns potential landfill fodder into a productive garden, contributing to a more eco-conscious lifestyle. Secondly, it democratizes gardening. Whether you live in a sprawling suburban home or a tiny apartment, this method allows anyone to cultivate their own food. No sprawling garden beds are required; just a sunny windowsill or balcony will do.
The benefits extend beyond environmental and accessibility factors. Growing your own kale ensures you have access to fresh, nutrient-rich greens, free from harmful pesticides and herbicides. You control the growing environment, ensuring the best possible quality. Plus, there’s an undeniable satisfaction in nurturing a plant from seedling to harvest.
But don’t stop there! This method is incredibly versatile. Consider these variations to personalize your kale plastic bottle gardening experience:
* Vertical Garden Wall: String multiple bottle gardens together to create a stunning vertical display. This is perfect for maximizing space and adding a touch of greenery to any wall.
* Herb Garden Hybrid: Combine kale with other herbs like basil, parsley, or mint in the same bottle. Just ensure they have similar sunlight and watering requirements.
* Different Kale Varieties: Experiment with different types of kale, such as curly kale, Tuscan kale (lacinato), or red Russian kale, to discover your favorite flavors and textures.
* Nutrient Boost: Enhance your kale’s growth by adding organic fertilizers or compost tea to the soil. This will provide essential nutrients for optimal development.
* Watering System Upgrade: Create a self-watering system by adding a wick that draws water from a reservoir at the bottom of the bottle. This is especially useful if you tend to forget to water your plants regularly.
This DIY trick is more than just a gardening project; it’s a statement about sustainability, resourcefulness, and the power of homegrown food. It’s a chance to connect with nature, even in the most urban environments. It’s a way to reduce your carbon footprint and enjoy the freshest, most delicious kale imaginable.
We wholeheartedly encourage you to try this kale plastic bottle gardening method. It’s simple, affordable, and incredibly rewarding. Once you’ve given it a go, we’d love to hear about your experience! Share your photos, tips, and challenges in the comments below. Let’s build a community of bottle gardeners and inspire others to embrace sustainable living. What are you waiting for? Grab a plastic bottle, some soil, and kale seeds, and start your gardening adventure today!
Frequently Asked Questions (FAQ)
What type of plastic bottle is best for kale plastic bottle gardening?
Ideally, you should use food-grade plastic bottles, such as those used for water, juice, or soda. Avoid using bottles that have contained harsh chemicals or cleaning products, as these could contaminate your kale. PET (Polyethylene Terephthalate) bottles, commonly marked with a “1” inside a recycling triangle, are generally considered safe. Make sure to thoroughly wash the bottle with soap and water before using it for gardening.
How much sunlight does kale need when grown in a plastic bottle?
Kale thrives in full sun, requiring at least 6 hours of direct sunlight per day. If you don’t have a spot that receives full sun, aim for at least 4 hours of direct sunlight and supplement with artificial grow lights if necessary. Insufficient sunlight can result in leggy, weak plants with poor leaf development. Rotate the bottle regularly to ensure all sides of the kale plant receive adequate sunlight.
What type of soil should I use for kale plastic bottle gardening?
Use a well-draining potting mix specifically formulated for container gardening. Avoid using garden soil, as it can become compacted in a container and hinder drainage. A good potting mix will retain moisture while allowing excess water to drain away, preventing root rot. You can also amend the potting mix with compost or other organic matter to provide additional nutrients.
How often should I water my kale plants in plastic bottles?
Water your kale plants when the top inch of soil feels dry to the touch. The frequency of watering will depend on factors such as the weather, the size of the bottle, and the type of potting mix you’re using. In hot, dry weather, you may need to water daily, while in cooler, wetter weather, you may only need to water every few days. Avoid overwatering, as this can lead to root rot. Ensure the bottle has drainage holes to allow excess water to escape.
How do I fertilize my kale plants in plastic bottles?
Kale is a heavy feeder and benefits from regular fertilization. You can use a balanced liquid fertilizer diluted to half strength every 2-3 weeks. Alternatively, you can incorporate slow-release fertilizer granules into the potting mix at planting time. Organic options include compost tea, fish emulsion, and seaweed extract. Avoid over-fertilizing, as this can burn the roots and damage the plants.
How do I protect my kale plants from pests and diseases?
Inspect your kale plants regularly for signs of pests or diseases. Common pests include aphids, cabbage worms, and slugs. You can control aphids with a strong spray of water or by introducing beneficial insects like ladybugs. Cabbage worms can be handpicked or treated with Bacillus thuringiensis (Bt), a natural insecticide. Slugs can be controlled with slug bait or by creating barriers around the plants. To prevent diseases, ensure good air circulation and avoid overwatering. Remove any infected leaves promptly to prevent the spread of disease.
When is the best time to harvest kale from my plastic bottle garden?
You can start harvesting kale leaves when they are about 4-6 inches long. Harvest the outer leaves first, leaving the inner leaves to continue growing. This will encourage the plant to produce more leaves. You can harvest kale continuously throughout the growing season. The flavor of kale is often improved by a light frost.
Can I grow kale in plastic bottles indoors?
Yes, you can grow kale in plastic bottles indoors, but you will need to provide adequate light. Place the bottles near a sunny window that receives at least 6 hours of direct sunlight per day. If you don’t have enough natural light, you can supplement with artificial grow lights. LED grow lights are a good option, as they are energy-efficient and provide the full spectrum of light that plants need to grow.
How long will my kale plants last in plastic bottles?
With proper care, kale plants can last for several months in plastic bottles. However, they may eventually become root-bound and need to be transplanted into a larger container or into the ground. You can also propagate new kale plants from cuttings taken from the original plant.
Is kale plastic bottle gardening sustainable?
Yes, kale plastic bottle gardening is a sustainable practice. It reuses plastic bottles that would otherwise end up in landfills, reduces the need for commercially grown kale (which often involves transportation and pesticide use), and allows you to grow your own food locally. By using organic gardening practices, you can further enhance the sustainability of this method.

Leave a Comment