
Growing Hot Peppers at Home can seem intimidating, but trust me, it’s easier than you think! Have you ever dreamed of adding a fiery kick to your meals with peppers you’ve grown yourself? Imagine the satisfaction of harvesting vibrant, spicy peppers right from your own backyard or even your windowsill. For centuries, hot peppers have been cultivated across the globe, adding flavor and heat to cuisines from Mexico to Thailand. They weren’t just about taste, either; many cultures believed in their medicinal properties, using them to ward off illness and boost vitality.
But why should you bother with growing hot peppers at home? Well, store-bought peppers can be expensive and sometimes lack the intense flavor you’re craving. Plus, knowing exactly where your food comes from and how it’s grown is incredibly rewarding. This DIY guide will provide you with simple, effective tricks and hacks to successfully cultivate your own thriving hot pepper plants, even if you’re a complete beginner. I’m going to show you how to avoid common pitfalls and maximize your yield, so you can enjoy a bountiful harvest of delicious, fiery peppers all season long. Get ready to unleash your inner gardener and spice up your life!
Growing Hot Peppers at Home: From Seed to Sizzle!
Okay, pepperheads, let’s talk about fire! I’m going to walk you through everything you need to know to grow your own scorching hot peppers right at home. Whether you’re a seasoned gardener or a complete newbie, this guide will help you cultivate a bumper crop of peppers that will set your taste buds ablaze.
Choosing Your Pepper Varieties
First things first, what kind of heat are you craving? There’s a whole world of peppers out there, from the mild jalapeño to the face-melting Carolina Reaper. Here’s a quick rundown of some popular choices:
* **Jalapeño:** A classic, versatile pepper with a mild to medium heat. Great for salsas, poppers, and adding a kick to just about anything.
* **Serrano:** A bit hotter than a jalapeño, with a bright, fresh flavor. Perfect for adding a zing to Mexican dishes.
* **Cayenne:** A fiery pepper often dried and ground into powder. Use it sparingly!
* **Habanero:** Known for its intense heat and fruity flavor. Handle with care!
* **Scotch Bonnet:** Similar to habaneros in heat and flavor, but with a slightly sweeter taste.
* **Ghost Pepper (Bhut Jolokia):** One of the hottest peppers in the world. Only for the truly brave!
* **Carolina Reaper:** The current reigning champion of heat. Seriously, be careful with this one.
Consider your climate and growing space when choosing your peppers. Some varieties are better suited to certain conditions than others.
Starting Your Peppers from Seed
Starting your peppers from seed is the most economical way to grow them, and it gives you access to a wider variety of peppers. Here’s how to do it:
Getting Started Indoors
Peppers need a long growing season, so you’ll need to start them indoors about 8-10 weeks before the last expected frost.
1. **Gather Your Supplies:** You’ll need:
* Pepper seeds
* Seed starting trays or small pots
* Seed starting mix (a sterile, well-draining mix)
* A heat mat (optional, but highly recommended)
* A grow light (also optional, but helps prevent leggy seedlings)
* A spray bottle
* A humidity dome (or plastic wrap)
2. **Sow the Seeds:**
* Moisten the seed starting mix. It should be damp, but not soggy.
* Fill the seed starting trays or pots with the mix.
* Make a small indentation (about 1/4 inch deep) in the center of each cell or pot.
* Place 2-3 seeds in each indentation. This increases your chances of germination.
* Gently cover the seeds with the seed starting mix.
* Lightly mist the surface with water.
3. **Provide Warmth and Humidity:**
* Place the seed starting trays or pots on a heat mat. Peppers germinate best at temperatures between 80-90°F (27-32°C).
* Cover the trays or pots with a humidity dome or plastic wrap to create a humid environment.
* Place the trays or pots under a grow light, or in a sunny window.
4. **Maintain Moisture:**
* Check the seed starting mix daily and mist with water as needed to keep it moist. Don’t let it dry out, but don’t overwater either.
* Once the seeds germinate, remove the humidity dome or plastic wrap.
5. **Thin the Seedlings:**
* Once the seedlings have their first true leaves (the second set of leaves that appear after the cotyledons), thin them to one seedling per cell or pot. Choose the strongest, healthiest-looking seedling and snip off the others at the soil line.
Hardening Off Your Seedlings
Before you transplant your pepper seedlings outdoors, you need to “harden them off.” This process gradually acclimates them to the outdoor environment, preventing shock.
1. **Start Slowly:**
* Begin by placing the seedlings outdoors in a sheltered location (like a porch or patio) for just an hour or two each day.
* Gradually increase the amount of time they spend outdoors each day, over the course of a week or two.
2. **Protect from the Elements:**
* Protect the seedlings from direct sunlight, strong winds, and extreme temperatures.
* If the weather is particularly harsh, bring the seedlings back indoors.
3. **Monitor for Stress:**
* Watch for signs of stress, such as wilting or leaf burn. If you see these signs, reduce the amount of time the seedlings spend outdoors.
Transplanting Your Peppers Outdoors
Once the danger of frost has passed and your pepper seedlings are hardened off, it’s time to transplant them into the garden.
1. **Choose a Sunny Location:** Peppers need at least 6-8 hours of sunlight per day.
2. **Prepare the Soil:**
* Peppers prefer well-drained soil that is rich in organic matter.
* Amend the soil with compost or well-rotted manure before planting.
3. **Space the Plants:**
* Space pepper plants 18-24 inches apart.
* If you’re growing multiple rows of peppers, space the rows 24-36 inches apart.
4. **Dig the Holes:**
* Dig holes that are slightly larger than the root balls of the seedlings.
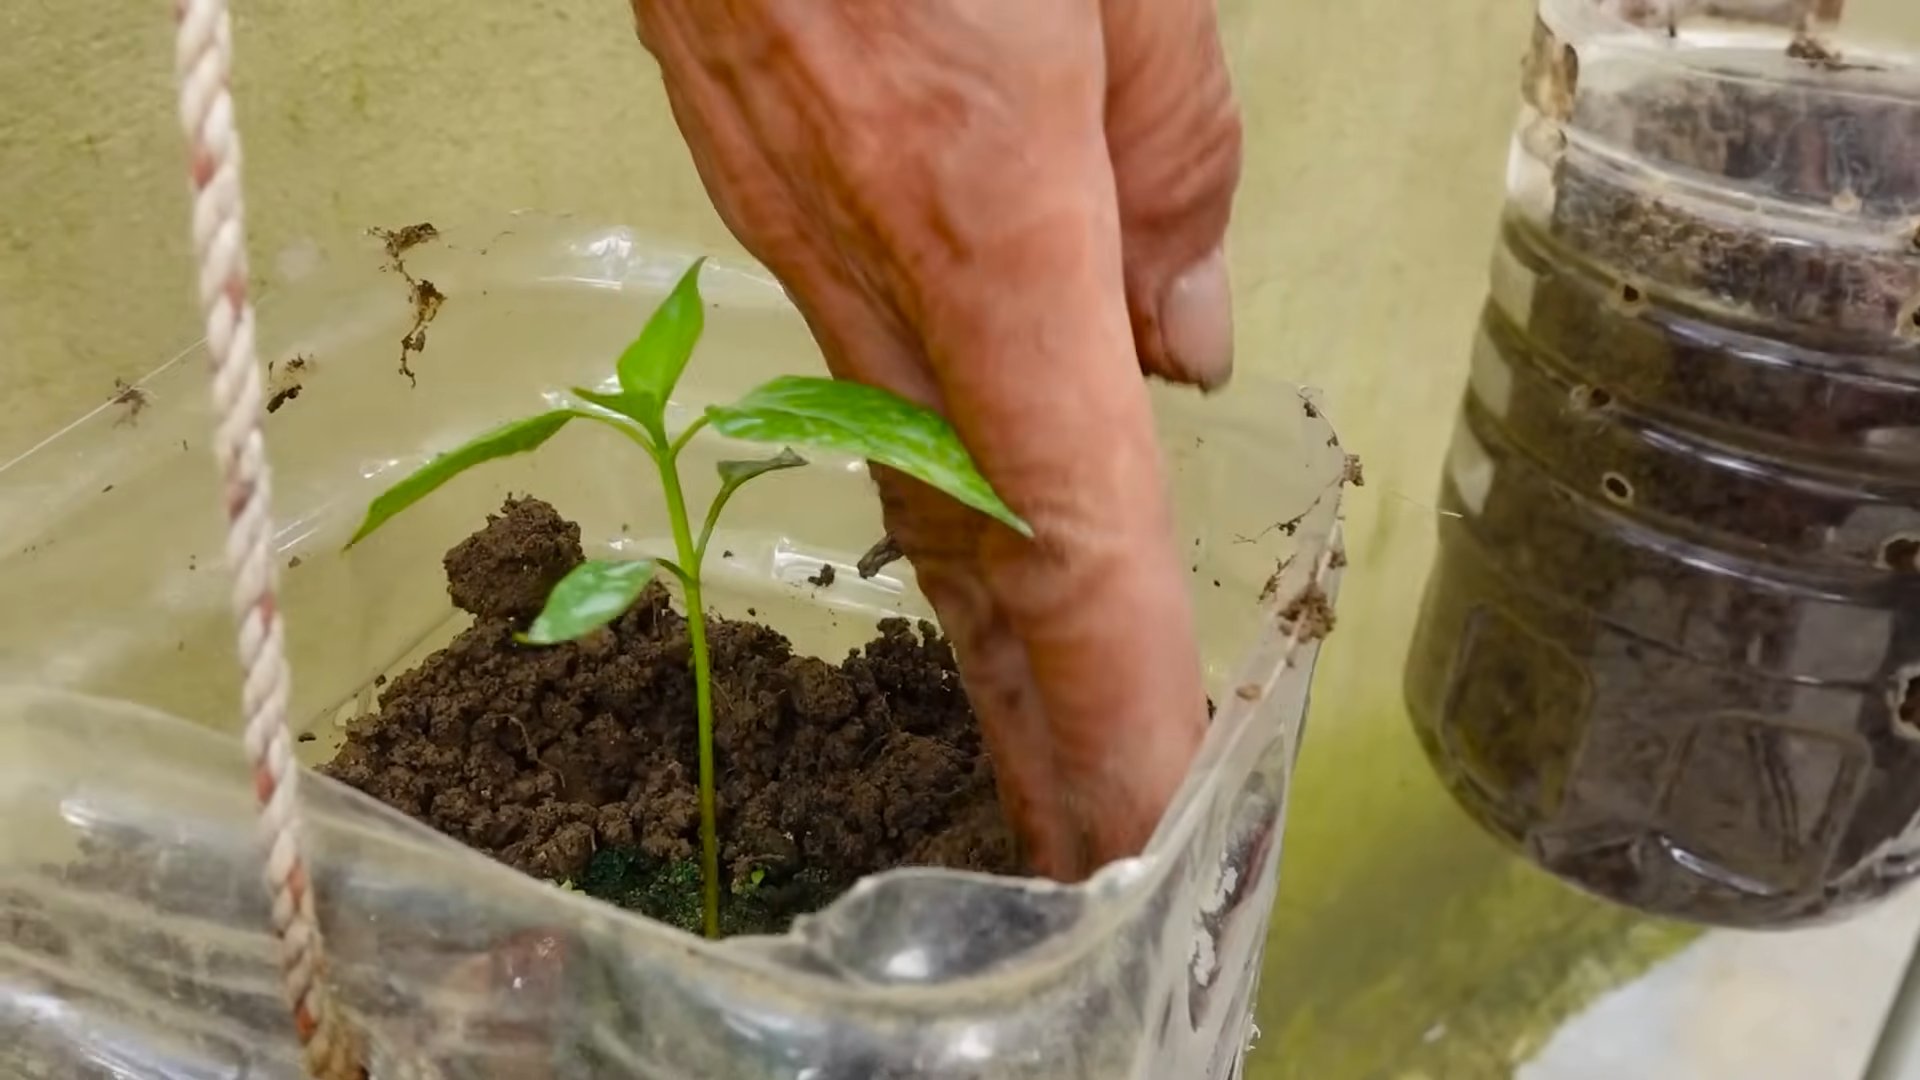
5. **Transplant the Seedlings:**
* Gently remove the seedlings from their pots or trays.
* Loosen the roots slightly.
* Place the seedlings in the holes and backfill with soil.
* Water thoroughly.
6. **Mulch:**
* Apply a layer of mulch around the pepper plants to help retain moisture, suppress weeds, and regulate soil temperature.
Caring for Your Pepper Plants
Once your pepper plants are in the ground, they’ll need regular care to thrive.
1. **Watering:**
* Water deeply and regularly, especially during hot, dry weather.
* Avoid overhead watering, as this can promote fungal diseases.
* Water at the base of the plants.
2. **Fertilizing:**
* Fertilize pepper plants every 2-3 weeks with a balanced fertilizer.
* You can also use a fertilizer specifically formulated for peppers and tomatoes.
3. **Pruning:**
* Pruning is optional, but it can help improve air circulation and encourage bushier growth.
* Remove any suckers (small shoots that grow from the base of the plant) to encourage more fruit production.
4. **Pest and Disease Control:**
* Keep an eye out for pests and diseases. Common pepper pests include aphids, flea beetles, and spider mites. Common diseases include blossom end rot, fungal leaf spot, and viral diseases.
* Use organic pest control methods whenever possible.
* Remove any diseased leaves or plants immediately.
5. **Support:**
* Taller pepper varieties may need staking or caging to prevent them from falling over.
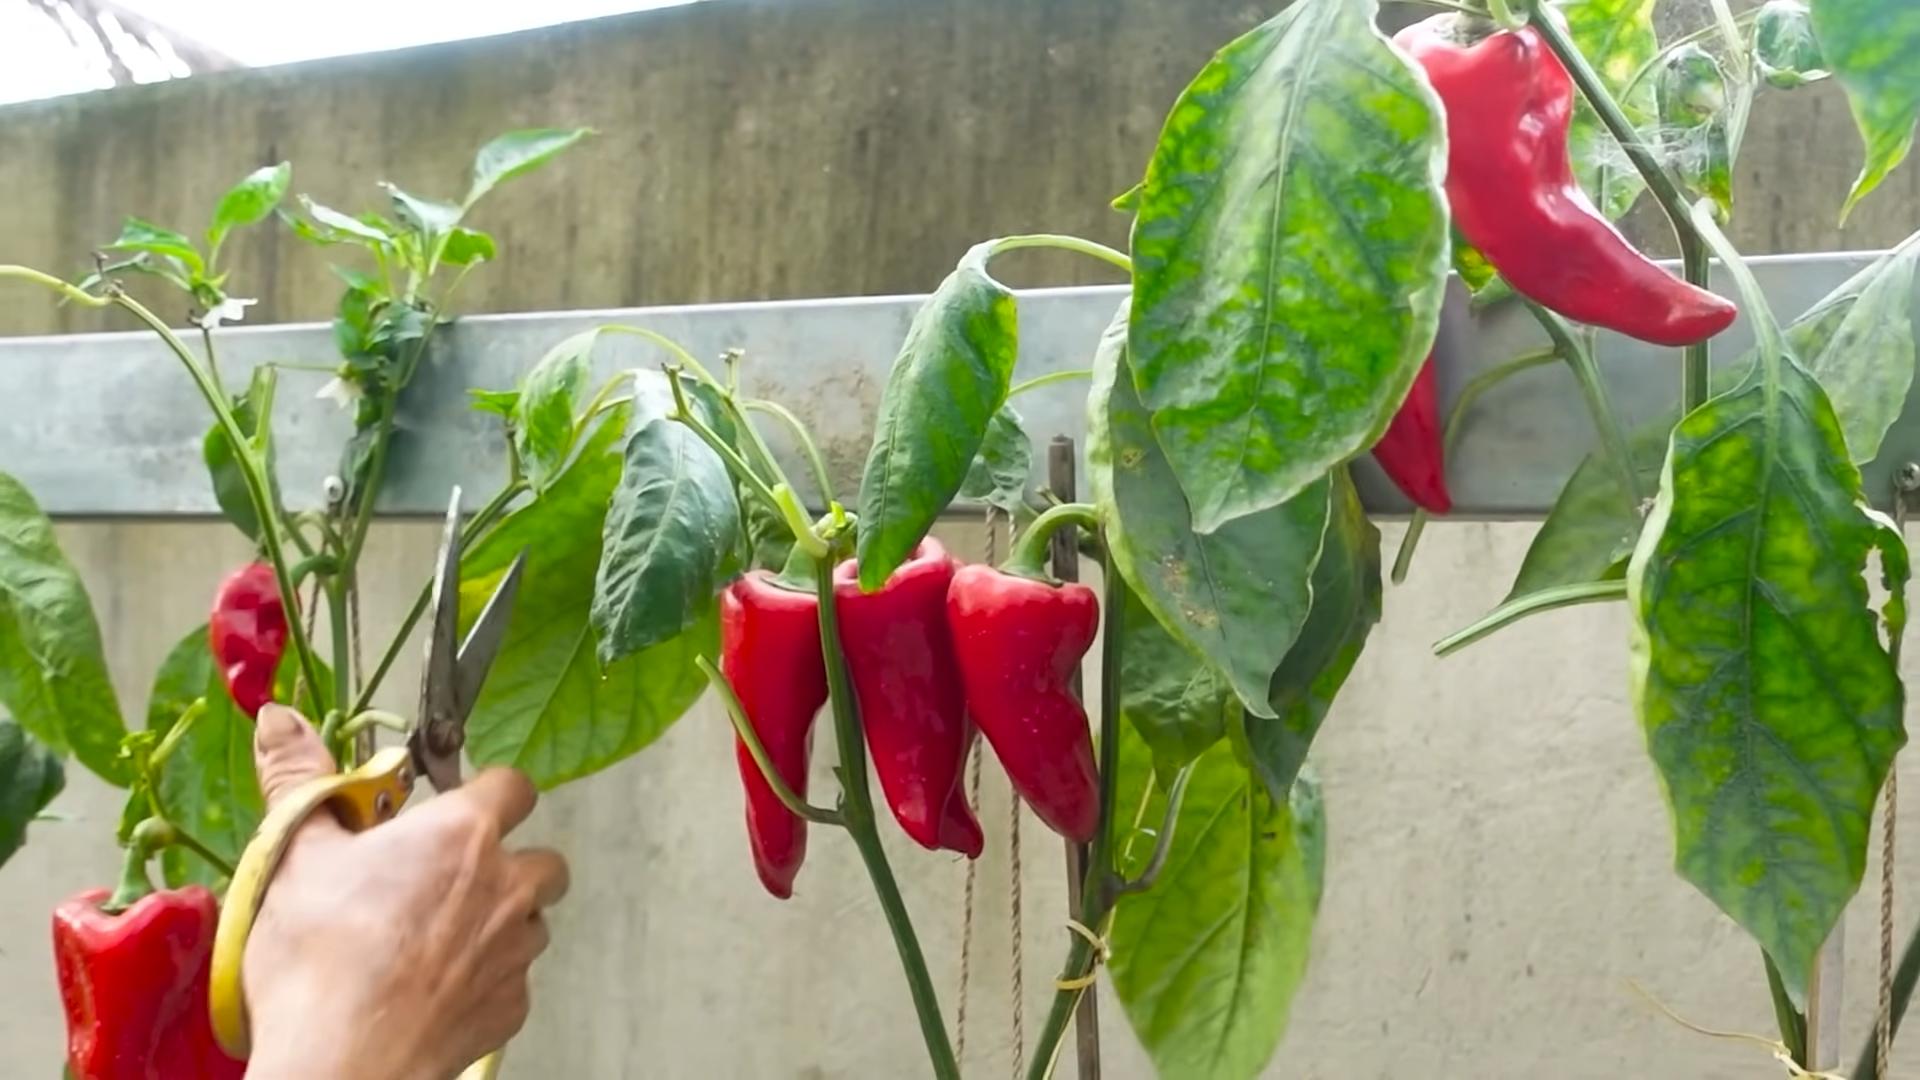
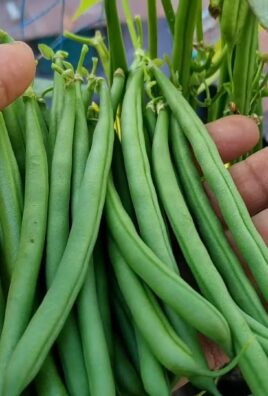
Harvesting Your Peppers
The moment you’ve been waiting for! Harvesting your peppers is the most rewarding part of the process.
1. **Timing:**
* Peppers are typically ready to harvest when they reach their mature size and color.
* The exact timing will depend on the variety of pepper you’re growing.
2. **Method:**
* Use a sharp knife or scissors to cut the peppers from the plant.
* Leave a small piece of stem attached to the pepper.
3. **Storage:**
* Fresh peppers can be stored in the refrigerator for up to a week.
* You can also dry, freeze, or pickle peppers for longer storage.
Troubleshooting Common Pepper Problems
Even with the best care, you may encounter some problems when growing peppers. Here are a few common issues and how to address them:
* **Blossom End Rot:** This is caused by a calcium deficiency in the soil. To prevent blossom end rot, amend the soil with calcium before planting and water regularly. You can also use a calcium spray.
* **Aphids:** These tiny insects can suck the sap from pepper plants, causing them to weaken and become stunted. To control aphids, spray the plants with insecticidal soap or neem oil.
* **Fungal Leaf Spot:** This disease causes brown or black spots to appear on the leaves of pepper plants. To prevent fungal leaf spot, avoid overhead watering and provide good air circulation. You can also use a fungicide.
* **Lack of Fruit Set:** If your pepper plants are producing flowers but not setting fruit, it could be due to a number of factors, including temperature stress, lack of pollination, or nutrient deficiencies. Make sure your plants are getting enough
Conclusion
So, there you have it! Growing hot peppers at home isn’t just a fun hobby; it’s a gateway to unlocking a world of flavor and spice right in your own backyard (or balcony!). We’ve covered everything from selecting the right seeds and nurturing seedlings to transplanting, providing essential care, and finally, harvesting your fiery bounty. But why is this DIY trick a must-try?
Firstly, the flavor. Store-bought hot peppers, while convenient, often lack the vibrant, nuanced taste that homegrown peppers possess. When you grow your own, you control the entire process, ensuring optimal growing conditions that translate to superior flavor. Imagine the difference between a generic, mass-produced hot sauce and one crafted with peppers you nurtured from seed – the latter bursts with freshness and complexity that the former simply can’t match.
Secondly, the variety. The world of hot peppers is vast and diverse, far beyond the limited selection typically found in grocery stores. From the fruity sweetness of habaneros to the scorching heat of ghost peppers and the unique smoky flavor of chipotles (made from smoked jalapenos), growing your own allows you to explore a spectrum of flavors and heat levels tailored to your personal preferences. You can cultivate rare and heirloom varieties that are simply unavailable commercially.
Thirdly, the satisfaction. There’s an undeniable sense of accomplishment that comes with nurturing a plant from a tiny seed to a thriving, pepper-laden specimen. It’s a tangible connection to nature and a rewarding experience that fosters a deeper appreciation for the food we consume. Plus, you get bragging rights!
But the benefits don’t stop there. Growing your own hot peppers is also a sustainable choice. You reduce your reliance on commercially grown produce, which often involves long-distance transportation and potentially harmful pesticides. By opting for organic growing methods, you can ensure that your peppers are not only delicious but also environmentally friendly.
Ready to take your hot pepper game to the next level? Consider these variations and suggestions:
* Hydroponics: For those with limited space or challenging soil conditions, hydroponic systems offer a controlled and efficient way to grow hot peppers indoors.
* Container Gardening: Even if you don’t have a traditional garden, you can successfully grow hot peppers in containers on your patio, balcony, or even indoors with sufficient lighting.
* Companion Planting: Enhance your pepper plants’ growth and deter pests by planting them alongside beneficial companions like basil, marigolds, and carrots.
* Fermentation: Transform your harvested peppers into delicious and complex fermented hot sauces, salsas, and other culinary creations.
* Drying and Powdering: Preserve your peppers for long-term use by drying them and grinding them into a potent chili powder.
Don’t be intimidated by the prospect of growing hot peppers at home. It’s a relatively straightforward process that yields incredible results. Start small, experiment with different varieties, and learn from your experiences. The most important thing is to get started and enjoy the journey.
We encourage you to embark on this exciting adventure and discover the joys of growing your own hot peppers. Once you’ve harvested your first batch, we’d love to hear about your experience! Share your tips, tricks, and favorite recipes in the comments below. Let’s build a community of passionate hot pepper growers and celebrate the fiery flavors of homegrown goodness! Remember, mastering the art of growing hot peppers at home is a journey, not a destination. Embrace the challenges, celebrate the successes, and savor the spice!
Frequently Asked Questions (FAQ)
What are the best hot pepper varieties for beginners?
For beginners, it’s best to start with relatively easy-to-grow varieties like jalapenos, serranos, and poblano peppers. These peppers are generally more forgiving and less demanding than some of the super-hot varieties. They also offer a good balance of flavor and heat, making them versatile for various culinary applications. Jalapenos are great for pickling, stuffing, and adding a mild kick to salsas. Serranos provide a bit more heat and are excellent in sauces and stir-fries. Poblanos are mild and flavorful, perfect for roasting and stuffing. As you gain experience, you can gradually explore more challenging and hotter varieties.
How much sunlight do hot pepper plants need?
Hot pepper plants thrive in full sun, requiring at least 6-8 hours of direct sunlight per day. Sunlight is crucial for photosynthesis, which is the process by which plants convert light energy into chemical energy for growth and fruit production. Insufficient sunlight can lead to stunted growth, reduced fruit yield, and less flavorful peppers. If you’re growing peppers indoors, you’ll need to supplement natural sunlight with grow lights to ensure they receive adequate illumination.
What kind of soil is best for growing hot peppers?
Hot pepper plants prefer well-draining soil that is rich in organic matter. The soil should be loose and airy to allow for proper root development. Avoid heavy clay soils that retain too much moisture, as this can lead to root rot. Amend your soil with compost, aged manure, or other organic materials to improve its drainage and fertility. A slightly acidic to neutral soil pH (around 6.0-7.0) is ideal for hot pepper growth.
How often should I water my hot pepper plants?
Water your hot pepper plants regularly, especially during hot and dry weather. The frequency of watering will depend on factors such as the weather, soil type, and size of the plant. Generally, you should water when the top inch of soil feels dry to the touch. Avoid overwatering, as this can lead to root rot and other problems. Water deeply and thoroughly, ensuring that the water reaches the roots. During periods of heavy rain, you may need to reduce watering frequency.
When should I fertilize my hot pepper plants?
Fertilize your hot pepper plants regularly throughout the growing season. Start with a balanced fertilizer (e.g., 10-10-10) when transplanting seedlings. Once the plants start to flower, switch to a fertilizer that is higher in phosphorus and potassium to promote fruit production. Avoid fertilizers that are too high in nitrogen, as this can lead to excessive foliage growth at the expense of fruit development. Follow the instructions on the fertilizer label for application rates and frequency. Organic fertilizers, such as compost tea and fish emulsion, are also excellent options.
How do I prevent pests and diseases from affecting my hot pepper plants?
Prevention is key when it comes to pests and diseases. Start by selecting disease-resistant varieties and providing your plants with optimal growing conditions. Inspect your plants regularly for signs of pests or diseases. Common pests that affect hot pepper plants include aphids, spider mites, and whiteflies. Control these pests with insecticidal soap, neem oil, or other organic pesticides. Diseases such as blossom end rot and fungal infections can be prevented by ensuring proper watering, good air circulation, and avoiding overhead watering. Remove any infected leaves or plants promptly to prevent the spread of disease.
How do I know when my hot peppers are ripe?
The color of the pepper is the best indicator of ripeness. Most hot peppers will change color from green to red, yellow, orange, or brown when they are ripe, depending on the variety. The pepper should also feel firm and slightly waxy to the touch. The time it takes for a pepper to ripen will vary depending on the variety and growing conditions.
Can I grow hot peppers indoors?
Yes, you can grow hot peppers indoors, but you’ll need to provide them with adequate light and warmth. Place your pepper plants near a sunny window that receives at least 6-8 hours of direct sunlight per day. If you don’t have enough natural light, supplement with grow lights. Use a well-draining potting mix and water regularly. Indoor pepper plants may require more frequent fertilization than outdoor plants.
How do I save seeds from my hot peppers?
To save seeds from your hot peppers, allow the peppers to fully ripen on the plant. Once they are ripe, carefully remove the seeds from the pepper and spread them out on a paper towel to dry. Allow the seeds to dry completely for several days before storing them in an airtight container in a cool, dark place. Label the container with the variety of pepper and the date of harvest.
Leave a Comment