
Purple Cabbage Gardening: Unleash the Vibrant Hues in Your Backyard
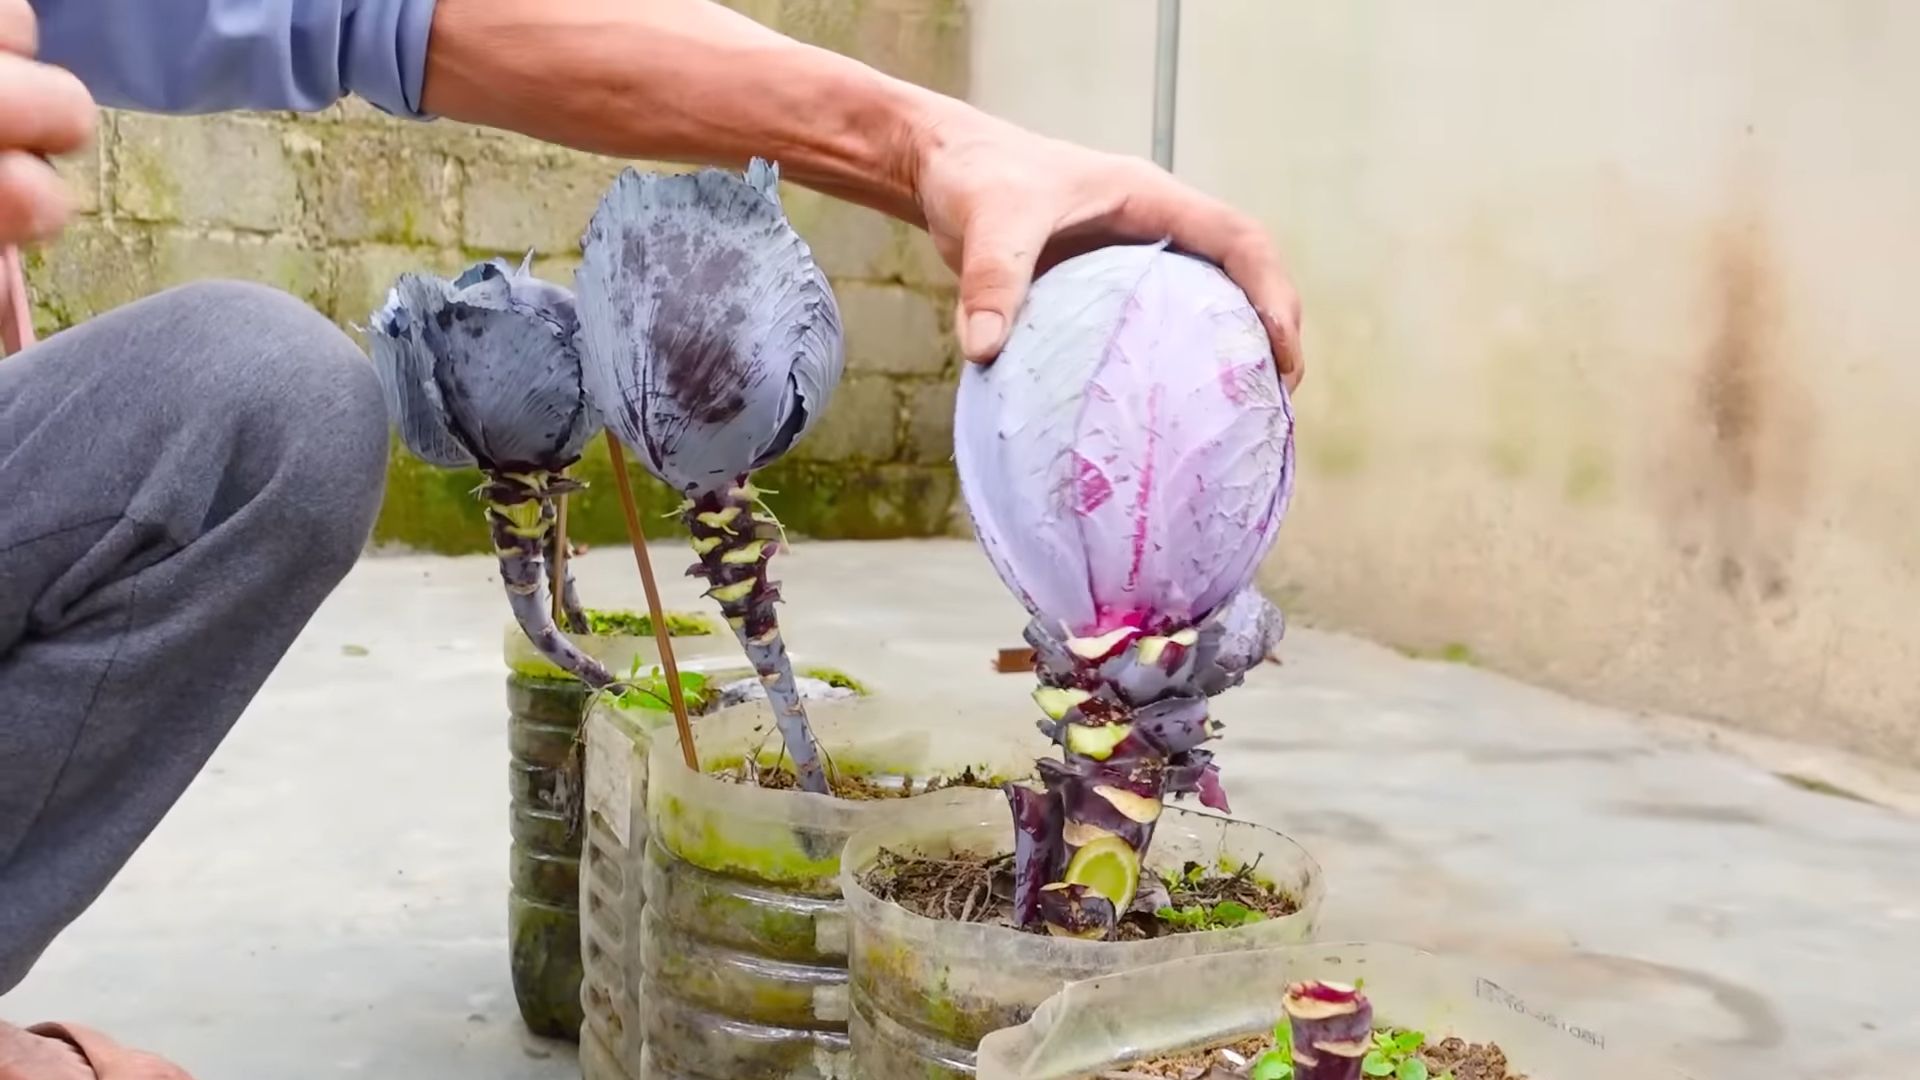
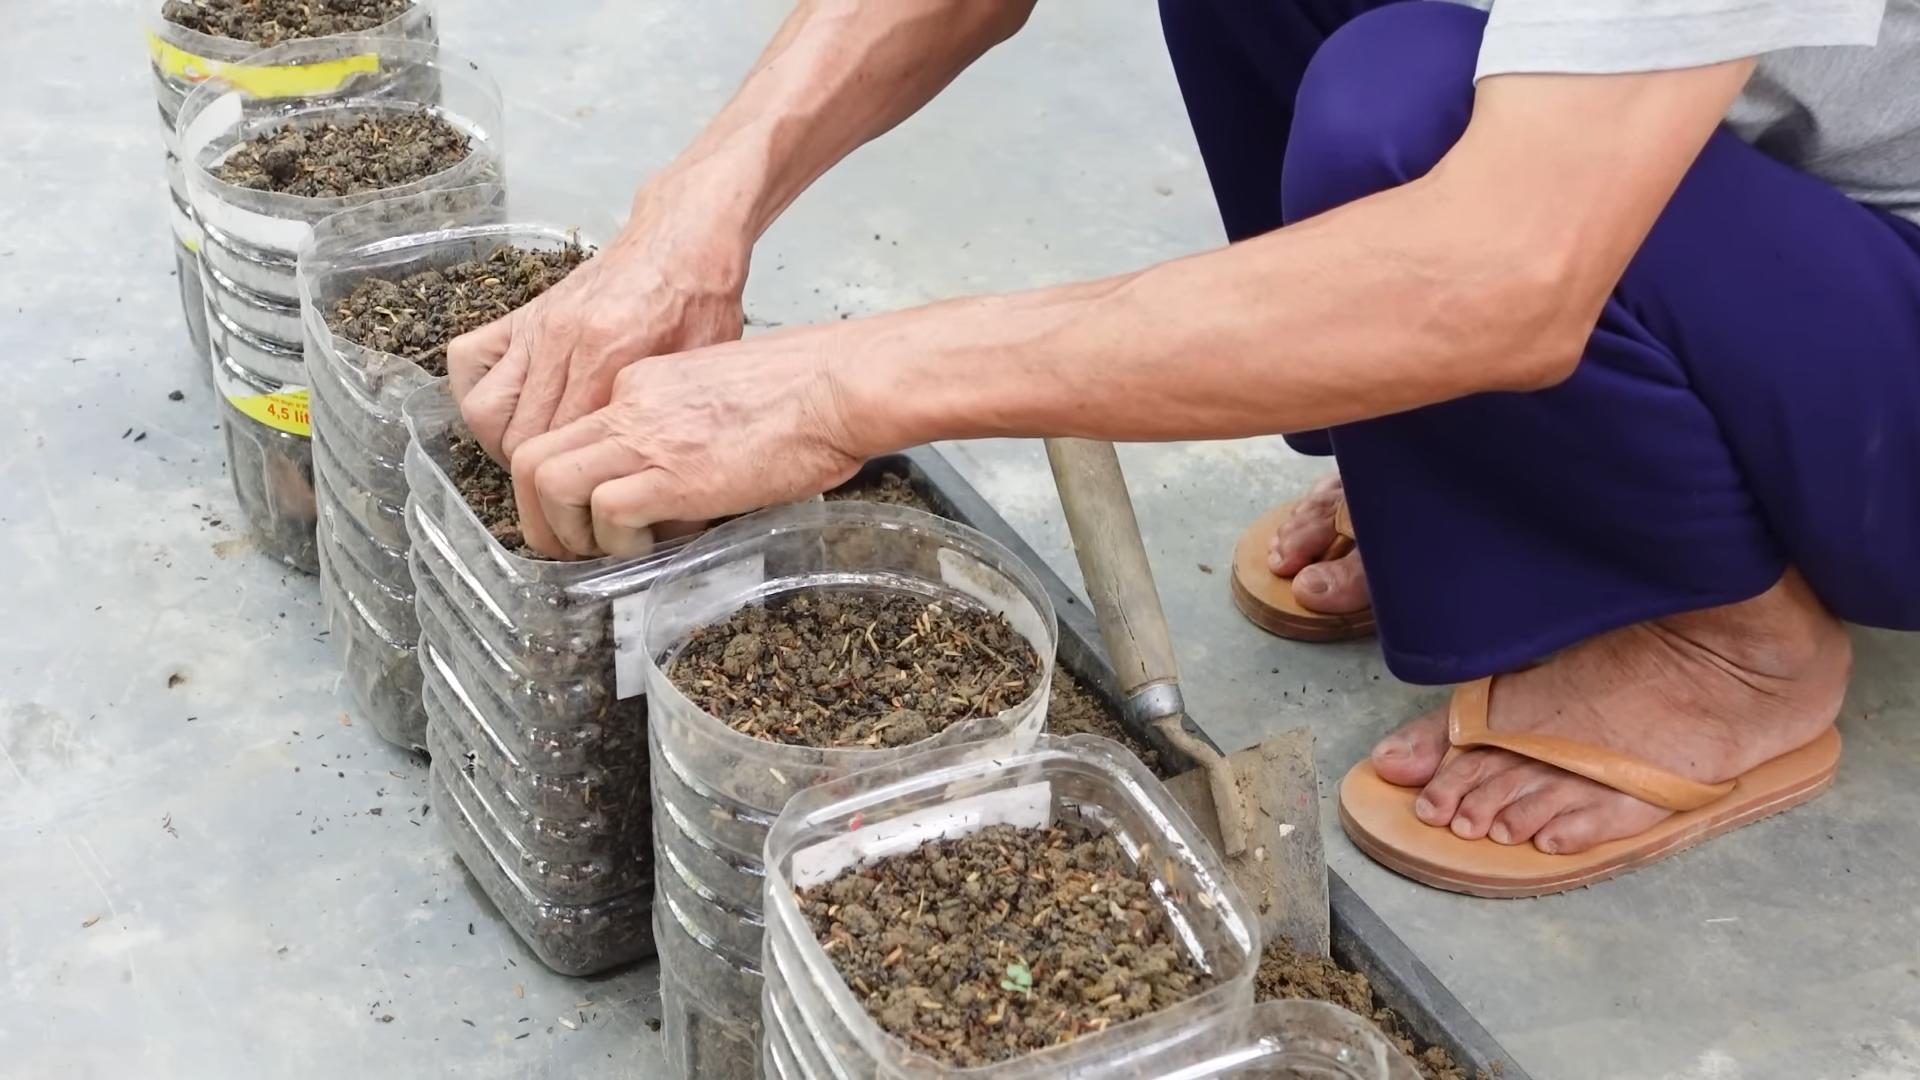
Purple cabbage gardening—it sounds almost magical, doesn’t it? The thought of vibrant, jewel-toned heads of cabbage flourishing in your own backyard, ready to be harvested and enjoyed, is incredibly rewarding. This isn’t just about growing a vegetable; it’s about connecting with nature, creating a beautiful landscape, and savoring the freshest, most flavorful food imaginable. And the best part? It’s easier than you think!
For centuries, cabbage has held a significant place in culinary traditions across the globe. From hearty stews to vibrant slaws, its versatility is undeniable. But growing your own purple cabbage offers a unique satisfaction, a direct connection to the source of your food. I remember my grandmother’s garden, bursting with life, and the pride she took in her perfectly formed purple cabbages. That memory inspired me to share these simple yet effective purple cabbage gardening tricks and DIY solutions.
Why Grow Your Own Purple Cabbage?
In today’s world, where concerns about food sourcing and quality are paramount, growing your own purple cabbage offers a powerful solution. You control the growing process, ensuring your vegetables are free from harmful pesticides and herbicides. Plus, the taste? Nothing beats the sweet, slightly peppery flavor of a homegrown purple cabbage. This article is your guide to mastering purple cabbage gardening, providing you with practical tips and DIY solutions to overcome common challenges and achieve a bountiful harvest. Get ready to transform your garden into a vibrant purple paradise!
DIY Paint Brush Organizer: A Step-by-Step Guide
I love painting, but keeping my paintbrushes organized has always been a nightmare! So, I decided to create my own organizer, and it was surprisingly easy. Here’s how I did it, and how you can too!
Gathering Your Supplies
- A sturdy wooden box (I found a great one at a thrift store!)
- Several small jars or containers (Mason jars work perfectly)
- Sandpaper (various grits, from coarse to fine)
- Wood glue
- Wood stain (your choice of color)
- Paintbrushes (obviously!)
- Cloth rags
- Measuring tape
- Pencil
- Drill with drill bits (if needed, depending on your box and jars)
- Screws (if needed)
- Optional: Decorative elements like knobs, stencils, or paint
Preparing the Wooden Box
- Clean the box: Before you start, give your wooden box a good cleaning. Wipe it down with a damp cloth to remove any dust or debris. Let it dry completely.
- Sand the box: Use sandpaper to smooth out any rough edges or imperfections on the box. Start with a coarser grit sandpaper and gradually move to a finer grit for a smoother finish. Pay close attention to the corners and edges.
- Stain the box (optional): If you want to change the color of your box, now is the time to apply wood stain. Follow the instructions on your stain’s packaging carefully. Apply a thin, even coat and let it dry completely. You may need multiple coats for a richer color. Remember to let each coat dry thoroughly before applying the next.
- Measure and mark: Measure the inside dimensions of your box and plan the placement of your jars. Use a pencil to lightly mark where you want to place each jar. This will help you ensure even spacing and a visually appealing arrangement.
Attaching the Jars
- Consider your attachment method: Depending on the size and shape of your jars and the material of your box, you have a few options for attaching the jars. You can use wood glue, screws, or a combination of both. For smaller jars, strong wood glue might be sufficient. For larger or heavier jars, screws will provide a more secure hold.
- Glue method: If using glue, apply a generous amount of wood glue to the bottom of each jar and to the corresponding marked area inside the box. Press the jars firmly into place and hold them for a few minutes to allow the glue to set. Use clamps or weights if necessary to ensure a strong bond. Let the glue dry completely according to the manufacturer’s instructions – this usually takes several hours.
- Screw method: If using screws, pre-drill pilot holes in the box to prevent the wood from splitting. Then, carefully screw the jars into place. Make sure the screws are long enough to provide a secure hold but not so long that they go through the bottom of the box.
- Combination method: For extra security, especially with heavier jars, you can combine both methods. Use glue to initially secure the jars, and then reinforce them with screws. This will create a very strong and durable attachment.
Finishing Touches
- Clean up any excess glue or stain: Once the glue and/or stain are completely dry, use sandpaper to smooth out any excess glue or stain that may have seeped out. Wipe away any dust with a clean cloth.
- Add decorative elements (optional): To personalize your organizer, you can add decorative elements such as knobs, stencils, or paint. Let your creativity shine! If using paint, make sure to apply a protective sealant afterwards to protect the paint and make it easier to clean.
- Fill with brushes: Once everything is dry and secure, carefully place your paintbrushes into the jars. Arrange them by size or type for easy access.
- Placement: Find a convenient spot in your workspace to place your new paint brush organizer. Make sure it’s easily accessible and won’t be knocked over easily.
Troubleshooting
Glue not holding:
If the glue isn’t holding the jars securely, you might need to use a stronger adhesive or reinforce the attachment with screws.
Jars too heavy:
If your jars are too heavy for glue alone, definitely use screws for added support.
Uneven spacing:
If the jars aren’t evenly spaced, you can carefully remove them and readjust their placement before the glue dries completely.
Box too small:
If your box is too small to accommodate all your jars, consider using a larger box or reducing the number of jars.
And there you have it! Your very own custom-made paint brush organizer. Enjoy the satisfaction of a job well done, and the added bonus of a much more organized workspace!
Conclusion
So there you have it! Our guide to successfully growing your own vibrant purple cabbage. This DIY approach to gardening offers a rewarding experience that goes beyond simply having delicious, homegrown vegetables. It connects you to the earth, teaches patience and observation, and provides a sense of accomplishment unlike anything else. Growing your own purple cabbage is a must-try for several reasons: it’s incredibly cost-effective in the long run, allows you to control the quality and freshness of your produce, and provides a unique sense of pride in knowing exactly where your food comes from. The vibrant color of purple cabbage adds a stunning pop to your garden, and the delicious flavor of homegrown vegetables is simply unparalleled.
Beyond the basic method outlined, there are numerous ways to personalize your purple cabbage gardening journey. Experiment with different companion planting techniques. Marigolds, for example, are known to deter pests that might target your cabbage. Consider using different soil amendments to optimize your soil’s drainage and nutrient content. Compost is a fantastic addition, providing a natural boost to your plants’ growth. You can also explore different varieties of purple cabbage; some mature faster than others, offering a wider range of harvest times. For those with limited space, consider vertical gardening techniques or growing your purple cabbage in containers. The possibilities are truly endless!
Don’t be intimidated by the prospect of growing your own purple cabbage. Even beginners can achieve fantastic results with a little patience and the right information. This DIY approach is far more accessible than you might think. The satisfaction of harvesting your own beautiful, healthy purple cabbage is an experience you won’t soon forget. So, grab some seeds, prepare your soil, and embark on this rewarding gardening adventure. We encourage you to try this method and share your experiences with us! Post pictures of your thriving purple cabbage plants on social media using #PurpleCabbageGardening and tag us – we’d love to see your success!
Remember, the journey of growing your own food is as much about the process as it is about the end result. Embrace the challenges, celebrate the successes, and enjoy the incredible taste of homegrown purple cabbage. This is more than just gardening; it’s a connection to nature and a celebration of self-sufficiency.
Frequently Asked Questions
What type of soil is best for growing purple cabbage?
Purple cabbage thrives in loose, well-draining soil that is rich in organic matter. Amend heavy clay soils with compost or other organic materials to improve drainage. Sandy soils may benefit from the addition of peat moss or other soil amendments to retain moisture.
How much sunlight does purple cabbage need?
Purple cabbage needs at least six hours of direct sunlight per day to grow properly. Choose a location in your garden that receives ample sunlight, especially during the crucial growing stages.
When is the best time to plant purple cabbage?
The best time to plant purple cabbage depends on your climate. In cooler climates, it’s best to start seeds indoors 6-8 weeks before the last expected frost. In warmer climates, you can direct sow seeds after the last frost or start transplants. Always check your local frost dates for the most accurate planting schedule.
How often should I water my purple cabbage?
Water your purple cabbage regularly, especially during dry periods. Aim to keep the soil consistently moist but not waterlogged. Overwatering can lead to root rot, while underwatering can stunt growth. The frequency of watering will depend on your climate and soil type.
What are some common pests and diseases that affect purple cabbage?
Common pests include aphids, cabbage worms, and slugs. Diseases include black rot and downy mildew. Regularly inspect your plants for signs of pests or diseases and take appropriate action, such as using organic pest control methods or removing affected plants.
How long does it take for purple cabbage to mature?
The time it takes for purple cabbage to mature varies depending on the variety, but generally ranges from 70 to 90 days from planting. Check the seed packet or plant tag for specific maturity information.
Can I save seeds from my purple cabbage to plant next year?
While you can technically save seeds from your purple cabbage, it’s generally not recommended for hybrid varieties. Hybrid varieties may not produce true-to-type plants from saved seeds. If you want to save seeds, choose an open-pollinated variety.
What can I do with my harvested purple cabbage?
Purple cabbage is incredibly versatile! You can use it in salads, coleslaws, stir-fries, kimchi, and many other dishes. It adds a beautiful color and a slightly sweet and peppery flavor to your culinary creations. You can also ferment it to make sauerkraut.
My purple cabbage leaves are yellowing. What could be the cause?
Yellowing leaves can indicate several issues, including nutrient deficiencies (especially nitrogen), overwatering, underwatering, or pest infestations. Inspect your plants carefully to determine the cause and take appropriate corrective measures.
Where can I buy purple cabbage seeds or seedlings?
You can purchase purple cabbage seeds or seedlings from many garden centers, nurseries, online retailers, and even some larger grocery stores. Choose high-quality seeds or healthy seedlings for the best results.

Leave a Comment