
Easy Strawberry Gardening: Your Guide to a Sweet Harvest
Easy strawberry gardening—it sounds idyllic, doesn’t it? Sun-drenched berries bursting with flavor, right from your own backyard. But the reality can sometimes feel a bit daunting. That’s why I’m thrilled to share my Easy Strawberry Gardening tips and tricks with you – a collection of DIY solutions and proven techniques to help you achieve that perfect, juicy harvest, no matter your experience level.
For centuries, strawberries have held a special place in cultures worldwide, symbolizing love, prosperity, and even a touch of mischief. From the ancient Romans who cultivated wild varieties to the modern-day obsession with gourmet strawberry varieties, these little gems have captivated us all. But growing your own strawberries doesn’t require a degree in horticulture or acres of land. In fact, with a few simple Easy Strawberry Gardening techniques, you can transform a small patch of your garden—or even a container on your balcony—into a bountiful berry patch.
Why Grow Your Own?
Let’s be honest, store-bought strawberries, while convenient, often lack the intense flavor and sweetness of homegrown ones. Plus, there’s an undeniable satisfaction in nurturing a plant from seed to succulent fruit. Knowing exactly where your food comes from, and the joy of sharing your harvest with friends and family, makes Easy Strawberry Gardening a truly rewarding experience. This article will equip you with the knowledge and confidence to tackle this delightful project, guiding you through everything from selecting the right variety to harvesting your delicious bounty. So, let’s get started on your journey to Easy Strawberry Gardening success!
Quick Bag Tying Hacks: Mastering the Art of the Knot
Let’s face it, tying plastic bags securely and quickly can be a surprisingly frustrating task. But fear not! I’ve got some seriously effective bag-tying hacks that will make your life easier. These techniques work for grocery bags, trash bags, and even those pesky bread bags. Get ready to become a bag-tying ninja!
Section 1: The Grocery Bag Challenge
Grocery bags are notorious for their flimsy handles and tendency to unravel. Here’s how to conquer them:
- Gather your supplies: You’ll only need the grocery bag itself!
- Choose your method: I’ll show you two foolproof methods below.
Method 1: The Double Knot
- Lay the bag flat on a surface. Grab both handles.
- Tie a simple knot, pulling it tight. Don’t worry about making it perfect at this stage.
- Now, tie another knot directly above the first one. This double knot creates significantly more security.
- Give both knots a final tug to ensure they’re snug. You’ve now got a super secure closure!
Method 2: The Twist and Tuck
- Hold the bag by its handles. Twist the handles together tightly several times, creating a long, twisted rope.
- Tuck the twisted end of the handles under itself, creating a loop.
- Pull the loop tight. This creates a secure knot that’s surprisingly strong.
- For extra security, you can tuck the loose end of the loop back into the bag itself.
Section 2: Trash Bag Triumph
Trash bags are a different beast altogether. Their size and material require a slightly different approach. Here’s how to master them:
- Assess your bag: Note the thickness and size of the bag. Thicker bags might need a more robust tying method.
- Prepare for action: Make sure the bag is mostly full, but not overflowing.
Method 1: The Overhand Knot
- Gather the top of the trash bag together, creating a bundle.
- Bring one side of the bag over the other, creating a loop.
- Pull the loose end through the loop, creating a simple overhand knot.
- Tighten the knot firmly. For extra security, repeat steps 2 and 3 for a double overhand knot.
- Important Tip: If the bag is particularly heavy, consider using a sturdy twist tie or rubber band in addition to the knot.
Method 2: The Square Knot
- Gather the top of the trash bag, creating a bundle.
- Separate the bundle into two distinct sections.
- Tie a simple overhand knot with one section, leaving a loop.
- Take the second section and pass it over and then under the loop, creating a square knot.
- Pull both ends tight to secure the knot. This method is excellent for heavier trash bags.
Section 3: Beyond the Basics: Bread Bag Brilliance
Those tiny bread bags are notorious for their frustrating closures. Here’s how to tame them:
- Assess the closure: Some bread bags have twist ties; others are simply open. Adapt the method accordingly.
- Prepare the bag: Ensure the bread is completely inside the bag before sealing.
Method 1: The Twist Tie Technique (if applicable)
- Gather the top of the bread bag.
- Twist the bag tightly several times to compact the contents.
- Secure the twist with the provided twist tie. Pull it tight and ensure it’s securely fastened.
Method 2: The Rubber Band Rescue
- Gather the top of the
Let’s face it, tying plastic bags securely and quickly can be a surprisingly frustrating task. But fear not! I’ve got some seriously effective bag-tying hacks that will make your life easier. These techniques work for grocery bags, trash bags, and even those pesky bread bags. Get ready to become a bag-tying ninja!
Section 1: The Grocery Bag Challenge
Grocery bags are notorious for their flimsy handles and tendency to unravel. Here’s how to conquer them:
- Gather your supplies: You’ll only need the grocery bag itself!
- Choose your method: I’ll show you two foolproof methods below.
Method 1: The Double Knot
- Lay the bag flat on a surface. Grab both handles.
- Tie a simple knot, pulling it tight. Don’t worry about making it perfect at this stage.
- Now, tie another knot directly above the first one. This double knot creates significantly more security.
- Give both knots a final tug to ensure they’re snug. You’ve now got a super secure closure!
Method 2: The Twist and Tuck
- Hold the bag by its handles. Twist the handles together tightly several times, creating a long, twisted rope.
- Tuck the twisted end of the handles under itself, creating a loop.
- Pull the loop tight. This creates a secure knot that’s surprisingly strong.
- For extra security, you can tuck the loose end of the loop back into the bag itself.
Section 2: Trash Bag Triumph
Trash bags are a different beast altogether. Their size and material require a slightly different approach. Here’s how to master them:
- Assess your bag: Note the thickness and size of the bag. Thicker bags might need a more robust tying method.
- Prepare for action: Make sure the bag is mostly full, but not overflowing.
Method 1: The Overhand Knot
- Gather the top of the trash bag together, creating a bundle.
- Bring one side of the bag over the other, creating a loop.
- Pull the loose end through the loop, creating a simple overhand knot.
- Tighten the knot firmly. For extra security, repeat steps 2 and 3 for a double overhand knot.
- Important Tip: If the bag is particularly heavy, consider using a sturdy twist tie or rubber band in addition to the knot.
Method 2: The Square Knot
- Gather the top of the trash bag, creating a bundle.
- Separate the bundle into two distinct sections.
- Tie a simple overhand knot with one section, leaving a loop.
- Take the second section and pass it over and then under the loop, creating a square knot.
- Pull both ends tight to secure the knot. This method is excellent for heavier trash bags.
Section 3: Beyond the Basics: Bread Bag Brilliance
Those tiny bread bags are notorious for their frustrating closures. Here’s how to tame them:
- Assess the closure: Some bread bags have twist ties; others are simply open. Adapt the method accordingly.
- Prepare the bag: Ensure the bread is completely inside the bag before sealing.
Method 1: The Twist Tie Technique (if applicable)
- Gather the top of the bread bag.
- Twist the bag tightly several times to compact the contents.
- Secure the twist with the provided twist tie. Pull it tight and ensure it’s securely fastened.
Method 2: The Rubber Band Rescue
- Gather the top of the bread bag.
- Twist the bag tightly several times to compact the contents.
- Secure the twist with a rubber band. Stretch the rubber band around the twisted top and ensure it’s snug.
- Pro Tip: Use a small rubber band for a tighter seal.
Method 3: The Fold and Tuck
- Fold the top of the bread bag over itself several times, creating a layered flap.
- Tuck the folded flap under itself, creating a secure closure.
- Press down firmly to ensure a tight seal. This method is best for bags that are not completely full.
Section 4: Advanced Bag Tying Techniques
Once you’ve mastered the basics, you can explore these advanced techniques for even more efficient bag tying:
- Practice makes perfect: The more you practice these techniques, the faster and more efficient you’ll become.
- Experiment with different knots: There are many different types of knots. Experiment to find the ones that work best for you and the type of bag you’re using.
- Consider using tools: For very large or heavy bags, consider using tools like twist ties, rubber bands, or even clips to help secure the closure.
- Think about bag material: The material of the bag will affect the best knotting technique. Thicker bags might require stronger knots.
With a little practice, you’ll be tying bags like a pro in no time! Happy bag tying!
Conclusion
So there you have it – your guide to effortless strawberry gardening! This DIY approach isn’t just about growing delicious strawberries; it’s about reclaiming control over your food source, enjoying the satisfaction of nurturing plants from seed to succulent fruit, and experiencing the unparalleled taste of homegrown berries. This easy strawberry gardening method is a must-try for anyone, regardless of experience level. It simplifies the often-daunting task of growing strawberries, making it accessible to even the busiest urban gardener or the most novice green thumb. The rewards – juicy, sun-ripened strawberries bursting with flavor – far outweigh the minimal effort required.
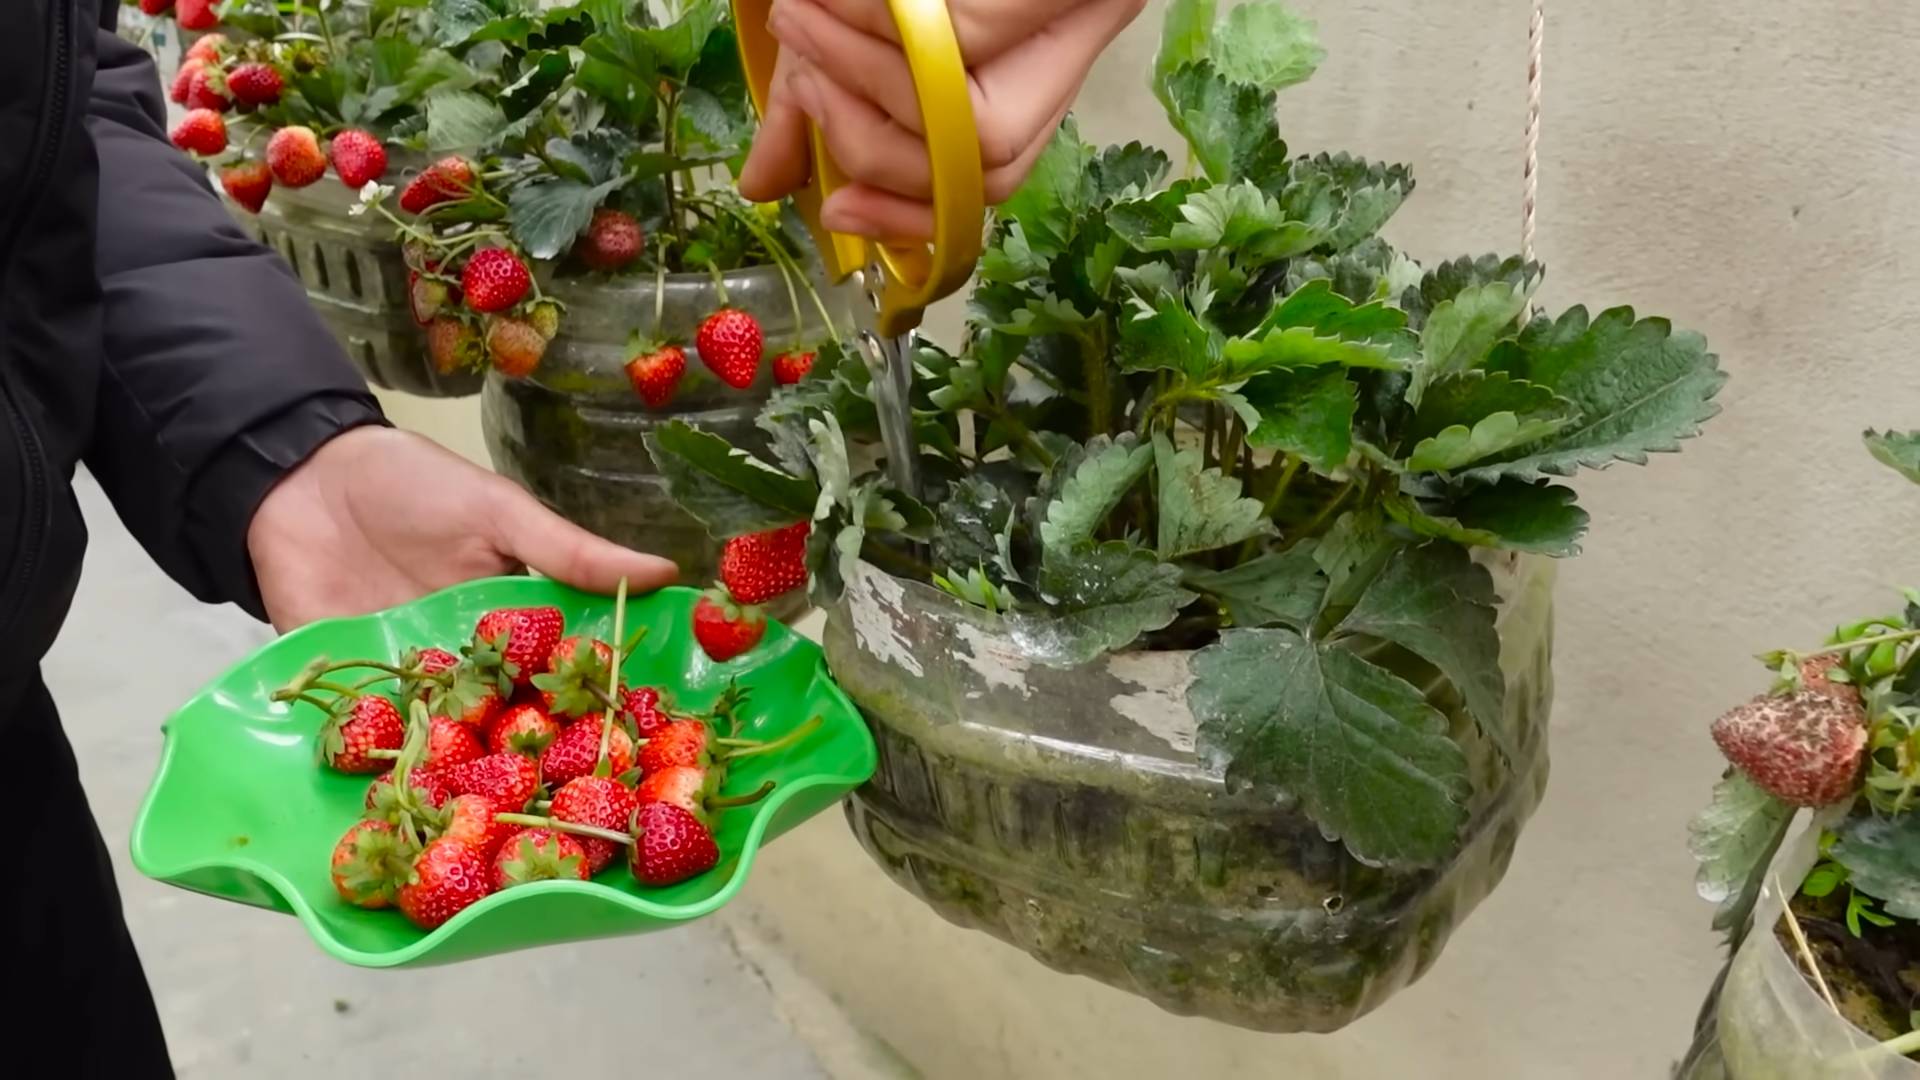
Beyond the basic method outlined, the possibilities for customization are endless. Experiment with different strawberry varieties to discover your favorites. Some varieties are better suited to specific climates, so research what thrives best in your region. Consider companion planting; basil, for example, is known to deter pests and enhance the flavor of strawberries. You can also explore different growing mediums. While we focused on raised beds for their ease of management, you can adapt this method to hanging baskets, containers, or even vertical gardening systems. Get creative and find what works best for your space and lifestyle. Perhaps you’ll even try a strawberry tower for maximum yield in a minimal footprint!
Don’t be afraid to experiment with different mulching techniques. Straw is a classic choice, but wood chips or even shredded newspaper can also work well to retain moisture and suppress weeds. Remember, consistent watering is key, especially during dry spells. Regularly check the moisture level of your soil and adjust your watering schedule accordingly. And finally, don’t forget the joy of sharing! Once your plants start producing, invite friends and family over to enjoy the fruits of your labor (literally!). The taste of homegrown strawberries is an experience everyone should share.
We strongly encourage you to embark on this easy strawberry gardening journey. It’s a rewarding experience that connects you with nature, provides fresh, healthy food, and offers a sense of accomplishment that’s hard to match. Share your experiences, photos, and tips with us! We’d love to hear about your successes and learn from any challenges you encounter. Let’s build a community of easy strawberry gardening enthusiasts, sharing knowledge and celebrating the sweet rewards of our efforts. Join us and let’s grow together!
Frequently Asked Questions
What type of strawberries are best for beginners?
For beginners, June-bearing strawberries are generally recommended. They produce a large crop once a year, making them easier to manage than everbearing or day-neutral varieties. Look for disease-resistant varieties that are well-suited to your climate.
How much sunlight do strawberries need?
Strawberries thrive in full sun, meaning at least 6-8 hours of direct sunlight per day. Choose a location in your garden that receives ample sunlight. If you have limited space, consider using supplemental grow lights to ensure your plants get enough light.
How often should I water my strawberries?
Consistent watering is crucial, especially during dry periods. Aim to keep the soil consistently moist but not waterlogged. The frequency of watering will depend on your climate and soil type. Check the soil moisture regularly and adjust your watering schedule accordingly. A good rule of thumb is to water deeply but less frequently.
What are some common strawberry pests and diseases?
Common strawberry pests include aphids, spider mites, and slugs. Diseases include gray mold (botrytis) and powdery mildew. Regularly inspect your plants for signs of pests or diseases and take appropriate action. Good sanitation practices, such as removing weeds and diseased leaves, can help prevent problems.
Can I grow strawberries in pots or containers?
Absolutely! Growing strawberries in containers is a great option for those with limited garden space. Choose containers that are at least 12 inches deep and wide to allow for proper root development. Ensure adequate drainage to prevent root rot.
When can I expect my first harvest?
For June-bearing strawberries, you can expect your first harvest about a year after planting. Everbearing and day-neutral varieties will produce fruit throughout the growing season, but the yield may be smaller per harvest.
What should I do with my strawberry harvest?
The possibilities are endless! Enjoy them fresh, make delicious jams and jellies, bake a strawberry pie, or freeze them for later use. The sweet taste of homegrown strawberries is a reward in itself.
What if my strawberries aren’t producing many fruits?
Several factors can affect strawberry production. Insufficient sunlight, inadequate watering, nutrient deficiencies, or pest infestations can all reduce yields. Review your gardening practices and address any potential issues. Consider soil testing to determine nutrient levels.
Is this easy strawberry gardening method suitable for all climates?
While the basic principles apply across various climates, you’ll need to adapt the method to your specific conditions. Choose strawberry varieties that are well-suited to your region’s climate and adjust watering and mulching techniques accordingly. Researching your local climate and suitable strawberry varieties is crucial for success.
Where can I find more information on easy strawberry gardening?
Numerous resources are available online and in libraries. Search for information on strawberry cultivation, specific varieties suitable for your region, and pest and disease management. Local gardening clubs and extension offices can also provide valuable advice and support.


Leave a Comment