
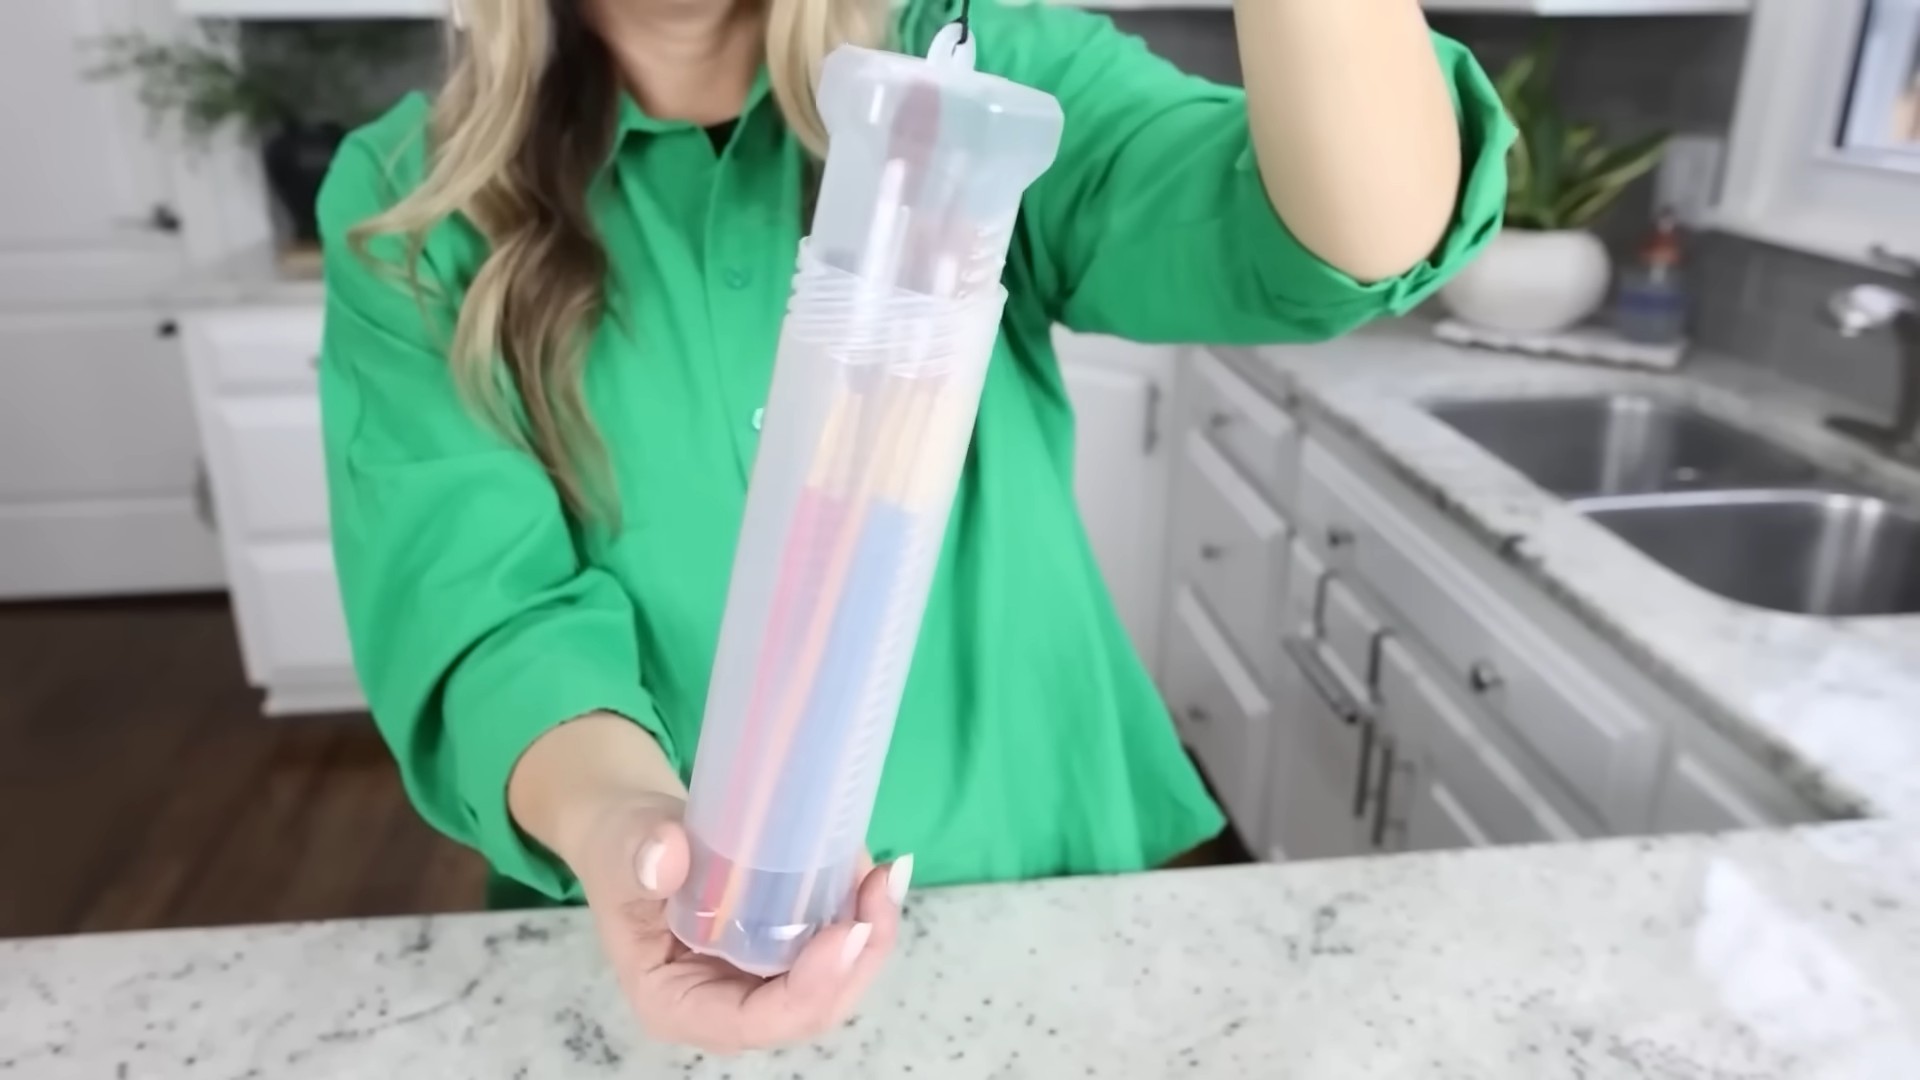
DIY Paint Brush Organizer
I love gardening, but let’s be honest, one of the least glamorous parts is keeping all my tools organized. Spilled paint, tangled brushes, and the general chaos of a messy shed or garage can quickly dampen even the most enthusiastic gardener’s spirit. That’s why I’m so excited to share this fantastic DIY paint brush organizer project with you! It’s a simple, inexpensive, and incredibly effective solution to a common gardening problem.
The history of gardening tools is rich and varied, spanning centuries and cultures. From the simple hand trowel to the more complex watering cans, each tool reflects the evolution of our relationship with the natural world. But no matter how sophisticated our tools become, the need for efficient organization remains constant. A well-organized workspace is not just aesthetically pleasing; it’s crucial for productivity and enjoyment.
This DIY paint brush organizer isn’t just about tidiness; it’s about preserving your valuable tools. Proper storage protects your brushes from damage, ensuring they last longer and perform better. Imagine the frustration of reaching for your favorite brush only to find it bent or damaged because it was haphazardly thrown into a drawer! This simple project will help you avoid that frustration and keep your brushes in top condition.
Whether you’re a seasoned gardener with a vast collection of tools or a beginner just starting out, this DIY paint brush organizer is a must-have. It’s a project that anyone can tackle, regardless of their DIY skills, and the results are truly rewarding. So, let’s get started and create a more organized and efficient gardening space!

Building a Custom Bookshelf from Reclaimed Wood
I love the look of reclaimed wood, and I’ve always wanted a unique bookshelf. So, I decided to build my own! This project took a bit of time, but the result is a beautiful, one-of-a-kind piece of furniture that I’m incredibly proud of. Here’s how I did it:
Gathering Your Materials
- Reclaimed wood planks (I used about 10, varying in width and length – aim for a mix of interesting textures and colors!)
- Wood glue
- Wood screws (various lengths, depending on plank thickness)
- Wood filler
- Sandpaper (various grits, starting with coarser and moving to finer)
- Wood stain (your choice of color – I went with a dark walnut)
- Polyurethane sealant (clear)
- Measuring tape
- Level
- Drill with various drill bits
- Safety glasses
- Work gloves
- Clamps (lots of them!)
- Putty knife
- Paintbrushes (for stain and sealant)
- Drop cloths or newspaper to protect your work area
Preparing the Reclaimed Wood
1. Clean the wood: Before you start, give your reclaimed wood planks a good cleaning. I used a stiff brush and a damp cloth to remove any loose dirt, debris, or old paint. Let them dry completely. This step is crucial for a good finish.
2. Assess and cut: Once dry, lay out your planks to visualize your bookshelf design. You’ll likely need to cut some planks to size to create the shelves and sides. Use a measuring tape and a saw (circular saw or hand saw, depending on your comfort level) to make precise cuts. Remember to always wear safety glasses when using power tools!
3. Sanding is key: Sand each plank thoroughly, starting with a coarser grit sandpaper (around 80 grit) to remove any rough spots or splinters. Gradually move to finer grits (120, then 220) for a smooth finish. This step is essential for a professional-looking bookshelf. Pay special attention to the edges.
Assembling the Bookshelf
1. Building the sides: I decided to create the sides of my bookshelf using two longer planks, standing vertically. I carefully measured and marked where I wanted the shelves to sit.
2. Attaching the shelves: Using wood glue and screws, I attached the shelves to the sides. I pre-drilled pilot holes to prevent the wood from splitting. This is important, especially with reclaimed wood, which can be more brittle than new lumber. I used clamps to hold everything in place while the glue dried. This is where having plenty of clamps comes in handy!
3. Filling gaps and imperfections: Reclaimed wood often has gaps and imperfections. I used wood filler to fill any noticeable gaps or holes between the planks. Let the filler dry completely, then sand it smooth.
4. Reinforcing the structure: For extra stability, I added some support pieces to the back of the bookshelf, screwing them into the sides and shelves. This helps prevent the bookshelf from racking (leaning).
Finishing Touches
1. Applying the stain: Once everything is dry and sanded smooth, it’s time to apply the stain. I used a dark walnut stain, applying it evenly with a brush, following the grain of the wood. Let it dry completely according to the manufacturer’s instructions. You may need multiple coats for even coverage.
2. Sealing the wood: After the stain has dried, apply a clear polyurethane sealant. This protects the wood from moisture and scratches, extending the life of your bookshelf. Again, apply multiple coats for optimal protection, allowing each coat to dry completely before applying the next.
3. Final sanding (optional): After the sealant has dried, you might want to do a very light sanding with very fine-grit sandpaper (320 or higher) to smooth out any imperfections in the finish. This is optional, but it can make a difference in the final look.
Placement and Enjoyment
1. Find the perfect spot: Once your bookshelf is completely dry and finished, find the perfect spot in your home to display it.
2. Fill it with books: The most rewarding part – fill your beautiful, handcrafted bookshelf with your favorite books and enjoy your creation!
Tips and Tricks:
- Take your time. This is a project that benefits from careful attention to detail.
- Don’t be afraid to experiment with different designs. The beauty of a DIY project is that you can customize it to your liking.
- If you’re unsure about any step, consult online resources or ask for help from a more experienced DIYer.
- Safety first! Always wear safety glasses and gloves when using power tools.
Troubleshooting:
- Wood splitting: If the wood splits while screwing, use a smaller drill bit for the pilot hole.
- Uneven stain: Make sure to apply the stain evenly and in thin coats to avoid blotchiness.
- Bubbles in sealant: Apply the sealant in thin coats and avoid working too quickly to prevent bubbles.
Conclusion
So there you have it – a simple, effective, and incredibly satisfying DIY paint brush organizer! This project proves that you don’t need to spend a fortune on fancy storage solutions to keep your painting supplies neat and tidy. By repurposing everyday items, you not only save money but also reduce waste, contributing to a more sustainable crafting practice. The entire process is quick, requiring minimal tools and materials, making it perfect for a weekend project or a quick mid-week tidy-up. The end result? A beautifully organized workspace that inspires creativity and makes finding the perfect brush a breeze. This DIY paint brush organizer is a must-try for any artist, crafter, or DIY enthusiast, regardless of their skill level. The sense of accomplishment from creating something functional and aesthetically pleasing from recycled materials is truly rewarding. Plus, it’s incredibly customizable!
Beyond the basic design outlined in this guide, the possibilities are endless. Experiment with different sized containers to accommodate various brush sizes and types. Consider using decorative washi tape or paint to personalize your organizer and match your existing workspace aesthetic. If you’re feeling particularly ambitious, try incorporating additional compartments for other painting essentials like palettes, sponges, or cleaning cloths. You could even use different materials entirely – think repurposed tin cans, mason jars, or even a creatively decorated shoe organizer hung on the wall. The key is to let your creativity flow and adapt the design to your specific needs and preferences. Don’t be afraid to experiment with different materials and techniques to create a truly unique and personalized DIY paint brush organizer.
We strongly encourage you to try this project and share your experience with us! Show us your creations on social media using the hashtag #DIYPaintBrushOrganizer. We’d love to see your unique variations and be inspired by your ingenuity. Whether you’re a seasoned artist or a beginner just starting out, this project offers a fantastic opportunity to declutter your workspace, enhance your creativity, and experience the satisfaction of a successful DIY endeavor. Remember, the best part about DIY projects is the freedom to personalize and adapt them to your own style and needs. So grab those recycled containers, gather your supplies, and get ready to transform your chaotic paint brush collection into a beautifully organized masterpiece!
Frequently Asked Questions
What types of containers work best for this DIY paint brush organizer?
Almost any container that’s deep enough to hold your paintbrushes will work! We recommend using containers that are sturdy and easy to clean, such as plastic containers, glass jars, or even repurposed tin cans. The size of the container will depend on the size and number of brushes you need to store. Consider using a variety of sizes to accommodate different brush types.
Can I use this organizer for other art supplies besides paint brushes?
Absolutely! This organizer is versatile enough to hold a variety of art supplies. You can use it to store pencils, markers, pens, sculpting tools, or even small craft supplies. The key is to choose containers that are appropriately sized for the items you want to store.
What if I don’t have all the materials listed in the instructions?
Don’t worry! The beauty of DIY projects is their adaptability. If you don’t have a specific material listed, feel free to substitute it with something similar. For example, if you don’t have foam, you could use fabric scraps or even crumpled newspaper to cushion the bottom of your containers. Get creative and use what you have on hand!
How do I clean my DIY paint brush organizer?
Cleaning your organizer will depend on the materials you used. If you used plastic containers, simply wipe them down with a damp cloth. If you used glass jars, you can wash them with soap and water. For tin cans, make sure they are thoroughly cleaned and dried before storing your brushes to prevent rust.
Is this project suitable for beginners?
Absolutely! This project is incredibly beginner-friendly. It requires minimal tools and skills, making it a perfect project for those new to DIY. The instructions are straightforward, and the process is simple and easy to follow. Even if you’ve never done a DIY project before, you’ll be able to create a beautiful and functional DIY paint brush organizer with ease.
What if my paint brushes are different sizes and shapes?
That’s perfectly fine! The beauty of this project is its adaptability. You can use different sized containers to accommodate your various brush sizes. You might even consider using smaller containers within larger ones to create customized compartments for different brush types. Don’t be afraid to get creative and find a solution that works best for your specific collection.
Can I make this organizer more decorative?
Yes! Personalization is key to any DIY project. Once you’ve assembled your basic organizer, you can decorate it to match your style and workspace. Consider using paint, washi tape, stickers, or even fabric scraps to add a personal touch. You can also use decorative containers to begin with, adding a touch of elegance to your organization system.
Where can I find the materials for this project?
Many of the materials for this project can be found around your home. You can repurpose old containers, jars, or cans. Additional materials like foam or fabric scraps can often be found at craft stores or even dollar stores. The beauty of this project is its use of readily available and often recycled materials.


Leave a Comment