
Rosemary Growing Small Spaces
Rosemary Growing Small Spaces – Have you always dreamed of fresh rosemary for your cooking, but felt your apartment balcony or tiny backyard was just too small? Don’t despair! I’m here to share some amazing Rosemary Growing Small Spaces tricks and DIY projects that will transform even the most limited area into a thriving herb garden. For centuries, rosemary has held a special place in cultures around the world, symbolizing remembrance and even used in ancient rituals. Its fragrant leaves add a unique depth of flavor to countless dishes, from roasted lamb to hearty soups. But who needs to buy it when you can grow it yourself?
The truth is, growing your own herbs is incredibly rewarding, and rosemary, despite its reputation for being a bit of a sun-worshipper, is surprisingly adaptable to small spaces. This article isn’t just about planting a few sprigs; it’s about maximizing your space and creating a beautiful, productive little rosemary haven. We’ll explore clever container gardening techniques, DIY vertical gardens, and even pruning strategies specifically designed for compact growth. You’ll learn how to choose the right rosemary variety for your space, the ideal soil and sunlight conditions, and how to protect your plants from common pests and diseases.
Whether you’re a seasoned gardener or a complete beginner, these Rosemary Growing Small Spaces tips will empower you to bring the delightful aroma and culinary benefits of rosemary into your life, no matter how small your garden might be. So, let’s get started and unlock the secrets to growing this amazing herb in even the most confined environments!
Fast Lime Cleaning: A DIY Guide to Sparkling Surfaces
Lime scale. That stubborn, chalky buildup that plagues bathrooms and kitchens. I’ve battled it for years, and let me tell you, I’ve tried everything. But this DIY method? It’s a game-changer. Get ready to say goodbye to those unsightly deposits and hello to sparkling clean surfaces!
Gathering Your Supplies
- White vinegar: This is your secret weapon. Choose a good quality, undiluted white vinegar. The higher the acidity, the better it works.
- Spray bottle: An empty spray bottle makes application so much easier.
- Microfiber cloths: These are gentle yet effective at scrubbing away lime scale. Avoid abrasive cloths that could scratch your surfaces.
- Baking soda (optional): For extra stubborn stains, baking soda provides a gentle abrasive action.
- Rubber gloves: Vinegar can be a little harsh on your skin, so protecting your hands is important.
- Toothbrush (old, soft-bristled): Perfect for getting into those hard-to-reach crevices.
- Plastic scraper (optional): For really thick lime scale deposits.
Preparing Your Surfaces
1. Safety First: Always test your cleaning solution on a small, inconspicuous area first to ensure it doesn’t damage the surface. This is especially important for delicate materials like marble or granite.
2. Clear the Area: Remove any soap scum, loose dirt, or other debris from the affected area. A quick wipe-down with a damp cloth will do the trick.
3. Protect Surrounding Areas: If you’re cleaning a shower or sink, consider covering surrounding areas with plastic sheeting or towels to prevent accidental splashing.
Applying the Vinegar Solution
1. Fill the Spray Bottle: Fill your spray bottle with undiluted white vinegar. Don’t be shy!
2. Generous Application: Spray the vinegar solution liberally onto the lime scale-affected areas. Make sure the surface is thoroughly saturated. For really stubborn areas, you might want to let the vinegar sit for a few minutes to soak in.
3. Let it Sit (Optional): For particularly stubborn lime scale, let the vinegar solution sit for 15-30 minutes. The longer it sits, the more effective it will be at breaking down the mineral deposits. For less severe build-up, you can skip this step.
Scrubbing and Cleaning
1. Gentle Scrubbing: Using a microfiber cloth, gently scrub the affected areas. The vinegar should start to loosen the lime scale. For smaller areas or hard-to-reach spots, use your old toothbrush.
2. Baking Soda Boost (Optional): If the lime scale is particularly stubborn, sprinkle some baking soda onto the wet surface and gently scrub with your cloth or toothbrush. The baking soda will create a mild abrasive paste that helps lift the scale.
3. Scrape Away (Optional): For extremely thick deposits, use a plastic scraper to gently remove the loosened lime scale. Be careful not to scratch the surface.
4. Rinse Thoroughly: Once you’ve removed the majority of the lime scale, rinse the area thoroughly with clean water. Make sure to remove all traces of vinegar.
Dealing with Specific Areas
Shower Heads
1. Soak the Shower Head: Fill a plastic bag with vinegar and secure it around the shower head using a rubber band. Let it soak for at least an hour, or even overnight for really stubborn build-up.
2. Scrub and Rinse: After soaking, scrub the shower head with a toothbrush and rinse thoroughly. You might be amazed at how easily the lime scale comes off.
Faucet Aerators
1. Remove the Aerator: Unscrew the aerator from your faucet. This usually involves a simple twist.
2. Soak in Vinegar: Soak the aerator in a bowl of vinegar for at least 30 minutes, or longer if needed.
3. Clean and Reinstall: Use a toothbrush to scrub away any remaining lime scale. Rinse thoroughly and reinstall the aerator.
Toilet Bowls
1. Pour in Vinegar: Pour a cup or two of vinegar directly into the toilet bowl, focusing on the areas with lime scale.
2. Let it Sit: Let the vinegar sit for at least 30 minutes, or even overnight for best results.
3. Scrub and Flush: Use a toilet brush to scrub the bowl, paying attention to the waterline. Flush the toilet to rinse away the vinegar and lime scale.
Glass Shower Doors
1. Spray and Wipe: Spray the glass shower doors liberally with the vinegar solution.
2. Scrub with Microfiber: Use a microfiber cloth to scrub away the lime scale. For stubborn spots, let the vinegar sit for a few minutes before scrubbing.
3. Rinse and Dry: Rinse the glass thoroughly and dry with a clean cloth to prevent water spots.
Post-Cleaning Tips
1. Regular Maintenance: To prevent future lime scale buildup, wipe down your surfaces regularly with a damp cloth.
2. Consider a Water Softener: If you have particularly hard water, consider installing a water softener to reduce the amount of minerals in your water.
3. Ventilation: Ensure good ventilation in your bathroom to prevent moisture buildup, which contributes to lime scale formation.
Troubleshooting
If you still have some stubborn lime scale after following these steps, you may need to repeat the process or try a stronger cleaning solution. However, always test any new solution on a small, inconspicuous area first. For extremely stubborn or extensive lime scale, you may want to consider professional cleaning services.
Conclusion
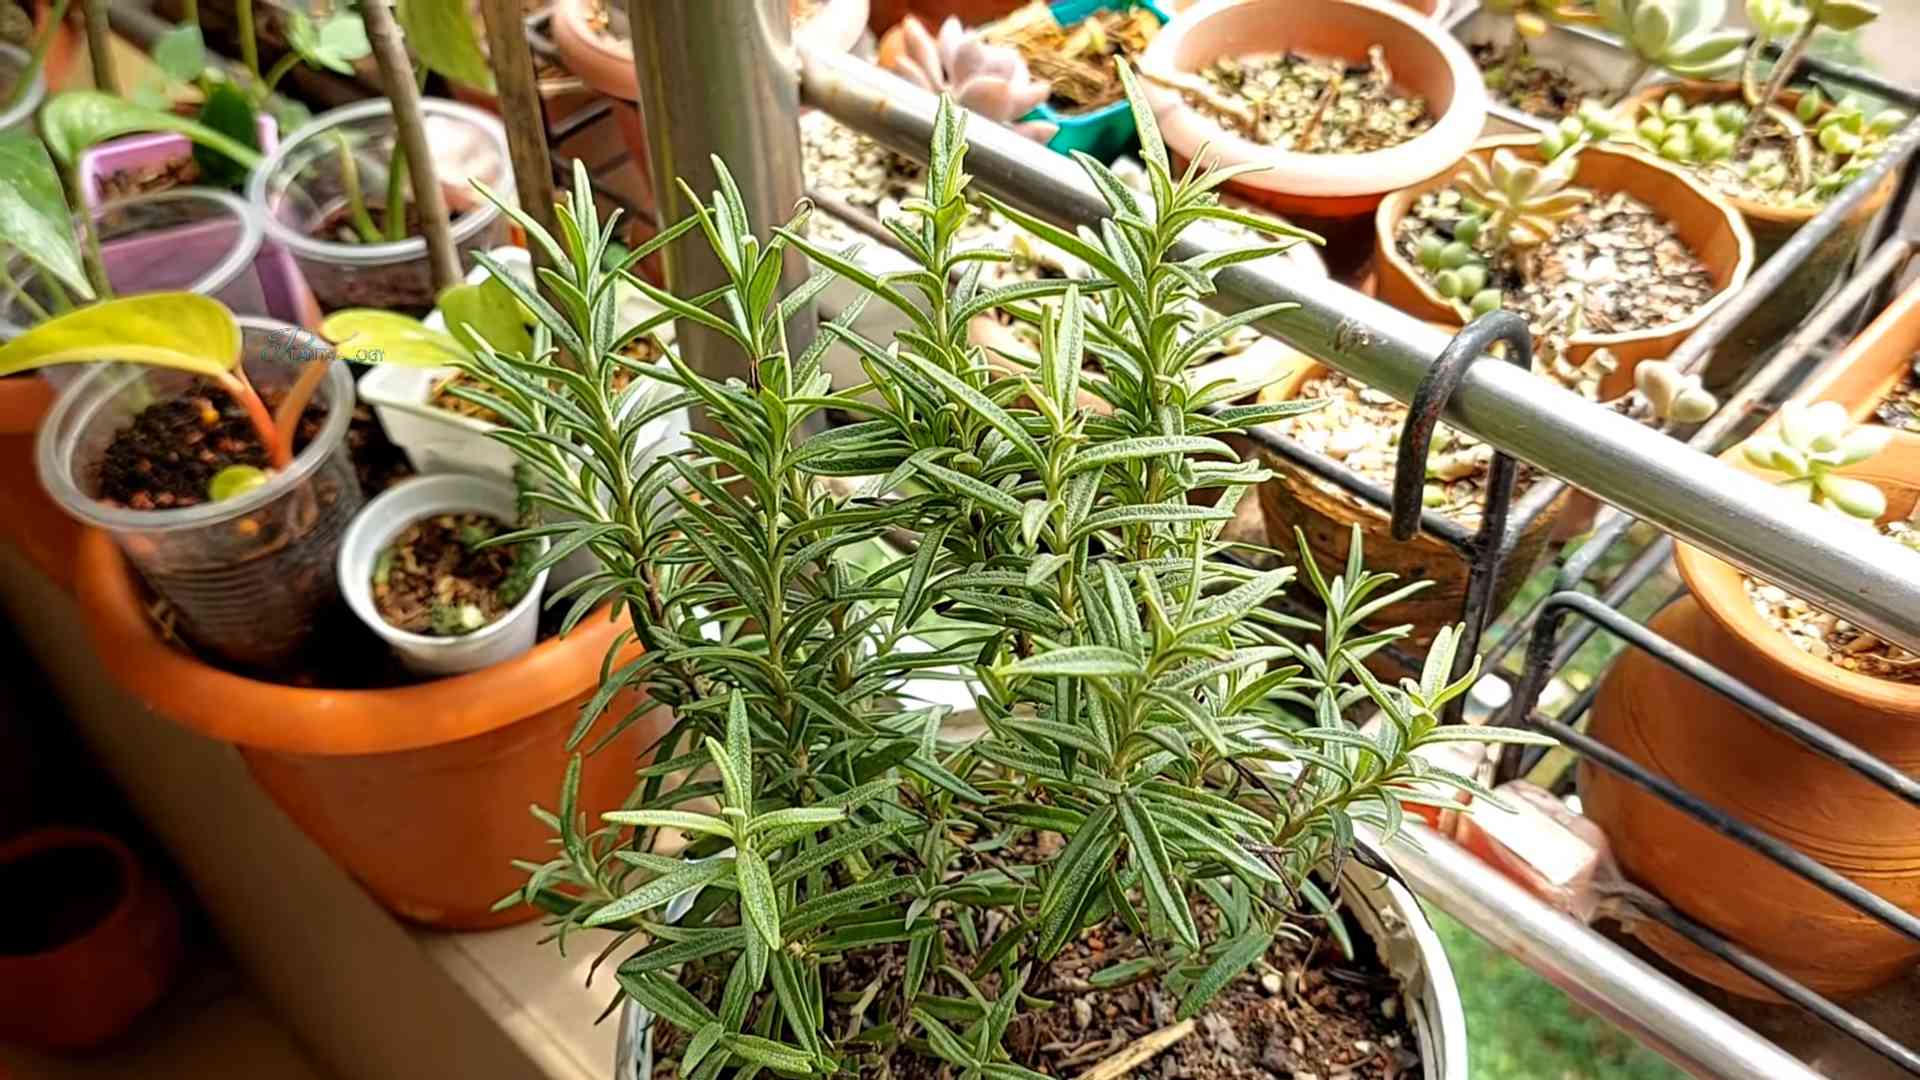
So there you have it – a comprehensive guide to successfully growing rosemary, even in the most compact of spaces! This DIY approach to rosemary cultivation isn’t just about saving money; it’s about connecting with nature, enjoying the fragrant rewards of your labor, and experiencing the satisfaction of nurturing life, even within the confines of an apartment or small balcony. This Rosemary Growing Small Spaces guide empowers you to bring the vibrant, aromatic beauty of rosemary into your life, regardless of your available space. The techniques outlined here, from choosing the right pot and soil to mastering the art of pruning and propagation, are designed to maximize your success and minimize your effort. You’ll be amazed at how easily you can cultivate this versatile herb, transforming a small corner of your home into a fragrant oasis.
Beyond the basic techniques, the possibilities are endless. Experiment with different pot sizes and shapes to find what best suits your aesthetic and space. Consider using a self-watering pot for even more convenience, especially if you’re prone to forgetting to water regularly. You can also explore different varieties of rosemary, each with its unique flavor profile and growth habit. Some varieties are more compact than others, making them ideal for truly tiny spaces. Think about incorporating your rosemary plants into a larger herb garden or even a vertical garden system to maximize space utilization. The key is to adapt the techniques to your specific environment and preferences.
Don’t be afraid to get creative! Try growing your rosemary in a hanging basket, a decorative planter, or even a repurposed container. The possibilities are as limitless as your imagination. And remember, the beauty of this DIY approach lies in its adaptability. Whether you’re a seasoned gardener or a complete beginner, you can achieve remarkable results with a little patience and care. This Rosemary Growing Small Spaces method is a testament to the fact that even the smallest spaces can bloom with life and flavor.
We strongly encourage you to try this method and share your experience with us! Show us your thriving rosemary plants on social media using #RosemaryGrowingSmallSpaces. We’d love to see your successes and learn from your experiences. Your feedback will help inspire others to embark on their own rosemary-growing journey, proving that anyone can cultivate this wonderful herb, no matter how limited their space may seem. Join the growing community of urban gardeners and experience the joy of harvesting fresh rosemary from your own homegrown plant. Start your Rosemary Growing Small Spaces adventure today!
Frequently Asked Questions
Q: What type of soil is best for growing rosemary in small spaces?
Well-draining soil is crucial for rosemary. A potting mix specifically designed for herbs or a general-purpose potting mix amended with perlite or coarse sand will work well. Avoid heavy clay soils that retain too much moisture, as this can lead to root rot.
Q: How much sunlight does rosemary need?
Rosemary thrives in full sun, meaning at least 6-8 hours of direct sunlight per day. If you don’t have a sunny spot indoors, consider a grow light to supplement natural sunlight. A south-facing window is ideal in most climates.
Q: How often should I water my rosemary?
Water your rosemary thoroughly when the top inch of soil feels dry to the touch. Avoid overwatering, which can lead to root rot. The frequency of watering will depend on factors such as the size of your pot, the type of soil, and the ambient temperature and humidity.
Q: When is the best time to prune my rosemary?
Pruning is essential for maintaining the shape and health of your rosemary plant. The best time to prune is after the plant has finished flowering, typically in late spring or early summer. Regular pruning encourages bushier growth and prevents the plant from becoming leggy.
Q: Can I propagate rosemary from cuttings?
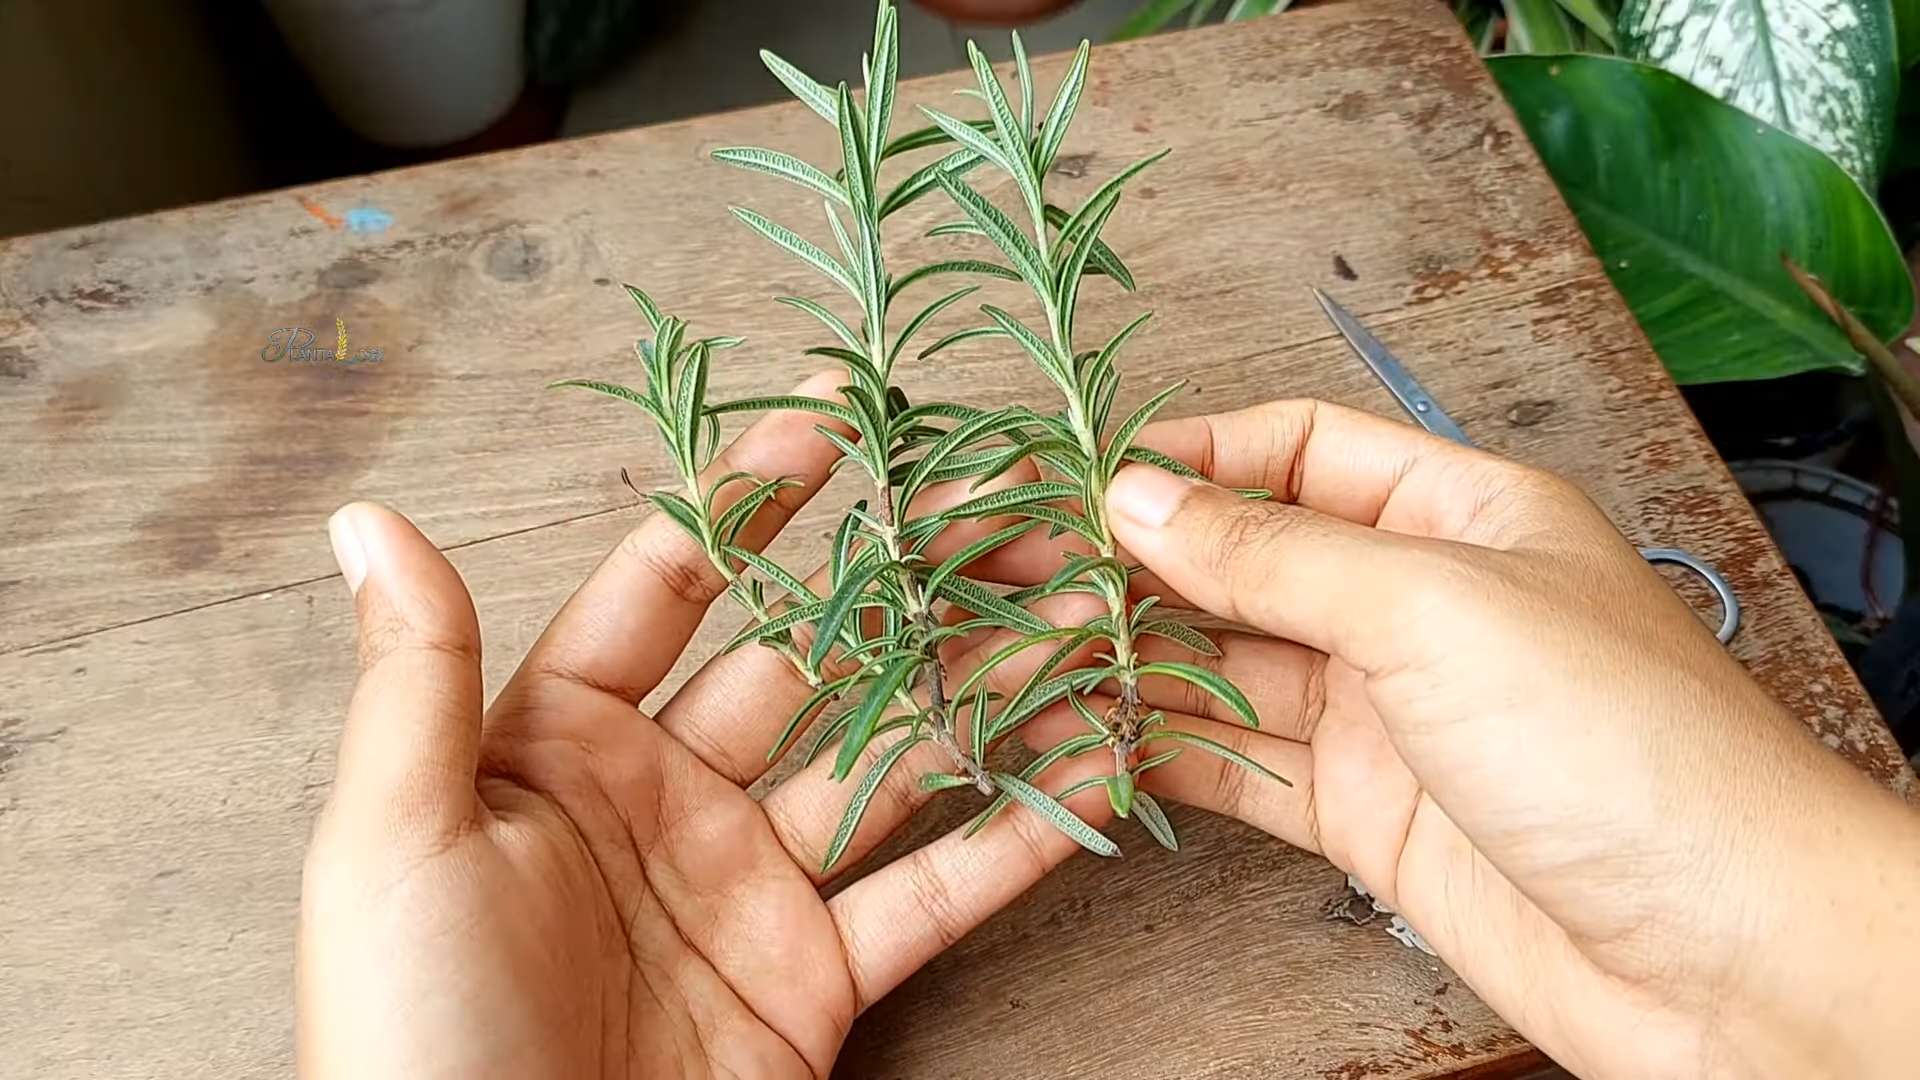
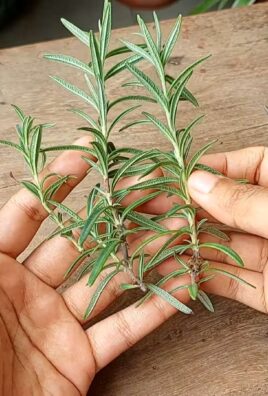
Yes, rosemary is easily propagated from stem cuttings. Take 4-6 inch cuttings from healthy stems, remove the lower leaves, and dip the cut ends in rooting hormone before planting them in moist potting mix. Keep the cuttings moist and in a warm location until roots develop.
Q: What are some common problems when growing rosemary in small spaces?
Overwatering is a common problem, leading to root rot. Insufficient sunlight can also hinder growth. Pest infestations, such as spider mites or aphids, can occur, requiring appropriate treatment. Regularly inspect your plant for any signs of problems and address them promptly.
Q: What are the benefits of growing rosemary in a small space?
Growing rosemary in a small space offers numerous benefits, including access to fresh, flavorful herbs year-round, a beautiful and aromatic addition to your home, the satisfaction of nurturing a plant, and the potential to save money compared to buying rosemary at the grocery store. It also contributes to a more sustainable lifestyle by reducing your carbon footprint associated with transporting herbs.
Q: Can I grow rosemary indoors year-round?
Yes, you can grow rosemary indoors year-round, provided you provide it with sufficient sunlight (either natural or supplemental) and well-draining soil. However, be mindful of temperature fluctuations and ensure adequate ventilation to prevent fungal diseases.
Q: What can I do with my harvested rosemary?
Fresh rosemary can be used in a wide variety of culinary applications, from roasting meats and vegetables to flavoring soups, stews, and sauces. It can also be used to make rosemary oil, infused vinegar, or even dried for later use. The possibilities are endless!

Leave a Comment