
Grow Carrots Small Garden: Unlocking Abundant Harvests in Confined Spaces
Grow Carrots Small Garden? It sounds like a challenge, doesn’t it? But what if I told you that even with limited space, you could enjoy the sweet crunch of homegrown carrots? This article is your guide to unlocking the secrets of successfully growing carrots, even if you only have a small balcony, patio, or a tiny backyard plot. Forget the image of vast carrot fields; we’re talking about maximizing yield in compact spaces, a skill that’s become increasingly important in our modern, often urban, lives.
The history of carrots is fascinating! Originally purple or yellow, the orange carrot we know and love is a relatively recent development, cultivated in the Netherlands centuries ago. But regardless of color, the joy of harvesting your own carrots is timeless. And in today’s world, with a growing emphasis on sustainable living and knowing where your food comes from, home gardening is experiencing a remarkable resurgence.
Why Grow Carrots in a Small Garden?
There are so many reasons to try your hand at growing carrots in a small garden! Beyond the obvious satisfaction of nurturing plants from seed to harvest, homegrown carrots are incredibly flavorful, often surpassing the taste of store-bought varieties. Plus, you control the growing process, ensuring your carrots are free from pesticides and other potentially harmful chemicals. This DIY approach not only provides delicious, healthy food but also connects you to nature in a deeply rewarding way.
This article will equip you with practical, easy-to-follow Grow Carrots Small Garden techniques, from choosing the right variety and preparing the soil to dealing with common pests and harvesting your bounty. Get ready to transform your small space into a thriving carrot patch—you might be surprised at just how much you can grow!
My French Bean Planting Guide: From Seed to Supper
I love the taste of fresh, homegrown French beans. There’s nothing quite like it! This guide will walk you through everything you need to know to successfully grow your own, from preparing the seeds to harvesting your delicious bounty. Let’s get started!
Phase 1: Seed Starting
- Choose your beans: Select high-quality French bean seeds. Consider the variety – bush beans are compact and easy to grow, while pole beans need support to climb. I personally prefer bush beans for their ease of management.
- Soaking (Optional but Recommended): Soaking your seeds for 12-24 hours in lukewarm water before planting can significantly improve germination rates. This helps soften the seed coat and speeds up the sprouting process. Just make sure to drain the water before planting.
- Starting Indoors (Recommended for Early Starts): If you live in a cooler climate or want an earlier harvest, start your seeds indoors 6-8 weeks before the last expected frost. Use small pots or seed trays filled with seed-starting mix, not garden soil. Garden soil is often too dense for delicate seedlings.
- Direct Sowing (For Warmer Climates): In warmer climates, you can directly sow seeds outdoors after the last frost. The soil should be warm (at least 60°F or 15°C).
Step-by-Step Instructions for Starting Indoors:
1. Fill your seed starting pots or trays with seed-starting mix. Gently moisten the mix, ensuring it’s evenly damp but not soggy.
2. Plant your seeds about 1 inch deep and 2 inches apart. If you’re using larger containers, you can space them further apart.
3. Cover the seeds with a thin layer of seed-starting mix.
4. Gently water the seeds again using a watering can with a fine rose to avoid disturbing the seeds.
5. Cover the pots or trays with clear plastic wrap or a humidity dome to retain moisture and warmth. This creates a mini-greenhouse effect.
6. Place the pots in a warm, sunny location. A south-facing windowsill is ideal.
7. Check the moisture level daily. Mist the soil lightly if it feels dry. Remove the plastic wrap or humidity dome once the seeds germinate.
8. Once the seedlings have developed their first two sets of true leaves (not the seed leaves), they are ready to be transplanted outdoors.
Step-by-Step Instructions for Direct Sowing:
1. Prepare the soil by loosening it with a garden fork or tiller to a depth of about 12 inches. Remove any rocks or weeds.
2. Amend the soil with compost or other organic matter to improve drainage and fertility. French beans love rich soil!
3. Make furrows or holes about 1 inch deep and 2-3 inches apart. For pole beans, space them further apart.
4. Plant the seeds in the furrows or holes, covering them with soil.
5. Gently water the seeds.
6. Keep the soil consistently moist until germination.
Phase 2: Transplanting and Growing
- Hardening Off (For Indoor-Started Seedlings): Before transplanting seedlings started indoors, gradually acclimate them to outdoor conditions over a period of 7-10 days. Start by placing them outdoors for a few hours each day, gradually increasing the exposure time. This prevents shock.
- Choosing a Location: Select a sunny location that receives at least 6-8 hours of sunlight per day. French beans need plenty of sun to thrive.
- Soil Preparation: Ensure the soil is well-drained and rich in organic matter. A soil pH of 6.0-7.0 is ideal.
- Spacing: Space bush beans 6-12 inches apart. Pole beans need more space, about 18-24 inches apart. Follow the spacing recommendations on your seed packet.
- Watering: Water regularly, especially during dry periods. Aim for consistently moist soil, but avoid overwatering, which can lead to root rot.
- Support for Pole Beans: If you’re growing pole beans, provide support such as stakes, trellises, or teepees. This will help the plants climb and prevent them from sprawling on the ground.
- Fertilizing: While French beans are not heavy feeders, a light application of balanced fertilizer can boost growth and yield. Follow the instructions on the fertilizer package.
- Pest and Disease Control: Regularly inspect your plants for pests and diseases. Address any issues promptly to prevent widespread damage. Consider using organic pest control methods whenever possible.
Step-by-Step Instructions for Transplanting:
1. Dig holes slightly larger than the root balls of your seedlings.
2. Gently remove the seedlings from their pots, being careful not to damage the roots.
3. Plant the seedlings in the holes, covering the roots with soil.
4. Gently firm the soil around the base of the plants.
5. Water thoroughly.
Phase 3: Harvesting
- Harvesting Time: Harvest your French beans when they are young and tender, typically 50-70 days after planting, depending on the variety. The pods should be firm and bright green.
- Harvesting Technique: Snap the beans off the plant, leaving a short stem attached. This encourages further growth and prevents damage to the plant.
- Regular Harvesting: Harvest regularly to encourage continuous production. The more you harvest, the more the plant will produce.
- Storage: Store harvested beans in the refrigerator for up to a week. You can also blanch and freeze them for longer storage.
Step-by-Step Instructions for Harvesting:
1. Inspect your bean plants regularly for mature pods.
2. Gently snap off the pods, leaving a small portion of the stem attached.
3. Place the harvested beans in a container or basket.
4. Refrigerate the beans promptly to maintain freshness.
Remember to always refer to the specific instructions on your seed packet for optimal results. Happy gardening!
Conclusion
So there you have it – a foolproof method for growing delicious, sweet carrots even in the smallest of gardens! This DIY trick isn’t just about maximizing space; it’s about maximizing flavor and yield. By employing the techniques outlined above, you’ll bypass many common carrot-growing pitfalls, resulting in a bountiful harvest that will leave you amazed. This Grow Carrots Small Garden guide empowers you to enjoy the fresh taste of homegrown carrots, regardless of your garden’s size. It’s a rewarding experience that connects you to your food source and provides a sense of accomplishment unlike any other.
The beauty of this method lies in its adaptability. Feel free to experiment with different carrot varieties; some are better suited to container gardening than others. Consider using a mix of early and late-season varieties to extend your harvest. You can also adjust the depth of your containers based on the specific carrot type you choose. For instance, Nantes carrots, known for their short, stubby shape, might thrive in shallower containers than longer varieties like Imperator. Don’t be afraid to get creative with your container choices, too! While the examples provided focused on readily available options, you can repurpose almost anything – from old buckets and troughs to even cleverly modified plastic bottles – as long as it provides adequate drainage and depth.
Beyond the container itself, consider enriching your soil mix. Adding compost or other organic matter will significantly improve drainage and provide essential nutrients for healthy carrot growth. Remember, consistent watering is key, especially during dry spells. Avoid overwatering, which can lead to root rot, but ensure the soil remains consistently moist. Regular weeding is also crucial to prevent competition for resources. By paying attention to these details, you’ll significantly increase your chances of success and enjoy a truly exceptional harvest.
We strongly encourage you to try this Grow Carrots Small Garden method and share your experience with us! Whether you’re a seasoned gardener or a complete beginner, this technique is designed to be accessible and rewarding. Post pictures of your thriving carrot patch on social media and tag us – we’d love to see your results and celebrate your success. Let’s inspire each other to grow more food, even in the most limited spaces. The joy of harvesting your own homegrown carrots is an experience you won’t soon forget.
Frequently Asked Questions
Q: What type of soil is best for growing carrots in containers?
A: A well-draining soil mix is crucial for successful carrot cultivation. A blend of potting soil, compost, and perlite or vermiculite works exceptionally well. Avoid heavy clay soils, which can hinder root development and lead to misshapen carrots. The addition of compost improves soil structure and provides essential nutrients.
Q: How often should I water my container-grown carrots?
A: Consistent moisture is key, but avoid overwatering. Water thoroughly when the top inch of soil feels dry to the touch. The frequency will depend on factors like weather conditions, container size, and soil type. Check the moisture level regularly, especially during hot and dry periods. Using a moisture meter can be helpful in determining when to water.
Q: What are some common problems encountered when growing carrots in containers, and how can I prevent them?
A: One common issue is rootbound carrots, which can occur if the container is too small. Choosing appropriately sized containers is crucial. Another problem is poor drainage, leading to root rot. Ensure your containers have adequate drainage holes. Pest infestations, such as carrot root flies, can also be a concern. Using row covers or netting can help protect your plants. Finally, inconsistent watering can lead to stunted growth or cracked roots.
Q: Can I use any type of container for growing carrots?
A: While deep containers are ideal, you can adapt various containers for carrot cultivation. The key is to ensure sufficient depth (at least 8-12 inches) for proper root development and adequate drainage. Repurposed buckets, troughs, and even large plastic pots can work well. Just make sure there are drainage holes to prevent waterlogging.
Q: How long does it take to grow carrots in containers using this method?
A: The time it takes to harvest your carrots will depend on the variety you choose. Generally, early-season varieties can be ready for harvest in as little as 60-70 days, while later-season varieties may take up to 90-100 days. Always check the seed packet for specific information on the expected harvest time.
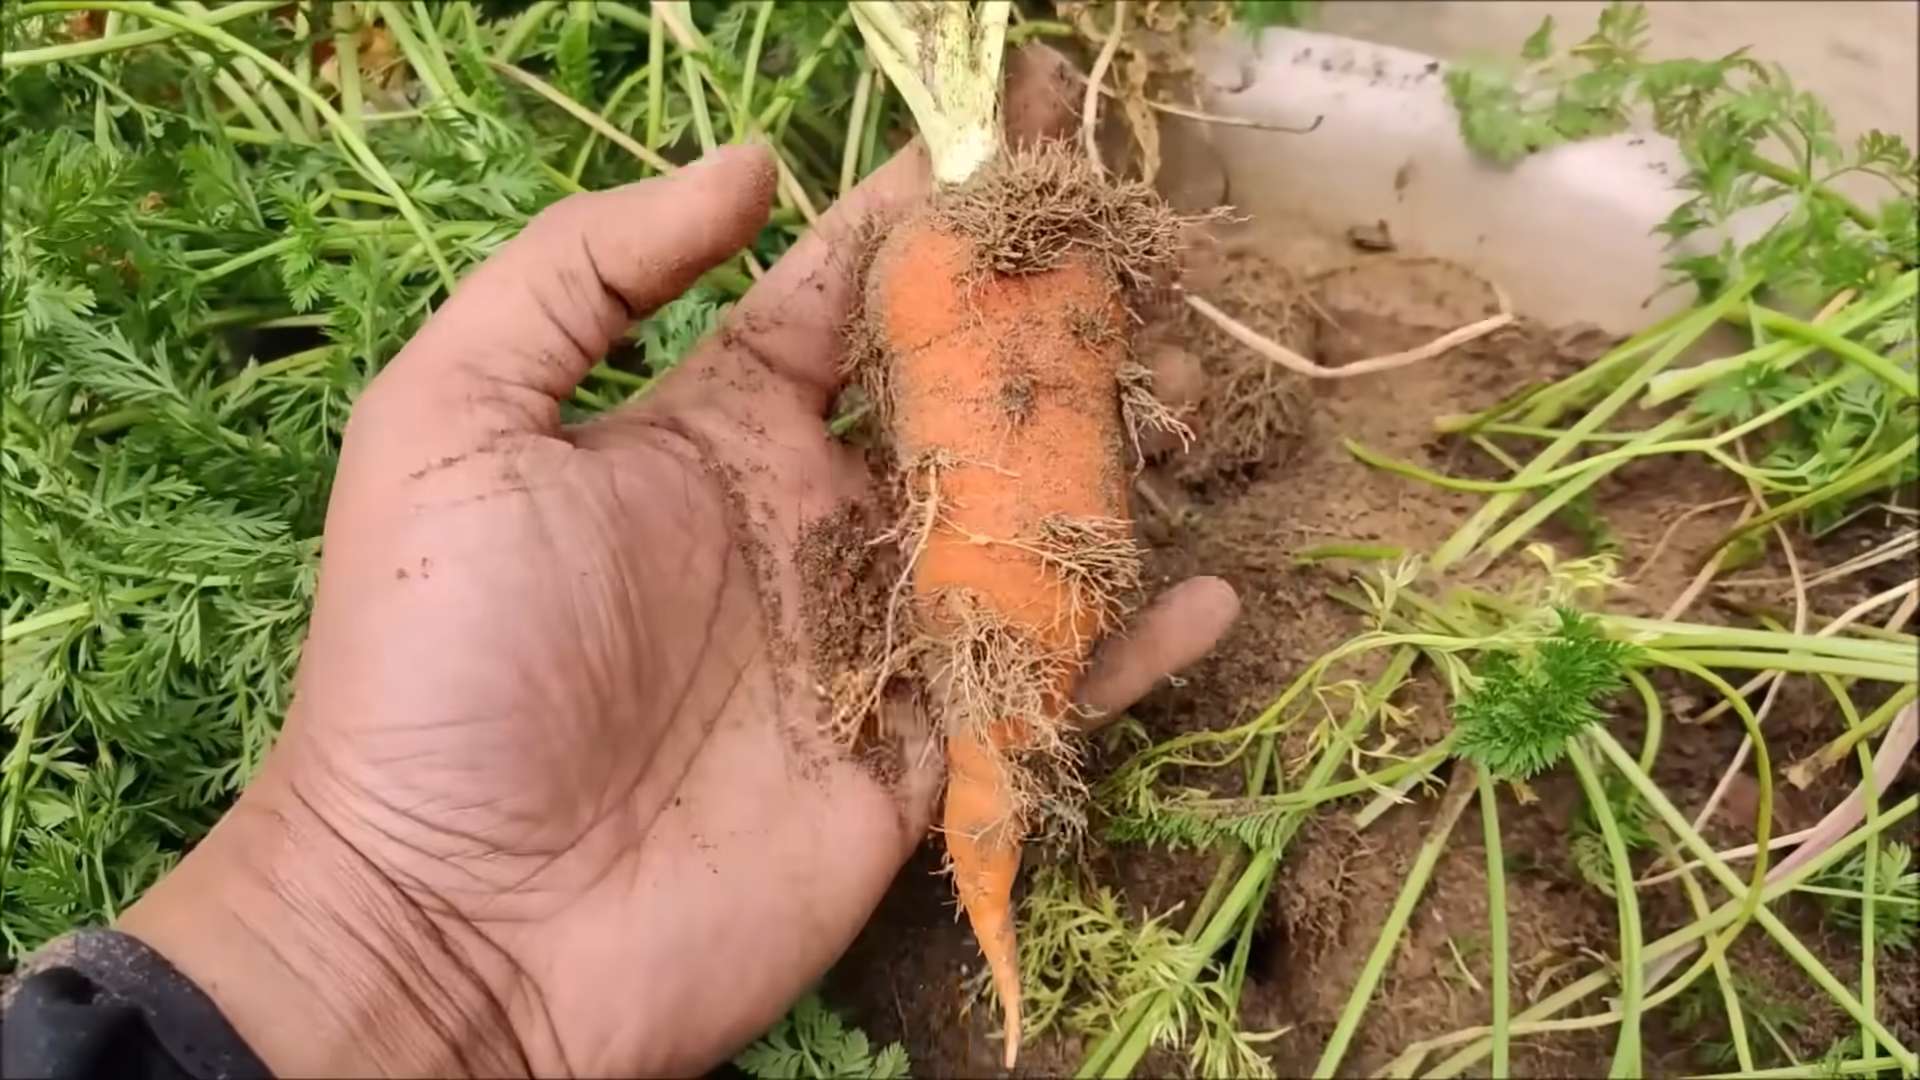
Q: What should I do if my carrots are small or misshapen?
A: Small or misshapen carrots are often a result of poor soil conditions (compacted soil, lack of nutrients), insufficient watering, or overcrowding. Ensure you’re using a well-draining soil mix rich in organic matter, water consistently, and provide enough space between plants. Rocks or other obstructions in the soil can also cause misshapen carrots.
Q: Can I grow other vegetables alongside my carrots in the same container?
A: While it’s possible, it’s generally not recommended to grow other vegetables alongside carrots in the same container, especially those with large or aggressive root systems. Carrots require ample space for their roots to develop properly. Companion planting is possible, but careful consideration of space and resource competition is essential. Consider companion planting with herbs that repel pests instead.
Leave a Comment