
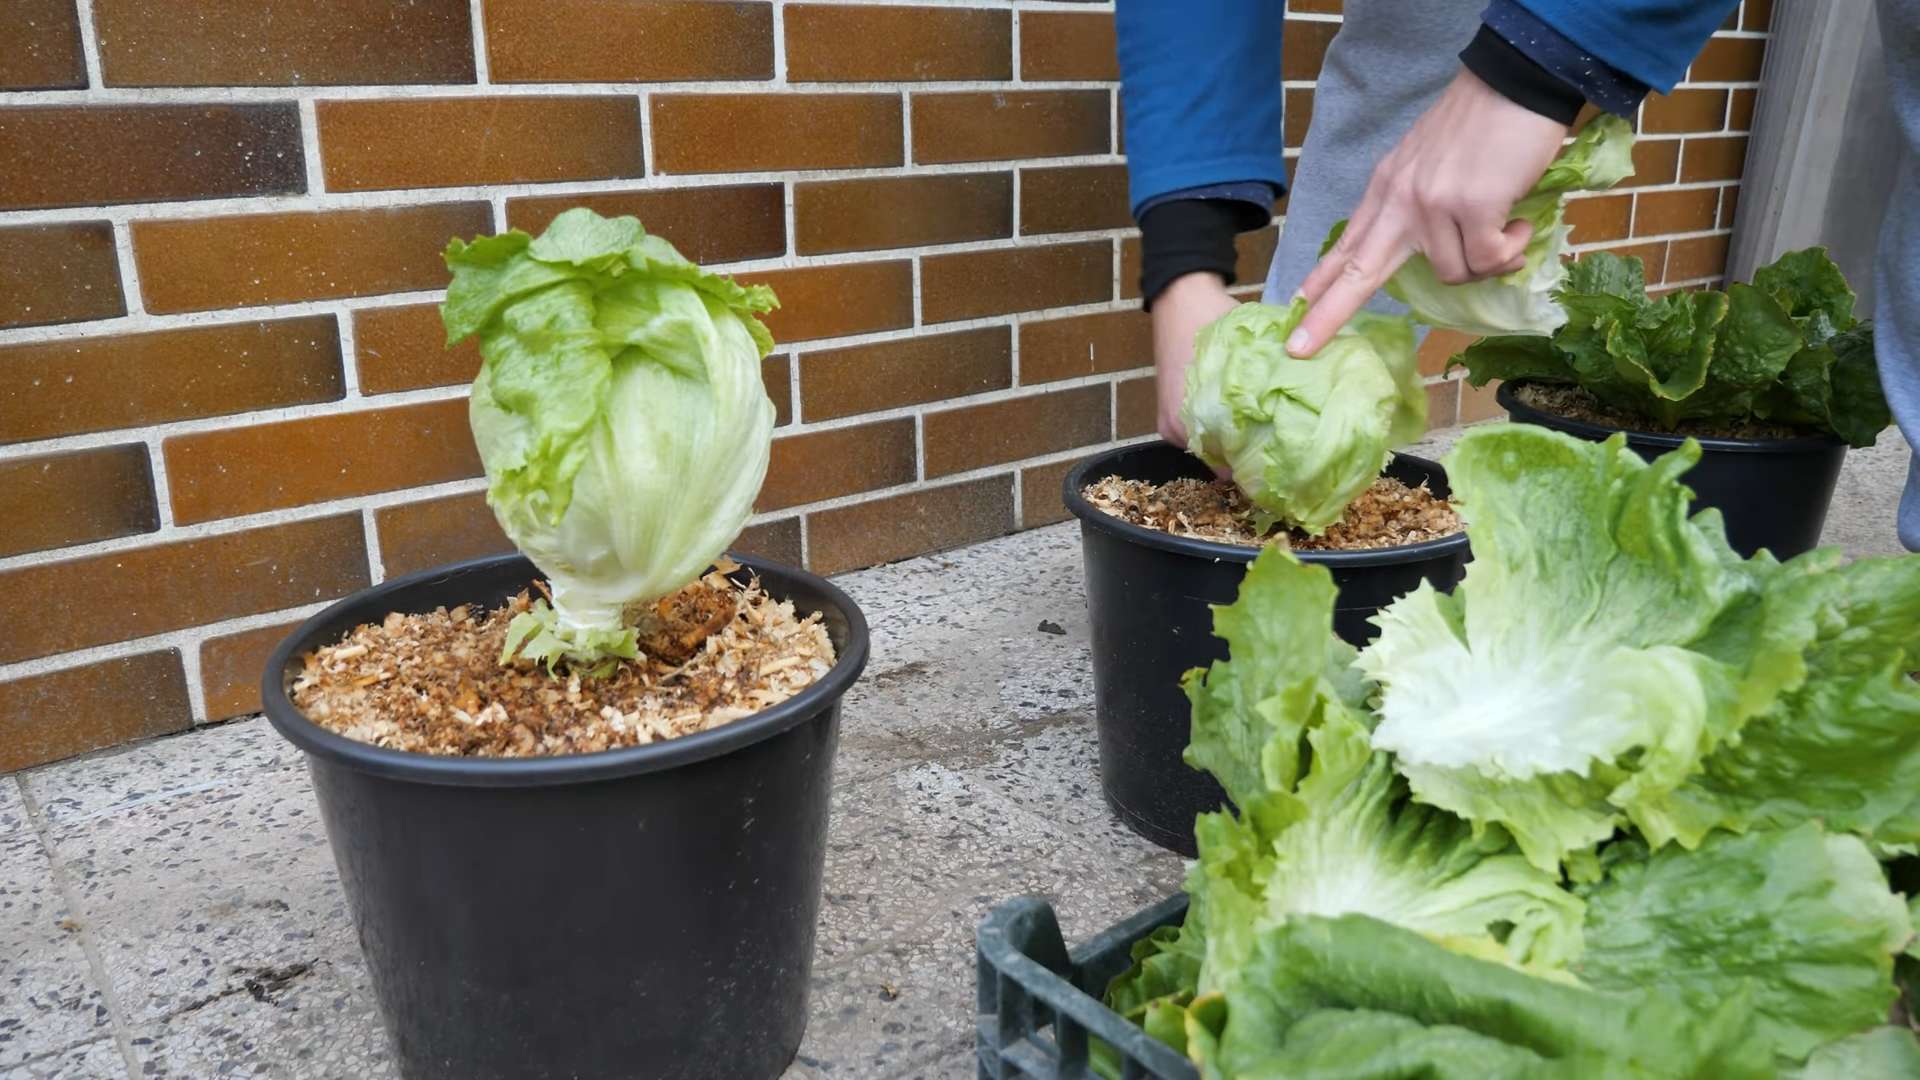
Grow Iceberg Lettuce: Your Guide to Crisp, Homegrown Heads
Growing your own food is incredibly rewarding, and few things beat the satisfaction of biting into a crisp, homegrown head of iceberg lettuce. That’s why I’m so excited to share my Grow Iceberg Lettuce guide with you today! This isn’t just another gardening article; it’s a journey into the world of DIY gardening, packed with simple tricks and hacks to help you achieve lush, delicious lettuce, even if you’ve never grown anything before.
Iceberg lettuce, with its iconic pale green heart, has a rich history. While its exact origins are debated, its popularity exploded in the 20th century, becoming a staple in American salads and cuisine. But store-bought lettuce often lacks the vibrant freshness and flavor of homegrown varieties. That’s where this Grow Iceberg Lettuce guide comes in!
Why Grow Your Own Iceberg Lettuce?
There are so many reasons to ditch the supermarket and try your hand at growing your own iceberg lettuce. Firstly, you’ll enjoy unparalleled freshness and flavor. Store-bought lettuce often travels long distances and sits in storage, resulting in a loss of nutrients and a less-than-ideal taste. Secondly, growing your own lettuce is a fantastic way to connect with nature and enjoy the therapeutic benefits of gardening. And finally, you’ll know exactly what’s gone into your food, ensuring it’s free from pesticides and other harmful chemicals.
This article will walk you through everything you need to know, from seed selection and soil preparation to harvesting and storage. Get ready to transform your garden (or even a sunny windowsill!) into a thriving lettuce patch. Let’s get started on your journey to growing the perfect head of iceberg lettuce!
Growing Potatoes in Your Backyard: A Complete Guide
I’ve always loved potatoes, and nothing beats the taste of a homegrown spud. This guide will walk you through the entire process, from choosing the right potatoes to harvesting your bounty. Let’s get started!
Choosing Your Seed Potatoes
- Select certified seed potatoes: These are disease-free and will give you the best results. You can usually find these at garden centers or online.
- Choose the right variety: Consider your climate and the space you have available. Some varieties are better suited for smaller gardens or containers.
- Inspect your potatoes carefully: Look for firm, healthy potatoes without any signs of disease or damage. Avoid potatoes with bruises, soft spots, or sprouts that are excessively long.
- Consider the size: Seed potatoes are typically smaller than those you buy in the grocery store. Aim for potatoes that are about 2-3 inches in diameter. Larger potatoes can be cut into sections, but more on that later.
Preparing Your Seed Potatoes
- Cut larger potatoes (optional): If you have larger potatoes, you can cut them into sections, ensuring each section has at least one or two “eyes” (the buds from which new sprouts will grow). Let the cut sections sit out for a day or two to allow the cut surfaces to callous over. This helps prevent rot.
- Treat with fungicide (optional): A fungicide treatment can help protect your seed potatoes from diseases. Follow the instructions on the fungicide packaging carefully.
- Pre-sprouting (optional): For an earlier harvest, you can pre-sprout your seed potatoes. Place them in a cool, dark, and well-ventilated area for a few weeks before planting. This will encourage the development of strong sprouts.
Preparing Your Planting Site
- Choose a sunny location: Potatoes need at least six hours of sunlight per day.
- Prepare the soil: Potatoes thrive in well-drained, loose soil. Amend heavy clay soils with compost or other organic matter to improve drainage. Test your soil pH; potatoes prefer slightly acidic soil (pH 5.5-6.5).
- Enrich the soil: Incorporate plenty of compost or well-rotted manure into the soil to provide essential nutrients.
- Consider raised beds or containers: If your soil is poorly drained, consider planting your potatoes in raised beds or large containers. This will improve drainage and make harvesting easier.
Planting Your Potatoes
- Dig planting holes or trenches: The depth of your planting holes or trenches will depend on the size of your seed potatoes. Generally, plant them about 4-6 inches deep and 12-18 inches apart.
- Place the seed potatoes in the holes: Ensure the eyes are facing upwards.
- Cover the potatoes with soil: Cover the potatoes with a few inches of soil. You’ll add more soil later as the plants grow.
- Water thoroughly: Give your newly planted potatoes a good watering.
Hilling and Ongoing Care
- Hilling: As your potato plants grow, you’ll need to “hill” them. This involves adding more soil around the base of the plants, burying the stems up to the lowest leaves. This encourages the development of more potatoes and protects them from sunlight.
- Watering: Keep the soil consistently moist, but avoid overwatering, which can lead to rot. Water deeply and less frequently rather than shallowly and often.
- Weeding: Regularly remove weeds to prevent them from competing with your potato plants for nutrients and water.
- Pest and disease control: Monitor your plants for pests and diseases. Take appropriate action if necessary, using organic methods whenever possible.
- Fertilizing (optional): If your soil is poor, you may need to fertilize your potato plants. Use a balanced fertilizer, following the instructions on the package.
Harvesting Your Potatoes
- Timing: The harvesting time depends on the variety of potato you planted and the growing conditions. Early potatoes are usually ready to harvest in about 70-80 days, while later varieties may take 90-120 days.
- Signs of readiness: The plants will start to flower, then the foliage will begin to yellow and die back. This is a good indication that the potatoes are ready to harvest.
- Harvesting method: Carefully dig around the base of the plants to avoid damaging the potatoes. Use a garden fork or trowel to gently lift the potatoes from the ground.
- Cleaning and curing: Once harvested, gently brush off any excess soil. Allow the potatoes to cure in a cool, dark, and well-ventilated area for a few days to a week before storing them.
- Storing: Store your potatoes in a cool, dark, and dry place. Avoid storing them in direct sunlight or in temperatures above 50°F (10°C).
Troubleshooting
Common Potato Problems and Solutions
- Blight: A fungal disease that can quickly destroy potato plants. Remove affected plants immediately and consider using a copper-based fungicide as a preventative measure.
- Potato beetles: These insects can severely damage potato plants. Handpick them off the plants or use an insecticidal soap.
- Potato scab: A bacterial disease that causes scabby lesions on the potatoes. Ensure good soil drainage and avoid over-fertilizing with nitrogen.
- Poor yields: This can be due to several factors, including poor soil conditions, insufficient sunlight, inadequate watering, or pest infestations. Address these issues to improve yields in future plantings.
Remember to always research the specific needs of your chosen potato variety for optimal results. Happy gardening!
Conclusion
So there you have it – a simple, effective, and surprisingly rewarding method for growing your own crisp, delicious iceberg lettuce! This DIY approach not only saves you money compared to store-bought heads but also allows you to control the quality and freshness of your produce. You’ll be amazed at the satisfaction of harvesting your own homegrown lettuce, knowing exactly where it came from and how it was grown. Growing iceberg lettuce from seed is easier than you think, and the results are undeniably worth the effort. This method eliminates the need for expensive hydroponic systems or complicated gardening techniques, making it perfect for beginners and experienced gardeners alike. The process is incredibly rewarding, allowing you to enjoy the freshest, most flavorful lettuce you’ve ever tasted. You’ll be able to savor the crisp, clean taste of lettuce grown without pesticides or harmful chemicals, a true testament to the power of home gardening. The feeling of biting into a perfectly grown head of iceberg lettuce from your own garden is unparalleled.
Beyond the basic method outlined, there are numerous ways to customize your iceberg lettuce growing experience. Experiment with different types of soil – a well-draining mix is key, but you can adjust the composition based on your local climate and soil conditions. Consider using grow lights to supplement natural sunlight, especially during shorter days or in areas with limited sun exposure. This can significantly speed up the growth process and ensure a bountiful harvest. You can also explore companion planting, incorporating herbs or other vegetables that complement lettuce growth and deter pests. For example, planting basil nearby can help repel aphids. Furthermore, you can try different sowing techniques, such as direct sowing or starting seeds indoors before transplanting. Each method offers unique advantages, allowing you to tailor your approach to your specific needs and preferences. Don’t be afraid to experiment and find what works best for you and your garden. The beauty of this DIY approach is its adaptability; you can easily adjust the process to fit your lifestyle and resources.
We strongly encourage you to try this simple yet effective method of growing your own iceberg lettuce. It’s a fantastic way to connect with nature, enjoy fresh, healthy food, and experience the satisfaction of growing your own produce. Share your experience with us! We’d love to hear about your successes, challenges, and any variations you’ve tried. Post pictures of your thriving lettuce plants on social media using the hashtag #GrowIcebergLettuce and tag us – we can’t wait to see your results! Remember, even small successes are significant steps towards a more self-sufficient and fulfilling lifestyle. The journey of growing your own food is as rewarding as the delicious harvest itself. So, grab your seeds, get your hands dirty, and embark on this exciting adventure of growing your own crisp, refreshing iceberg lettuce. You won’t regret it!
Frequently Asked Questions
What type of soil is best for growing iceberg lettuce?
Iceberg lettuce thrives in well-draining soil that is rich in organic matter. A slightly acidic pH level (around 6.0-6.8) is ideal. You can amend your soil with compost or other organic materials to improve drainage and fertility. Avoid heavy clay soils, as they can retain too much water and lead to root rot.
How much sunlight does iceberg lettuce need?
Iceberg lettuce prefers at least six hours of sunlight per day. However, in hot climates, some afternoon shade may be beneficial to prevent the leaves from bolting (going to seed prematurely). If you’re growing lettuce indoors, you’ll need to supplement with grow lights to ensure adequate light exposure.
How often should I water my iceberg lettuce?
Keep the soil consistently moist but not waterlogged. Water deeply and less frequently, allowing the top inch or two of soil to dry out slightly between waterings. Overwatering can lead to root rot, while underwatering can result in stunted growth and wilting. Adjust your watering schedule based on your climate and soil conditions.
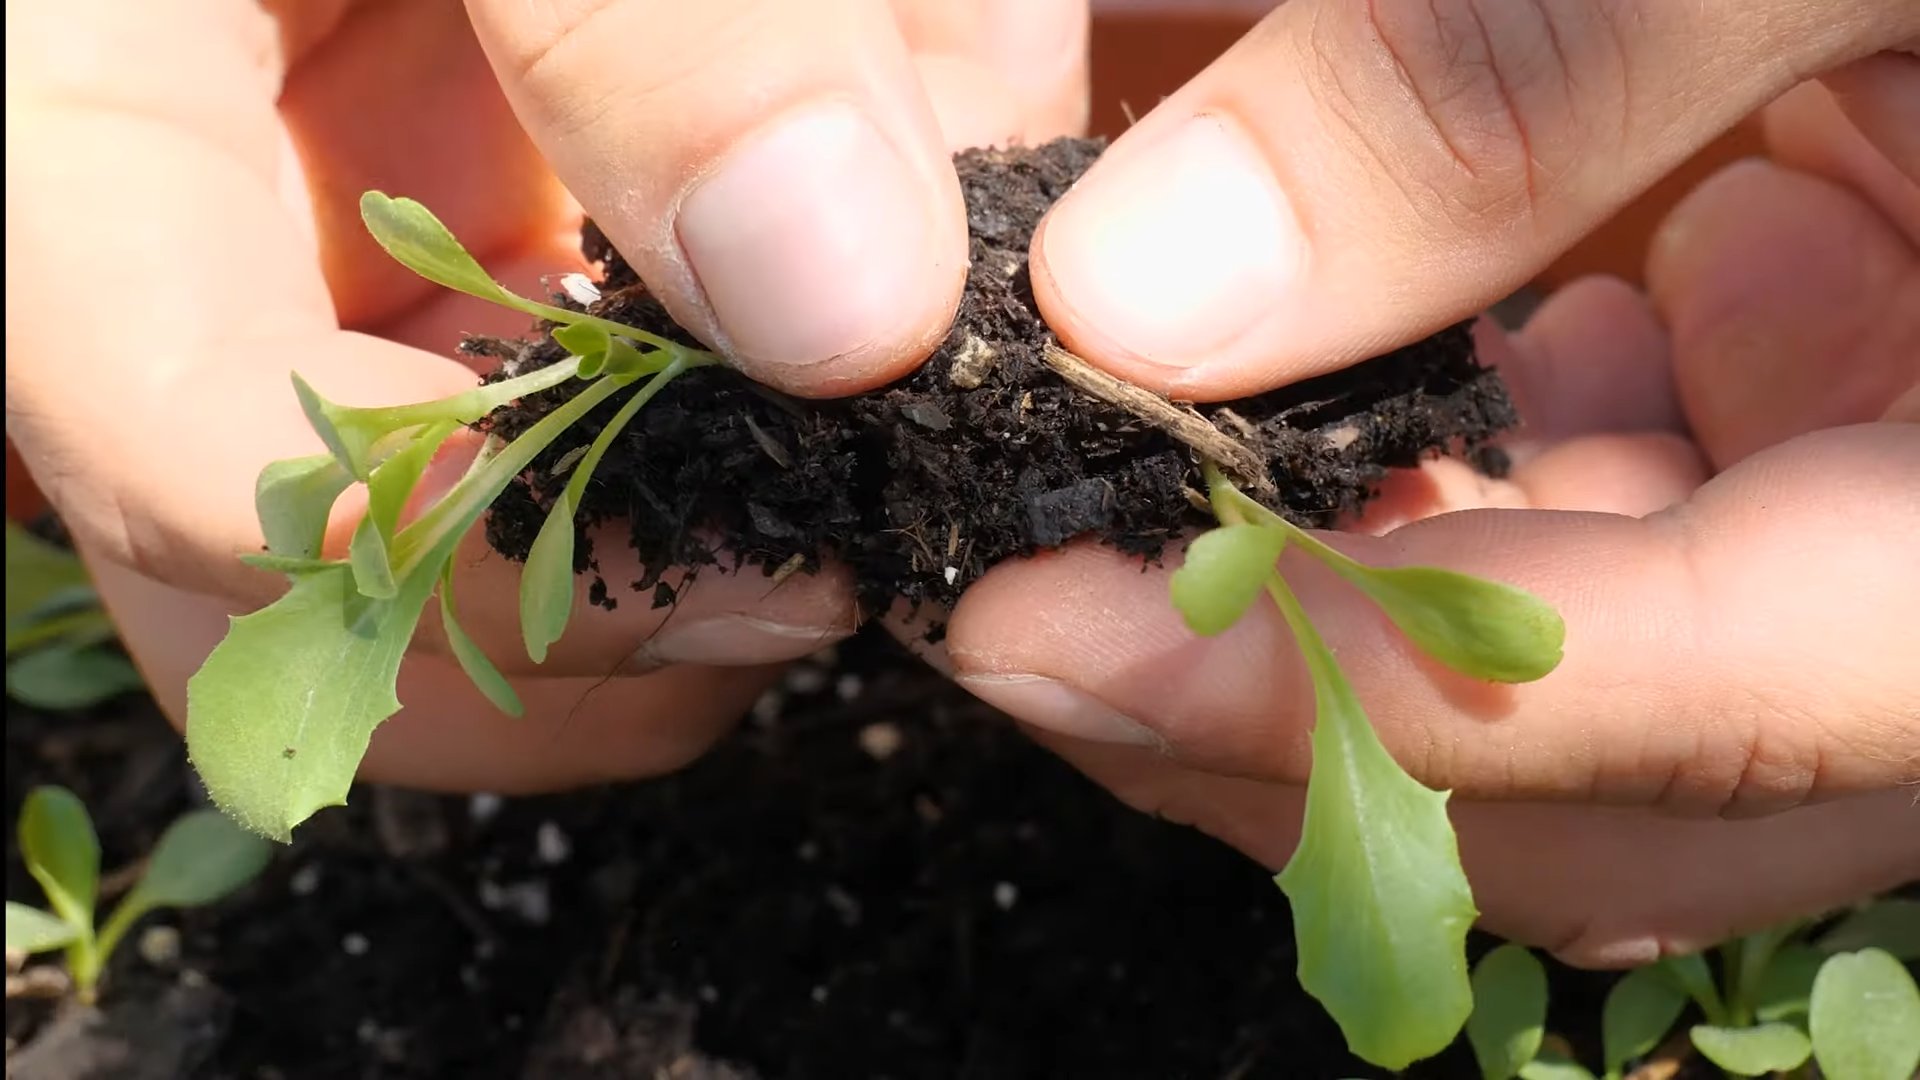
How long does it take to grow iceberg lettuce from seed?
The time it takes to harvest iceberg lettuce from seed varies depending on the variety and growing conditions. Generally, it takes around 60-75 days from sowing to harvest. Using seedlings can shorten this time considerably.
What are some common problems when growing iceberg lettuce?
Common problems include pests like aphids and slugs, diseases like downy mildew, and bolting (premature flowering). Regularly inspect your plants for pests and diseases, and take appropriate measures to control them. Providing adequate shade during hot weather can help prevent bolting.
Can I grow iceberg lettuce in containers?
Absolutely! Iceberg lettuce can be successfully grown in containers, making it a great option for those with limited garden space. Choose containers that are at least 12 inches deep to accommodate the roots. Ensure the containers have adequate drainage holes to prevent waterlogging.
What should I do if my iceberg lettuce is bolting?
Bolting is often caused by stress, such as heat or drought. If your lettuce is bolting, try to provide more shade and consistent watering. While the lettuce may not be as crisp, you can still harvest the leaves for salads.
What are some tips for harvesting iceberg lettuce?
Harvest your iceberg lettuce when the heads are firm and fully developed. Use a sharp knife to cut the heads from the base of the plant. Avoid pulling the heads out, as this can damage the roots and surrounding plants.


Leave a Comment