
Growing Marigolds from Seed is easier than you might think, and I’m here to show you how! Have you ever admired those vibrant, cheerful blooms in someone’s garden and thought, “I wish I could do that?” Well, guess what? You absolutely can! For centuries, marigolds have been cherished not only for their beauty but also for their practical benefits in the garden. From ancient Aztec rituals where they were used for medicinal purposes to their modern-day role as natural pest repellents, marigolds have a rich and fascinating history.
But beyond their historical significance, growing marigolds from seed offers a fantastic way to add a splash of color to your outdoor space, attract beneficial insects, and even deter unwanted pests like nematodes. Plus, starting from seed is incredibly rewarding and budget-friendly! In this DIY guide, I’ll walk you through every step of the process, from selecting the right seeds to nurturing your seedlings into thriving, flower-filled plants. So, grab your gardening gloves, and let’s get started on this exciting journey of bringing these sunny beauties to life in your own backyard!
Growing Marigolds From Seed: A Beginner’s Guide
Hey there, fellow gardening enthusiasts! I’m so excited to share my experience with growing marigolds from seed. These cheerful, vibrant flowers are not only beautiful but also incredibly easy to cultivate, making them perfect for beginners like I once was! Plus, they’re fantastic for attracting pollinators and deterring pests in your garden. Let’s dive in!
Choosing Your Marigold Variety
Before we get our hands dirty, let’s talk about the different types of marigolds. There are two main categories: African marigolds (Tagetes erecta) and French marigolds (Tagetes patula).
* **African Marigolds:** These are the tall ones, often reaching 1-3 feet in height. They boast large, pom-pom-like blooms in shades of yellow, orange, and gold. They’re great for adding height to your garden beds.
* **French Marigolds:** These are smaller and bushier, typically growing 6-12 inches tall. Their flowers are smaller and often have intricate patterns and color combinations, including bi-colors and stripes. They’re perfect for borders, containers, and edging.
I personally love growing a mix of both for a diverse and colorful display! Consider your garden space and desired aesthetic when making your choice. You can find seeds at most garden centers or online retailers.
Gathering Your Supplies
To successfully grow marigolds from seed, you’ll need a few essential supplies:
* **Marigold Seeds:** Choose your favorite variety!
* **Seed Starting Trays or Pots:** These provide a controlled environment for germination. I prefer using seed starting trays with a clear plastic dome to retain moisture.
* **Seed Starting Mix:** This is a lightweight, sterile soil mix specifically formulated for seedlings. Don’t use regular garden soil, as it can be too heavy and may contain diseases.
* **Watering Can or Spray Bottle:** For gentle watering.
* **Grow Lights (Optional):** If you don’t have a sunny windowsill, grow lights can provide the necessary light for healthy seedling development.
* **Heat Mat (Optional):** This can speed up germination by providing bottom heat.
* **Small Trowel or Spoon:** For transplanting seedlings.
* **Labels and a Permanent Marker:** To keep track of your different varieties.
Starting Your Seeds Indoors (Recommended)
Starting your marigold seeds indoors gives them a head start, especially if you live in a region with a shorter growing season. I usually start mine about 6-8 weeks before the last expected frost.
1. **Prepare Your Seed Starting Trays:** Fill each cell of your seed starting tray with seed starting mix. Gently tap the tray to settle the mix.
2. **Sow the Seeds:** Make a small indentation (about 1/4 inch deep) in the center of each cell. Place 2-3 marigold seeds in each indentation. This increases the chances of at least one seed germinating.
3. Cover the Seeds: Lightly cover the seeds with more seed starting mix.
4. **Water Gently:** Use a spray bottle or watering can with a gentle rose head to moisten the soil. Avoid overwatering, as this can lead to damping-off disease. The soil should be moist but not soggy.
5. **Provide Warmth and Light:** Place the seed starting tray in a warm location (around 70-75°F). A heat mat can be helpful. If you don’t have a sunny windowsill, use grow lights. Keep the lights on for 14-16 hours per day.
6. **Maintain Moisture:** Keep the soil consistently moist by misting it with water as needed. Cover the tray with a clear plastic dome to retain moisture.
7. **Monitor Germination:** Marigold seeds typically germinate in 5-10 days. Once the seedlings emerge, remove the plastic dome to improve air circulation and prevent fungal diseases.
8. **Thin the Seedlings:** Once the seedlings have their first true leaves (the second set of leaves that appear after the initial seed leaves), thin them to one seedling per cell. Choose the strongest, healthiest seedling and gently snip off the others at the soil line with small scissors. Don’t pull them out, as this can disturb the roots of the remaining seedling.
9. **Harden Off the Seedlings:** Before transplanting your marigolds outdoors, you need to “harden them off.” This process gradually acclimates them to outdoor conditions. Start by placing the seedlings outdoors in a sheltered location for an hour or two each day, gradually increasing the amount of time they spend outside over the course of a week. Protect them from direct sunlight and strong winds.
Direct Sowing Marigold Seeds Outdoors
If you live in a region with a long growing season, you can also direct sow marigold seeds outdoors after the last frost.
1. **Prepare the Soil:** Choose a sunny location with well-drained soil. Amend the soil with compost or other organic matter to improve its fertility and drainage.
2. **Sow the Seeds:** Sow the seeds about 1/4 inch deep and 1 inch apart.
3. **Water Gently:** Water the soil gently to keep it moist.
4. **Thin the Seedlings:** Once the seedlings emerge, thin them to the desired spacing (6-12 inches apart for French marigolds, 12-18 inches apart for African marigolds).
Transplanting Your Marigold Seedlings
Once your seedlings have been hardened off and the danger of frost has passed, it’s time to transplant them into your garden or containers.
1. **Choose a Sunny Location:** Marigolds thrive in full sun (at least 6 hours of sunlight per day).
2. **Prepare the Planting Hole:** Dig a hole that is slightly larger than the root ball of the seedling.
3. **Gently Remove the Seedling:** Carefully remove the seedling from its cell, being careful not to damage the roots. Gently loosen the roots if they are circling the bottom of the cell.
4. **Place the Seedling in the Hole:** Place the seedling in the hole, ensuring that the top of the root ball is level with the surrounding soil.
5. **Fill the Hole:** Fill the hole with soil and gently firm it around the seedling.
6. **Water Thoroughly:** Water the seedling thoroughly to help it establish its roots.
7. **Mulch (Optional):** Apply a layer of mulch around the base of the plant to help retain moisture and suppress weeds.
Caring for Your Marigolds
Marigolds are relatively low-maintenance plants, but here are a few tips to keep them thriving:
* **Watering:** Water regularly, especially during dry periods. Avoid overwatering, as this can lead to root rot. Allow the soil to dry out slightly between waterings.
* **Fertilizing:** Marigolds don’t require a lot of fertilizer. You can fertilize them lightly with a balanced fertilizer (10-10-10) every few weeks.
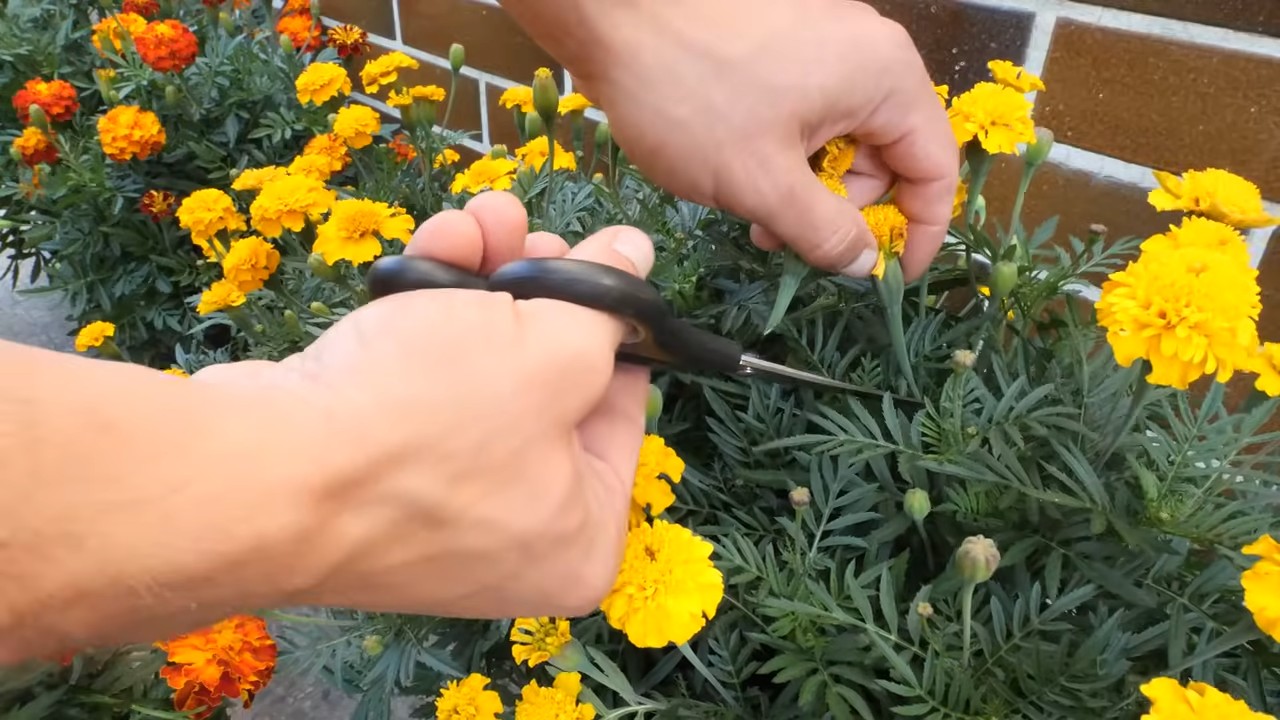
* **Deadheading:** Deadhead spent flowers regularly to encourage more blooms. Simply pinch or snip off the faded flowers just below the flower head.
* **Pest Control:** Marigolds are generally pest-resistant, but they can sometimes be affected by aphids or spider mites. If you notice any pests, spray the plants with insecticidal soap or neem oil.
* **Disease Prevention:** To prevent fungal diseases, avoid overwatering and ensure good air circulation. Remove any diseased leaves or flowers promptly.
Troubleshooting
Even with the best care, you might encounter a few problems while growing marigolds. Here are some common issues and how to address them:
* **Leggy Seedlings:** This happens when seedlings don’t get enough light. They stretch towards the light source, resulting in weak, spindly stems. Provide more light by using grow lights or moving the seedlings to a sunnier location.
* **Damping-Off:** This is a fungal disease that causes seedlings to rot at the soil line. Prevent damping-off by using sterile seed starting mix, avoiding overwatering, and ensuring good air circulation.
* **Lack of Blooms:** This can be caused by insufficient sunlight, over-fertilizing, or not deadheading spent flowers. Make sure your marigolds are getting at least 6 hours of sunlight per day, avoid over-fertilizing, and deadhead regularly.
* **Yellowing Leaves:** This can be caused by overwatering, nutrient deficiencies, or pests. Check the soil moisture and adjust your watering accordingly. Fertilize with a balanced fertilizer if necessary. Inspect the plants for pests and treat them as needed.
Enjoying Your Marigolds
Once your marigolds are in full bloom, you can enjoy their beauty in your garden or cut them for bouquets. They also make great companion plants for vegetables, as they can help deter pests like nematodes and whiteflies. I love planting them near my tomatoes and peppers!
Growing marigolds from seed is a rewarding experience that anyone can enjoy. With a little patience and care, you can have a garden filled with these cheerful and beneficial flowers. Happy gardening!

Conclusion
So, there you have it! Growing marigolds from seed isn’t just a cost-effective way to fill your garden with vibrant color; it’s a deeply rewarding experience that connects you to the natural world. From the initial anticipation of those tiny sprouts emerging to the satisfaction of watching them burst into bloom, every step of the process is a testament to the power of nature and your own green thumb.
Why is this DIY trick a must-try? Because it empowers you to take control of your garden’s aesthetic and health. You get to choose the specific varieties of marigolds that best suit your needs and preferences, whether you’re looking for towering African marigolds to deter pests, compact French marigolds for edging, or unique heirloom varieties with unusual colors and forms. Plus, starting from seed allows you to nurture stronger, healthier plants that are better adapted to your local climate and soil conditions. You avoid the potential shock that can sometimes occur when transplanting mature plants from a nursery.
But the benefits don’t stop there. Growing marigolds from seed is also an incredibly educational experience, especially if you have children. It’s a fantastic way to teach them about the life cycle of plants, the importance of sunlight and water, and the wonders of germination. Imagine the excitement on their faces as they watch their tiny seeds transform into beautiful, blooming flowers!
Looking for variations to spice things up? Consider experimenting with different seed-starting methods. Try using peat pots for easy transplanting, or sow seeds directly into the ground after the last frost for a more natural approach. You can also try succession planting, sowing seeds every few weeks to ensure a continuous bloom throughout the growing season. Another fun variation is to save seeds from your favorite marigolds at the end of the season and use them to grow even more flowers the following year. This is a great way to preserve unique varieties and create a truly personalized garden.
Don’t be afraid to get creative with your marigold arrangements. Plant them in containers on your patio, use them to create colorful borders in your flower beds, or interplant them with vegetables to deter pests and attract pollinators. Marigolds are incredibly versatile and can be used in a wide variety of garden settings.
We wholeheartedly encourage you to give this DIY trick a try. It’s easier than you might think, and the rewards are well worth the effort. Once you’ve experienced the joy of growing your own marigolds from seed, you’ll never want to go back to buying them from the store.
So, grab a packet of seeds, prepare your soil, and get ready to embark on a floral adventure. And most importantly, don’t forget to share your experiences with us! We’d love to hear about your successes, your challenges, and any tips or tricks you’ve discovered along the way. Share your photos and stories on social media using [Your Hashtag] and let’s inspire others to discover the magic of growing marigolds from seed. Happy gardening!
Frequently Asked Questions (FAQ)
What is the best time to start marigold seeds indoors?
The ideal time to start marigold seeds indoors is typically 6-8 weeks before the last expected frost in your area. This allows the seedlings to develop a strong root system before being transplanted outdoors. Check your local frost dates to determine the best time to start your seeds. If you live in a warmer climate with a longer growing season, you can start seeds later or even sow them directly into the ground after the last frost.
How deep should I plant marigold seeds?
Marigold seeds should be planted about ¼ inch deep in well-draining soil. Gently cover the seeds with soil and water them thoroughly. Avoid planting them too deep, as this can prevent them from germinating.
How long does it take for marigold seeds to germinate?
Marigold seeds typically germinate within 5-14 days, depending on the temperature and moisture levels. Keep the soil consistently moist but not waterlogged during this time. Using a heat mat can help speed up germination, especially in cooler climates.
What kind of soil is best for growing marigolds from seed?
Marigolds prefer well-draining soil that is rich in organic matter. A good potting mix is ideal for starting seeds indoors. When transplanting seedlings outdoors, amend the soil with compost or other organic matter to improve drainage and fertility. Marigolds are relatively adaptable and can tolerate a variety of soil types, but they will thrive in soil that is well-drained and nutrient-rich.
How much sunlight do marigolds need?
Marigolds need at least 6 hours of sunlight per day to thrive. Choose a sunny location in your garden or on your patio for planting. If you are growing marigolds indoors, place them near a sunny window or use grow lights to provide adequate light.
How often should I water marigolds?
Water marigolds regularly, especially during hot, dry weather. Allow the soil to dry out slightly between waterings to prevent root rot. Avoid overwatering, as this can lead to fungal diseases. A good rule of thumb is to water when the top inch of soil feels dry to the touch.
Do marigolds need fertilizer?
Marigolds benefit from regular fertilization, especially during the growing season. Use a balanced fertilizer or a fertilizer specifically formulated for flowering plants. Follow the instructions on the fertilizer package for application rates. Avoid over-fertilizing, as this can lead to excessive foliage growth and fewer flowers.
How do I prevent pests and diseases from affecting my marigolds?
Marigolds are relatively pest-resistant, but they can be susceptible to certain pests and diseases, such as spider mites, aphids, and powdery mildew. To prevent these problems, keep your plants healthy by providing them with adequate sunlight, water, and nutrients. Regularly inspect your plants for signs of pests or diseases and take action promptly if you notice any problems. You can use insecticidal soap or neem oil to control pests, and fungicides to treat fungal diseases. Good air circulation can also help prevent powdery mildew.
Can I save seeds from my marigolds to grow more plants next year?
Yes, you can save seeds from your marigolds to grow more plants next year. Allow the flower heads to dry completely on the plant. Once they are dry, carefully remove the seeds from the flower heads and store them in a cool, dry place until next spring. Be aware that hybrid marigolds may not produce true-to-type seeds, so the resulting plants may not look exactly like the parent plants.
What are some companion plants for marigolds?
Marigolds are excellent companion plants for a variety of vegetables and flowers. They are known to deter pests such as nematodes, aphids, and whiteflies. Some good companion plants for marigolds include tomatoes, peppers, eggplant, basil, and cabbage. Planting marigolds near these plants can help protect them from pests and improve their overall health.
Leave a Comment