
Grow Delicious Melons Backyard – sounds like a dream, right? Imagine stepping outside your back door and plucking a perfectly ripe, juicy melon, bursting with flavor. It’s not just a dream; it’s an achievable reality with a few clever tricks and a little DIY spirit! For centuries, cultivating melons has been a cherished practice, dating back to ancient Egypt and beyond. These sweet fruits were symbols of abundance and prosperity, enjoyed by royalty and commoners alike.
But let’s be honest, growing melons can sometimes feel like a gamble. You might end up with small, bland fruits, or worse, a plant that never produces at all. That’s where these DIY hacks come in! I’m going to share some simple, yet effective techniques that will dramatically increase your chances of success.
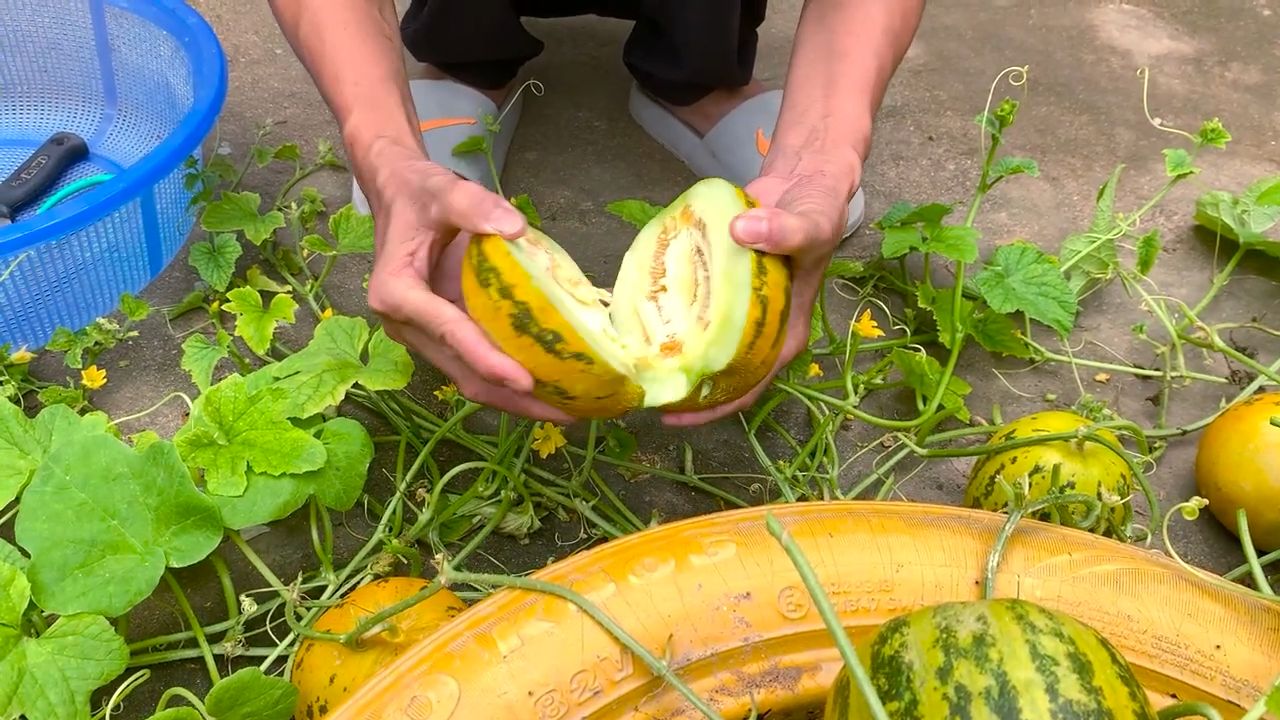
Why do you need these tricks? Because everyone deserves to experience the joy of harvesting their own homegrown melons. Plus, store-bought melons often lack the intense flavor and sweetness of those grown with love and care in your own backyard. So, get ready to transform your garden into a melon oasis and grow delicious melons backyard like a pro! Let’s dive in!
Growing Delicious Melons in Your Backyard: A Comprehensive DIY Guide
Hey there, fellow gardening enthusiasts! I’m so excited to share my tried-and-true method for growing juicy, flavorful melons right in your own backyard. Forget those bland, store-bought melons – with a little effort and these tips, you’ll be enjoying homegrown sweetness all summer long! This guide covers everything from seed starting to harvesting, ensuring you have the best possible chance of melon success.
Choosing the Right Melon Variety
Before we dive into the nitty-gritty, let’s talk about melon varieties. Not all melons are created equal, and some are better suited for certain climates and growing conditions than others. Here’s a quick rundown of some popular choices:
* Watermelons: These are the classic summer treat! Look for varieties like ‘Sugar Baby’ (small and early), “Crimson Sweet” (disease resistant and flavorful), or “Jubilee” (large and impressive). Consider “Bush Sugar Baby” if you have limited space.
* Cantaloupes: Known for their fragrant aroma and orange flesh, cantaloupes are a backyard favorite. ‘Athena’ and ‘Hales Best Jumbo’ are reliable choices.
* Honeydew Melons: These have a smooth, pale green rind and sweet, light green flesh. ‘Honeycrisp’ is a popular and reliable variety.
* Specialty Melons: Don’t be afraid to experiment! Consider growing Galia melons (sweet and aromatic), Charentais melons (French heirloom with intense flavor), or even Armenian cucumbers (technically a melon, but used like a cucumber).
Important Tip: Check your local climate and growing season before selecting your melon varieties. Some melons require a longer growing season than others. Seed packets and online resources will provide this information.
Phase 1: Starting Your Melon Seeds (or Buying Transplants)
You have two options here: starting your own seeds indoors or buying transplants from a local nursery. Starting seeds gives you more control over the process and allows you to choose from a wider variety of melons. However, buying transplants can save you time and effort.
Starting Seeds Indoors:
* When to Start: Start your melon seeds about 4-6 weeks before the last expected frost in your area.
* Materials You’ll Need:
* Seed starting trays or small pots
* Seed starting mix (a light, well-draining mix)
* Heat mat (optional, but helpful for germination)
* Grow lights (optional, but recommended for strong seedlings)
* Spray bottle or watering can
* Step-by-Step Instructions:
1. Prepare Your Trays: Fill your seed starting trays or pots with seed starting mix. Gently tap the trays to settle the mix.
2. Sow the Seeds: Plant 2-3 melon seeds per cell or pot, about ½ inch deep.
3. Water Gently: Moisten the soil with a spray bottle or watering can. Be careful not to overwater.
4. Provide Warmth: Place the trays on a heat mat (if using) and cover them with a humidity dome or plastic wrap to create a warm, humid environment.
5. Provide Light: Once the seeds germinate (usually within 7-10 days), remove the humidity dome and place the trays under grow lights or in a sunny window. If using a window, rotate the trays regularly to prevent the seedlings from leaning towards the light.
6. Water Regularly: Keep the soil consistently moist, but not soggy. Water when the top inch of soil feels dry to the touch.
7. Thin the Seedlings: Once the seedlings have their first true leaves (the second set of leaves after the initial seed leaves), thin them to one seedling per cell or pot. Choose the strongest, healthiest seedling and snip off the others at the soil line.
8. Harden Off the Seedlings: About a week before you plan to transplant the seedlings outdoors, begin hardening them off. This process gradually acclimates the seedlings to outdoor conditions. Start by placing the trays outdoors in a sheltered location for a few hours each day, gradually increasing the amount of time they spend outside. Protect them from strong winds and direct sunlight during this process.
Buying Transplants:
* Choosing Healthy Transplants: Look for transplants that are healthy and vigorous, with green leaves and sturdy stems. Avoid plants that are yellowed, wilted, or have signs of pests or diseases.
* Hardening Off Transplants: Even if you buy transplants, it’s still a good idea to harden them off for a few days before planting them in the garden.
Phase 2: Preparing Your Garden Bed
Melons are heavy feeders, meaning they need a lot of nutrients to thrive. Proper soil preparation is crucial for a successful melon crop.
* Choosing the Right Location: Melons need at least 6-8 hours of direct sunlight per day. Choose a location in your garden that receives plenty of sun.
* Soil Preparation:
* Soil Testing: Ideally, you should test your soil to determine its pH and nutrient levels. Melons prefer a slightly acidic to neutral soil pH (6.0-7.0).
* Amending the Soil: Amend your soil with plenty of organic matter, such as compost, well-rotted manure, or leaf mold. This will improve drainage, aeration, and nutrient content. Work the organic matter into the top 12-18 inches of soil.
* Adding Fertilizer: Melons benefit from a fertilizer that is high in phosphorus and potassium. You can use a balanced fertilizer (e.g., 10-10-10) or a fertilizer specifically formulated for fruits and vegetables. Follow the instructions on the fertilizer package.
* Creating Mounds or Rows: Melons grow best in raised mounds or rows. This helps to improve drainage and warm the soil. Create mounds that are about 12 inches high and 2-3 feet wide. Space the mounds about 4-6 feet apart.
Phase 3: Planting Your Melons
Now comes the exciting part – planting your melon seedlings or transplants in the garden!
* When to Plant: Wait until the soil has warmed up to at least 60°F (15°C) before planting your melons. This is usually a few weeks after the last expected frost.
* Planting Instructions:
1. Dig a Hole: Dig a hole in the top of each mound or row that is large enough to accommodate the root ball of the seedling or transplant.
2. Remove the Plant from the Container: Gently remove the plant from its container, being careful not to damage the roots.
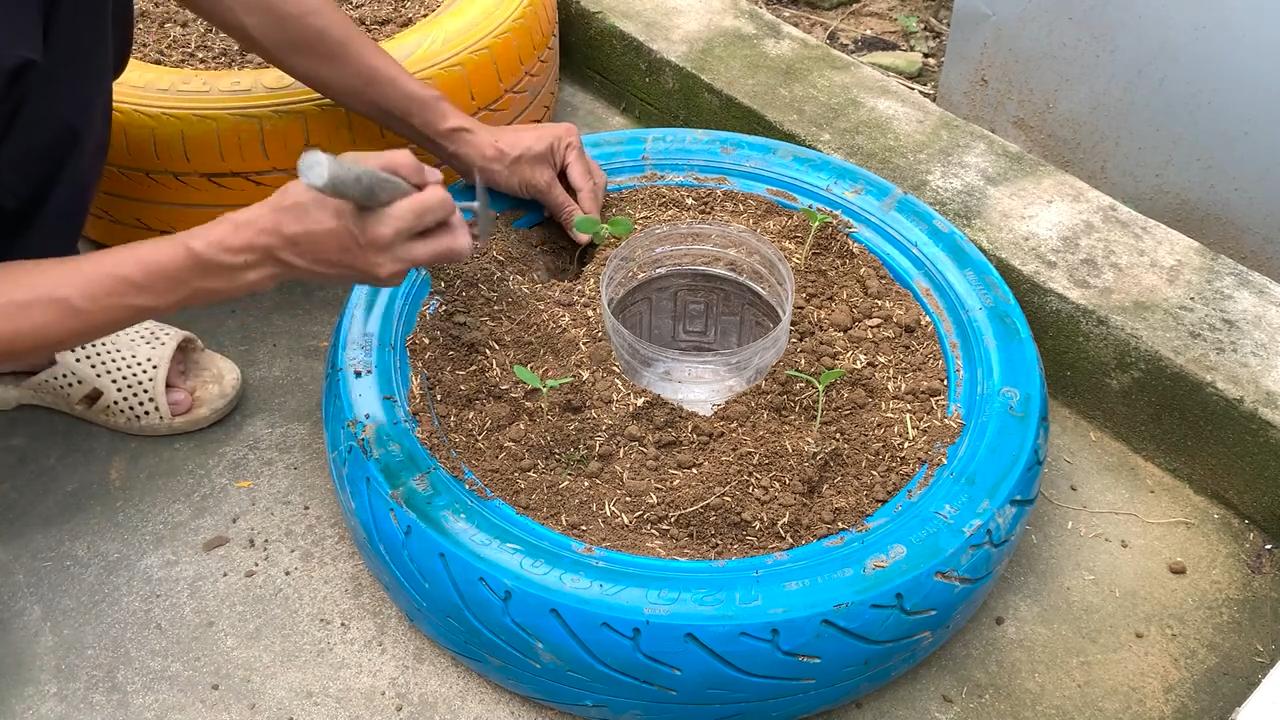
3. Plant the Seedling: Place the seedling in the hole and backfill with soil. Make sure the top of the root ball is level with the surrounding soil.
4. Water Thoroughly: Water the newly planted seedlings thoroughly.
5. Mulch: Apply a layer of mulch around the plants to help retain moisture, suppress weeds, and regulate soil temperature. Straw, hay, or wood chips are good choices for mulch.
Phase 4: Caring for Your Melon Plants
Once your melons are planted, it’s important to provide them with the care they need to thrive.
* Watering: Melons need consistent watering, especially during hot, dry weather. Water deeply and regularly, aiming to keep the soil consistently moist but not soggy. Avoid overhead watering, as this can promote fungal diseases. Drip irrigation is an excellent way to water melons.
* Fertilizing: Side-dress your melon plants with fertilizer every 2-3 weeks. Use a fertilizer that is high in phosphorus and potassium.
* Weeding: Keep the garden bed free of weeds, as weeds can compete with the melon plants for nutrients and water. Hand-pull weeds or use a hoe to remove them.
* Pest and Disease Control: Monitor your melon plants regularly for signs of pests or diseases. Common melon pests include aphids, squash bugs, and cucumber beetles. Common melon diseases include powdery mildew and fusarium wilt. Use organic pest control methods whenever possible. Insecticidal soap, neem oil, and Bacillus thuringiensis (Bt) are effective against many common pests. Copper fungicides can help to control fungal diseases.
* Pollination: Melons require pollination to produce fruit. Bees are the primary pollinators of melons. If you don’t have enough bees in your garden, you may need to hand-pollinate the flowers. To hand-pollinate, use a small paintbrush to transfer pollen from the male flowers to the female flowers. Female flowers have a small, immature melon at the base of the flower.
* Pruning: While not always necessary, pruning melon vines can improve air circulation and encourage fruit production. Remove any dead, diseased, or yellowing leaves. You can also prune the vines to limit their size.
* Supporting the Fruit:
Conclusion
So, there you have it! Growing delicious melons in your backyard isn’t just a pipe dream; it’s an achievable reality with a little know-how and the right approach. We’ve explored the essential steps, from selecting the perfect melon variety for your climate to nurturing those precious seedlings and providing the support they need to thrive. But the real game-changer, the secret weapon in your melon-growing arsenal, is this DIY trick we’ve shared.
Why is this DIY approach a must-try? Because it addresses some of the most common challenges faced by home gardeners attempting to cultivate these sweet, juicy fruits. It tackles issues like soil drainage, temperature regulation, and pest control head-on, giving your melon plants the best possible chance to flourish. Think of it as creating a mini-oasis, a personalized paradise where your melons can soak up the sun, draw nutrients from the soil, and develop that incredible flavor we all crave.
Beyond the core method, there’s plenty of room for experimentation and personalization. Consider these variations to tailor the technique to your specific needs and preferences:
* **Compost Tea Boost:** Regularly water your melon plants with diluted compost tea to provide an extra dose of nutrients and beneficial microbes. This can significantly enhance growth and fruit quality.
* **Companion Planting Power:** Surround your melon patch with companion plants like marigolds (to deter pests) or basil (to attract pollinators). This creates a more balanced and thriving ecosystem.
* **Vertical Growing Adventures:** If space is limited, explore vertical growing techniques using trellises or cages. This not only saves space but also improves air circulation around the plants, reducing the risk of fungal diseases.
* Mulch Magic: Experiment with different types of mulch, such as straw or wood chips, to retain moisture, suppress weeds, and regulate soil temperature.
Remember, gardening is a journey of learning and discovery. Don’t be afraid to try new things, observe your plants closely, and adapt your approach as needed. The rewards of growing your own delicious melons are well worth the effort. Imagine biting into a sun-ripened cantaloupe or watermelon, bursting with flavor and knowing that you nurtured it from seed to table. It’s an incredibly satisfying experience.
We wholeheartedly encourage you to give this DIY trick a try. It’s a simple, effective, and rewarding way to elevate your melon-growing game. And most importantly, we want to hear about your experiences! Share your successes, your challenges, and any variations you’ve tried in the comments below. Let’s create a community of melon enthusiasts, sharing tips and inspiring each other to grow the best melons possible. So, grab your seeds, gather your supplies, and get ready to embark on a delicious adventure! Happy gardening!
Frequently Asked Questions (FAQ)
What kind of melons work best with this DIY trick?
This DIY trick is versatile and can benefit a wide range of melon varieties, including watermelons, cantaloupes, honeydews, and even smaller specialty melons like Galia or Charentais. However, consider the size and growth habit of the melon when choosing a variety. Larger melons like watermelons may require more support and space, while smaller melons are better suited for vertical growing techniques. Also, research which melon varieties thrive in your specific climate and growing conditions. Local nurseries and agricultural extension offices are excellent resources for this information.
How often should I water my melon plants after using this DIY method?
Watering frequency depends on several factors, including the type of soil, the climate, and the stage of growth. Generally, melon plants need consistent moisture, especially during flowering and fruit development. Check the soil moisture regularly by sticking your finger about an inch deep into the soil. If it feels dry, it’s time to water. When watering, water deeply and thoroughly, allowing the water to soak into the soil. Avoid overhead watering, as this can increase the risk of fungal diseases. The DIY method helps with drainage, but overwatering can still be detrimental. Aim for consistent moisture without waterlogging.
What if I don’t have access to all the materials listed for the DIY trick? Can I substitute anything?
Absolutely! Gardening is all about resourcefulness. If you don’t have access to specific materials, consider these substitutions:
* **Instead of a specific type of compost:** Use whatever compost you have available, or even well-rotted manure. The key is to provide a nutrient-rich base for your melon plants.
* **Instead of a specific type of mulch:** Straw, wood chips, shredded leaves, or even cardboard can be used as mulch. The purpose of mulch is to retain moisture, suppress weeds, and regulate soil temperature.
* **Instead of a specific type of fertilizer:** Use a balanced fertilizer or a fertilizer specifically formulated for fruiting plants. Follow the instructions on the fertilizer packaging carefully to avoid over-fertilizing.
* Instead of specific soil amendment: You can use any type of organic matter that improves drainage and aeration, such as peat moss, coco coir, or perlite.
How do I know when my melons are ripe and ready to harvest?
Determining ripeness can be tricky, but here are some general guidelines:
* **Watermelons:** Look for a dull, rather than shiny, rind. The underside of the melon (where it rests on the ground) should be a creamy yellow color. Thump the melon; a ripe watermelon will sound hollow.
* **Cantaloupes:** The melon should have a sweet aroma, and the stem should slip easily from the vine with gentle pressure. The rind should have a distinct netting pattern.
* **Honeydews:** The rind should turn from a pale green to a creamy yellow color. The blossom end (opposite the stem) should feel slightly soft and give slightly to pressure.
Remember, these are just general guidelines. Experience is the best teacher. As you grow melons, you’ll learn to recognize the subtle signs of ripeness.
My melon plants are attracting pests. What can I do?
Pests can be a frustrating challenge, but there are several things you can do to protect your melon plants:
* **Handpicking:** Regularly inspect your plants and handpick any pests you find, such as squash bugs or cucumber beetles.
* **Insecticidal soap:** Spray your plants with insecticidal soap to control aphids, whiteflies, and other soft-bodied insects.
* **Neem oil:** Neem oil is a natural insecticide and fungicide that can help control a wide range of pests and diseases.
* **Row covers:** Use row covers to protect your plants from pests, especially during the early stages of growth.
* **Companion planting:** Plant companion plants like marigolds or nasturtiums to deter pests.
* Attract beneficial insects: Plant flowers that attract beneficial insects like ladybugs and lacewings, which prey on pests.
Can I use this DIY trick in containers?
Yes, you can adapt this DIY trick for container gardening. Choose a large container with good drainage. The size of the container will depend on the type of melon you’re growing. Use a high-quality potting mix and incorporate compost or other organic matter. Be sure to provide adequate support for the melon vines, such as a trellis or cage. Container-grown melons may require more frequent watering and fertilization than those grown in the ground.
What if my melon plants are not producing fruit?
Lack of fruit production can be due to several factors:
* **Poor pollination:** Melons require pollination to set fruit. If you’re not seeing bees or other pollinators in your garden, you may need to hand-pollinate the flowers.
* **Insufficient sunlight:** Melons need at least 6-8 hours of sunlight per day to produce fruit.
* **Lack of nutrients:** Make sure your plants are getting enough nutrients, especially phosphorus and potassium.
* **Water stress:** Both overwatering and underwatering can prevent fruit production.
* Temperature extremes:** Extreme heat or cold can also affect fruit set.
Investigate these factors and adjust your growing practices accordingly.
How can I improve the flavor of my homegrown melons?
The key to delicious melons is proper ripening on the vine. Allow the melons to ripen fully before harvesting. Also, ensure your plants are getting adequate sunlight, water, and nutrients. Soil health also plays a crucial role in flavor development. Amend your soil with compost and other organic matter to improve its fertility and drainage. Finally, consider the variety of melon you’re growing. Some varieties are simply more flavorful than others.
Leave a Comment