
Growing squash can be incredibly rewarding, but let’s be honest, sometimes those sprawling vines and demanding needs can feel a bit overwhelming! Ever dream of harvesting a bumper crop of beautiful squash without battling pests, diseases, or the dreaded squash vine borer? Well, you’re in the right place! I’m about to share a simple, yet incredibly effective, DIY trick that will revolutionize your squash growing game.
For centuries, gardeners have sought innovative ways to coax the best yields from their crops. While the exact origin of this particular hack is a bit murky, the spirit of ingenuity it embodies is timeless. Think of the ancient Egyptians, meticulously irrigating their fields along the Nile, or the ingenious terrace farming techniques developed in the Andes. We’re all part of that same tradition, constantly learning and adapting to improve our harvests.
So, why do you need this growing squash styrofoam trick? Because it addresses a major pain point for squash growers: protecting those precious stems from pests and rot! This simple DIY solution creates a barrier, keeping your plants healthy and thriving, leading to bigger, better, and more abundant squash. Trust me, once you try this, you’ll wonder why you didn’t do it sooner. Let’s dive in and unlock the secret to squash-growing success!
DIY Squash Booster: The Styrofoam Trick for Bigger, Healthier Harvests
Hey fellow gardeners! I’m always on the lookout for ways to boost my vegetable yields, and this year, I stumbled upon a trick that’s been a game-changer for my squash: using styrofoam! It sounds a little unconventional, I know, but trust me, it works wonders. This method helps prevent squash rot, improves drainage, and even reflects sunlight for better ripening. Let’s dive into how you can use this simple hack to grow the biggest, healthiest squash you’ve ever seen.
What You’ll Need
Before we get started, gather these supplies:
* Styrofoam pieces: You can use packing peanuts, styrofoam sheets cut into squares, or even recycled styrofoam containers. Just make sure they’re clean! I prefer using larger pieces, about 4×4 inches, for better support.
* Squash seedlings or seeds: Choose your favorite squash variety! I’m partial to zucchini and butternut squash.
* Gardening gloves: To keep your hands clean and protected.
* Trowel or small shovel: For planting.
* Well-draining soil: Amend your garden soil with compost or other organic matter for best results.
* Watering can or hose: For watering your squash plants.
* Optional: Landscape fabric or mulch: To further suppress weeds and retain moisture.
Why Styrofoam? The Benefits Explained
You might be wondering, “Why styrofoam? What’s so special about it?” Here’s the breakdown:
* Prevents Squash Rot: This is the biggest benefit! Squash, especially pumpkins and zucchini, are prone to rotting on the underside where they touch the damp soil. The styrofoam elevates the squash, allowing air to circulate and preventing moisture buildup.
* Improved Drainage: Styrofoam doesn’t absorb water, so it helps improve drainage around the base of the squash. This is especially important in areas with heavy clay soil.
* Reflects Sunlight: The white surface of the styrofoam reflects sunlight onto the squash, promoting even ripening and better color development. Think of it as a mini reflector for your veggies!
* Pest Deterrent (to some extent): While not a foolproof solution, the barrier created by the styrofoam can make it slightly harder for some ground-dwelling pests to reach the squash.
* Lightweight and Easy to Use: Styrofoam is incredibly lightweight and easy to handle, making it a breeze to incorporate into your gardening routine.
* Recycled Material: You can often reuse styrofoam packaging materials, making this a sustainable gardening practice.
Planting with Styrofoam: A Step-by-Step Guide
This method works whether you’re starting with seedlings or seeds. I’ll walk you through both scenarios.
Planting Squash Seedlings with Styrofoam
1. Prepare the Soil: Choose a sunny spot in your garden with well-draining soil. Amend the soil with compost or other organic matter to improve fertility and drainage. I usually dig in a generous amount of compost a week or two before planting.
2. Dig the Planting Hole: Dig a hole that’s slightly larger than the root ball of your squash seedling.
3. Place the Styrofoam: Before placing the seedling, put a piece of styrofoam at the bottom of the hole. This will act as a base for the root ball and improve drainage. Make sure the styrofoam is large enough to support the seedling without sinking into the soil.
4. Plant the Seedling: Gently remove the seedling from its container and place it in the hole, on top of the styrofoam. Make sure the top of the root ball is level with the surrounding soil.
5. Backfill with Soil: Fill the hole with soil, gently patting it down around the seedling.
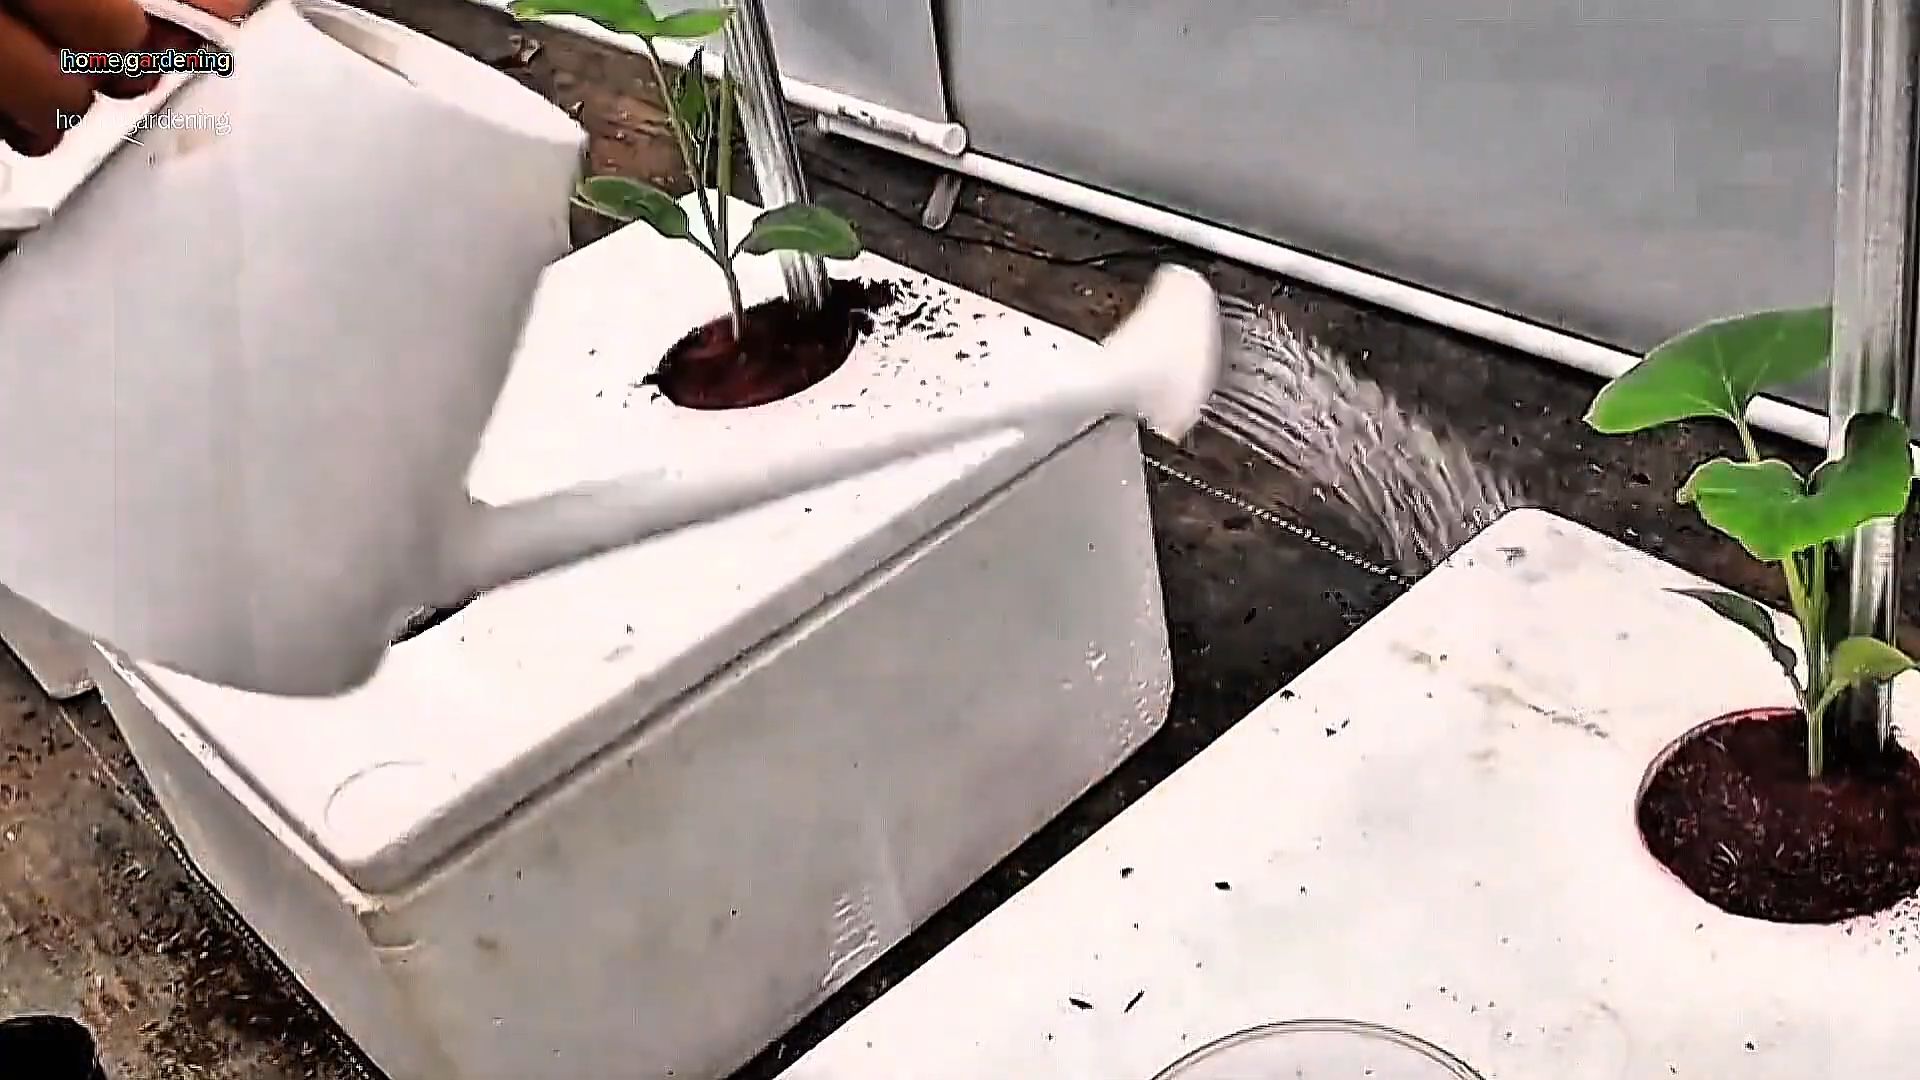
6. Water Thoroughly: Water the seedling thoroughly after planting. This will help settle the soil and encourage root growth.
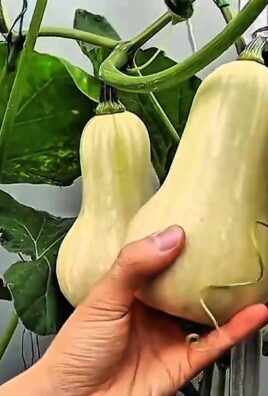
7. Add More Styrofoam (Optional): Once the plant starts producing squash, you can add more styrofoam pieces under the developing fruits to keep them off the ground. I usually wait until the squash are about the size of a tennis ball before adding the extra support.
8. Mulch (Optional): Add a layer of mulch around the base of the plant to suppress weeds and retain moisture.
Planting Squash Seeds with Styrofoam
1. Prepare the Soil: Same as with seedlings, choose a sunny spot and amend the soil.
2. Create a Small Mound: Create a small mound of soil where you’ll plant the seeds. This will help with drainage.
3. Place the Styrofoam: Place a piece of styrofoam on top of the mound. This will be the base for your squash plant.
4. Plant the Seeds: Sow 2-3 squash seeds directly into the styrofoam, about an inch deep. Space them a few inches apart.
5. Cover with Soil: Gently cover the seeds with soil.
6. Water Gently: Water the area gently, being careful not to wash away the seeds.
7. Thin Seedlings (If Necessary): Once the seedlings emerge, thin them to one plant per styrofoam piece. Choose the strongest, healthiest seedling and snip off the others at the soil line.
8. Add More Styrofoam (Optional): As the plant grows and produces squash, add more styrofoam pieces under the developing fruits.
9. Mulch (Optional): Add a layer of mulch around the base of the plant.
Caring for Your Styrofoam-Supported Squash
Once your squash plants are in the ground, here are some tips for keeping them healthy and productive:
* Water Regularly: Squash plants need consistent moisture, especially during hot weather. Water deeply at the base of the plant, avoiding getting the leaves wet, which can lead to fungal diseases. I usually water in the morning to allow the leaves to dry out during the day.
* Fertilize: Feed your squash plants with a balanced fertilizer every few weeks. You can use a liquid fertilizer or a slow-release granular fertilizer. Follow the instructions on the fertilizer package.
* Control Pests and Diseases: Keep an eye out for common squash pests like squash bugs, squash vine borers, and aphids. You can use insecticidal soap or other organic pest control methods to manage these pests. Also, watch for signs of fungal diseases like powdery mildew. Improve air circulation around the plants and avoid overhead watering to prevent these diseases.
* Pollination: Squash plants require pollination to produce fruit. If you’re not seeing many bees in your garden, you may need to hand-pollinate the flowers. To do this, use a small paintbrush to transfer pollen from the male flowers (which have a long, thin stem) to the female flowers (which have a small squash growing behind the flower).
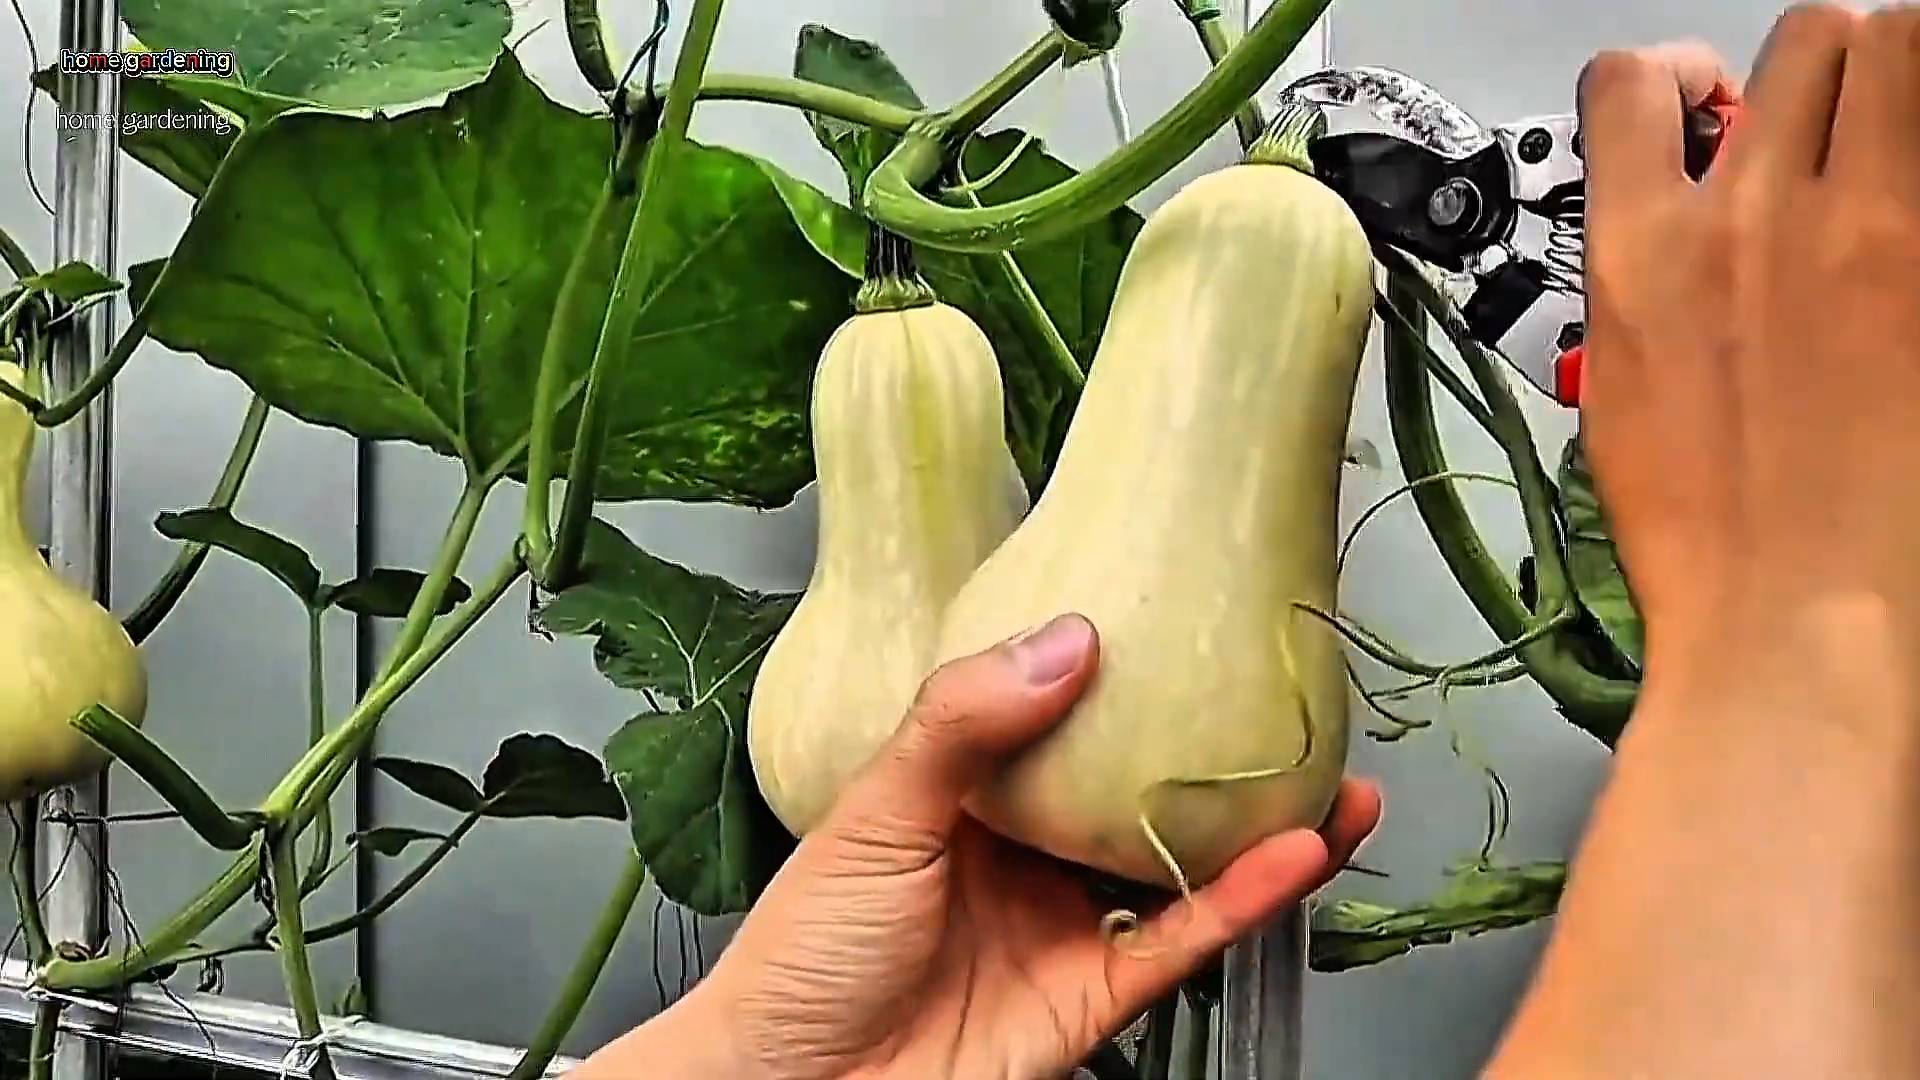
* Harvesting: Harvest your squash when they’re mature but still tender. The exact timing will depend on the variety of squash you’re growing. For zucchini, harvest when they’re about 6-8 inches long. For butternut squash, harvest when the skin is hard and the stem is dry.
Troubleshooting
Even with the styrofoam trick, you might encounter some challenges. Here are a few common issues and how to address them:
* Styrofoam Blowing Away: If you live in a windy area, the styrofoam pieces might blow away. To prevent this, you can weigh them down with small rocks or secure them to the ground with garden staples.
* Slugs and Snails: Slugs and snails can still be a problem, even with the styrofoam. Use slug bait or other snail control methods to protect your squash plants.
* Styrofoam Degrading: Over time, the styrofoam might start to break down, especially if it’s exposed to direct sunlight. Replace the styrofoam pieces as needed.
* Not Enough Sunlight: If your squash plants aren’t getting enough sunlight, they might not produce as much fruit. Make sure they’re planted in a sunny location that receives at least 6-8 hours of sunlight per day.
Alternative Materials
While I’m a big fan of styrofoam for this trick, you can also use other materials to elevate your squash:
* Wood Scraps: Small pieces of wood can work well, but make sure they’re not treated with chemicals that could leach into the soil.
* Rocks: Flat rocks can provide a stable base for your squash.
* Plastic Containers: Upside-down plastic containers can also be used, but make sure they have drainage holes.
* Commercial Plant Supports: You can also purchase commercial plant supports specifically designed for squash and other vining plants.
My Personal Experience
I’ve been using the styrofoam trick for a few years now, and I’ve seen a significant improvement in my squash yields. I used to lose a lot of squash to rot, but now I rarely have that problem. Plus, the squash are bigger, healthier, and more flavorful. I especially noticed
Conclusion
So, there you have it! This simple yet ingenious styrofoam trick for growing squash is more than just a gardening hack; it’s a game-changer. We’ve explored how elevating your squash fruits off the damp ground can dramatically reduce the risk of rot, a common and heartbreaking problem for squash growers everywhere. Think of it: no more prematurely decaying pumpkins, zucchini, or butternut squash! This translates to a more bountiful harvest, healthier plants, and ultimately, a more rewarding gardening experience.
But the benefits extend beyond just preventing rot. By improving air circulation around the developing fruit, you’re also creating an environment less hospitable to pests and diseases. This means less need for potentially harmful pesticides and a more natural, organic approach to gardening. Plus, the styrofoam provides a clean, stable surface, preventing soil from splashing onto the squash and further contributing to decay.
Don’t think this trick is limited to just one type of squash, either. While we’ve focused on the general principles, feel free to experiment with different sizes and shapes of styrofoam to accommodate various squash varieties. For larger pumpkins, you might need a thicker, more robust piece of styrofoam to provide adequate support. For smaller zucchini or yellow squash, a thinner piece will suffice. You can even get creative and paint the styrofoam to blend in with your garden or add a touch of whimsy! Consider using recycled styrofoam packaging – a great way to repurpose materials and reduce waste. You could also try using small wooden pallets or even upturned terracotta pots as alternatives, although styrofoam is often the most readily available and cost-effective option.
This styrofoam trick for growing squash is particularly beneficial in regions with high humidity or frequent rainfall, where the risk of rot is significantly increased. However, even in drier climates, it can still provide a valuable boost to your squash plants, ensuring a cleaner, healthier, and more productive harvest.
We truly believe that this simple technique can make a significant difference in your squash growing endeavors. It’s easy to implement, inexpensive, and incredibly effective. So, why not give it a try? You have nothing to lose and everything to gain – a bigger, healthier, and more abundant squash harvest awaits!
We’re confident that you’ll be amazed by the results. But don’t just take our word for it. We encourage you to try this styrofoam trick for growing squash in your own garden and see the difference for yourself. And most importantly, we want to hear about your experience! Share your photos, tips, and stories with us in the comments below. Let’s build a community of squash-growing enthusiasts who are passionate about maximizing their harvests and minimizing waste. Happy gardening!
FAQ
What exactly is the purpose of using styrofoam under squash?
The primary purpose of placing styrofoam under growing squash is to prevent the fruit from sitting directly on the damp soil. This direct contact with moisture can lead to rot, especially in humid climates or during periods of heavy rainfall. The styrofoam acts as a barrier, elevating the squash and allowing for better air circulation around the fruit. This reduces the risk of fungal diseases and decay, resulting in a healthier and more abundant harvest. Think of it as giving your squash a little “lift” to keep it dry and happy!
What kind of styrofoam should I use? Is there a specific thickness or size that’s best?
The best type of styrofoam to use is clean, rigid styrofoam. You can often find this type of styrofoam in packaging materials from electronics, appliances, or furniture. Avoid using styrofoam that is heavily soiled or contaminated with chemicals. As for thickness and size, it depends on the size of the squash you’re growing. For smaller squash varieties like zucchini or yellow squash, a thinner piece of styrofoam (around 1-2 inches thick) will suffice. For larger pumpkins or butternut squash, you’ll need a thicker and more substantial piece (2-4 inches thick) to provide adequate support. The styrofoam should be large enough to fully support the squash without it tipping or rolling off. A good rule of thumb is to choose a piece of styrofoam that is slightly larger than the expected diameter of the mature squash.
When is the best time to put the styrofoam under the squash?
The ideal time to place the styrofoam under the squash is when the fruit is still relatively small, about the size of a softball or slightly larger. This allows you to gently lift the squash without damaging the vine. If you wait until the squash is much larger, it can be more difficult to lift and position the styrofoam without risking injury to the plant. It’s also a good idea to check your squash plants regularly and place the styrofoam as soon as you notice the fruit starting to develop and rest on the ground.
Will the styrofoam attract pests or harm the environment?
Styrofoam itself is not typically attractive to pests. However, if the styrofoam becomes soiled with decaying plant matter or food scraps, it could potentially attract insects or rodents. To prevent this, keep the styrofoam clean and free of debris. As for the environmental impact, styrofoam is not biodegradable and can contribute to landfill waste. To mitigate this, consider using recycled styrofoam whenever possible. You can also explore alternative materials like small wooden pallets, upturned terracotta pots, or even thick layers of straw or mulch. While these alternatives may not be as readily available or as effective as styrofoam in preventing rot, they can be a more environmentally friendly option.
Can I use something other than styrofoam? What are some alternatives?
Yes, absolutely! While styrofoam is a popular and effective choice, there are several alternatives you can use to elevate your squash. Some options include:
* **Small wooden pallets:** These provide a sturdy and well-ventilated platform for your squash.
* **Upturned terracotta pots:** These offer good drainage and can add a decorative touch to your garden.
* **Thick layers of straw or mulch:** While not as rigid as styrofoam, a thick layer of straw or mulch can help to create a barrier between the squash and the damp soil.
* **Pieces of wood:** Scrap pieces of untreated wood can also be used, but be sure to avoid using treated wood, as the chemicals can leach into the soil.
* **Plastic containers:** Inverted plastic containers can also work, but ensure they have drainage holes to prevent water from pooling.
The best alternative will depend on your personal preferences, the availability of materials, and the size of your squash plants.
My squash is already rotting. Can I still use the styrofoam trick to save it?
Unfortunately, if your squash is already showing signs of rot, the styrofoam trick may not be able to completely reverse the damage. However, it can still help to prevent the rot from spreading further and potentially salvage some of the fruit. Remove any affected parts of the squash and then place it on the styrofoam to improve air circulation and prevent further contact with the damp soil. It’s also important to address the underlying cause of the rot, such as poor drainage or overcrowding of plants.
Does this trick work for all types of squash?
Yes, this trick can be used for virtually all types of squash, including pumpkins, zucchini, butternut squash, spaghetti squash, and acorn squash. The key is to choose a piece of styrofoam that is appropriately sized and sturdy enough to support the weight of the mature fruit.
Will this trick protect my squash from squash bugs or vine borers?
While the styrofoam trick primarily focuses on preventing rot, it can indirectly help to reduce the risk of pest infestations. By improving air circulation around the squash, you’re creating an environment that is less hospitable to squash bugs and other pests. However, it’s important to note that the styrofoam trick alone is not a foolproof solution for pest control. You’ll still need to implement other pest management strategies, such as regular inspections of your plants, hand-picking pests, and using appropriate insecticides or organic pest control methods. Vine borers, which attack the stems of squash plants, are not directly affected by the styrofoam trick, but maintaining healthy plants through proper watering and fertilization can help them to withstand borer damage.
Leave a Comment