
Pet Hair Removal Glove: Are you tired of battling pet hair that seems to cling to every surface in your home? I know I am! It’s a never-ending struggle for pet owners, and sometimes it feels like you’re losing the war against those pesky fur tumbleweeds. But what if I told you there’s a simple, cost-effective, and even enjoyable way to tackle this problem?
For centuries, people have sought innovative ways to manage pet hair, from rudimentary brushes to elaborate grooming tools. While the tools have evolved, the underlying challenge remains the same: keeping our homes clean and comfortable while sharing them with our beloved furry companions. This DIY pet hair removal glove is a modern solution rooted in that age-old quest.
Let’s face it, traditional methods like vacuuming and lint rollers can be time-consuming and often ineffective. They might pick up some of the hair, but they often miss the embedded fur that clings stubbornly to furniture and fabrics. That’s where this DIY hack comes in! This pet hair removal glove is not only incredibly easy to make, but it’s also gentle on your furniture and a fun way to bond with your pet while keeping your home hair-free. I’m excited to share this simple yet effective solution with you, so you can finally say goodbye to the endless pet hair struggle!
DIY Pet Hair Removal Glove: Say Goodbye to Fur Frustration!
Okay, fellow pet lovers, let’s be honest: shedding is the bane of our existence. We adore our furry companions, but the constant battle against pet hair clinging to everything we own? Not so much. I’ve tried countless lint rollers, vacuums, and brushes, and while some work okay, I always felt like there had to be a better, more efficient (and maybe even fun!) way. That’s when I stumbled upon the idea of a DIY pet hair removal glove. And let me tell you, it’s a game-changer!
This glove is super easy to make, uses materials you probably already have lying around, and is surprisingly effective. Plus, it’s kind of like giving your pet a massage while you’re removing their fur. Win-win!
Materials You’ll Need:
* An old gardening glove (or any glove with a textured surface). Latex or rubber gloves work best.
* Silicone caulk or hot glue (silicone caulk is more durable, but hot glue is faster).
* Small rubber bands (the kind used for hair or crafts).
* Scissors.
* A damp cloth for cleanup.
* (Optional) Glitter or decorative elements to personalize your glove!
Why This Works: The Science Behind the Stick
The key to this glove’s effectiveness is the textured surface created by the rubber bands. The rubber bands, when secured to the glove, create a slightly sticky and textured surface. As you run the glove over fabric or your pet’s fur, the hair clings to the rubber bands due to static electricity and the physical grip of the rubber. It’s a simple concept, but incredibly effective!
Step-by-Step Instructions: Making Your Pet Hair Removal Glove
Alright, let’s get down to business! Here’s how to create your very own pet hair removal glove:
1. Prepare Your Glove: Start by cleaning your glove thoroughly. Make sure it’s dry and free of any dirt or debris. This will ensure that the adhesive (silicone caulk or hot glue) sticks properly. If you’re using an old gardening glove, check for any holes or tears and repair them if necessary. A solid base is crucial for the glove to function effectively.
2. Gather Your Rubber Bands: Sort through your rubber bands and discard any that are broken or stretched out. You want them to be relatively uniform in size and shape for consistent hair removal. I find that smaller, thinner rubber bands work best because they create a denser, more effective surface.
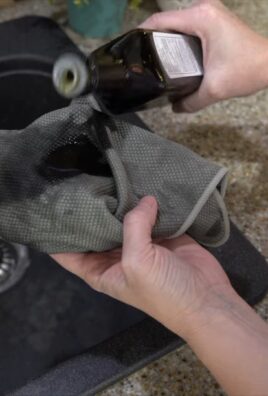
3. Apply the Adhesive: This is where the magic happens! You have two options here: silicone caulk or hot glue.
* Silicone Caulk: This is the more durable option. Apply a small dab of silicone caulk to the glove’s surface where you want to attach a rubber band. Don’t use too much, or it will take forever to dry. A pea-sized amount is usually sufficient.
* Hot Glue: This is the faster option, but it might not be as long-lasting. Apply a small dot of hot glue to the glove’s surface. Work quickly, as hot glue cools down fast.
4. Attach the Rubber Bands: Immediately after applying the adhesive, press a rubber band onto the dot of glue. Make sure the rubber band is lying flat against the glove. Hold it in place for a few seconds to allow the adhesive to set.
5. Repeat, Repeat, Repeat: This is the most time-consuming part, but trust me, it’s worth it! Continue applying adhesive and attaching rubber bands, covering the entire palm and fingers of the glove. Aim for a dense, even distribution of rubber bands. The closer they are together, the more effective the glove will be at picking up hair. I like to overlap the rubber bands slightly to create a more textured surface.
6. Let it Dry (Important!): This is crucial, especially if you’re using silicone caulk. Allow the adhesive to dry completely before using the glove. Silicone caulk can take up to 24 hours to fully cure, so be patient! Hot glue will dry much faster, usually within a few minutes.
7. Trim Any Excess: Once the adhesive is dry, use scissors to trim any excess rubber band material that might be sticking out or interfering with the glove’s movement. You want the surface to be relatively smooth and comfortable to use.
8. Personalize (Optional): If you’re feeling creative, you can add glitter, paint, or other decorative elements to your glove. This is totally optional, but it can make the glove more fun to use! Just make sure that any decorations you add don’t interfere with the glove’s functionality.
Using Your Pet Hair Removal Glove: A Fur-tastic Experience!
Now for the fun part: putting your new glove to the test!
1. Test it Out: Before using the glove on your pet, test it out on a small, inconspicuous area of fabric, like the back of a chair or a corner of your couch. This will give you a feel for how the glove works and how much pressure to apply.
2. Gently Stroke Your Pet: Put on the glove and gently stroke your pet in the direction of their fur growth. The rubber bands will grab onto loose hair, pulling it away from their coat.
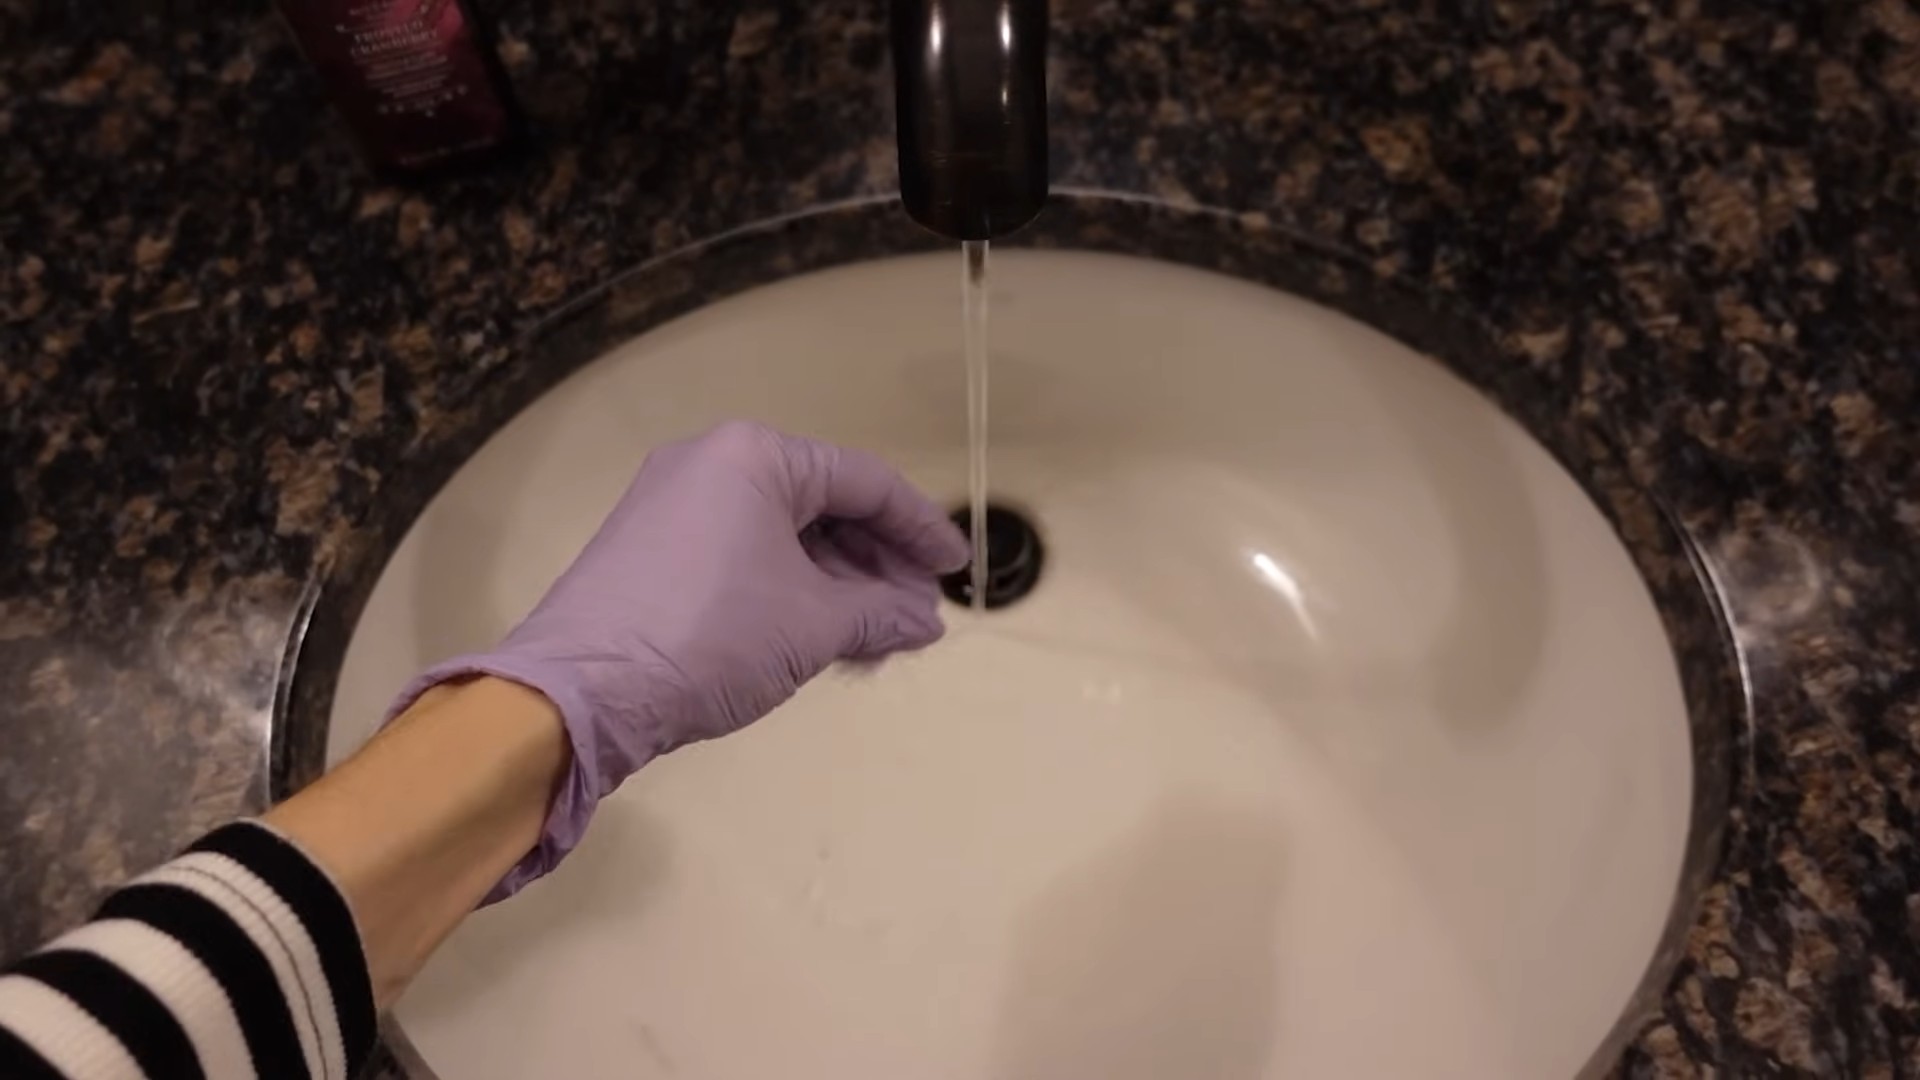
3. Collect the Hair: As you stroke your pet, the hair will accumulate on the glove. Periodically, remove the accumulated hair by pulling it off the glove with your other hand. You can also use a damp cloth to wipe the glove clean.
4. Repeat as Needed: Continue stroking your pet and removing hair until you’ve removed as much loose fur as possible. You may need to repeat this process several times, especially during shedding season.
5. Clean the Glove: After each use, clean the glove thoroughly with a damp cloth. This will remove any remaining hair and prevent the glove from becoming clogged. You can also wash the glove with mild soap and water if necessary. Make sure to let it dry completely before storing it.
Tips and Tricks for Maximum Hair Removal:
* Use a Damp Glove: Lightly dampen the glove with water before using it. This can help to attract more hair and prevent static electricity.
* Work in Sections: Divide your pet’s body into sections and focus on one section at a time. This will ensure that you remove all the loose hair.
* Be Gentle: Don’t apply too much pressure when stroking your pet. You want to remove the hair without causing them any discomfort.
* Reward Your Pet: Give your pet treats and praise during the grooming process to make it a positive experience for them.
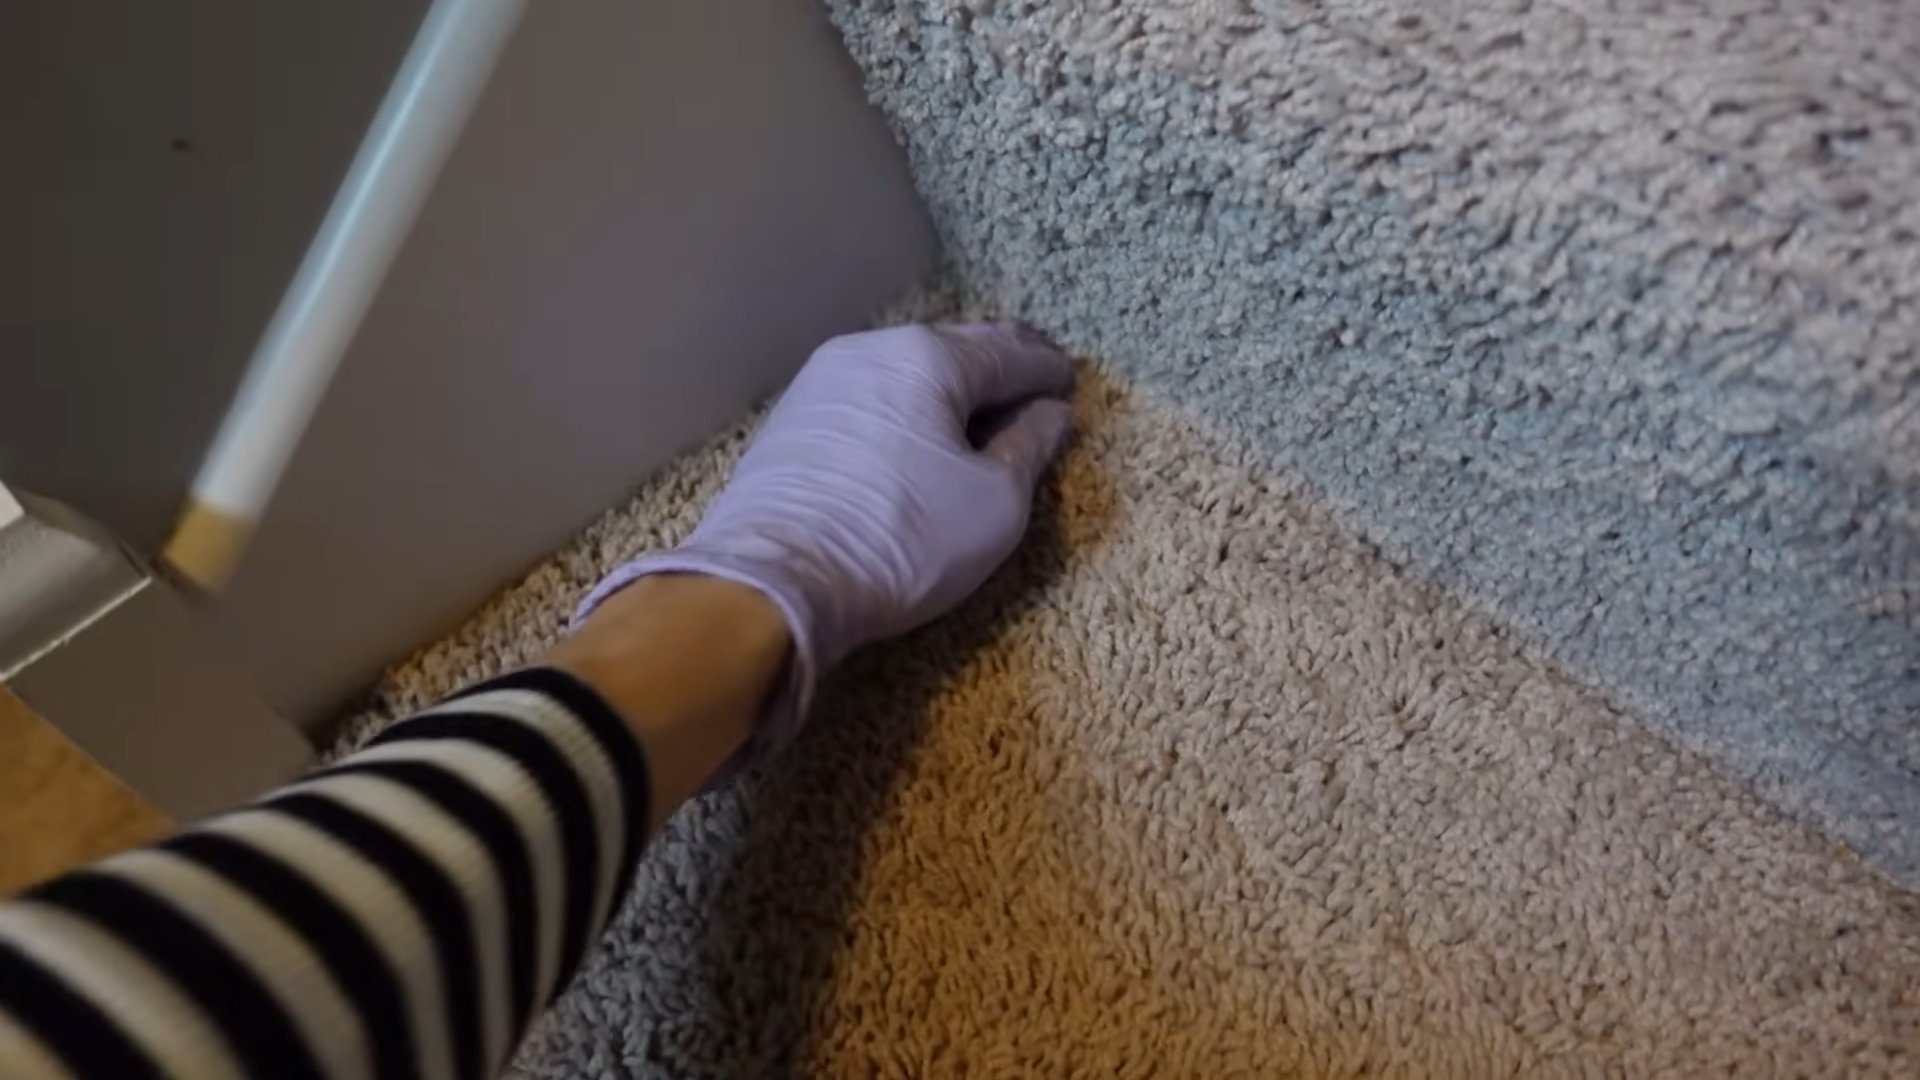
* Use on Furniture: This glove isn’t just for pets! It works great on furniture, carpets, and clothing too. Simply rub the glove over the surface to remove pet hair.
* Experiment with Rubber Band Placement: Try different patterns and densities of rubber band placement to see what works best for your pet’s fur type.
* Replace Rubber Bands as Needed: Over time, the rubber bands may become worn or damaged. Replace them as needed to maintain the glove’s effectiveness.
* Storage: Store your glove in a cool, dry place away from direct sunlight. This will help to prolong its lifespan.
Troubleshooting: Common Issues and Solutions
* Glove Not Picking Up Hair: Make sure the rubber bands are clean and dry. Also, try applying more pressure when stroking your pet.
* Rubber Bands Falling Off: Use a stronger adhesive, like silicone caulk. Also, make sure the glove’s surface is clean and dry before applying the adhesive.
* Glove Causing Irritation: If your pet has sensitive skin, try using a softer glove material or applying less pressure.
* Glove Smells Bad: Wash the glove with mild soap and water and let it dry completely. You can also add a few drops of essential oil to the water to freshen it up.
Alternative Materials and Variations:
* Sponge Glove: Instead of a gardening glove, you can use a sponge glove. The porous surface of the sponge will help to trap hair.
* Microfiber Cloth: Attach small pieces of microfiber cloth to the glove instead of rubber bands. Microfiber is known for its ability to attract and trap dust and hair.
* Velcro Strips: Use small strips of Velcro (hook side) instead of rubber bands. The Velcro will grab onto the hair and hold it in place.
* Dishwashing Gloves: The textured surface of dishwashing gloves can also be effective at removing pet hair.
Safety Precautions:
* Always supervise your pet when using the glove.
* Do not use the glove on open wounds or irritated skin.
* If your pet shows any signs of discomfort, stop using the glove immediately.
* Keep the glove out of reach of children and pets when not in use.
I hope you found this DIY guide helpful! With
Conclusion
So, there you have it! Transforming a simple household glove into a powerful pet hair removal glove is not just a clever hack; it’s a game-changer for pet owners battling the never-ending fur storm. We’ve explored how easy it is to create, the science behind why it works so effectively, and the myriad of surfaces it can conquer. But why is this DIY trick a must-try?
Firstly, it’s incredibly cost-effective. Forget expensive, specialized pet hair removal tools that often underperform. This solution utilizes materials you likely already have at home, making it a budget-friendly alternative that delivers impressive results. Secondly, it’s eco-friendly. By repurposing a glove, you’re reducing waste and contributing to a more sustainable lifestyle. Thirdly, it’s versatile. From upholstery and carpets to clothing and car interiors, this glove tackles pet hair on a wide range of surfaces, making it a truly all-in-one solution.
But the real magic lies in its effectiveness. The textured surface of the glove, combined with the slight tackiness of the rubber or latex, creates an ideal environment for attracting and clinging to pet hair. The electrostatic charge generated as you rub the glove against surfaces further enhances its hair-grabbing capabilities. This means less time spent vacuuming and lint-rolling, and more time enjoying the company of your furry friends.
Looking for variations? Consider using different types of gloves to find the texture that works best for your pet’s hair. A textured dishwashing glove might be more effective for short, coarse hair, while a latex glove could be ideal for long, fine hair. You can also experiment with adding a small amount of fabric softener to the glove before use. This can help to further reduce static cling and make the hair removal process even easier. Another variation is to slightly dampen the glove before use. The moisture can help to clump the hair together, making it easier to collect.
Beyond the basic glove, you can also customize your pet hair removal glove to suit your specific needs. For example, if you have a large area to cover, you could attach the glove to a long-handled brush or mop. This would allow you to reach high places and cover more ground with each swipe. If you have a pet that sheds excessively, you could even create a dedicated “pet grooming glove” by attaching the glove to a grooming brush. This would allow you to remove loose hair directly from your pet’s coat, preventing it from ending up on your furniture in the first place.
We are confident that this DIY pet hair removal glove will become your new go-to weapon in the fight against pet hair. It’s simple, effective, and affordable – what’s not to love?
Now, it’s your turn! We encourage you to try this DIY trick and experience the difference for yourself. Don’t be afraid to experiment with different glove types and techniques to find what works best for you and your pet. Once you’ve mastered the art of the pet hair removal glove, we want to hear all about it! Share your experiences, tips, and variations in the comments below. Let’s create a community of pet owners who are armed with the knowledge and tools to conquer the pet hair battle once and for all! We can’t wait to see your before-and-after photos and hear your success stories. Happy cleaning!
Frequently Asked Questions (FAQ)
What types of gloves work best for a pet hair removal glove?
The best type of glove depends on the type of pet hair you’re dealing with and the surface you’re cleaning. Latex or nitrile gloves are generally a good starting point due to their slight tackiness. However, textured dishwashing gloves can be more effective for short, coarse hair, as the texture helps to grab onto the individual strands. Microfiber gloves are also an option, especially for delicate surfaces. Experiment to see what works best for your specific needs. Consider the thickness of the glove as well. A thicker glove might be more durable, but a thinner glove might offer better dexterity and feel.
Will this pet hair removal glove work on all types of surfaces?
The pet hair removal glove is quite versatile, but its effectiveness can vary depending on the surface. It works well on upholstery, carpets, clothing, car interiors, and even hard surfaces like wood floors (though you’ll likely need to vacuum up the collected hair afterward). However, it might not be as effective on very plush or deeply textured surfaces, as the glove might not be able to reach the embedded hair. For those surfaces, you might need to use a combination of the glove and a vacuum cleaner with an upholstery attachment. Always test the glove on a small, inconspicuous area first to ensure it doesn’t damage the surface.
How do I clean the pet hair off the glove after using it?
Cleaning the glove is easy! Simply run it under warm water and use your fingers to gently remove the collected hair. For stubborn clumps, you can use a soft brush or a lint roller. Allow the glove to air dry completely before storing it. You can also use a mild soap or detergent to clean the glove if it’s particularly dirty. Avoid using harsh chemicals or abrasive cleaners, as these can damage the glove. Regularly cleaning the glove will help to maintain its effectiveness and prolong its lifespan.
Is this pet hair removal glove safe for all types of pets?
Yes, the pet hair removal glove is safe for all types of pets, as long as you’re using it on surfaces and not directly on your pet. However, if you’re considering using the glove to groom your pet, be very gentle and avoid applying too much pressure. Some pets might be sensitive to the texture of the glove, so introduce it slowly and positively. Always supervise your pet during grooming sessions and stop if they show any signs of discomfort. Never use the glove on open wounds or irritated skin.
Can I use this glove on my pet directly to remove loose fur?
While the primary purpose is for removing hair from surfaces, you *can* use it gently on your pet. However, proceed with caution. Some pets love the sensation, while others find it irritating. Use a very light touch and avoid sensitive areas like the face and ears. If your pet seems uncomfortable, stop immediately. This method is best suited for pets with short to medium-length hair. For long-haired pets, a traditional grooming brush might be more effective. Always prioritize your pet’s comfort and well-being.
How often should I use the pet hair removal glove?
The frequency of use depends on how much your pet sheds and how often you clean. If your pet sheds heavily, you might need to use the glove daily or every other day. If your pet sheds less, you can use it less frequently. Regularly using the glove will help to prevent pet hair from accumulating and becoming embedded in your furniture and carpets. A good rule of thumb is to use the glove whenever you notice pet hair starting to build up.
Will this pet hair removal glove damage my furniture or clothing?
The pet hair removal glove is generally safe for most furniture and clothing, but it’s always a good idea to test it on a small, inconspicuous area first. Avoid using excessive pressure, as this could potentially damage delicate fabrics. If you’re concerned about damaging your furniture, you can try using a softer glove or a microfiber cloth instead. Always follow the manufacturer’s instructions for cleaning your furniture and clothing.
Where should I store my pet hair removal glove when not in use?
Store your pet hair removal glove in a clean, dry place away from direct sunlight and extreme temperatures. This will help to prevent the glove from deteriorating and prolong its lifespan. You can store it in a drawer, a closet, or even hang it on a hook. Make sure the glove is completely dry before storing it to prevent mold or mildew from growing.
Can I use this glove to remove other types of debris besides pet hair?
Yes, the pet hair removal glove can also be used to remove other types of debris, such as dust, lint, and crumbs. However, it’s best to use a separate glove for pet hair and other types of debris to avoid cross-contamination. You can also use the glove to clean up spills, but make sure to thoroughly clean and disinfect it afterward.
What if the pet hair removal glove isn’t working as well as I expected?
If you’re not seeing the results you expected, try these tips:
* Make sure the glove is clean and dry.
* Experiment with different types of gloves.
* Apply a small amount of fabric softener to the glove.
* Slightly dampen the glove before use.
* Use a vacuum cleaner with an upholstery attachment in conjunction with the glove.
* Increase the pressure you’re applying, but be careful not to damage the surface.
* Consider using a specialized pet hair removal product in addition to the glove.
If you’ve tried all of these tips and you’re still not seeing results, it might be time to invest in a more powerful pet hair removal tool. However, for many pet owners, the pet hair removal glove is a simple, effective, and affordable solution that can make a big difference in the fight against pet hair.
Leave a Comment