
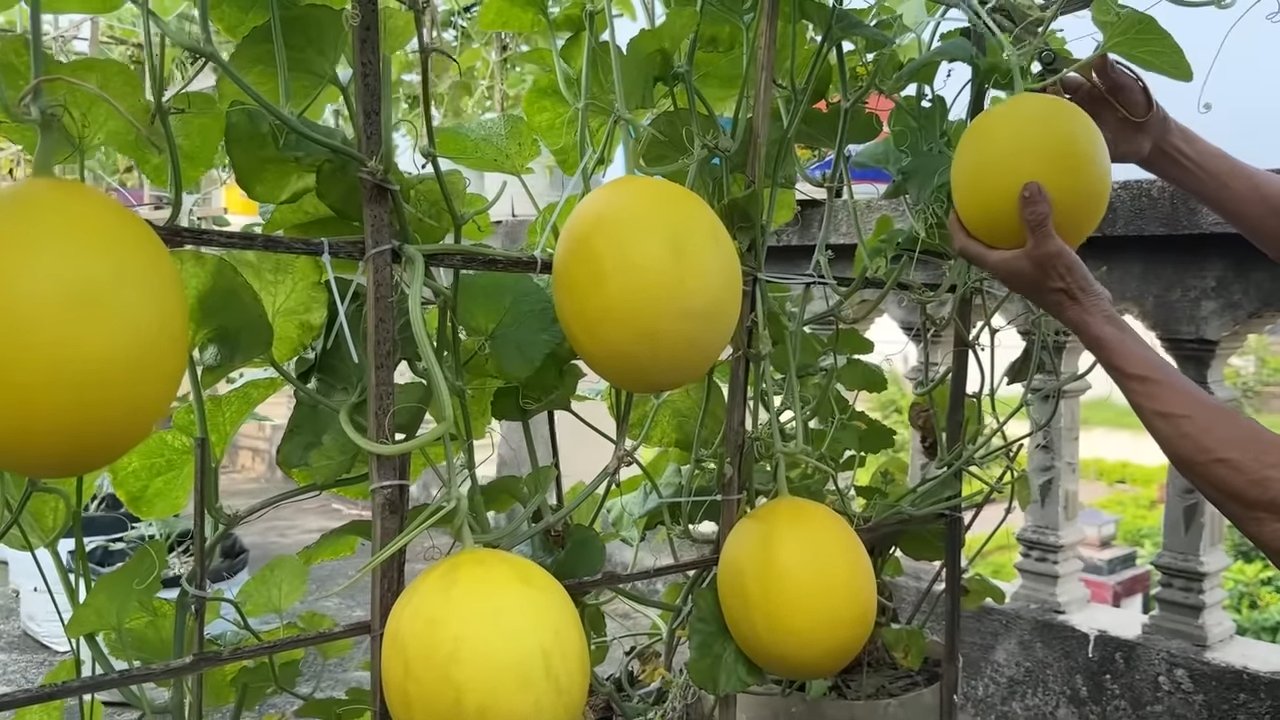
Grow Large Melons at Home – imagine sinking your teeth into a juicy, sweet melon that you nurtured from seed to fruit, right in your own backyard! Forget those bland, store-bought melons; we’re talking about homegrown goodness bursting with flavor.
For centuries, cultivating melons has been a cherished tradition across various cultures. From the ancient Egyptians who depicted them in their artwork to the Chinese emperors who prized them as delicacies, melons have always held a special place in our hearts (and stomachs!). But you don’t need to be royalty or a seasoned farmer to enjoy the fruits – or rather, melons – of your labor.
Many gardeners struggle to achieve impressive melon sizes, often ending up with smaller-than-expected yields. That’s where these DIY tricks and hacks come in! I’m going to share some simple yet effective techniques that will help you grow large melons at home, even if you’re a beginner. We’ll cover everything from soil preparation and pollination secrets to watering strategies and support systems. Get ready to impress your friends and family with your melon-growing prowess. Let’s get started!
Growing Giant Melons: My Secrets to Bumper Crops!
Okay, melon lovers, gather ’round! I’m going to share my tried-and-true methods for growing HUGE, juicy melons right in your own backyard. Forget those puny grocery store melons – we’re talking prize-winning, brag-worthy fruit! It takes a little effort, but trust me, the reward is absolutely worth it.
Choosing the Right Melon Variety
First things first, you need to pick the right melon variety. Not all melons are created equal when it comes to size. Some are naturally smaller, while others are bred for impressive growth. Here are a few of my favorites for growing giants:
* **Watermelon:** ‘Carolina Cross’ (known for record-breaking sizes), ‘Charleston Gray’ (reliable and large), ‘Black Diamond’ (dark, sweet, and hefty).
* **Cantaloupe:** ‘Athena’ (disease-resistant and produces large melons), ‘Hales Best Jumbo’ (classic cantaloupe flavor with good size).
* **Honeydew:** ‘Honey Dew Green Flesh’ (sweet and can grow quite large with proper care).
Pro Tip: Always buy seeds or seedlings from a reputable source to ensure you’re getting the variety you expect.
Preparing the Soil: The Foundation for Success
Melons are heavy feeders, meaning they need a lot of nutrients to grow big and strong. Soil preparation is absolutely crucial.
* **Sunlight:** Melons need at least 6-8 hours of direct sunlight per day. Choose a location in your garden that gets plenty of sun.
* **Soil Type:** Melons prefer well-drained, sandy loam soil. If your soil is heavy clay, you’ll need to amend it.
* **Soil Testing:** I highly recommend getting your soil tested. This will tell you the pH level and nutrient content, allowing you to make targeted amendments. The ideal pH for melons is between 6.0 and 6.8.
* **Amending the Soil:**
* **Compost:** Add plenty of compost to your soil. Compost improves drainage, adds nutrients, and helps retain moisture. I usually add a 3-4 inch layer and work it into the top 12 inches of soil.
* **Manure:** Well-rotted manure is another excellent soil amendment. It’s rich in nutrients and helps improve soil structure. Be sure it’s well-rotted to avoid burning the plants.
* **Fertilizer:** Based on your soil test results, you may need to add fertilizer. A balanced fertilizer (e.g., 10-10-10) is a good starting point. You can also use a fertilizer specifically formulated for vegetables.
* **Creating Mounds or Rows:** Melons grow best on slightly raised mounds or rows. This improves drainage and warms the soil more quickly. I usually create mounds that are about 12 inches high and 2-3 feet wide.
Step-by-Step Soil Preparation:
1. **Clear the Area:** Remove any weeds, rocks, or debris from the planting area.
2. **Till the Soil:** Till the soil to a depth of at least 12 inches. This will loosen the soil and make it easier for the roots to grow.
3. **Add Amendments:** Spread compost, manure, and fertilizer over the tilled soil.
4. **Incorporate Amendments:** Use a tiller or garden fork to work the amendments into the soil.
5. **Create Mounds or Rows:** Form mounds or rows using a hoe or shovel.
6. **Water Thoroughly:** Water the soil thoroughly to settle it and help the amendments start to break down.
Starting Your Melon Plants
You have two options for starting your melon plants: starting from seed indoors or buying transplants. I usually start my seeds indoors to get a head start on the growing season, especially in cooler climates.
* **Starting Seeds Indoors:**
* **Timing:** Start seeds 4-6 weeks before the last expected frost.
* **Containers:** Use seed starting trays or small pots.
* **Seed Starting Mix:** Use a high-quality seed starting mix.
* **Planting:** Plant seeds about 1/2 inch deep.
* **Watering:** Keep the soil moist but not soggy.
* **Light:** Provide plenty of light. Use grow lights or place the seedlings in a sunny window.
* **Hardening Off:** Before transplanting the seedlings outdoors, you’ll need to harden them off. This means gradually exposing them to outdoor conditions over a period of 7-10 days. Start by placing them in a sheltered location for a few hours each day, gradually increasing the amount of time they spend outdoors.
* **Buying Transplants:**
* **Choose Healthy Plants:** Look for plants that are healthy, vigorous, and free from pests and diseases.
* **Avoid Root-Bound Plants:** Avoid plants that are root-bound (roots circling around the bottom of the pot).
Step-by-Step Seed Starting:
1. **Fill Containers:** Fill seed starting trays or pots with seed starting mix.
2. **Plant Seeds:** Plant 2-3 seeds per cell or pot.
3. **Water Gently:** Water the soil gently to moisten it.
4. **Provide Light:** Place the trays or pots under grow lights or in a sunny window.
5. **Maintain Moisture:** Keep the soil moist but not soggy.
6. **Thin Seedlings:** Once the seedlings have emerged, thin them to one plant per cell or pot.
7. **Harden Off:** Harden off the seedlings before transplanting them outdoors.
Transplanting Your Melon Plants
Once the danger of frost has passed and the soil has warmed up, it’s time to transplant your melon plants outdoors.
* **Timing:** Transplant in the late afternoon or early evening to avoid stressing the plants.
* **Spacing:** Space watermelon plants 3-5 feet apart, cantaloupe and honeydew plants 2-3 feet apart.
* **Planting Depth:** Plant the seedlings at the same depth they were growing in the containers.
* **Watering:** Water the plants thoroughly after transplanting.
Step-by-Step Transplanting:
1. **Dig Holes:** Dig holes in the prepared mounds or rows, spacing them according to the type of melon you’re growing.
2. **Remove Plants from Containers:** Gently remove the plants from their containers, being careful not to damage the roots.
3. **Plant Seedlings:** Place the seedlings in the holes and backfill with soil.
4. **Water Thoroughly:** Water the plants thoroughly to settle the soil.
5. **Mulch:** Apply a layer of mulch around the plants to help retain moisture and suppress weeds. I like to use straw or black plastic mulch.
Caring for Your Melon Plants: The Secret to Giant Growth
This is where the real work begins! Consistent care is essential for growing giant melons.
* **Watering:** Melons need consistent watering, especially during hot, dry weather. Water deeply and regularly, aiming for about 1-2 inches of water per week. Avoid overhead watering, as this can promote fungal diseases. Drip irrigation is ideal.
* **Fertilizing:** Continue to fertilize your melon plants throughout the growing season. Use a fertilizer that is high in phosphorus and potassium, which are essential for fruit development. I like to use a liquid fertilizer every 2-3 weeks.
* **Weed Control:** Keep the area around your melon plants free of weeds. Weeds compete with the plants for water and nutrients. Mulching helps suppress weeds.
* **Pest and Disease Control:** Monitor your plants regularly for pests and diseases. Common melon pests include aphids, squash bugs, and vine borers. Common diseases include powdery mildew and fusarium wilt. Use appropriate insecticides or fungicides to control pests and diseases. I prefer to use organic methods whenever possible.
* **Pruning:** Pruning can help improve air circulation and promote larger fruit. Remove any suckers (small shoots that grow from the base of the plant) and any leaves that are touching the ground.
* **Pollination:** Melons need to be pollinated in order to produce fruit. If you’re not seeing any fruit set, you may need to hand-pollinate the flowers. To hand-pollinate, use a small paintbrush to transfer pollen from the male flowers to the female flowers. Female flowers have a small swelling at the base of the flower (the developing fruit).
* **Fruit Thinning:** This is the most important step for growing giant melons! Once the plants start producing fruit, you’ll need to thin them. This means removing some of the smaller fruits to allow the remaining fruits to grow larger. I usually leave only one or two melons per vine. This allows the plant to focus all of its energy on developing those fruits.
* **Supporting the Fruit:** As the melons grow larger, they may need support to prevent them from breaking off the vine. You can use slings made from cloth or netting to support the fruit. Place the sling under the melon
Conclusion
So, there you have it! Growing large melons at home isn’t some unattainable dream reserved for professional farmers. With a little planning, the right techniques, and a dash of patience, you can be harvesting juicy, impressive melons right from your own backyard. This DIY approach, focusing on strategic pruning, consistent watering, and targeted fertilization, is a game-changer. It’s not just about getting *any* melon; it’s about cultivating those prize-winning, brag-worthy giants that will be the envy of your neighbors.
Why is this DIY trick a must-try? Because it empowers you to take control of the growing process. You’re not relying on luck or hoping for the best. You’re actively shaping the outcome, maximizing the potential of your melon plants, and ensuring they dedicate their energy to producing fewer, but significantly larger, fruits. Think of it as a focused investment – less quantity, exponentially more quality and size.
But don’t stop there! Experiment with different melon varieties. While this method works wonders for watermelons, cantaloupes, and honeydews, each variety has its own nuances. Try grafting your melon plants onto more vigorous rootstock for even greater nutrient uptake and disease resistance. Consider using shade cloth during the hottest parts of the day to prevent sunscald and maintain optimal growing temperatures. And don’t be afraid to get creative with your fertilization schedule, adjusting it based on your soil conditions and the specific needs of your melon plants.
This isn’t just about following a recipe; it’s about embarking on a gardening adventure. It’s about connecting with nature, learning new skills, and experiencing the satisfaction of nurturing something from seed to spectacular fruit. The key to success in growing large melons at home lies in consistent observation and adaptation. Pay attention to your plants, learn their language, and adjust your approach as needed.
We’re confident that this DIY guide will set you on the path to melon-growing success. But the real magic happens when you put it into practice. So, grab your gardening gloves, prepare your soil, and get ready to witness the incredible transformation of tiny seedlings into magnificent melons.
Don’t keep your melon-growing secrets to yourself! Share your experiences, your triumphs, and even your challenges in the comments below. Let’s build a community of passionate melon growers, sharing tips, tricks, and inspiration. We can’t wait to hear about your journey and see the impressive melons you’re able to grow using these techniques. Happy growing!
Frequently Asked Questions (FAQ)
What is the best type of melon to grow using this method?
While this method can be applied to various melon types, watermelons, cantaloupes, and honeydews generally respond very well to pruning and focused fertilization. Watermelons, in particular, have the potential to grow to impressive sizes with the right care. Consider varieties known for their large size, such as ‘Carolina Cross’ or ‘Charleston Gray,’ if your primary goal is to grow the biggest melon possible. However, don’t be afraid to experiment with other varieties to see what thrives best in your specific climate and soil conditions. Remember to research the specific needs of each variety you choose.
How often should I water my melon plants?
Consistent watering is crucial, especially during the fruit development stage. The frequency will depend on your climate, soil type, and the age of the plant. Generally, aim for deep watering 2-3 times per week, ensuring the soil is thoroughly moistened to a depth of at least 6 inches. Use a soaker hose or drip irrigation to deliver water directly to the roots, minimizing water loss through evaporation and reducing the risk of fungal diseases. Check the soil moisture regularly by sticking your finger into the soil. If the top inch feels dry, it’s time to water. During extremely hot or dry periods, you may need to water more frequently.
What kind of fertilizer should I use, and when should I apply it?
Melons are heavy feeders and require a balanced fertilizer to support their growth and fruit production. Start with a fertilizer high in nitrogen during the early vegetative growth stage to promote strong vine development. Once the plants begin to flower and set fruit, switch to a fertilizer higher in phosphorus and potassium to encourage fruit development and sweetness. Apply fertilizer according to the manufacturer’s instructions, typically every 2-3 weeks. Consider using a slow-release fertilizer to provide a steady supply of nutrients over time. You can also supplement with liquid seaweed or compost tea for an extra boost of micronutrients. Soil testing is highly recommended to determine the specific nutrient deficiencies in your soil and tailor your fertilization program accordingly.
How do I know when my melon is ripe?
Determining ripeness can be tricky, but there are several indicators to look for. For watermelons, check the underside where the melon rests on the ground. This spot should be creamy yellow or even slightly orange. Also, thump the melon – a ripe watermelon will have a deep, hollow sound. For cantaloupes, the stem should slip easily from the fruit with gentle pressure. The melon should also have a fragrant aroma. Honeydews are ripe when the skin turns a creamy yellow color and the blossom end feels slightly soft. Experience is the best teacher, so pay close attention to your melons and learn to recognize the subtle signs of ripeness.
What are some common pests and diseases that affect melon plants, and how can I prevent them?
Common pests include aphids, squash bugs, vine borers, and cucumber beetles. Diseases include powdery mildew, downy mildew, and fusarium wilt. Prevention is key. Start by choosing disease-resistant varieties. Practice crop rotation to prevent the buildup of soilborne pathogens. Provide good air circulation by spacing plants adequately. Regularly inspect your plants for signs of pests or diseases and take action promptly. Use organic pest control methods such as insecticidal soap, neem oil, or diatomaceous earth. For fungal diseases, apply a copper-based fungicide or a biofungicide containing Bacillus subtilis. Remove and destroy any infected plant material to prevent the spread of disease.
How much space do melon plants need?
Melon plants, especially watermelons, require a significant amount of space to spread their vines. Allow at least 4-6 feet between plants in rows that are 8-10 feet apart. If you’re growing melons in a smaller garden, consider using a trellis to support the vines and save space. Vertical gardening can be a great way to maximize your yield in a limited area. Just be sure to provide adequate support for the heavy fruits.
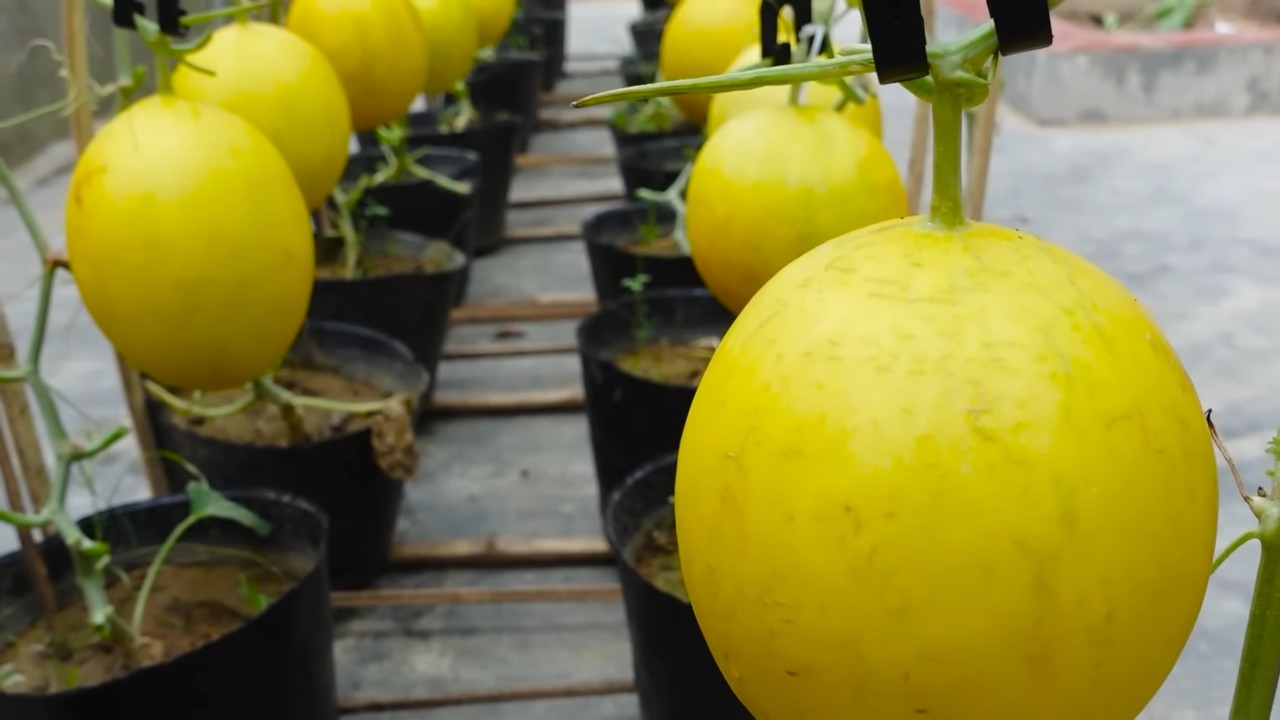
Can I grow melons in containers?
Yes, you can grow melons in containers, but you’ll need to choose a large container (at least 20 gallons) and select a compact or bush variety. Ensure the container has good drainage and use a high-quality potting mix. Container-grown melons will require more frequent watering and fertilization than those grown in the ground. Provide support for the vines as they grow.
What if my melon plant produces lots of small melons instead of a few large ones?
This is often a sign that the plant is not getting enough nutrients or that it’s trying to support too many fruits. Thinning the fruits early in the season is crucial for directing the plant’s energy towards fewer, larger melons. Remove any misshapen or damaged fruits, leaving only 1-2 melons per vine. Ensure you’re providing adequate fertilization and watering. Also, check for any signs of pests or diseases that may be stressing the plant.
How do I protect my melons from animals?
Animals such as squirrels, rabbits, and birds can be a nuisance to melon growers. Protect your melons by using netting, fencing, or row covers. You can also try using deterrents such as motion-activated sprinklers or ultrasonic pest repellers. Regularly inspect your garden for signs of animal activity and take action promptly.
What is the best time of year to plant melons?
Melons are warm-season crops and require a long growing season. Plant them after the last frost when the soil has warmed to at least 65°F (18°C). In cooler climates, you may need to start seeds indoors 4-6 weeks before the last frost and transplant them outdoors once the weather is warm enough.
Leave a Comment