
Indoor Vegetable Gardening: Imagine plucking a ripe, juicy tomato straight from the vine in the middle of winter, right in your own kitchen! Sounds like a dream, doesn’t it? Well, it doesn’t have to be! For centuries, humans have cultivated plants indoors, from the elaborate orangeries of European royalty to the humble windowsill herb gardens of today. But now, with a few clever tricks and DIY hacks, you can take your indoor gardening game to a whole new level, and enjoy fresh, homegrown vegetables year-round.
I know what you’re thinking: “Indoor vegetable gardening? That sounds complicated!” But trust me, it’s easier than you think. Whether you’re a seasoned gardener or a complete beginner, this article is packed with simple, effective DIY solutions to help you overcome common challenges and maximize your harvest.
Why is this so important? Well, beyond the sheer joy of nurturing life, growing your own vegetables indoors offers a multitude of benefits. You’ll have access to fresh, organic produce free from harmful pesticides, save money on groceries, and reduce your carbon footprint. Plus, it’s a fantastic way to connect with nature and add a touch of green to your living space, especially during those long winter months. So, let’s dive in and discover the secrets to successful indoor vegetable gardening!
Creating Your Own Thriving Indoor Vegetable Garden
Okay, so you’re itching to grow your own veggies but don’t have a sprawling backyard? No problem! Indoor vegetable gardening is totally doable, and I’m here to walk you through it. It’s surprisingly rewarding to harvest fresh greens and herbs right from your windowsill, and with a little know-how, you can enjoy homegrown goodness year-round. Let’s get started!
Choosing the Right Vegetables
Before we dive into the nitty-gritty, let’s talk about which vegetables thrive indoors. Not everything is created equal when it comes to indoor growing. Some need tons of sunlight and space, while others are perfectly happy in a smaller, more controlled environment.
Here’s a quick rundown of some great options:
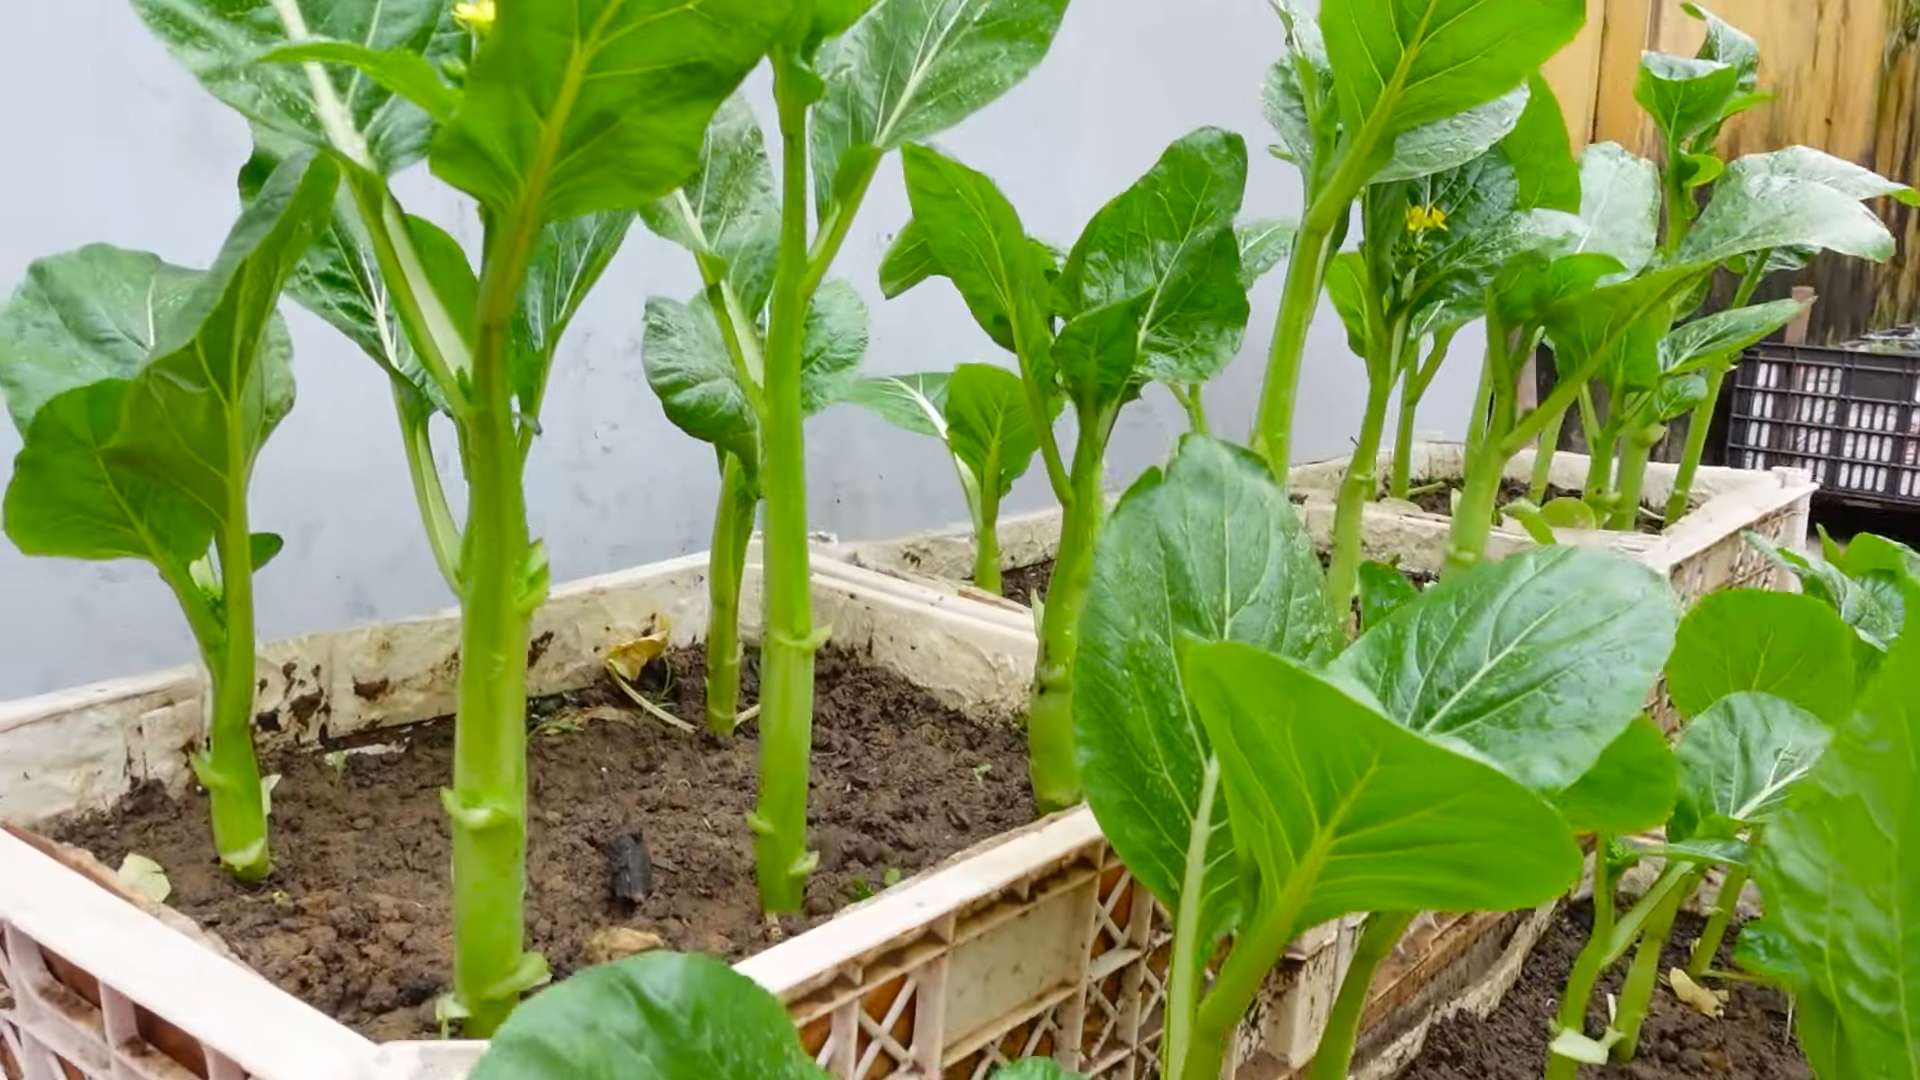
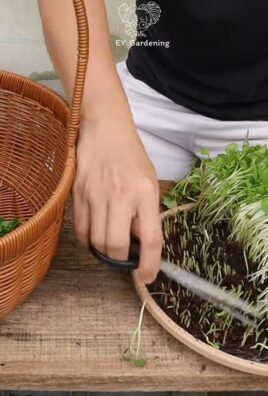
* Leafy Greens: Lettuce, spinach, kale, and arugula are all fantastic choices. They grow quickly and don’t require a ton of light.
* Herbs: Basil, mint, chives, parsley, and oregano are super easy to grow indoors and add a burst of flavor to your cooking.
* Peppers: Smaller pepper varieties, like chili peppers or bell peppers, can do well indoors with enough light.
* Tomatoes: Dwarf or bush tomato varieties are your best bet. They’re compact and produce delicious little fruits.
* Radishes: These quick-growing root vegetables are perfect for beginners.
* Green Onions: You can even regrow green onions from the scraps you buy at the store!
Gathering Your Supplies
Now that you’ve got your veggies picked out, it’s time to gather your supplies. Here’s what you’ll need:
* Containers: Choose pots that are at least 6 inches deep for leafy greens and herbs, and 8-12 inches deep for peppers and tomatoes. Make sure they have drainage holes!
* Potting Mix: Don’t use garden soil! It’s too heavy and doesn’t drain well. Opt for a high-quality potting mix specifically designed for containers.
* Grow Lights (Optional but Recommended): While a sunny windowsill can work, grow lights will give your plants the consistent light they need to thrive, especially during the winter months.
* Seeds or Seedlings: You can start from seeds or buy seedlings from a local nursery. Seedlings will give you a head start.
* Watering Can or Spray Bottle: For gentle watering.
* Fertilizer: A balanced liquid fertilizer will help your plants grow strong and healthy.
* Small Shovel or Trowel: For planting.
* Plant Labels: To keep track of what you’ve planted.
Step-by-Step Planting Guide
Alright, let’s get our hands dirty! Here’s how to plant your indoor vegetable garden:
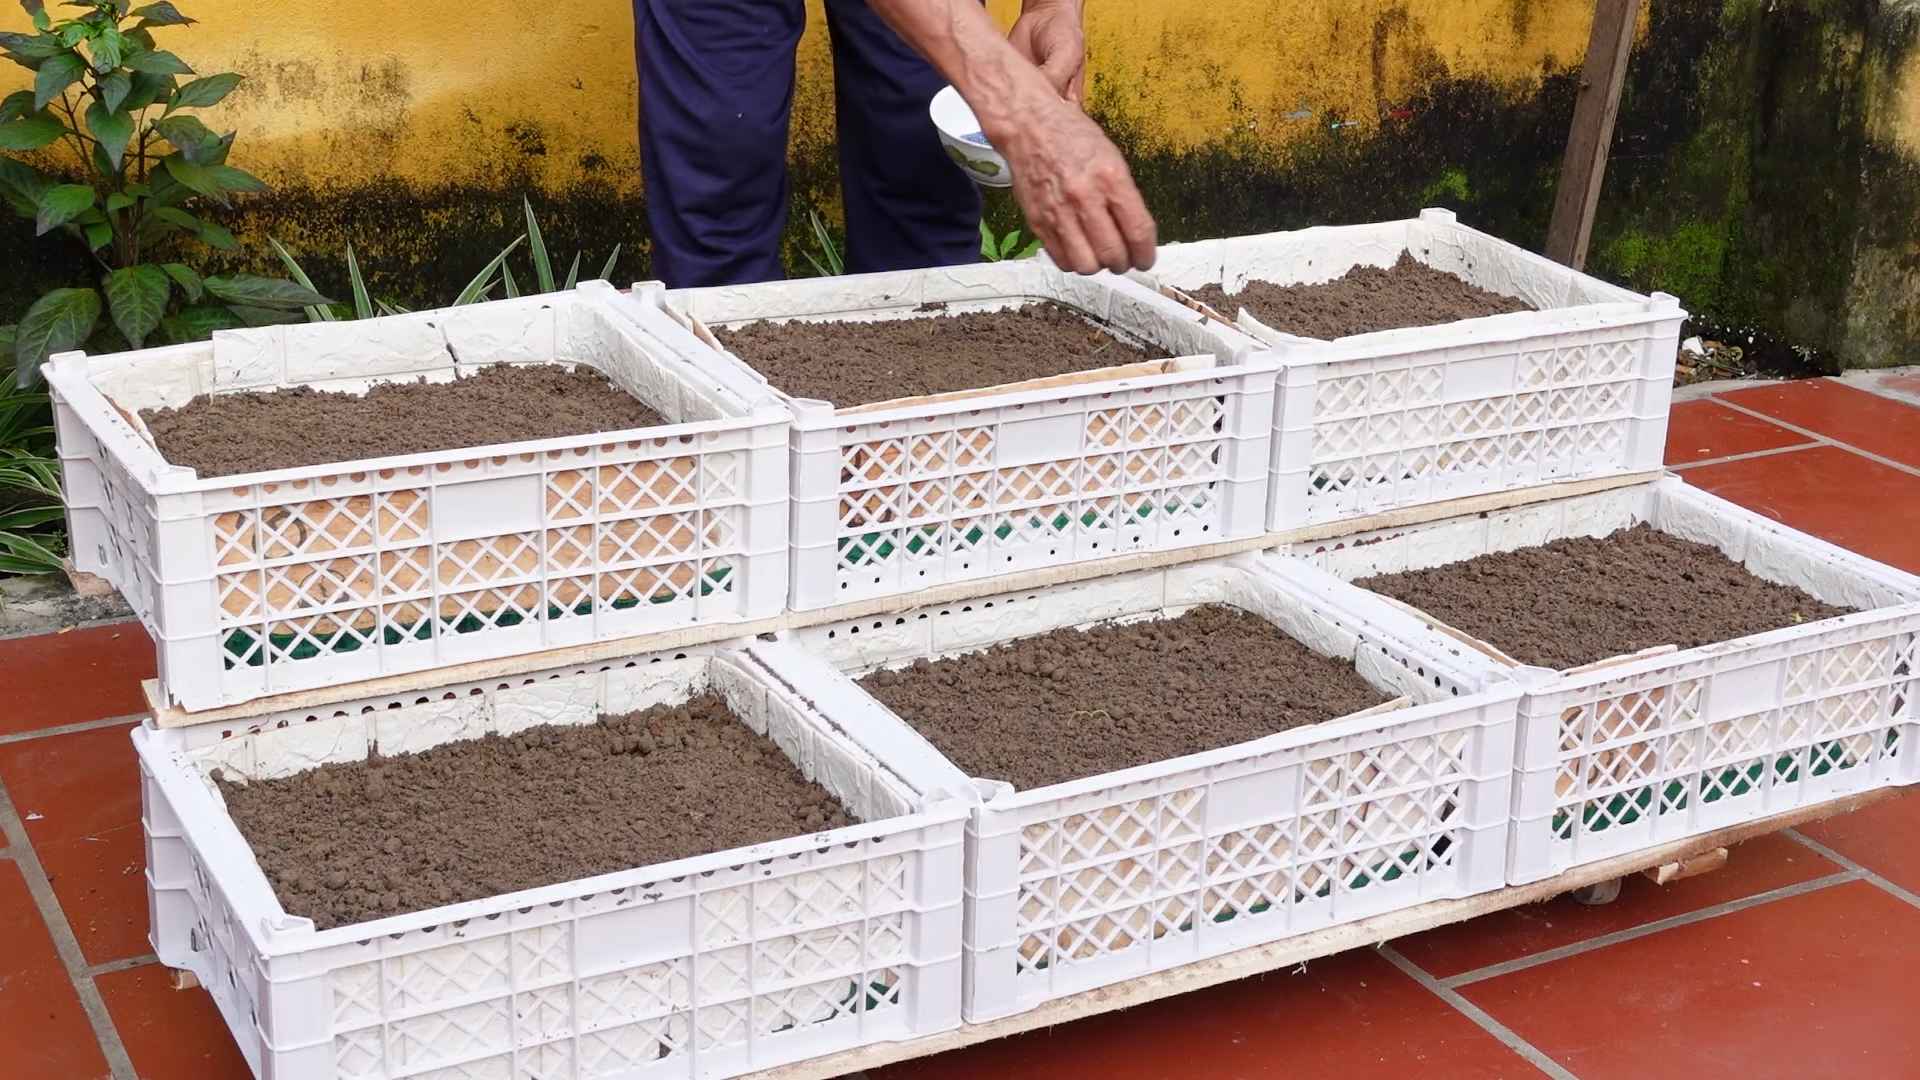
1. Preparing Your Containers
* Clean Your Pots: If you’re using old pots, wash them thoroughly with soap and water to remove any dirt or debris.
* Add Potting Mix: Fill your containers with potting mix, leaving about an inch of space at the top.
* Moisten the Soil: Lightly water the potting mix until it’s evenly moist but not soggy.
2. Planting Seeds
* Read the Seed Packet: Follow the instructions on the seed packet for planting depth and spacing.
* Make Small Holes: Use your finger or a pencil to create small holes in the soil.
* Sow the Seeds: Drop the seeds into the holes and gently cover them with soil.
* Water Gently: Water the soil lightly with a spray bottle to avoid disturbing the seeds.
* Label Your Pots: Don’t forget to label each pot with the name of the vegetable you planted and the date.
3. Planting Seedlings
* Gently Remove Seedlings: Carefully remove the seedlings from their containers, being careful not to damage the roots.
* Make a Hole: Dig a hole in the potting mix that’s large enough to accommodate the seedling’s root ball.
* Place the Seedling: Place the seedling in the hole and gently backfill with potting mix.
* Water Thoroughly: Water the seedling thoroughly after planting.
* Label Your Pots: Label each pot with the name of the vegetable.
Providing the Right Environment
Now that your plants are in their new homes, it’s crucial to provide them with the right environment to thrive.
1. Light
* Sunlight: Place your plants in a south-facing window for maximum sunlight. If you don’t have enough natural light, use grow lights.
* Grow Lights: Position grow lights a few inches above your plants and keep them on for 12-16 hours a day. LED grow lights are energy-efficient and work great.
2. Water
* Watering Frequency: Water your plants when the top inch of soil feels dry to the touch.
* Watering Technique: Water thoroughly until water drains out of the drainage holes. Avoid overwatering, which can lead to root rot.
* Humidity: Indoor air can be dry, especially during the winter. Increase humidity by misting your plants regularly or using a humidifier.
3. Temperature
* Ideal Temperature: Most vegetables prefer temperatures between 60-75°F (15-24°C).
* Avoid Extremes: Keep your plants away from drafts and extreme temperature fluctuations.
4. Fertilizing
* Fertilizing Schedule: Start fertilizing your plants about two weeks after planting.
* Type of Fertilizer: Use a balanced liquid fertilizer diluted to half strength.
* Application: Follow the instructions on the fertilizer label for application.
Troubleshooting Common Problems
Even with the best care, you might encounter some problems along the way. Here are a few common issues and how to address them:
* Yellowing Leaves: Could be a sign of overwatering, underwatering, or nutrient deficiency. Adjust your watering schedule and fertilize your plants.
* Leggy Growth: This usually indicates a lack of light. Move your plants to a sunnier location or use grow lights.
* Pests: Check your plants regularly for pests like aphids, spider mites, or whiteflies. Treat infestations with insecticidal soap or neem oil.
* Powdery Mildew: This fungal disease appears as a white powdery coating on the leaves. Improve air circulation and treat with a fungicide.
Harvesting Your Bounty
The best part of indoor vegetable gardening is, of course, harvesting your own fresh produce!
* Leafy Greens: Harvest leafy greens when they reach a desirable size. You can harvest individual leaves or cut the entire plant.
* Herbs: Harvest herbs as needed. Pinch off leaves or stems to encourage new growth.
* Peppers: Harvest peppers when they reach their mature color and size.
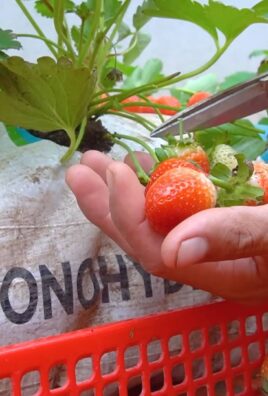
* Tomatoes: Harvest tomatoes when they are fully ripe and easily detach from the vine.
* Radishes: Harvest radishes when they reach about an inch in diameter.
* Green Onions: Snip off the green tops as needed.
Tips for Success
Here are a few extra tips to help you succeed with your indoor vegetable garden:
* Choose the Right Location: Pick a spot that gets plenty of sunlight or has access to grow lights.
* Use High-Quality Potting Mix: Don’t skimp on the potting mix! It’s essential for healthy plant growth.
* Water Regularly: Check the soil moisture regularly and water when needed.
* Fertilize Regularly: Provide your plants with the nutrients they need to thrive.
* Monitor for Pests and Diseases: Catch problems early and address them promptly.
* Rotate Your Crops: Rotate your crops each season to prevent soil depletion and pest buildup.
* Don’t Be Afraid to Experiment: Try different vegetables and techniques to see what works best for you.
Growing your own vegetables indoors is a fun and rewarding experience. With a little planning and effort, you can enjoy fresh, homegrown produce year-round. Happy gardening!
Conclusion
So, there you have it! Transforming your home into a thriving indoor vegetable garden is not only achievable, but incredibly rewarding. We’ve explored the ins and outs of bringing the bounty of nature indoors, and hopefully, you’re feeling inspired to embark on your own green journey.
Why is this DIY indoor vegetable gardening trick a must-try? Because it empowers you to take control of your food source, even in the smallest of spaces. Imagine fresh, flavorful herbs and vegetables readily available, adding a burst of freshness to your meals year-round. No more relying solely on grocery store produce, often shipped from afar and lacking in peak flavor. This is about sustainability, freshness, and the pure joy of nurturing life from seed to table.
But the benefits extend beyond just delicious food. Indoor gardening is a fantastic stress reliever. The simple act of tending to plants, watching them grow, and connecting with nature can have a profound impact on your well-being. It’s a mindful activity that grounds you in the present moment and provides a sense of accomplishment. Plus, let’s be honest, a lush indoor garden is a beautiful addition to any home, adding a touch of vibrancy and life to your living space.
Now, let’s talk variations. Feel free to experiment with different types of vegetables and herbs. Start with easy-to-grow options like lettuce, spinach, kale, cherry tomatoes, peppers, basil, mint, and chives. As you gain experience, you can branch out to more challenging varieties. Consider vertical gardening systems to maximize space, or try hydroponics for a soil-free growing experience. You can also tailor your lighting setup to suit the specific needs of your chosen plants. For example, leafy greens thrive under cooler light, while fruiting vegetables require warmer light.
Don’t be afraid to get creative with your containers. Repurpose old jars, cans, or even plastic bottles to create unique and eco-friendly planters. Just make sure they have adequate drainage. You can also add companion plants to your garden to deter pests and attract beneficial insects. Marigolds, for example, are known to repel aphids and other common garden pests.
The key to success is observation and adaptation. Pay close attention to your plants’ needs and adjust your watering, lighting, and fertilization accordingly. Don’t be discouraged if you encounter challenges along the way. Gardening is a learning process, and every mistake is an opportunity to grow (pun intended!).
We wholeheartedly encourage you to give this DIY indoor vegetable gardening trick a try. It’s a rewarding experience that will connect you with nature, improve your well-being, and provide you with fresh, delicious food.
And most importantly, we want to hear about your experiences! Share your photos, tips, and challenges in the comments below. Let’s create a community of indoor gardeners who support and inspire each other. What vegetables are you most excited to grow indoors? What challenges have you faced, and how did you overcome them? Your insights could be invaluable to other aspiring indoor gardeners. So, get your hands dirty, embrace the process, and enjoy the fruits (and vegetables!) of your labor. Happy gardening!
Frequently Asked Questions (FAQ)
What are the easiest vegetables to grow indoors for beginners?
For beginners venturing into indoor vegetable gardening, some of the easiest and most rewarding options include leafy greens like lettuce, spinach, and kale. These vegetables are relatively low-maintenance and can thrive under artificial light. Herbs such as basil, mint, and chives are also excellent choices, as they are compact, fast-growing, and add a burst of flavor to your culinary creations. Cherry tomatoes and peppers are slightly more challenging but still manageable for beginners, provided they receive adequate light and warmth. Start with these beginner-friendly options to build your confidence and gain experience before tackling more demanding vegetables.
How much light do indoor vegetable gardens need?
Light is crucial for the success of your indoor vegetable garden. Most vegetables require at least 6-8 hours of direct sunlight per day. If you don’t have access to sufficient natural light, you’ll need to supplement with artificial grow lights. LED grow lights are a popular choice due to their energy efficiency and long lifespan. The specific type and intensity of light will depend on the vegetables you’re growing. Leafy greens generally require less intense light than fruiting vegetables like tomatoes and peppers. Research the specific light requirements of your chosen vegetables and adjust your lighting setup accordingly. Position your grow lights close enough to the plants to provide adequate illumination, but not so close that they burn the leaves.
What type of soil is best for indoor vegetable gardening?
The ideal soil for indoor vegetable gardening is a well-draining potting mix that is rich in organic matter. Avoid using garden soil, as it can be too heavy and compacted for containers. A good potting mix will provide adequate drainage, aeration, and nutrients for your plants. You can also amend your potting mix with compost or other organic materials to improve its fertility. Consider using a soilless mix, such as coco coir or perlite, for hydroponic systems. These mixes provide excellent drainage and aeration, but they don’t contain any nutrients, so you’ll need to supplement with a nutrient solution.
How often should I water my indoor vegetable garden?
The frequency of watering will depend on several factors, including the type of vegetables you’re growing, the size of your containers, and the humidity levels in your home. As a general rule, water your plants when the top inch of soil feels dry to the touch. Avoid overwatering, as this can lead to root rot. When watering, water thoroughly until water drains out of the bottom of the container. This ensures that the entire root system is adequately hydrated. Check your plants daily and adjust your watering schedule as needed.
How do I deal with pests in my indoor vegetable garden?
Pests can be a challenge in indoor vegetable gardens, but there are several steps you can take to prevent and control them. Start by inspecting your plants regularly for signs of pests, such as aphids, spider mites, or whiteflies. If you spot any pests, take action immediately. You can try washing them off with a strong stream of water, or you can use insecticidal soap or neem oil. These are natural and effective pest control options that are safe for use on edible plants. You can also introduce beneficial insects, such as ladybugs or lacewings, to your garden to help control pests.
Can I grow vegetables indoors year-round?
Yes, you can absolutely grow vegetables indoors year-round! With the right lighting, temperature, and humidity, you can create a thriving indoor garden that provides you with fresh produce throughout the year. The key is to choose vegetables that are well-suited to indoor growing conditions and to provide them with the care they need. You may need to adjust your growing practices depending on the season. For example, you may need to provide supplemental heat during the winter months or increase ventilation during the summer months.
What are the best containers for indoor vegetable gardening?
The best containers for indoor vegetable gardening are those that are appropriately sized for the vegetables you’re growing and that provide adequate drainage. Choose containers that are at least 6-8 inches deep for leafy greens and herbs, and 12-18 inches deep for larger vegetables like tomatoes and peppers. Make sure your containers have drainage holes to prevent waterlogging. You can use plastic pots, terracotta pots, or even repurposed containers like buckets or bins. Just make sure they are clean and free of any harmful chemicals.
How do I fertilize my indoor vegetable garden?
Fertilizing is essential for providing your indoor vegetables with the nutrients they need to grow and thrive. Use a balanced fertilizer that is specifically formulated for vegetables. You can use a liquid fertilizer, a granular fertilizer, or a slow-release fertilizer. Follow the instructions on the fertilizer label carefully to avoid over-fertilizing. Over-fertilizing can burn the roots of your plants and damage them. Fertilize your plants regularly, especially during the growing season.
How do I pollinate my indoor vegetable plants?
Some vegetables, like tomatoes and peppers, require pollination to produce fruit. In an outdoor garden, pollination is typically done by bees and other insects. However, in an indoor garden, you’ll need to pollinate your plants manually. You can do this by gently shaking the plants or by using a small paintbrush to transfer pollen from one flower to another. Pollinate your plants regularly, especially when they are flowering.
What is the ideal temperature and humidity for indoor vegetable gardening?
Most vegetables thrive in temperatures between 65-75°F (18-24°C). Maintain a consistent temperature in your indoor garden to promote healthy growth. Humidity levels should be between 40-60%. You can increase humidity by using a humidifier or by placing your plants on a tray filled with water and pebbles. Avoid placing your plants near drafts or heating vents, as this can cause them to dry out.

Leave a Comment