
Bottle gardening eggplant: Ever dreamt of harvesting your own plump, juicy eggplants right from your windowsill or balcony? I know I have! Forget sprawling gardens and back-breaking labor; we’re diving into the surprisingly simple and incredibly rewarding world of growing eggplants in repurposed bottles.
For centuries, humans have cultivated food in ingenious ways, adapting to limited spaces and resources. From ancient rooftop gardens in bustling cities to modern-day vertical farms, the desire to nurture life and enjoy fresh produce has always driven innovation. Bottle gardening, a contemporary twist on this age-old practice, offers a sustainable and accessible solution for urban dwellers and gardening enthusiasts alike.
Why should you embrace this DIY trick? Well, let’s face it, space is often a luxury. Many of us lack the sprawling gardens our grandparents enjoyed. But that doesn’t mean we have to sacrifice the joy of growing our own food. Bottle gardening eggplant allows you to maximize your yield in a minimal footprint. Plus, it’s a fantastic way to recycle those plastic bottles that might otherwise end up in a landfill. I’m going to show you how to transform those discarded containers into thriving miniature eggplant farms, bringing a touch of green and a whole lot of deliciousness into your life. Get ready to roll up your sleeves and discover the magic of bottle gardening!
DIY Bottle Gardening: Grow Your Own Eggplant!
Hey there, fellow gardening enthusiasts! Ever thought about growing your own eggplant but felt intimidated by the space requirements or the perceived difficulty? Well, I’m here to tell you that you can absolutely cultivate these beautiful purple veggies right in your own backyard (or even on your balcony!) using recycled plastic bottles. This method is not only eco-friendly but also surprisingly effective. Let’s dive into how you can create your own bottle garden for eggplants!
What You’ll Need:
Before we get started, let’s gather all the necessary materials. Trust me, having everything ready beforehand will make the process much smoother.
* Large Plastic Bottles: Think those big water cooler bottles (3-5 gallon size) or even large soda bottles (2-liter or bigger). The bigger, the better, as eggplants need room to grow. You’ll need at least one bottle per eggplant plant.
* Eggplant Seeds or Seedlings: You can start from seeds or buy young seedlings from your local nursery. Seedlings will give you a head start.
* Potting Mix: A good quality potting mix is crucial for healthy growth. Avoid using garden soil directly, as it can compact and hinder drainage.
* Perlite or Vermiculite: These help improve drainage and aeration in the potting mix.
* Scissors or Utility Knife: For cutting the plastic bottles. Be careful!
* Drill or Nail and Hammer: To create drainage holes.
* Watering Can or Hose: For watering your plants.
* Fertilizer: A balanced, slow-release fertilizer will provide essential nutrients.
* Gloves: To protect your hands.
* Optional: Landscape Fabric or Burlap: To line the inside of the bottle and help retain moisture.
Preparing the Bottles:
This is where we transform those discarded bottles into mini-gardens!
1. Clean the Bottles: Thoroughly wash the plastic bottles with soap and water to remove any residue. Rinse them well and let them dry completely. This is important to prevent any contamination that could harm your plants.
2. Cut the Bottles: Decide how you want to cut the bottle. There are a couple of options:
* Option 1 (Vertical Bottle Garden): Cut the bottle lengthwise, creating two halves. This is great if you want to plant multiple smaller plants or if you want to easily access the roots later.
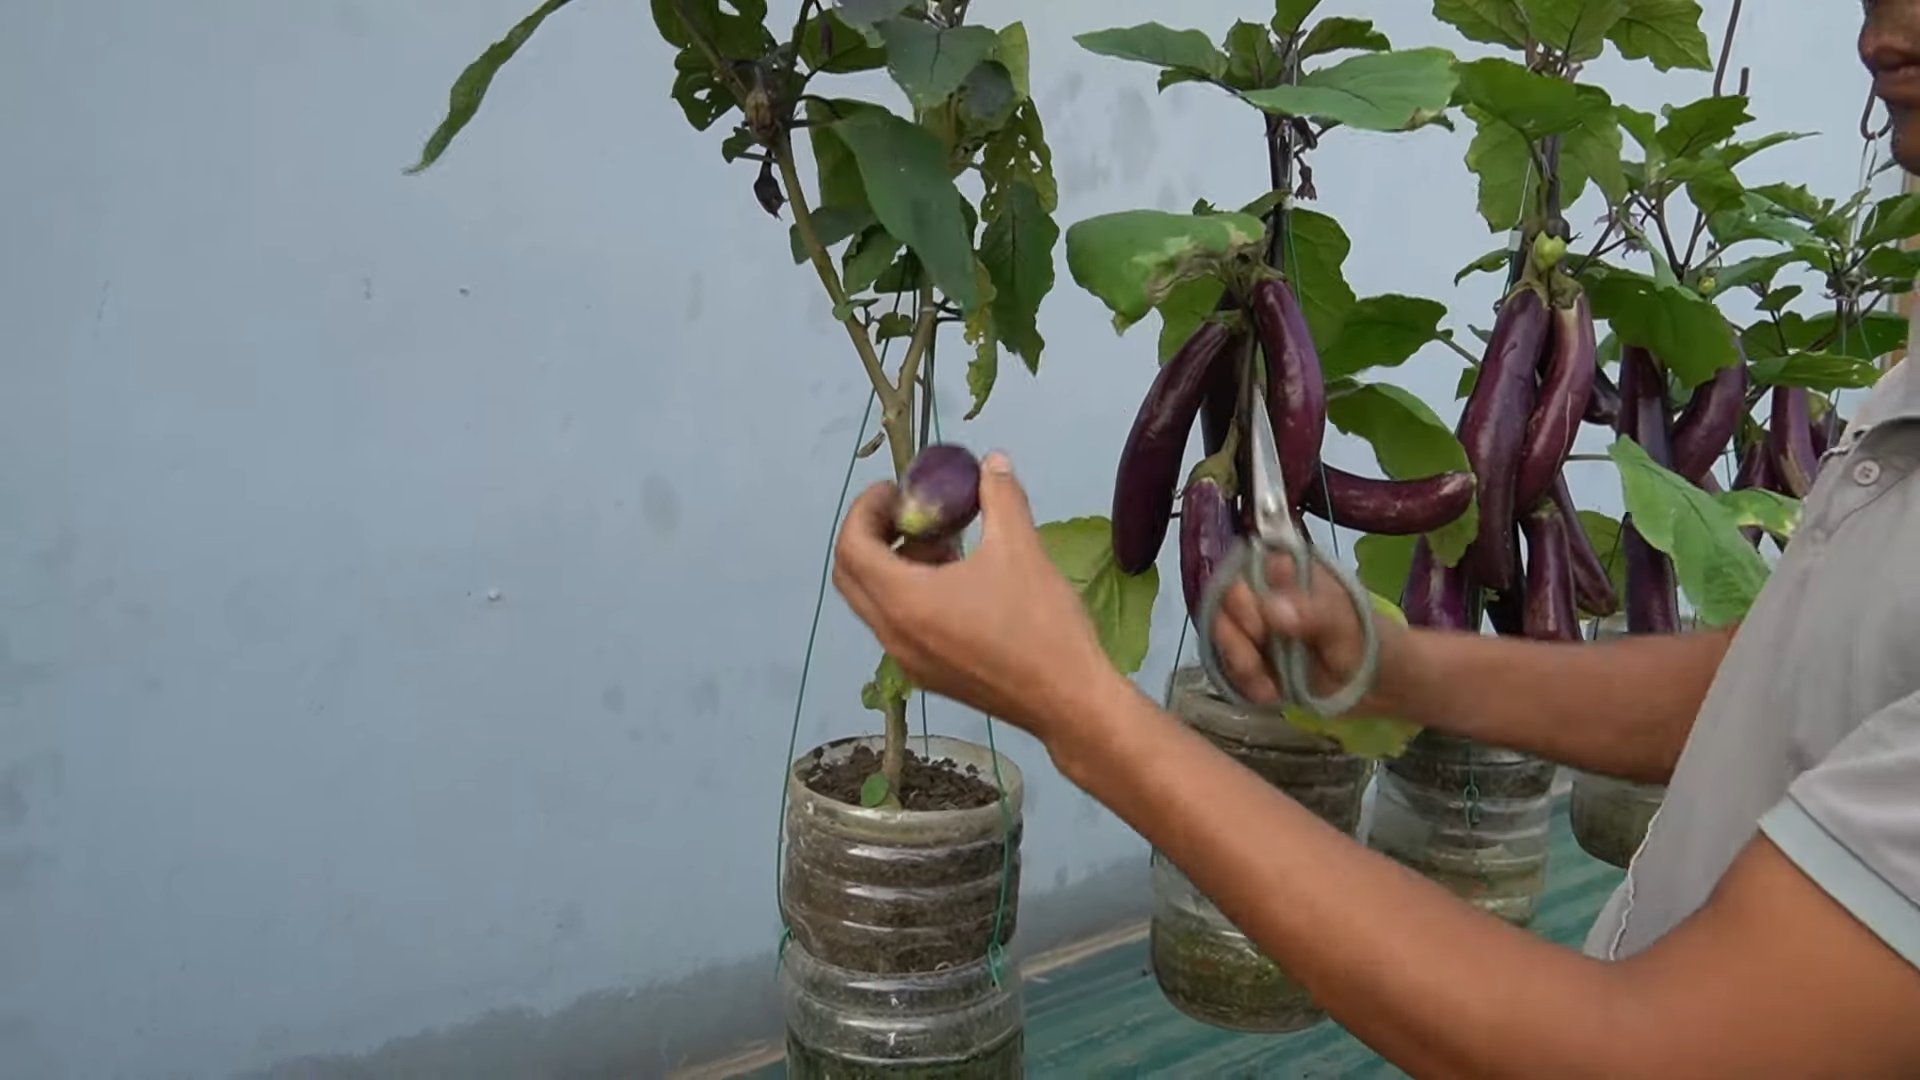
* Option 2 (Hanging Bottle Garden): Cut a large rectangular opening on one side of the bottle, leaving the top and bottom intact. This creates a “trough” for your eggplant. You can then hang the bottle using rope or wire.
* Option 3 (Simple Container): Cut off the top portion of the bottle, leaving a large container. This is the simplest method and works well for a single eggplant plant.
I personally prefer Option 3 for eggplants because it provides the most stability and space for the roots to develop.
3. Create Drainage Holes: This is absolutely essential! Eggplants don’t like sitting in soggy soil. Use a drill or a nail and hammer to create several drainage holes at the bottom of the bottle. Aim for at least 5-6 holes, spaced evenly.
4. (Optional) Line the Bottle: If you live in a hot, dry climate, consider lining the inside of the bottle with landscape fabric or burlap. This will help retain moisture and prevent the soil from drying out too quickly. Simply cut the fabric to fit the inside of the bottle and secure it with a bit of glue or tape.
Planting Your Eggplant:
Now for the fun part – getting those eggplants into their new homes!
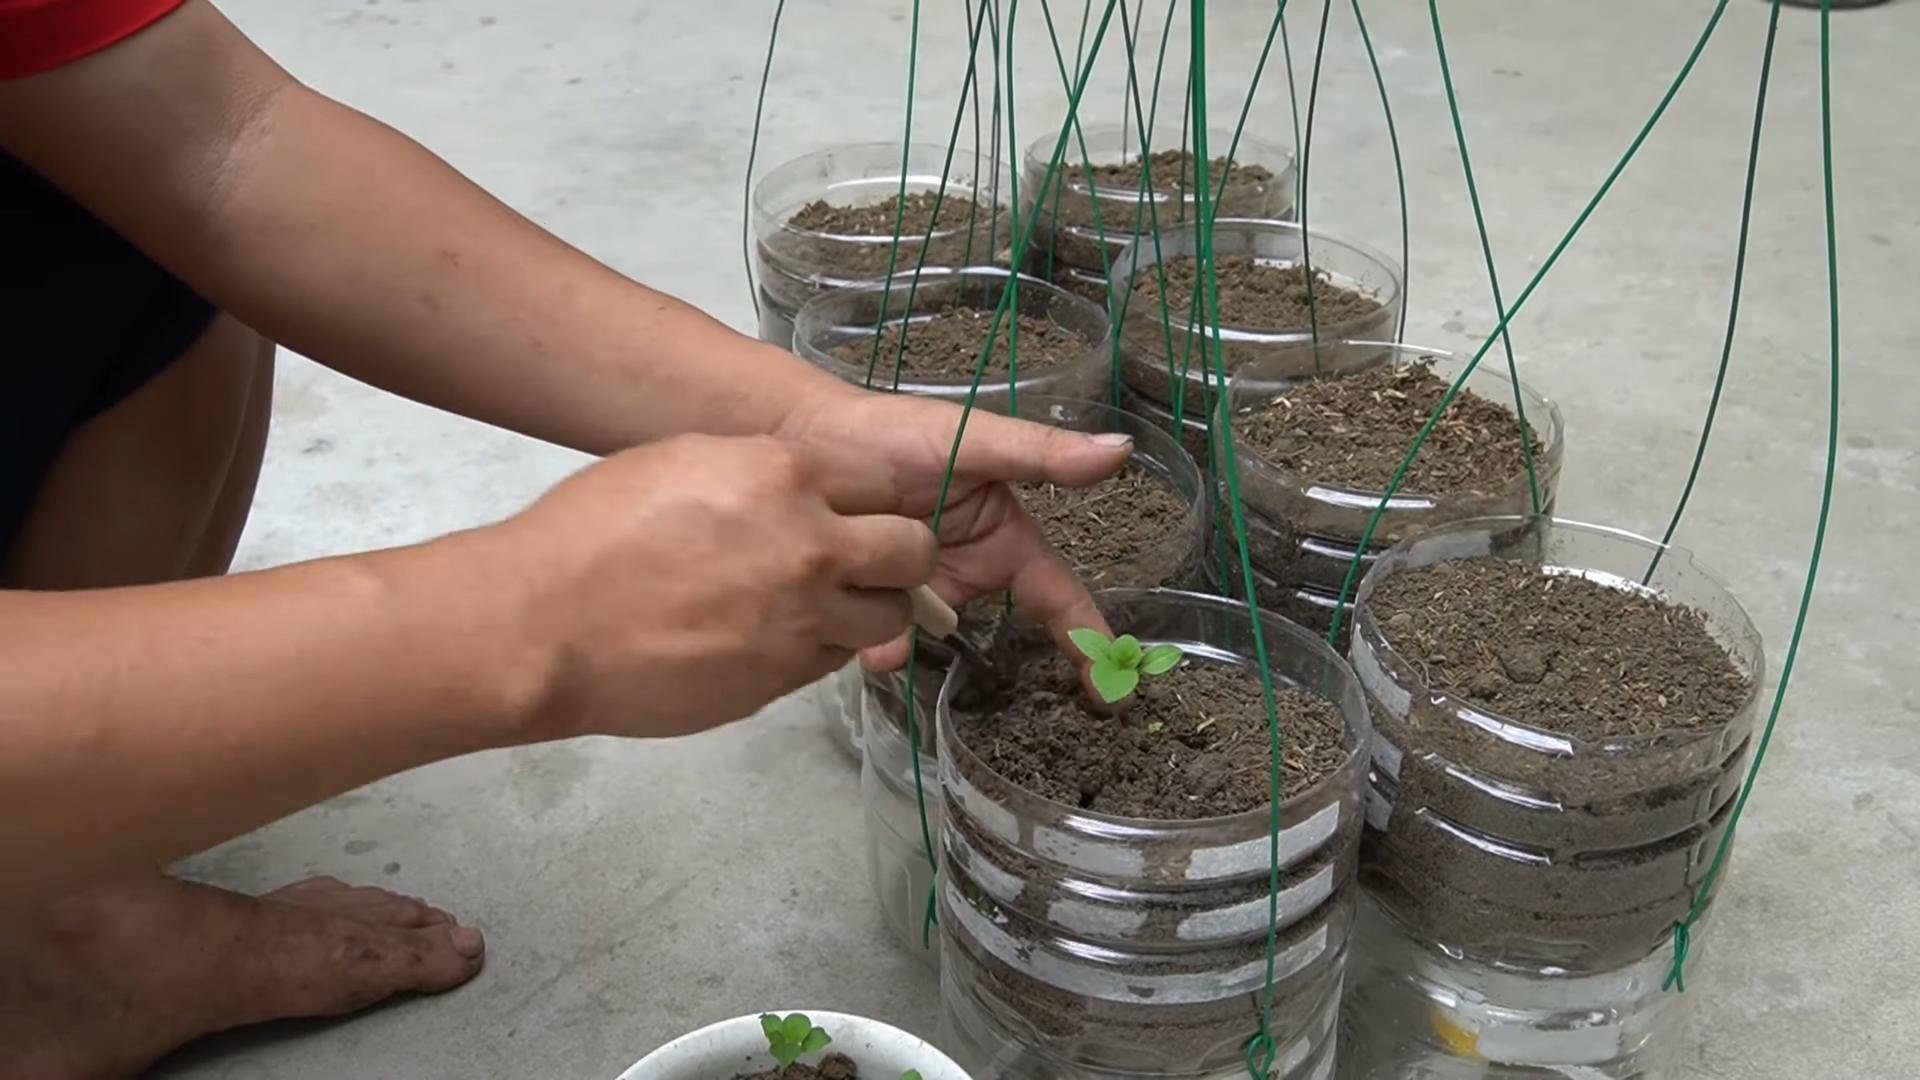
1. Prepare the Potting Mix: In a large container, mix the potting mix with perlite or vermiculite. A good ratio is about 80% potting mix and 20% perlite/vermiculite. This will ensure good drainage and aeration.
2. Fill the Bottle: Carefully fill the prepared bottle with the potting mix, leaving about an inch or two of space at the top.
3. Plant the Seed or Seedling:
* From Seed: Make a small indentation in the soil and sow the eggplant seeds according to the package instructions. Gently cover the seeds with soil and water lightly.
* From Seedling: Gently remove the seedling from its container, being careful not to damage the roots. Create a hole in the soil large enough to accommodate the root ball. Place the seedling in the hole and backfill with soil. Gently pat the soil around the base of the plant.
4. Water Thoroughly: After planting, water the eggplant thoroughly until water drains out of the drainage holes. This will help settle the soil and ensure that the roots are well-hydrated.
5. Add Fertilizer: Sprinkle a slow-release fertilizer around the base of the plant, following the package instructions. This will provide the eggplant with the nutrients it needs to grow and produce fruit.
Caring for Your Eggplant:
Once your eggplant is planted, it’s important to provide it with the right care to ensure healthy growth and a bountiful harvest.
1. Sunlight: Eggplants need at least 6-8 hours of sunlight per day. Place your bottle garden in a sunny location where it will receive plenty of direct sunlight. If you don’t have a sunny spot, you can supplement with grow lights.
2. Watering: Water your eggplant regularly, especially during hot, dry weather. Check the soil moisture by sticking your finger into the soil. If the top inch of soil feels dry, it’s time to water. Avoid overwatering, as this can lead to root rot.
3. Fertilizing: Eggplants are heavy feeders, so they need regular fertilization. In addition to the slow-release fertilizer you added at planting, you can also supplement with a liquid fertilizer every 2-3 weeks. Follow the package instructions for dilution rates.
4. Pruning: Pruning can help improve air circulation and encourage fruit production. Remove any yellowing or dead leaves. You can also prune away some of the lower branches to encourage the plant to focus its energy on producing fruit.
5. Pest Control: Keep an eye out for pests such as aphids, spider mites, and flea beetles. If you notice any pests, you can treat them with insecticidal soap or neem oil.
6. Support: As your eggplant grows, it may need support to prevent the branches from breaking under the weight of the fruit. You can use stakes or a tomato cage to provide support.
Harvesting Your Eggplant:
The moment you’ve been waiting for! Harvesting your own homegrown eggplants is incredibly rewarding.
1. Timing: Eggplants are typically ready to harvest about 60-80 days after planting. The fruit should be firm, glossy, and have a deep, rich color.
2. Harvesting: Use a sharp knife or pruning shears to cut the eggplant from the plant. Leave about an inch of stem attached to the fruit.
3. Enjoy! Now you can enjoy your delicious, homegrown eggplants in your favorite recipes!
Troubleshooting:
Even with the best care, you might encounter some challenges along the way. Here are a few common problems and how to address them:
* Yellowing Leaves: This could be a sign of overwatering, underwatering, or nutrient deficiency. Check the soil moisture and adjust your watering accordingly. If the soil is dry, water thoroughly. If the soil is soggy, allow it to dry out before watering again. You may also need to fertilize your eggplant with a balanced fertilizer.
* Lack of Fruit: This could be due to insufficient sunlight, poor pollination, or nutrient deficiency. Make sure your eggplant is getting at least 6-8 hours of sunlight per day. You can also hand-pollinate the flowers by gently shaking the plant or using a small paintbrush to transfer pollen from one flower to another. Fertilize your eggplant with a fertilizer that is high in phosphorus, which promotes flowering and fruiting.
* Pest Infestation: As mentioned earlier, keep an eye out for pests and treat them promptly with insecticidal soap or neem oil.
Tips for Success:
Here are a few extra tips to help you succeed with your bottle garden eggplant:
* Choose the Right Variety: Some eggplant varieties are better suited for container gardening than others. Look for compact or dwarf varieties that don’t get too large.
* Use High-Quality Potting Mix: Don’t skimp on the potting mix! A good quality potting mix will provide your eggplant with the nutrients and drainage it needs to thrive.
* Water Regularly: Eggplants need consistent moisture, so water them regularly, especially during hot, dry weather.
* Fertilize Regularly: Eggplants are heavy feeders, so fertilize them regularly with a balanced fertilizer.
* Provide Support: As your eggplant grows, it may need support to prevent
Conclusion
So, there you have it! Transforming a simple plastic bottle into a thriving eggplant haven is not just a clever gardening hack; it’s a testament to resourcefulness, sustainability, and the sheer joy of nurturing life. This DIY bottle gardening eggplant method offers a unique approach to growing your own food, especially if you’re limited on space or looking for an eco-friendly way to garden.
Why is this a must-try? Because it’s accessible to everyone, regardless of their gardening experience. It’s cost-effective, utilizing materials that might otherwise end up in the landfill. And most importantly, it allows you to enjoy the satisfaction of harvesting your own delicious, homegrown eggplants. Imagine the pride you’ll feel serving a dish made with eggplants you nurtured from seedling to fruit, all within the confines of a recycled bottle!
But the beauty of this DIY project lies in its adaptability. Feel free to experiment with different bottle sizes to accommodate various eggplant varieties. Consider using colored bottles to add a decorative touch to your garden space. You can even create a vertical garden by hanging multiple bottle planters, maximizing your yield in a minimal footprint.
For those seeking a more advanced approach, try incorporating companion planting within your bottle garden. Basil, for example, is known to deter pests and enhance the flavor of eggplants. Marigolds are another excellent choice, adding a splash of color while also repelling unwanted insects.
Don’t be afraid to get creative with your soil mixture. While a standard potting mix works well, you can enrich it with compost, worm castings, or even coffee grounds to provide your eggplants with an extra boost of nutrients. Remember to monitor the moisture levels regularly, as bottle gardens tend to dry out faster than traditional garden beds.
The key to success with bottle gardening eggplant is observation and adaptation. Pay close attention to your plants, noting any signs of stress or nutrient deficiencies. Adjust your watering and fertilization schedule accordingly. And most importantly, don’t give up if you encounter challenges along the way. Gardening is a learning process, and every setback is an opportunity to grow, both literally and figuratively.
We wholeheartedly encourage you to embark on this rewarding DIY adventure. Not only will you be contributing to a more sustainable lifestyle, but you’ll also be reaping the delicious rewards of your labor. So, gather your bottles, prepare your soil, and get ready to witness the magic of bottle gardening eggplant unfold before your very eyes.
And once you’ve experienced the joy of growing your own eggplants in bottles, we’d love to hear about your journey! Share your photos, tips, and experiences with us in the comments below. Let’s create a community of bottle gardening enthusiasts, inspiring others to embrace this innovative and eco-friendly approach to gardening. Your success stories can motivate others to take the plunge and discover the wonders of growing their own food, one bottle at a time. Let’s cultivate a greener future, together!
Frequently Asked Questions (FAQ)
What type of eggplant is best suited for bottle gardening?
Smaller eggplant varieties, such as Fairy Tale, Patio Baby, or even certain Asian varieties like Ichiban, tend to thrive best in bottle gardens. These varieties are more compact and produce smaller fruits, making them ideal for the limited space within a bottle. Larger eggplant varieties may become root-bound and struggle to produce a substantial yield. Always check the mature size of the eggplant variety before planting it in a bottle garden.
How big should the bottle be for bottle gardening eggplant?
A bottle with a capacity of at least 2 liters is recommended for growing eggplants. Larger bottles, such as those holding 3 or 5 liters, will provide more space for the roots to develop and support the plant’s growth. Ensure the bottle is sturdy and can withstand the weight of the soil and the mature plant. Clear plastic bottles are generally preferred, as they allow you to monitor the moisture levels of the soil.
What kind of soil should I use for bottle gardening eggplant?
A well-draining potting mix is essential for bottle gardening eggplants. You can use a commercially available potting mix or create your own by combining equal parts of peat moss, perlite, and vermiculite. Adding compost or well-rotted manure to the mix will provide essential nutrients for the plants. Avoid using garden soil, as it can be too heavy and may not drain properly, leading to root rot.
How often should I water my bottle gardening eggplant?
The frequency of watering will depend on the weather conditions, the size of the bottle, and the type of soil used. Generally, you should water your eggplant when the top inch of soil feels dry to the touch. Avoid overwatering, as this can lead to root rot. Ensure the bottle has drainage holes to allow excess water to escape. During hot and dry weather, you may need to water your plants more frequently.
How much sunlight does bottle gardening eggplant need?
Eggplants require at least 6-8 hours of direct sunlight per day to thrive. Place your bottle garden in a sunny location where it will receive ample sunlight throughout the day. If you live in an area with intense sunlight, you may need to provide some shade during the hottest part of the day to prevent the leaves from scorching.
Do I need to fertilize my bottle gardening eggplant?
Yes, eggplants are heavy feeders and require regular fertilization to produce a good yield. Use a balanced fertilizer, such as a 10-10-10 or 20-20-20, diluted to half strength. Fertilize your plants every 2-3 weeks during the growing season. You can also use organic fertilizers, such as compost tea or fish emulsion.
How do I prevent pests and diseases in my bottle gardening eggplant?
Regularly inspect your plants for signs of pests or diseases. Common pests that affect eggplants include aphids, spider mites, and flea beetles. You can control these pests by spraying your plants with insecticidal soap or neem oil. To prevent diseases, ensure good air circulation around your plants and avoid overwatering. Remove any infected leaves or stems promptly.
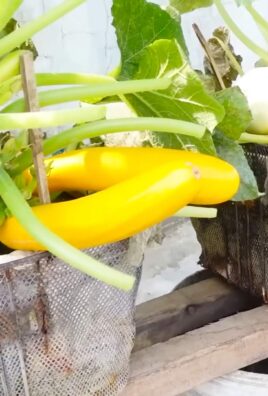
Can I grow other vegetables in bottles besides eggplants?
Absolutely! Bottle gardening is a versatile technique that can be used to grow a variety of vegetables, herbs, and flowers. Some other vegetables that thrive in bottle gardens include tomatoes, peppers, lettuce, spinach, and herbs like basil, mint, and oregano. Choose varieties that are compact and well-suited for container gardening.
How do I support the eggplant plant as it grows in the bottle?
As your eggplant plant grows, it may need support to prevent the stems from breaking under the weight of the fruits. You can use a small stake or trellis to support the plant. Gently tie the stems to the stake or trellis using soft twine or plant ties. Ensure the support is sturdy enough to withstand strong winds.
What do I do with the bottle garden at the end of the growing season?
At the end of the growing season, you can compost the soil and plant debris. The plastic bottle can be recycled or reused for other gardening projects. You can also clean the bottle and store it for use in the following growing season. Consider using the bottle to start seedlings indoors during the winter months.
Leave a Comment