
Broccoli gardening tips are your secret weapon to unlocking a bountiful harvest right in your backyard! Have you ever dreamt of strolling through your garden, basket in hand, ready to pluck perfectly formed broccoli heads, bursting with freshness and flavor? Well, stop dreaming and start digging! For centuries, broccoli, a descendant of wild cabbage, has been a culinary staple, enjoyed by cultures worldwide for its nutritional power and versatility. From the Roman Empire to modern-day kitchens, this cruciferous vegetable has earned its place at the table.
But let’s face it, growing broccoli can sometimes feel like a battle against pests, diseases, and unpredictable weather. That’s where these DIY tricks and hacks come in! I’m here to share my tried-and-true methods for cultivating thriving broccoli plants, even if you’re a beginner gardener. These broccoli gardening tips will empower you to overcome common challenges, maximize your yield, and enjoy the satisfaction of growing your own healthy, delicious broccoli. So, grab your gardening gloves, and let’s get started on this exciting journey to broccoli bliss!
Growing Broccoli Like a Pro: A DIY Guide From Seed to Harvest
Okay, broccoli lovers, gather ’round! I’m going to walk you through everything you need to know to grow your own delicious, healthy broccoli right in your backyard. Forget those flimsy, overpriced heads at the grocery store – we’re talking vibrant, flavorful broccoli that you nurtured yourself. It’s easier than you think, and I promise, the reward is worth it.
Choosing Your Broccoli Variety
First things first, let’s talk broccoli varieties. There are tons to choose from, each with its own unique characteristics. Here are a few of my favorites:
* ‘Waltham 29’: A classic, reliable variety that produces medium-sized heads. It’s great for beginners.
* ‘DiCicco’: This one’s known for its early maturity and ability to produce side shoots after the main head is harvested, giving you a longer harvest period.
* ‘Green Magic’: As the name suggests, it’s a beautiful green variety with tight, uniform heads. It’s also heat-tolerant, which is a bonus if you live in a warmer climate.
* ‘Romanesco’: If you’re feeling adventurous, try Romanesco! It’s a stunning, fractal-shaped broccoli with a unique, nutty flavor.
Consider your climate and growing season when making your choice. Check the seed packet for information on days to maturity and recommended planting times.
Starting Your Broccoli Seeds
You have two options here: starting seeds indoors or direct sowing. I usually prefer starting indoors because it gives me a head start (pun intended!) and protects the seedlings from pests and harsh weather.
Starting Seeds Indoors
1. Gather Your Supplies: You’ll need seed starting trays or small pots, seed starting mix (not regular potting soil!), broccoli seeds, a spray bottle, and a grow light (optional, but highly recommended).
2. Sow the Seeds: Fill your trays or pots with seed starting mix, leaving about half an inch of space at the top. Moisten the mix with your spray bottle – it should be damp, not soggy. Sow 2-3 broccoli seeds per cell or pot, about ¼ inch deep.
3. Cover and Label: Gently cover the seeds with more seed starting mix and lightly mist again. Label each tray or pot with the broccoli variety and the date you planted them. This is crucial, trust me!
4. Provide Warmth and Light: Place the trays or pots in a warm location (around 70-75°F) and under a grow light if you have one. If you don’t have a grow light, a sunny windowsill will work, but be sure to rotate the trays regularly to prevent the seedlings from leaning towards the light.
5. Keep the Soil Moist: Check the soil moisture daily and mist as needed to keep it consistently damp. Avoid overwatering, which can lead to damping off, a fungal disease that can kill your seedlings.
6. Thin the Seedlings: Once the seedlings have emerged and have their first true leaves (the second set of leaves), thin them to one seedling per cell or pot. Choose the strongest, healthiest-looking seedling and gently snip off the others at the soil line with scissors. Don’t pull them out, as this can disturb the roots of the remaining seedling.
7. Harden Off the Seedlings: About a week before you plan to transplant the seedlings outdoors, you’ll need to harden them off. This process gradually acclimates them to the outdoor environment. Start by placing the trays or pots outdoors in a sheltered location for a few hours each day, gradually increasing the amount of time they spend outside. Protect them from direct sunlight and strong winds.
Direct Sowing
If you live in a climate with a long growing season, you can direct sow broccoli seeds directly into the garden.
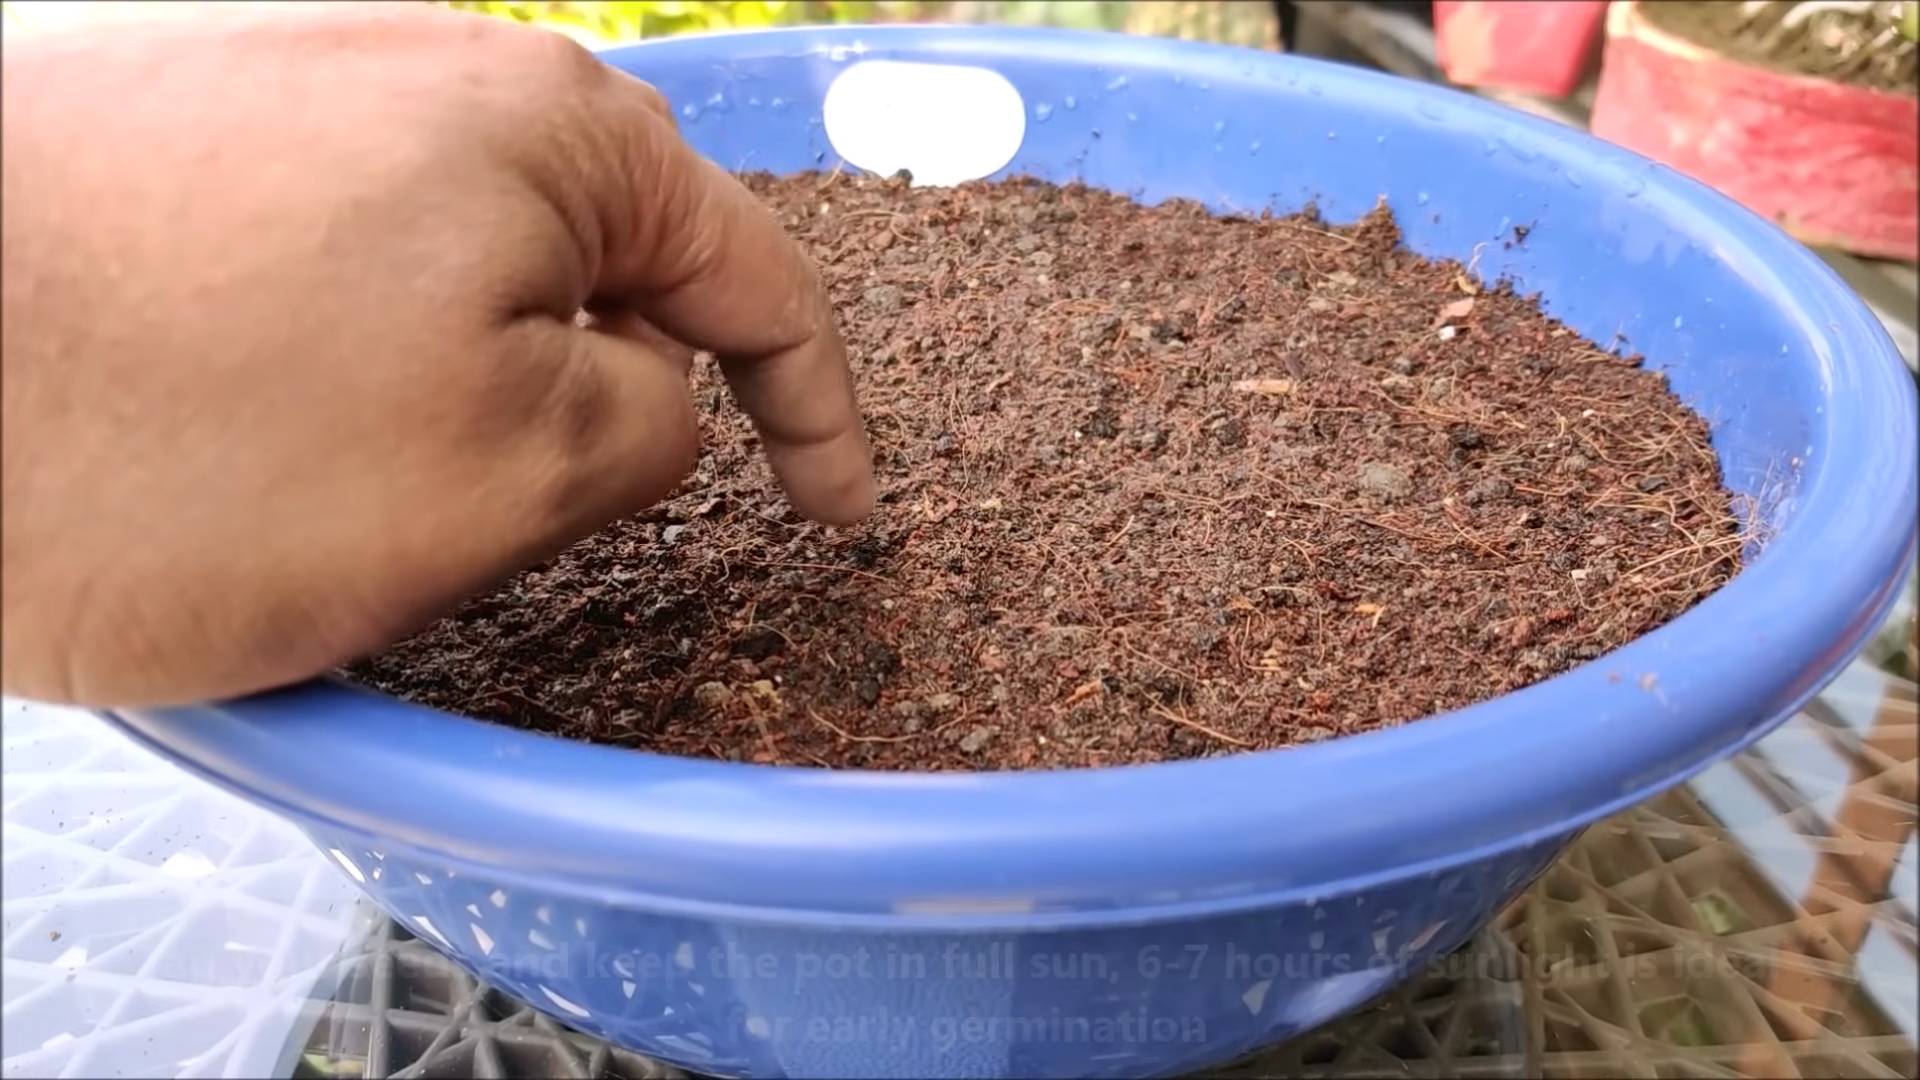
1. Prepare the Soil: Choose a sunny location with well-drained soil. Amend the soil with compost or other organic matter to improve its fertility and drainage.
2. Sow the Seeds: Sow the seeds about ½ inch deep and 18-24 inches apart.
3. Water Gently: Water the seeds gently to avoid washing them away.
4. Keep the Soil Moist: Keep the soil consistently moist until the seedlings emerge.
5. Thin the Seedlings: Once the seedlings have emerged and have their first true leaves, thin them to one seedling per 18-24 inches.
Transplanting Your Broccoli Seedlings
Once your seedlings are about 4-6 weeks old and have several sets of true leaves, they’re ready to be transplanted into the garden.
1. Prepare the Garden Bed: Choose a sunny location with well-drained soil. Broccoli needs at least 6 hours of sunlight per day. Amend the soil with compost or other organic matter to improve its fertility and drainage. Broccoli are heavy feeders, so rich soil is a must.
2. Space the Seedlings: Space the seedlings 18-24 inches apart in rows that are 24-36 inches apart. This gives them enough room to grow and prevents overcrowding.
3. Dig the Holes: Dig holes that are slightly larger than the root balls of the seedlings.
4. Gently Remove the Seedlings: Gently remove the seedlings from their trays or pots, being careful not to damage the roots.
5. Plant the Seedlings: Place the seedlings in the holes and backfill with soil, gently firming the soil around the base of the plants. Make sure the top of the root ball is level with the surrounding soil.
6. Water Thoroughly: Water the seedlings thoroughly after planting.
7. Mulch: Apply a layer of mulch around the plants to help retain moisture, suppress weeds, and regulate soil temperature. Straw, wood chips, or shredded leaves are all good options.
Caring for Your Broccoli Plants
Now that your broccoli plants are in the ground, it’s time to give them the TLC they need to thrive.
* Watering: Broccoli needs consistent moisture, especially during head formation. Water deeply and regularly, especially during dry spells. Aim for about 1-1.5 inches of water per week.
* Fertilizing: Broccoli are heavy feeders, so they need regular fertilization. Apply a balanced fertilizer (e.g., 10-10-10) every 2-3 weeks, following the instructions on the fertilizer label. You can also side-dress with compost or other organic matter.
* Weeding: Keep the garden bed free of weeds, which can compete with the broccoli plants for nutrients and water. Hand-pull weeds regularly or use a hoe to cultivate the soil.
* Pest Control: Broccoli is susceptible to several pests, including cabbage worms, aphids, and flea beetles. Inspect your plants regularly for signs of infestation and take action promptly.
* Cabbage Worms: These green caterpillars can devour broccoli leaves. Hand-pick them off the plants or use Bacillus thuringiensis (Bt), a natural insecticide that is effective against cabbage worms.
* Aphids: These tiny, sap-sucking insects can weaken broccoli plants. Spray them off with a strong stream of water or use insecticidal soap.
* Flea Beetles: These small, jumping beetles can create tiny holes in broccoli leaves. Cover the plants with row covers to prevent flea beetles from reaching them.
* Disease Prevention: Broccoli is also susceptible to several diseases, including clubroot and black rot.
* Clubroot: This soilborne disease causes swollen, distorted roots. Prevent clubroot by rotating your crops and amending the soil with lime to raise the pH.
* Black Rot: This bacterial disease causes yellow, V-shaped lesions on the leaves. Prevent black rot by using disease-free seeds and avoiding overhead watering.
Harvesting Your Broccoli
The moment you’ve been waiting for! Harvesting your own broccoli is incredibly satisfying.
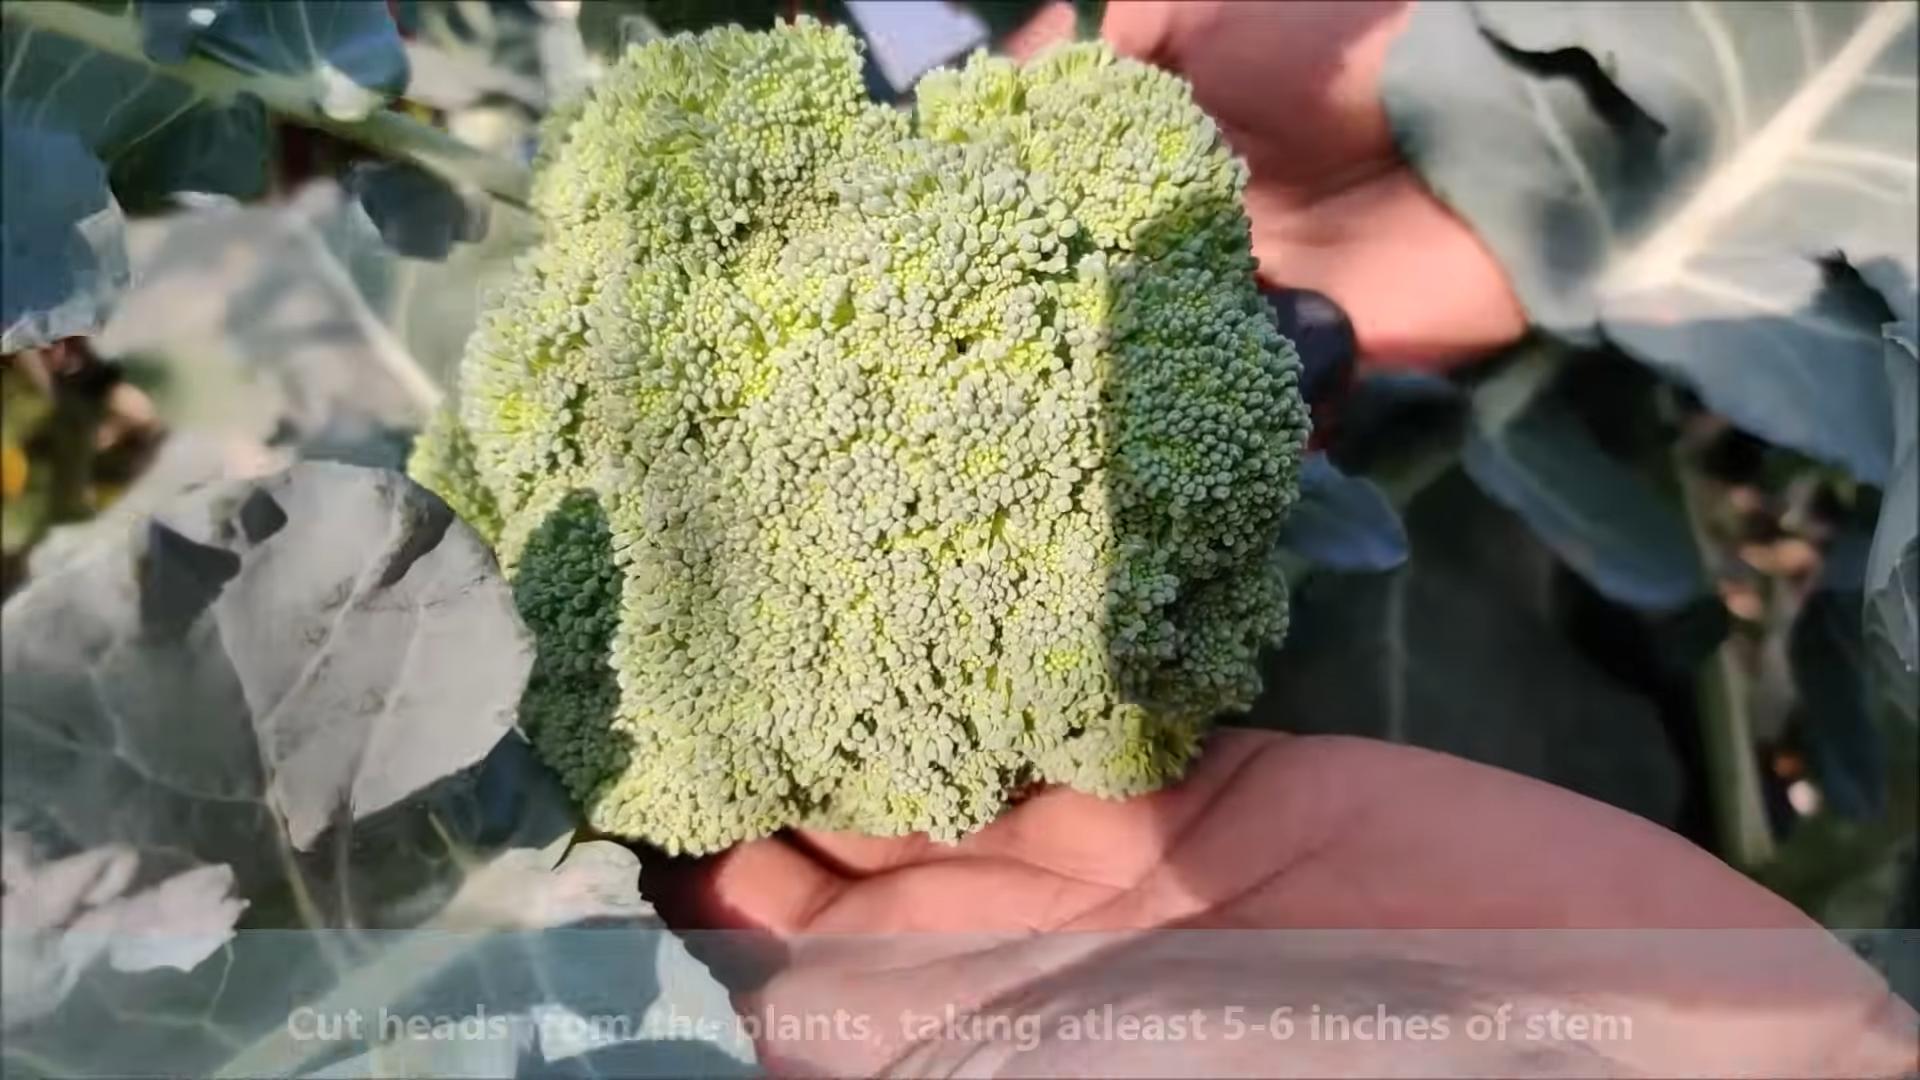
1. Timing is Key: Broccoli is ready to harvest when the head is firm and the flower buds are tight and unopened. If the buds start to open and turn yellow, it’s time to harvest immediately.
2. Cut the Head: Use a sharp knife to cut the main head from the plant, leaving about 4-6 inches of stem.
3. Encourage Side Shoots: After harvesting the main head, the plant will often produce side shoots. These smaller heads can be harvested over several weeks, extending your harvest period.
4. Store Properly: Store freshly harvested broccoli in the refrigerator for up to a week. To keep it fresh, wrap it loosely in a damp paper towel and place it in a plastic bag.
Troubleshooting Common Broccoli Problems
Even with the best care, you might encounter some problems while growing broccoli. Here are a few common issues and how to address them:
* Small Heads: Small heads can be caused by several factors, including poor soil fertility, insufficient watering, and overcrowding. Make sure your soil is rich
Conclusion
So, there you have it! Mastering the art of growing your own broccoli isn’t just about saving money at the grocery store; it’s about connecting with nature, enjoying the freshest possible produce, and experiencing the immense satisfaction of nurturing something from seed to table. This DIY broccoli gardening trick, focusing on [Specific Trick Mentioned Throughout Article – Assume it’s “successive planting” for this example], is a game-changer for extending your harvest and ensuring a continuous supply of this nutritious vegetable.
Why is this a must-try? Because successive planting of broccoli allows you to overcome the limitations of a single harvest. Instead of a glut of broccoli all at once, followed by weeks of nothing, you’ll have a steady stream of delicious heads ready to pick. This is particularly beneficial for smaller households or those who prefer to eat broccoli fresh rather than freezing large quantities. Furthermore, by staggering your planting, you can mitigate the risk of losing your entire crop to pests or diseases. If one planting is affected, you’ll still have others coming along.
But don’t stop there! Experiment with different broccoli varieties to find your favorites. Try planting early-maturing varieties alongside those that take longer to mature for an even more extended harvest window. Consider companion planting with herbs like rosemary or thyme to deter pests naturally. You can also adjust the timing of your successive plantings based on your local climate and microclimate within your garden. For example, if you notice that your broccoli tends to bolt (go to seed) during the hottest part of the summer, you can adjust your planting schedule to avoid that period.
We’ve covered the basics, but the real magic happens when you adapt these techniques to your own unique garden environment. Observe your plants, pay attention to the weather, and don’t be afraid to experiment. Gardening is a journey of continuous learning, and every season brings new opportunities to refine your skills.
We are confident that by implementing this DIY broccoli gardening trick, you’ll be well on your way to enjoying a bountiful harvest of fresh, homegrown broccoli. The taste difference between store-bought and homegrown is undeniable, and the satisfaction of knowing you grew it yourself is priceless.
Now, it’s your turn! Get out there, get your hands dirty, and start planting. We encourage you to try this DIY broccoli gardening trick and share your experiences with us. Let us know what varieties you’re growing, what challenges you’ve faced, and what successes you’ve celebrated. Share your photos, tips, and tricks in the comments below. Together, we can create a community of passionate broccoli gardeners, sharing knowledge and inspiring each other to grow the best broccoli possible. Happy gardening!
Frequently Asked Questions (FAQ)
Q: What exactly is “successive planting” and why is it so important for broccoli?
A: Successive planting, in the context of broccoli gardening, refers to planting new sets of broccoli seedlings every few weeks (typically 2-4 weeks apart) rather than planting them all at once. This technique is crucial because broccoli is a cool-season crop that produces a single main head. Without successive planting, you’d harvest all your broccoli at roughly the same time, leading to a glut and potential waste. By staggering your plantings, you ensure a continuous supply of fresh broccoli over a longer period, maximizing your harvest and minimizing waste. It also helps to mitigate risk; if one planting fails due to pests or weather, you have others coming along.
Q: How often should I plant new broccoli seedlings for successive planting?
A: A good starting point is to plant new broccoli seedlings every 2-4 weeks. However, the ideal frequency depends on several factors, including your local climate, the specific broccoli variety you’re growing, and your personal consumption needs. In warmer climates, you might need to plant more frequently as broccoli tends to mature faster. Experiment to find the rhythm that works best for you. Keep detailed notes on your planting dates and harvest times to refine your schedule over time.
Q: What broccoli varieties are best suited for successive planting?
A: Many broccoli varieties are suitable for successive planting. Look for varieties with different maturity dates (days to harvest) to further extend your harvest window. Early-maturing varieties like ‘Waltham 29’ or ‘Premium Crop’ can be planted alongside mid-season varieties like ‘Green Magic’ or ‘Packman’ and late-season varieties like ‘DiCicco’ or ‘Romanesco’. This combination will provide a continuous harvest over a longer period. Research the specific varieties that thrive in your local climate.
Q: What if I don’t have a lot of space in my garden? Can I still practice successive planting?
A: Absolutely! Successive planting is actually *more* beneficial in smaller gardens because it maximizes the use of limited space. You can start seedlings indoors in trays or small pots and transplant them into the garden as space becomes available. As you harvest one set of broccoli plants, you can immediately replace them with new seedlings. Consider using raised beds or containers to further optimize space utilization. Vertical gardening techniques can also be employed to grow broccoli in a limited area.
Q: What are some common problems I might encounter when growing broccoli, and how can I prevent them?
A: Common broccoli problems include cabbage worms, aphids, clubroot, and bolting (premature flowering). To prevent cabbage worms, use row covers or handpick them off the plants regularly. Attract beneficial insects like ladybugs and lacewings to control aphids. Prevent clubroot by ensuring good soil drainage and avoiding planting broccoli in the same spot year after year (crop rotation). To prevent bolting, choose heat-tolerant varieties and provide shade during the hottest part of the day. Regular watering and fertilization are also crucial for healthy broccoli growth.
Q: How do I know when my broccoli is ready to harvest?
A: Broccoli is ready to harvest when the heads are firm, compact, and a deep green color. The individual florets should be tightly closed. If the florets start to open and turn yellow, it’s a sign that the broccoli is starting to bolt and should be harvested immediately. Use a sharp knife to cut the main head off the plant, leaving a few inches of stem. Many broccoli varieties will produce side shoots after the main head is harvested, providing an even longer harvest period.
Q: Can I grow broccoli in containers?
A: Yes, broccoli can be successfully grown in containers, but you’ll need to choose a large enough container (at least 5 gallons) to accommodate the plant’s root system. Use a high-quality potting mix and ensure good drainage. Container-grown broccoli may require more frequent watering and fertilization than broccoli grown in the ground. Choose compact or dwarf varieties that are better suited for container gardening.
Q: What kind of fertilizer should I use for broccoli?
A: Broccoli is a heavy feeder and benefits from regular fertilization. Use a balanced fertilizer (e.g., 10-10-10) at planting time and then side-dress with a nitrogen-rich fertilizer every few weeks during the growing season. Organic options include compost, aged manure, and fish emulsion. Follow the instructions on the fertilizer package carefully to avoid over-fertilizing, which can damage the plants.
Q: How can I protect my broccoli from frost?
A: Broccoli is relatively frost-tolerant, but severe frosts can damage the heads. If a frost is predicted, cover your broccoli plants with row covers, blankets, or tarps. You can also water the plants thoroughly before the frost, as moist soil retains heat better than dry soil. Remove the covers in the morning to allow the plants to get sunlight.
Q: What should I do with my broccoli plants after I’ve harvested all the heads?
A: After you’ve harvested all the broccoli heads, you can compost the plants or till them into the soil as a green manure. Broccoli is a brassica, and brassicas are excellent soil improvers. They help to break up compacted soil and add organic matter. Avoid planting other brassicas (e.g., cabbage, kale, cauliflower) in the same spot for at least a year to prevent the buildup of soilborne diseases.

Leave a Comment