
Carrot container gardening: who knew growing these vibrant root vegetables could be so easy, even without a sprawling backyard? I’m so excited to share my favorite tips and tricks for cultivating delicious, homegrown carrots right on your patio, balcony, or even windowsill! For centuries, carrots have been a staple in diets around the world, dating back to ancient Persia where they were originally purple or white. Over time, selective breeding gifted us with the bright orange variety we know and love today.
But let’s face it, not everyone has the space or the ideal soil conditions for a traditional garden. That’s where container gardening comes to the rescue! Imagine the satisfaction of harvesting your own sweet, crunchy carrots, knowing exactly where they came from and what went into growing them. This DIY guide will walk you through everything you need to know, from choosing the right container and soil to preventing common pests and diseases. Plus, I’ll share some clever hacks to maximize your yield and ensure your carrot container gardening experience is a resounding success. Get ready to dig in (pun intended!) and discover the joy of growing your own carrots, no matter how small your space may be!
DIY Carrot Container Gardening: Grow Your Own Crunchy Goodness!
Hey there, fellow gardening enthusiasts! Ever thought about growing your own carrots but felt limited by space? Well, I’m here to tell you that container gardening is your answer! It’s surprisingly easy, super rewarding, and you get to enjoy the freshest, sweetest carrots imaginable. Let’s dive into how you can create your own carrot haven, even if you only have a balcony or patio.
Choosing the Right Container and Soil
First things first, we need to talk about the home for your future carrots. This is crucial, so pay close attention!
* Depth is Key: Carrots need room to grow downwards. Opt for a container that’s at least 12 inches deep, but 18-24 inches is even better, especially if you’re planning on growing longer varieties like Nantes or Imperator. Trust me, you don’t want stunted, misshapen carrots!
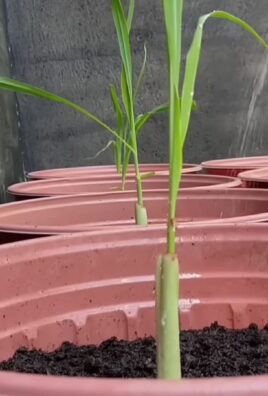
* Material Matters: Plastic, terracotta, even fabric grow bags will work. Just make sure your container has drainage holes. Soggy soil is a carrot’s worst enemy. I personally love using fabric grow bags because they allow for excellent drainage and aeration.
* Size it Up: The width of your container depends on how many carrots you want to grow. A good rule of thumb is to allow about 3-4 inches of space between each carrot. So, a 12-inch wide container can comfortably house 3-4 carrots.
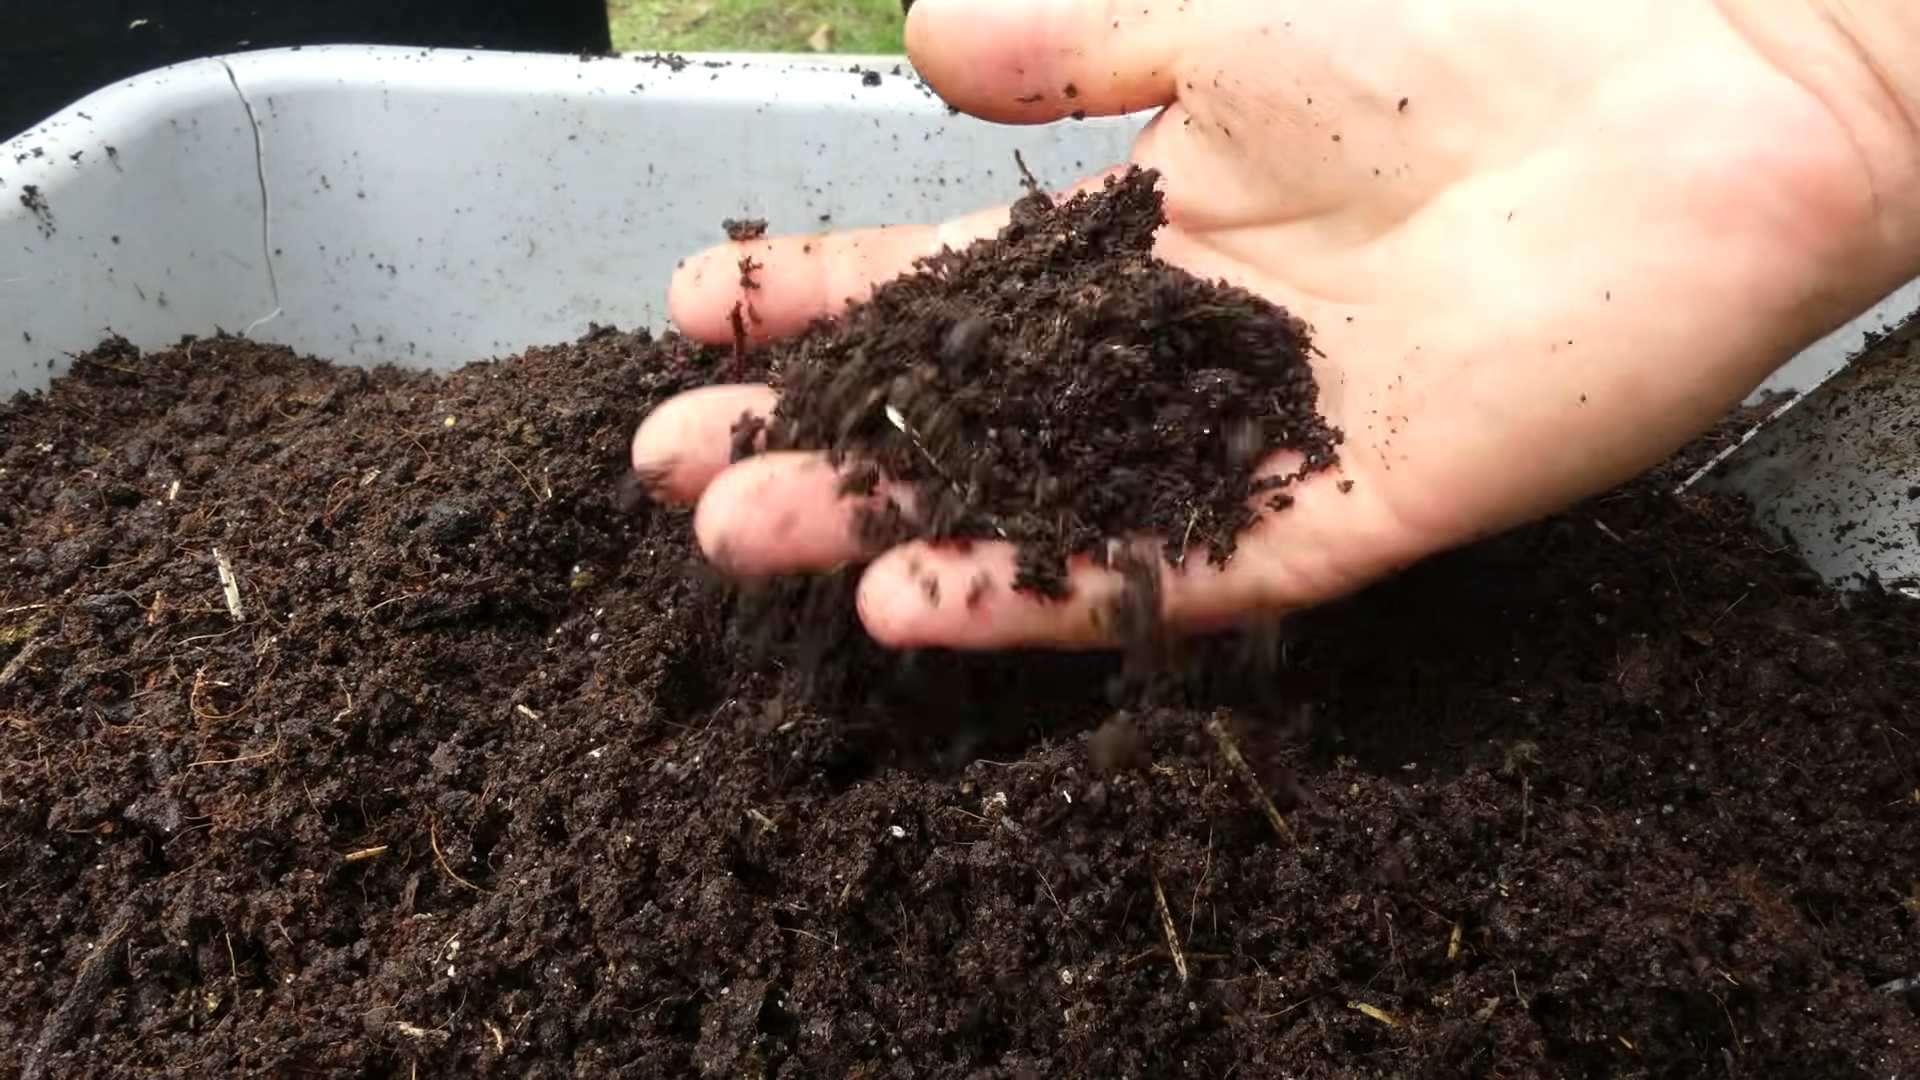
* Soil is King (or Queen!): Carrots thrive in loose, well-draining soil. Heavy clay soil will result in short, stubby, and often forked carrots. Avoid using garden soil directly in your containers. Instead, create a mix that’s light and airy.
Now, let’s talk about that soil mix. I’ve experimented with a few, and here’s my favorite recipe:
* 1 part compost (for nutrients and water retention)
* 1 part peat moss or coco coir (for moisture retention and aeration)
* 1 part perlite or vermiculite (for drainage and aeration)
Mix these ingredients thoroughly until you have a light, fluffy mixture. You can also buy pre-made potting mix specifically designed for vegetables. Just make sure it’s well-draining.
Planting Your Carrot Seeds
Alright, container and soil sorted! Now for the fun part: planting those tiny seeds that will become delicious carrots.
1. Moisten the Soil: Before planting, lightly moisten your soil mix. You want it damp, not soaking wet.
2. Sowing the Seeds: Carrot seeds are tiny, so it’s easy to over-sow. I like to mix the seeds with a bit of sand to make them easier to handle and space out. Sprinkle the seeds evenly over the surface of the soil.
3. Cover Lightly: Gently cover the seeds with a very thin layer (about 录 inch) of soil. You can also use vermiculite.
4. Water Gently: Water the soil gently using a watering can with a rose head or a spray bottle. You don’t want to dislodge the seeds.
5. Keep it Moist: Keep the soil consistently moist until the seeds germinate. This might mean watering daily, especially in warm weather. I often cover the container with plastic wrap to help retain moisture, but remember to remove it once the seedlings emerge.
6. Germination Time: Carrot seeds can take anywhere from 7 to 21 days to germinate, depending on the temperature. Be patient!
Thinning the Seedlings
This is a crucial step that many beginners overlook, but it’s essential for healthy carrot development.
1. Why Thin? If you don’t thin your seedlings, they’ll compete for resources (water, nutrients, sunlight) and you’ll end up with a bunch of skinny, underdeveloped carrots.
2. When to Thin: Once your seedlings are about 1-2 inches tall and have their first true leaves (the second set of leaves that appear after the initial seed leaves), it’s time to thin.
3. How to Thin: Gently pull out the weaker seedlings, leaving about 3-4 inches between the remaining plants. Be careful not to disturb the roots of the carrots you want to keep. I find it helpful to use small scissors to snip the unwanted seedlings at the soil line rather than pulling them out, which can damage the roots of the remaining plants.
4. Second Thinning (Optional): If your carrots are still crowded after the first thinning, you can do a second thinning a few weeks later, leaving even more space between the plants.
Caring for Your Carrot Plants
Now that your carrots are growing, it’s time to provide them with the care they need to thrive.
* Sunlight: Carrots need at least 6 hours of sunlight per day. Place your container in a sunny spot. If you don’t have enough natural sunlight, you can supplement with grow lights.
* Watering: Water regularly, keeping the soil consistently moist but not waterlogged. Check the soil moisture by sticking your finger about an inch into the soil. If it feels dry, it’s time to water.
* Fertilizing: Carrots are not heavy feeders, but they do benefit from occasional fertilization. Use a balanced, water-soluble fertilizer diluted to half strength every 2-3 weeks. Avoid fertilizers that are high in nitrogen, as this can promote leafy growth at the expense of root development.
* Weed Control: Keep your container free of weeds, which can compete with your carrots for resources. Hand-pull any weeds that appear.
* Pest Control: Carrots are relatively pest-resistant, but they can be susceptible to carrot rust flies. These flies lay their eggs near the base of the plants, and the larvae burrow into the roots, causing damage. To prevent carrot rust flies, cover your container with a fine mesh netting. You can also use companion planting to deter pests. Marigolds, for example, are known to repel many garden pests.
Harvesting Your Carrots
The moment you’ve been waiting for! Harvesting your own homegrown carrots is incredibly satisfying.
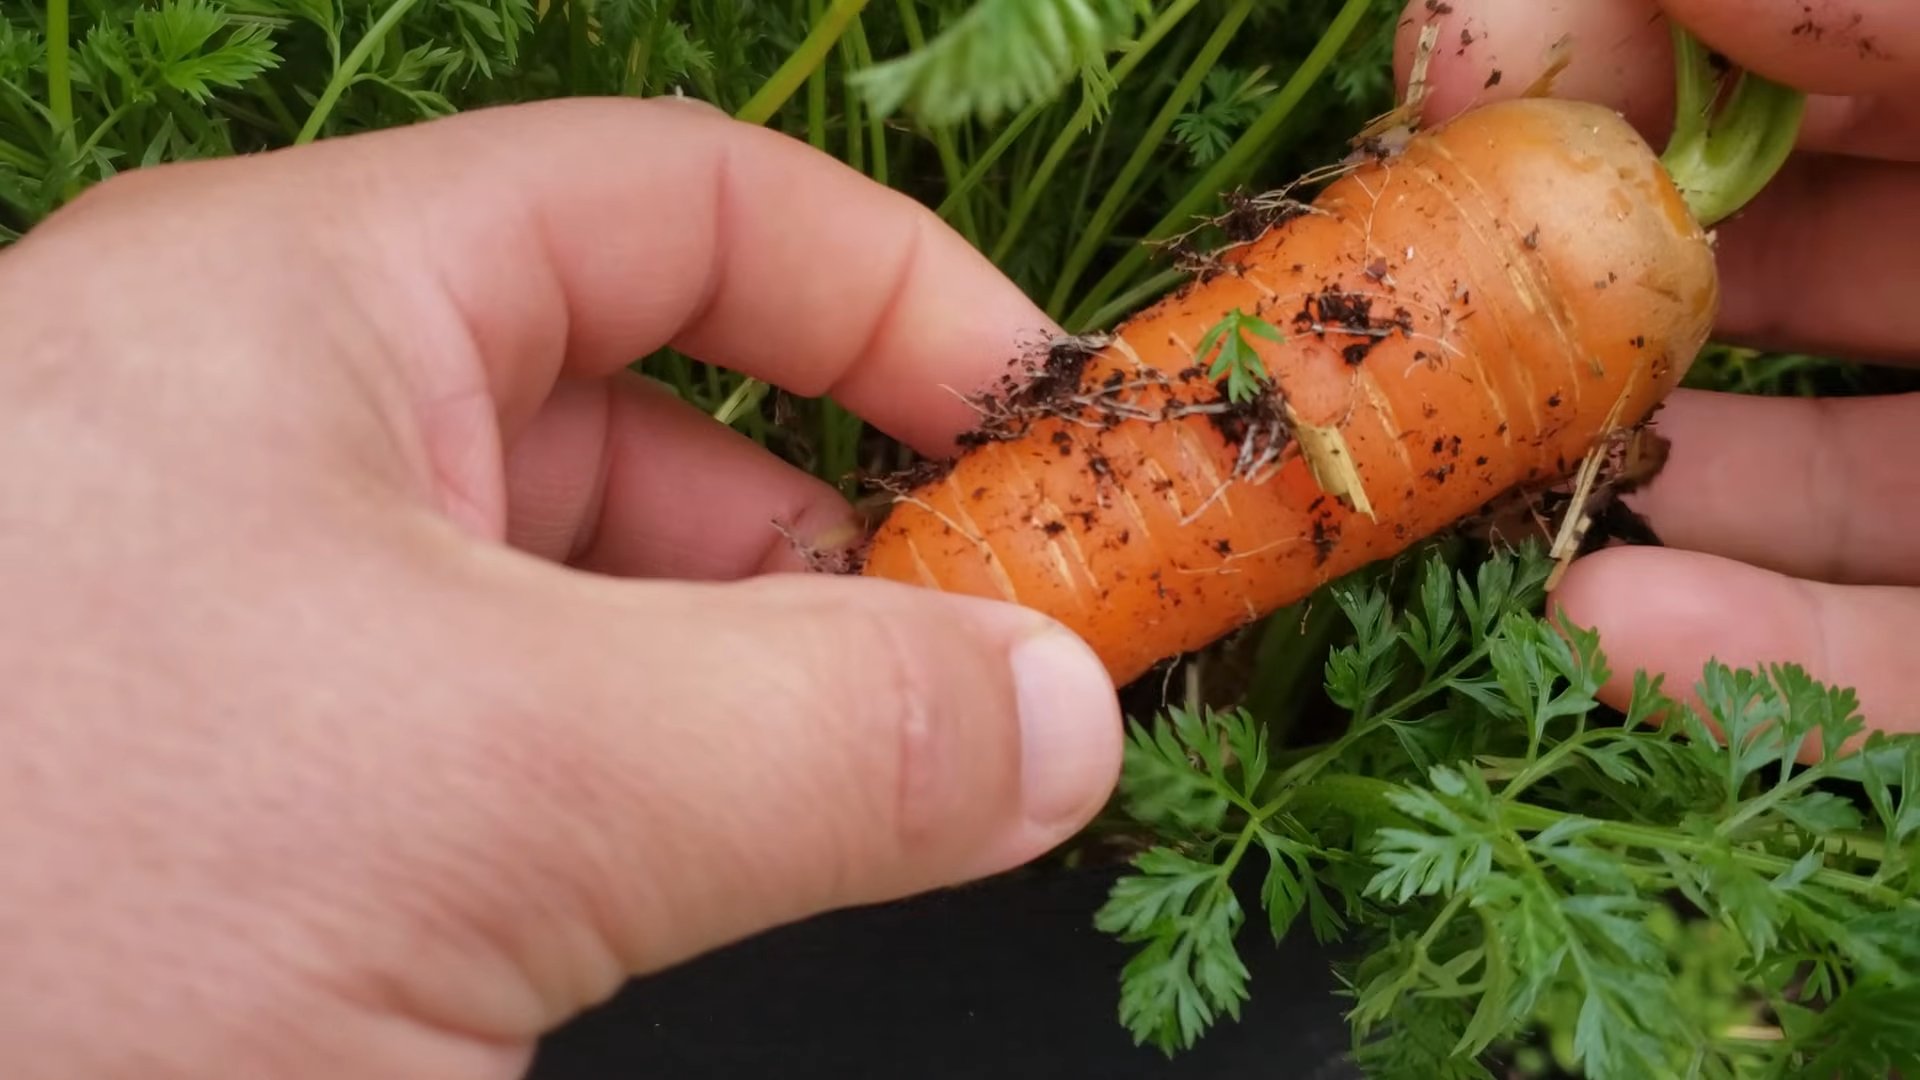
1. When to Harvest: Carrots are typically ready to harvest 60-80 days after planting, depending on the variety. Check the seed packet for specific maturity dates. You can also gauge ripeness by gently brushing away the soil around the top of the carrot to see its size.
2. How to Harvest: Gently loosen the soil around the carrot with a trowel or garden fork. Then, grasp the carrot by the base of the greens and pull it straight up. If the carrot is difficult to pull, you may need to loosen the soil further.
3. Enjoy! Brush off any excess soil and enjoy your freshly harvested carrots! They’ll taste sweeter and more flavorful than anything you can buy at the store.
Troubleshooting Common Problems
Even with the best care, you might encounter a few challenges along the way. Here are some common problems and how to address them:
* Forked Carrots: This is usually caused by rocks or compacted soil in the container. Make sure your soil mix is loose and free of debris.
* Stunted Growth: This could be due to insufficient sunlight, water, or nutrients. Make sure your carrots are getting enough of all three.
* Pests: As mentioned earlier, carrot rust flies can be a problem. Use netting or companion planting to deter them. Aphids can also sometimes attack carrot plants. Spray them off with a strong stream of water or use insecticidal soap.
* Bolting: Bolting (when the plant prematurely produces flowers and seeds) can occur if the carrots are exposed to extreme temperature fluctuations. Try to keep the container in a relatively stable environment.
Choosing the Right Carrot Variety
Not all carrots are created equal! Some varieties are better suited for container gardening than others. Here are a few of my favorites:
* ‘Thumbelina’: These are small, round carrots that are perfect for shallow containers.
* ‘Parisian’: Similar to ‘Thumbelina’, these are also small and round.
* ‘Nantes’: These are classic, cylindrical carrots that are relatively short and sweet.
* ‘Chantenay’: These are cone-shaped carrots that are wider at the top and taper towards the bottom. They’re known for their good flavor and storage ability.
When choosing a variety, consider the size of your container and your personal preferences.
Extra Tips for Carrot Container Gardening Success
* Succession Planting: To enjoy a continuous harvest of carrots, sow seeds every 2-3 weeks.
* Rotate Your Crops: Avoid planting carrots in the same container year after year. This can help prevent soilborne diseases and pest infestations.
* Don’t Overwater: While carrots need consistent moisture, overwatering can lead to root rot.
* Label Your Containers: It’s easy to forget what you planted where! Label your containers with the
Conclusion
So, there you have it! Transforming your patio, balcony, or even a sunny windowsill into a thriving carrot patch is not only achievable but incredibly rewarding. We’ve walked you through the simple steps of carrot container gardening, demonstrating how easy it is to cultivate these vibrant root vegetables in a limited space. Forget the sprawling garden beds; with the right container, soil, and a little sunshine, you can enjoy fresh, homegrown carrots right at your fingertips.
Why is this DIY trick a must-try? Because it democratizes gardening! It empowers anyone, regardless of their living situation, to connect with nature and experience the joy of growing their own food. Imagine the satisfaction of harvesting sweet, crisp carrots that you nurtured from seed to table. Plus, container gardening offers unparalleled control over the growing environment, minimizing pests and diseases that can plague traditional gardens. You’ll be amazed at the difference in taste and texture compared to store-bought carrots.
But the beauty of carrot container gardening lies in its adaptability. Feel free to experiment with different carrot varieties. Nantes carrots are a classic choice, known for their cylindrical shape and sweet flavor, perfect for slicing and snacking. For something a little different, try growing round carrots like ‘Parisian’ or ‘Thumbelina,’ which are ideal for shallow containers and add a whimsical touch to your harvest. Consider adding companion plants like marigolds or basil to your carrot containers. These not only deter pests but also enhance the overall aesthetic of your mini-garden. You can also interplant radishes with your carrots; radishes germinate quickly and help break up the soil, making it easier for carrot seedlings to emerge.
Don’t be afraid to get creative with your containers! While a standard pot works perfectly well, you can also repurpose old buckets, tubs, or even grow bags. Just ensure that your chosen container has adequate drainage to prevent waterlogging, which can lead to root rot. Remember to adjust your watering schedule based on the weather and the size of your container. Carrots prefer consistently moist soil, but avoid overwatering, which can also be detrimental.
We are confident that you’ll find carrot container gardening to be a fulfilling and delicious experience. It’s a fantastic way to introduce children to the wonders of gardening, teach them about where their food comes from, and encourage healthy eating habits. It’s also a great stress reliever, allowing you to unwind and connect with nature in the comfort of your own home.
So, what are you waiting for? Grab your seeds, soil, and containers, and embark on your carrot container gardening adventure today! We’re eager to hear about your experiences. Share your photos, tips, and triumphs with us in the comments below. Let’s build a community of container gardeners and inspire others to grow their own food, one carrot at a time. Happy gardening!
Frequently Asked Questions (FAQ)
What is the best size container for growing carrots?
The ideal container size for carrot container gardening depends on the variety of carrots you plan to grow. Generally, a container that is at least 12 inches deep and 8 inches wide is suitable for most standard carrot varieties like Nantes. However, if you’re growing longer varieties like Imperator, you’ll need a deeper container, ideally 18-24 inches deep. For smaller, round varieties like Parisian, a shallower container of around 6-8 inches deep will suffice. Remember, the more space the roots have to grow, the larger and healthier your carrots will be. Ensure the container has drainage holes to prevent waterlogging.
What type of soil is best for carrot container gardening?
Carrots thrive in loose, well-draining soil that is rich in organic matter. Avoid heavy clay soils, as they can impede root growth and result in misshapen carrots. A good potting mix specifically formulated for vegetables is an excellent choice. You can also create your own mix by combining equal parts of compost, peat moss (or coconut coir), and perlite or vermiculite. The compost provides essential nutrients, while the peat moss or coconut coir helps retain moisture, and the perlite or vermiculite improves drainage and aeration. Before planting, amend the soil with a slow-release organic fertilizer to provide a steady supply of nutrients throughout the growing season.
How often should I water my container carrots?
Consistent moisture is crucial for successful carrot container gardening. Water your carrots regularly, especially during hot and dry weather. The soil should be consistently moist but not waterlogged. Check the soil moisture by inserting your finger about an inch deep. If the soil feels dry, it’s time to water. Water deeply, allowing the water to drain out of the drainage holes. Avoid overhead watering, as it can promote fungal diseases. Instead, water at the base of the plants. Mulching around the plants with straw or wood chips can help retain moisture and suppress weeds.
How much sunlight do carrots need in containers?
Carrots need at least 6-8 hours of direct sunlight per day to thrive. Choose a sunny location for your carrot container gardening setup. If you live in a particularly hot climate, provide some afternoon shade to prevent the soil from drying out too quickly. If you don’t have access to a sunny location, you can supplement with grow lights. Position the grow lights about 6-12 inches above the plants and provide 14-16 hours of light per day. Rotate the containers regularly to ensure that all sides of the plants receive adequate sunlight.
How do I thin carrot seedlings in containers?
Thinning is essential for successful carrot container gardening. Carrot seeds are tiny, and it’s easy to sow them too densely. Overcrowding can lead to stunted growth and small, misshapen carrots. Once the seedlings emerge and have developed their first true leaves, thin them to about 1-2 inches apart. Gently pull out the weaker seedlings, being careful not to disturb the roots of the remaining plants. You can use small scissors to snip the seedlings at the soil line if you prefer. Thinning allows the remaining carrots to have enough space to develop properly.
What are common pests and diseases that affect container carrots?
While carrot container gardening minimizes the risk of pests and diseases compared to traditional gardening, carrots can still be susceptible to certain problems. Common pests include carrot rust flies, aphids, and nematodes. Carrot rust flies lay their eggs near the base of the plants, and the larvae tunnel into the roots, causing damage. Aphids suck sap from the leaves, weakening the plants. Nematodes are microscopic worms that can damage the roots. To prevent pest problems, use a good quality potting mix, practice crop rotation, and inspect your plants regularly for signs of infestation. If you spot pests, you can try spraying them with insecticidal soap or neem oil. Common diseases include leaf blight and root rot. Leaf blight causes brown spots on the leaves, while root rot causes the roots to become soft and mushy. To prevent diseases, avoid overwatering, provide good air circulation, and use a fungicide if necessary.
How long does it take for carrots to mature in containers?
The time it takes for carrots to mature in containers depends on the variety and growing conditions. Generally, carrots take between 60 and 80 days to mature. Check the seed packet for specific information on the maturity time for your chosen variety. You can start harvesting carrots when they reach the desired size. Gently loosen the soil around the carrots and pull them out by the tops. You can also harvest baby carrots earlier, around 50-60 days, for a sweeter and more tender flavor.
Can I grow carrots in containers during the winter?
Yes, you can grow carrots in containers during the winter, especially in mild climates. Carrots are relatively cold-hardy and can tolerate light frosts. In colder climates, you can protect your container carrots by moving them indoors to a greenhouse or sunny windowsill. You can also cover the containers with a layer of mulch or a frost blanket to insulate the soil. Keep in mind that carrots will grow more slowly during the winter due to the shorter days and cooler temperatures.
How do I know when my carrots are ready to harvest from the container?
Knowing when to harvest is key to successful carrot container gardening. The best way to determine if your carrots are ready is to check the seed packet for the expected maturity date. You can also gently brush away some of the soil around the base of the plants to check the size of the carrots. They should be the size and shape indicated on the seed packet. Another sign that carrots are ready to harvest is when the tops of the carrots start to emerge from the soil. The shoulders of the carrots will also become more visible. When you’re ready to harvest, gently loosen the soil around the carrots and pull them out by the tops. If the soil is dry, water it thoroughly a few hours before harvesting to make it easier to pull the carrots out.
Leave a Comment