
Chili pepper planting tips are your gateway to a fiery and flavorful garden! Imagine plucking vibrant, sun-ripened chili peppers straight from your own backyard, ready to spice up your favorite dishes. Sounds amazing, right? For centuries, chili peppers have been more than just a culinary ingredient; they’ve been woven into the cultural fabric of societies around the globe, from ancient Mesoamerica where they were first cultivated, to the bustling markets of Asia where they add a kick to countless meals.
But let’s be honest, sometimes getting those peppers to thrive can feel like a real challenge. That’s where these DIY tricks and hacks come in! I’m going to share some simple, yet effective, techniques that will help you overcome common obstacles and maximize your chili pepper harvest. Whether you’re dealing with pesky pests, struggling with soil conditions, or just looking for ways to boost your plant’s growth, I’ve got you covered.
Why do you need these chili pepper planting tips? Because everyone deserves the satisfaction of growing their own food, and with a little know-how, you can transform your garden into a chili pepper paradise. Plus, homegrown peppers taste so much better than anything you’ll find in the store! So, let’s dive in and unlock the secrets to a bountiful chili pepper harvest. Get ready to add some serious heat to your gardening game!
Spice Up Your Garden: A Comprehensive Guide to Growing Chili Peppers at Home
Hey there, fellow gardening enthusiasts! I’m so excited to share my tried-and-true methods for growing vibrant, flavorful chili peppers right in your own backyard (or balcony!). Whether you’re a seasoned gardener or just starting out, this guide will walk you through every step, from choosing the right seeds to harvesting your fiery bounty. Let’s get started!
Choosing Your Chili Pepper Varieties
Before we dive into the nitty-gritty, let’s talk about variety. Chili peppers come in a dazzling array of shapes, sizes, and heat levels. Consider your taste preferences and growing conditions when making your selection. Here are a few popular options:
* Jalapeño: A classic choice, known for its moderate heat and versatility. Perfect for salsas, poppers, and adding a kick to your favorite dishes.
* Serrano: A bit hotter than jalapeños, serranos offer a bright, fresh flavor. They’re great in pico de gallo and other Mexican-inspired recipes.
* Cayenne: These slender peppers pack a punch! Use them to make your own chili powder or add a fiery touch to stir-fries and sauces.
* Habanero: For those who crave intense heat, habaneros are a must-try. Be warned, they’re seriously spicy! Handle with care and use sparingly.
* Bell Peppers: Okay, okay, these aren’t spicy, but they’re still peppers! Growing bell peppers alongside your chilies can add color and sweetness to your garden.
Pro Tip: Check the Scoville Heat Unit (SHU) rating of each pepper variety to get an idea of its heat level. The higher the SHU, the hotter the pepper!
Starting Your Chili Pepper Seeds Indoors
In most climates, it’s best to start chili pepper seeds indoors about 6-8 weeks before the last expected frost. This gives them a head start and ensures a longer growing season.
1. Gather Your Supplies:
* Chili pepper seeds
* Seed starting trays or small pots
* Seed starting mix (a light, well-draining soil)
* Spray bottle
* Heat mat (optional, but highly recommended)
* Grow lights (optional, but beneficial)
* Clear plastic dome or plastic wrap
2. Sow the Seeds:
* Moisten the seed starting mix with water. It should be damp but not soggy.
* Fill the seed starting trays or pots with the moistened mix.
* Make a small indentation (about 1/4 inch deep) in the center of each cell or pot.
* Place 2-3 seeds in each indentation. This increases the chances of germination.
* Gently cover the seeds with the seed starting mix.
3. Provide Warmth and Moisture:
* Mist the surface of the soil with water to ensure the seeds are moist.
* Cover the trays or pots with a clear plastic dome or plastic wrap to create a humid environment.
* Place the trays or pots on a heat mat to maintain a soil temperature of 75-85°F (24-29°C). This is crucial for successful germination.
* If you’re using grow lights, position them a few inches above the trays or pots.
4. Wait for Germination:
* Chili pepper seeds can take anywhere from 7 to 21 days to germinate, depending on the variety and conditions.
* Keep the soil consistently moist but not waterlogged. Mist with water as needed.
* Once the seedlings emerge, remove the plastic dome or plastic wrap.
5. Provide Light and Air Circulation:
* If you’re using grow lights, continue to provide 14-16 hours of light per day.
* Ensure good air circulation around the seedlings to prevent fungal diseases. A small fan can help.
6. Thin the Seedlings:
* Once the seedlings have developed their first true leaves (the second set of leaves), thin them out, leaving only the strongest seedling in each cell or pot.
* Gently snip off the weaker seedlings at the soil line with scissors. Don’t pull them out, as this can disturb the roots of the remaining seedling.
Transplanting Your Chili Pepper Seedlings Outdoors
After the last frost has passed and the soil has warmed up, it’s time to transplant your chili pepper seedlings outdoors.
1. Harden Off the Seedlings:
* Before transplanting, you need to “harden off” the seedlings. This process gradually acclimates them to outdoor conditions.
* Start by placing the seedlings outdoors in a sheltered location for a few hours each day, gradually increasing the amount of time they spend outside over the course of a week or two.
* Protect them from direct sunlight and strong winds during this process.
2. Choose a Sunny Location:
* Chili peppers need at least 6-8 hours of direct sunlight per day to thrive. Choose a location in your garden that receives plenty of sun.
3. Prepare the Soil:
* Chili peppers prefer well-draining soil that is rich in organic matter.
* Amend the soil with compost or well-rotted manure before planting.
* The ideal soil pH for chili peppers is between 6.0 and 6.8.
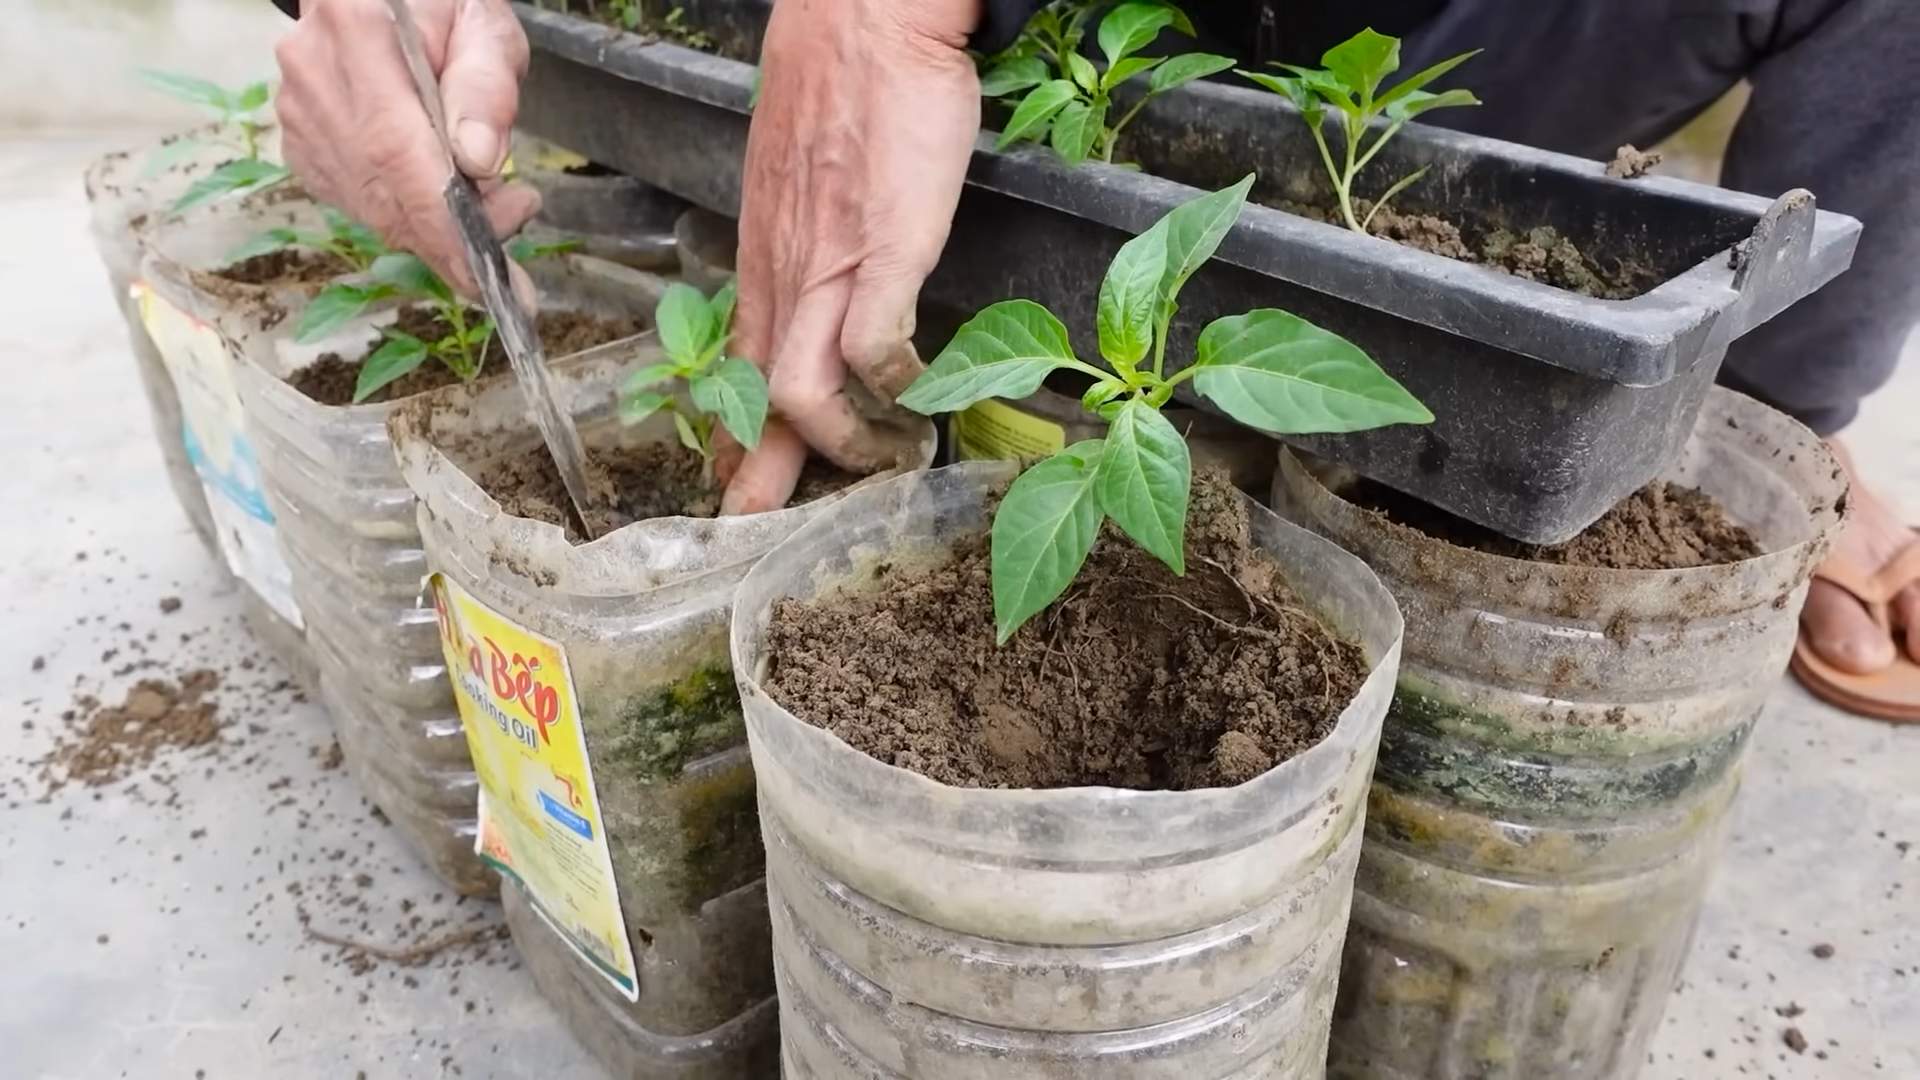
4. Transplant the Seedlings:
* Dig holes that are slightly larger than the root balls of the seedlings.
* Gently remove the seedlings from their pots or trays.
* Place the seedlings in the holes and backfill with soil.
* Space the plants about 18-24 inches apart, depending on the variety.
5. Water Thoroughly:
* Water the newly transplanted seedlings thoroughly to help them settle in.
6. Mulch Around the Plants:
* Apply a layer of mulch around the plants to help retain moisture, suppress weeds, and regulate soil temperature. Straw, wood chips, or shredded leaves are good options.
Caring for Your Chili Pepper Plants
Once your chili pepper plants are established, it’s important to provide them with proper care to ensure a bountiful harvest.
1. Watering:
* Water regularly, especially during hot, dry weather.
* Chili peppers need consistent moisture, but avoid overwatering, which can lead to root rot.
* Water deeply and less frequently, rather than shallowly and often.
2. Fertilizing:
* Fertilize your chili pepper plants every 2-3 weeks with a balanced fertilizer.
* Look for a fertilizer that is specifically formulated for vegetables or tomatoes.
* Avoid using fertilizers that are too high in nitrogen, as this can promote leafy growth at the expense of fruit production.
3. Pruning:
* Pruning is not essential for chili peppers, but it can help to improve air circulation and encourage bushier growth.
* Remove any yellowing or dead leaves.
* You can also pinch off the tips of the branches to encourage branching.
4. Pest and Disease Control:
* Keep an eye out for common chili pepper pests, such as aphids, spider mites, and whiteflies.
* Treat infestations with insecticidal soap or neem oil.
* Prevent fungal diseases by ensuring good air circulation and avoiding overwatering.
* If you notice any signs of disease, remove the affected leaves or plants immediately.
5. Support:
* As your chili pepper plants grow, they may need support to prevent the branches from breaking under the weight of the fruit.
* Use stakes, cages, or trellises to provide support.
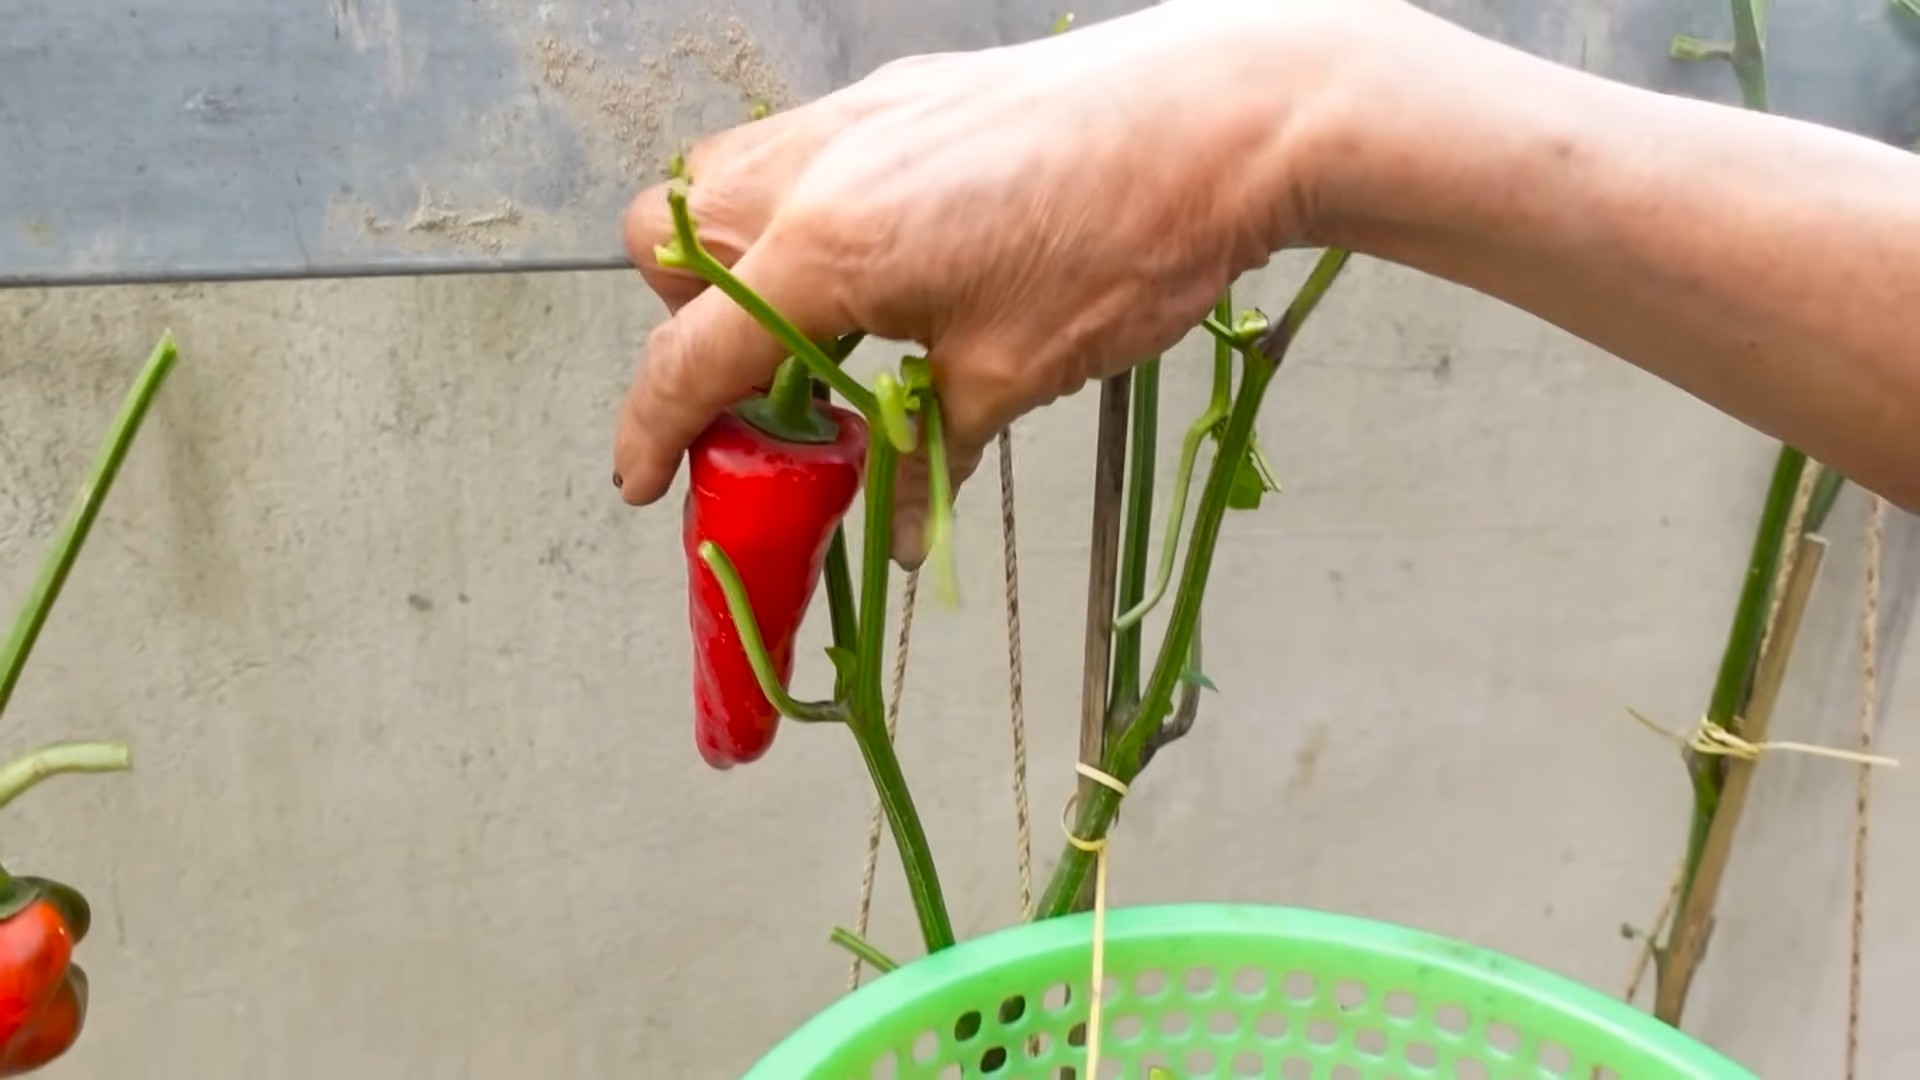
Harvesting Your Chili Peppers
The moment you’ve been waiting for! Harvesting your chili peppers is the most rewarding part of the process.
1. When to Harvest:
* Chili peppers are typically ready to harvest when they have reached their mature color and size.
* The color will vary depending on the variety. Jalapeños, for example, are typically harvested when they are dark green, while habaneros are harvested when they are bright orange.
* You can also harvest chili peppers when they are still green, but they will be less flavorful and less spicy.
2. How to Harvest:
* Use scissors or pruning shears to cut the peppers from the plant.
* Leave a small piece of stem attached to the pepper.
* Handle hot peppers with gloves to avoid skin irritation.
3. Storing Your Chili Peppers:
* Fresh chili peppers can be stored in the refrigerator for up to a week.
* You can also dry, freeze, or
Conclusion
So, there you have it! Mastering these chili pepper planting tips isn’t just about growing peppers; it’s about unlocking a world of flavor, freshness, and fiery satisfaction right in your own backyard (or balcony!). We’ve covered everything from seed selection and soil preparation to transplanting and ongoing care, arming you with the knowledge to cultivate a thriving chili pepper garden.
Why is this DIY approach a must-try? Because store-bought chili peppers, while convenient, often lack the vibrant flavor and intense heat of homegrown varieties. Plus, you have complete control over the growing process, ensuring your peppers are free from unwanted chemicals and pesticides. Imagine the pride of serving a dish seasoned with chili peppers you nurtured from tiny seeds!
But the benefits extend beyond just taste and control. Gardening, in general, is a fantastic stress reliever, connecting you with nature and providing a sense of accomplishment. And let’s not forget the economic advantages – a single chili pepper plant can yield a surprisingly abundant harvest, saving you money on groceries.
Ready to take your chili pepper game to the next level? Consider these variations and suggestions to personalize your growing experience:
* **Experiment with different varieties:** From the mild poblano to the scorching habanero, the world of chili peppers is incredibly diverse. Try growing a few different types to discover your favorites and add complexity to your culinary creations.
* **Companion planting:** Certain plants, like basil and marigolds, can deter pests and improve the growth of your chili peppers. Research companion planting strategies to create a thriving and balanced garden ecosystem.
* **Vertical gardening:** If you’re short on space, consider growing your chili peppers in containers on a trellis or vertical garden. This is a great option for apartment dwellers or anyone with limited outdoor space.
* **Fermenting your harvest:** Don’t let any excess peppers go to waste! Fermenting chili peppers is a fantastic way to preserve them and create delicious, probiotic-rich sauces and pastes.
* **Make your own chili powder:** Dry your harvested peppers and grind them into a homemade chili powder blend. You can customize the heat level and flavor profile to perfectly suit your taste.
We’re confident that with these chili pepper planting tips, you’ll be well on your way to a bountiful harvest. Don’t be afraid to experiment, learn from your mistakes, and most importantly, have fun!
Now, we want to hear from you! Have you tried growing chili peppers before? What are your favorite varieties or growing techniques? Share your experiences, tips, and photos in the comments below. Let’s build a community of passionate chili pepper growers and learn from each other. We can’t wait to see what you create!
Frequently Asked Questions (FAQ)
What is the best time to plant chili peppers?
The ideal time to plant chili peppers depends on your climate. In general, you should start seeds indoors 6-8 weeks before the last expected frost. Transplant seedlings outdoors when the soil has warmed up and the danger of frost has passed. If you live in a warm climate with a long growing season, you can direct sow seeds outdoors after the last frost.
What kind of soil do chili peppers need?
Chili peppers thrive in well-draining, fertile soil with a slightly acidic pH (around 6.0-6.8). Amend your soil with compost or other organic matter to improve drainage and nutrient content. Avoid heavy clay soils, as they can become waterlogged and inhibit root growth.
How much sunlight do chili peppers need?
Chili peppers require at least 6-8 hours of direct sunlight per day to produce a good harvest. Choose a sunny location in your garden or on your balcony for optimal growth. If you’re growing chili peppers indoors, use grow lights to supplement natural sunlight.
How often should I water chili peppers?
Water chili peppers regularly, especially during hot, dry weather. Aim to keep the soil consistently moist but not waterlogged. Water deeply at the base of the plant, avoiding wetting the foliage, which can increase the risk of fungal diseases. Check the soil moisture regularly and adjust your watering schedule accordingly.
What are some common pests and diseases that affect chili peppers?
Common pests that affect chili peppers include aphids, spider mites, whiteflies, and pepper weevils. Diseases include fungal infections like powdery mildew, blossom end rot, and verticillium wilt. Inspect your plants regularly for signs of pests or diseases and take appropriate action, such as using insecticidal soap, neem oil, or fungicide. Proper watering and good air circulation can also help prevent diseases.
How do I prevent blossom end rot in chili peppers?
Blossom end rot is a common problem in chili peppers caused by a calcium deficiency. To prevent it, ensure your soil has adequate calcium levels by adding lime or bone meal before planting. Water consistently to avoid fluctuations in soil moisture, which can hinder calcium uptake. You can also use a calcium-rich foliar spray to supplement calcium levels.
When should I harvest chili peppers?
The harvesting time for chili peppers depends on the variety and your desired level of ripeness. Most chili peppers will change color as they ripen, from green to red, yellow, or orange. You can harvest them at any stage of ripeness, but the flavor and heat will intensify as they mature. Use pruning shears or scissors to cut the peppers from the plant, leaving a small stem attached.
How do I store chili peppers?
Fresh chili peppers can be stored in the refrigerator for up to a week. For longer storage, you can dry, freeze, or pickle them. To dry chili peppers, string them together and hang them in a well-ventilated area or use a dehydrator. To freeze chili peppers, wash and dry them thoroughly, then place them in freezer bags or containers. Pickled chili peppers can be stored in the refrigerator for several months.
Can I grow chili peppers in containers?
Yes, chili peppers can be successfully grown in containers. Choose a container that is at least 12 inches in diameter and has drainage holes. Use a well-draining potting mix and provide regular watering and fertilization. Container-grown chili peppers may require more frequent watering and fertilization than those grown in the ground.
How do I increase the heat of my chili peppers?
Several factors can influence the heat level of chili peppers, including genetics, growing conditions, and stress. To increase the heat, provide plenty of sunlight, water sparingly (allowing the plant to experience some drought stress), and avoid over-fertilizing. Some growers also believe that adding Epsom salts to the soil can increase the heat of chili peppers.
Leave a Comment