
Cleaning with salt and toothpaste might sound like a bizarre beauty treatment, but trust me, it’s a surprisingly effective and budget-friendly way to tackle some of the trickiest cleaning challenges around your home! Forget those harsh chemicals and expensive specialty cleaners. I’m here to show you how these everyday items can become your secret weapons against grime, stains, and tarnish.
The concept of using abrasive materials for cleaning isn’t new. In ancient civilizations, people used sand and other natural abrasives to scrub surfaces. While we’ve come a long way since then, the principle remains the same: a gentle abrasive combined with a cleaning agent can work wonders. Salt, with its crystalline structure, provides that gentle abrasion, while toothpaste, formulated to remove plaque from teeth, contains mild detergents and polishing agents that are perfect for lifting dirt and grime.
So, why should you embrace cleaning with salt and toothpaste? Because it’s simple, safe, and often more effective than you’d imagine! We all face those stubborn stains and tarnished surfaces that seem impossible to clean. Instead of reaching for harsh chemicals that can damage your belongings and harm the environment, why not try a natural and readily available solution? I’m going to share some easy DIY tricks that will leave your home sparkling, all thanks to the power of salt and toothpaste. Get ready to be amazed!
DIY Cleaning Powerhouse: Salt and Toothpaste!
Hey everyone! I’m so excited to share this amazing cleaning hack with you. I stumbled upon this combination of salt and toothpaste quite by accident, and let me tell you, it’s a game-changer! It’s surprisingly effective for tackling a variety of cleaning challenges around the house. Forget harsh chemicals – this is a natural, budget-friendly way to get things sparkling.
This DIY cleaner is fantastic because:
- It’s incredibly affordable. You probably already have salt and toothpaste in your home!
- It’s non-toxic and safer than many commercial cleaners.
- It’s surprisingly versatile, working on everything from tarnished silver to stubborn stains.
- It’s easy to make and use – no complicated recipes or techniques required.
So, let’s dive in and learn how to harness the cleaning power of salt and toothpaste!
What You’ll Need
Before we get started, gather these simple supplies:
- Toothpaste: Plain white toothpaste (not gel) works best. Avoid anything with whitening agents or added colors for delicate surfaces. I usually use a basic, inexpensive brand.
- Salt: Regular table salt is perfect. Coarse salt can be used for scrubbing tougher stains, but be careful not to scratch delicate surfaces.
- Water: For mixing and rinsing.
- Cleaning cloths or sponges: Microfiber cloths are my go-to for most cleaning tasks.
- Soft-bristled toothbrush: Ideal for cleaning small or hard-to-reach areas.
- Small bowl or container: For mixing the paste.
- Gloves (optional): If you have sensitive skin, gloves are always a good idea.
Making the Salt and Toothpaste Cleaning Paste
This is the easiest part! The ratio of salt to toothpaste can be adjusted depending on the cleaning task. For general cleaning, I usually go with a 1:1 ratio. For tougher stains, I might add a bit more salt for extra scrubbing power.
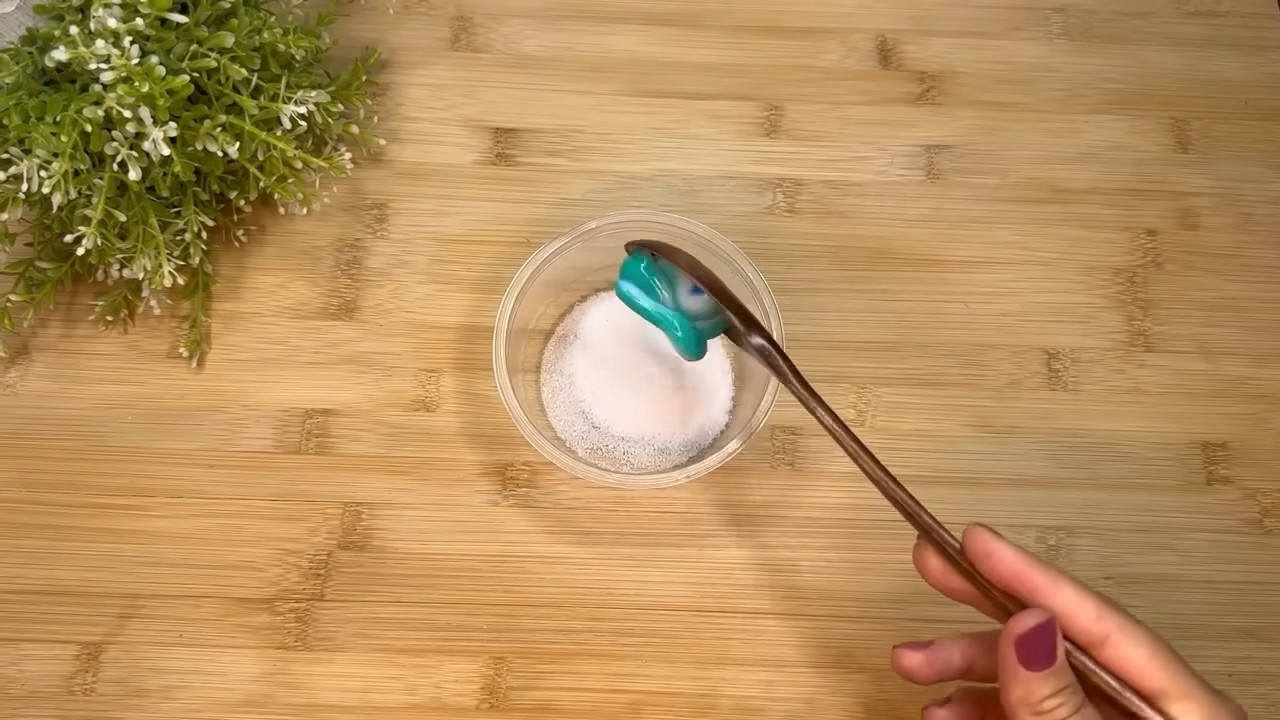
- Combine the ingredients: In your small bowl or container, mix equal parts toothpaste and salt. Start with a tablespoon of each and adjust as needed.
- Add a little water (optional): If the mixture is too thick, add a few drops of water at a time until you achieve a paste-like consistency. You want it to be thick enough to stick to the surface you’re cleaning, but not so thick that it’s difficult to spread.
- Mix well: Stir the mixture thoroughly until the salt is evenly distributed throughout the toothpaste.
That’s it! Your cleaning paste is ready to use.
Cleaning Different Surfaces
Now for the fun part – putting our DIY cleaner to the test! Here are some of my favorite ways to use this salt and toothpaste concoction:
Cleaning Tarnished Silver
Tarnished silver can look dull and lifeless, but this cleaning paste works wonders to restore its shine.
- Apply the paste: Using a soft cloth or your fingers, gently apply a thin layer of the salt and toothpaste paste to the tarnished silver.
- Let it sit: Allow the paste to sit on the silver for a few minutes (5-10 minutes should be enough). This gives the salt and toothpaste time to loosen the tarnish.
- Gently rub: Using a clean, soft cloth, gently rub the paste onto the silver in a circular motion. You should start to see the tarnish lifting away.
- Rinse thoroughly: Rinse the silver thoroughly with warm water to remove all traces of the paste.
- Dry and polish: Dry the silver completely with a clean, soft cloth. For an extra shine, you can polish it with a silver polishing cloth.
Important Note: Always test the paste on a small, inconspicuous area of the silver first to ensure it doesn’t damage the finish. Avoid using this method on antique or delicate silver pieces without consulting a professional.
Removing Stains from Sinks and Tubs
This paste is surprisingly effective at removing stubborn stains from sinks and tubs, especially those caused by hard water or soap scum.
- Wet the surface: Lightly wet the stained area of the sink or tub with water.
- Apply the paste: Apply a generous amount of the salt and toothpaste paste to the stain.
- Scrub gently: Using a sponge or cleaning cloth, gently scrub the stain in a circular motion. For tougher stains, you can use a slightly more abrasive sponge or a soft-bristled brush.
- Let it sit (optional): For really stubborn stains, let the paste sit on the stain for 10-15 minutes before scrubbing.
- Rinse thoroughly: Rinse the area thoroughly with water to remove all traces of the paste.
- Dry: Dry the surface with a clean cloth.
Tip: For grout stains in the bathroom, use an old toothbrush to apply the paste and scrub the grout lines.
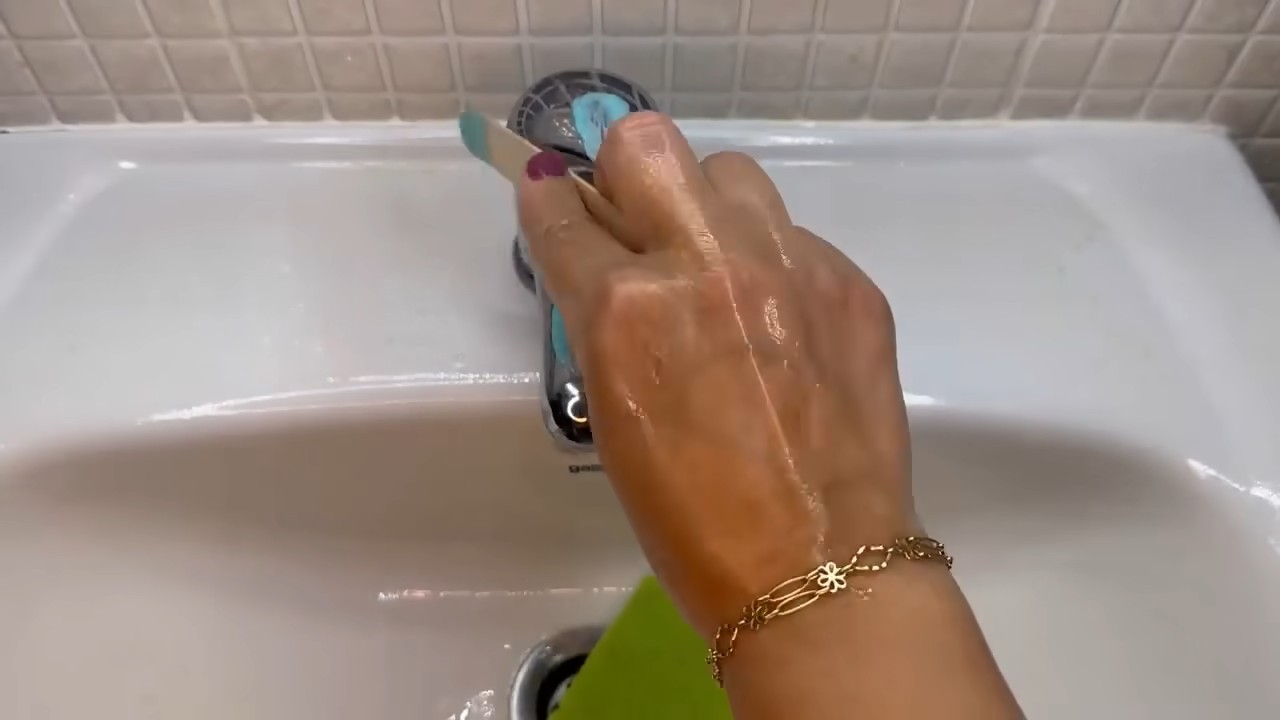
Cleaning Chrome Fixtures
Chrome fixtures can easily become dull and spotted with water stains. This cleaning paste can help restore their shine.
- Apply the paste: Apply a small amount of the salt and toothpaste paste to a clean, soft cloth.
- Rub the fixture: Gently rub the paste onto the chrome fixture in a circular motion.
- Rinse thoroughly: Rinse the fixture thoroughly with water to remove all traces of the paste.
- Dry and polish: Dry the fixture with a clean, soft cloth. For an extra shine, you can polish it with a microfiber cloth.
Caution: Avoid using this method on chrome fixtures with delicate finishes or coatings, as it may scratch the surface.
Removing Scuff Marks from Walls
Got scuff marks on your walls from shoes, furniture, or kids? This cleaning paste can help remove them without damaging the paint.
- Apply the paste: Apply a small amount of the salt and toothpaste paste to a clean, damp cloth.
- Gently rub the scuff mark: Gently rub the scuff mark with the cloth in a circular motion. Be careful not to rub too hard, as this could damage the paint.
- Wipe clean: Wipe the area with a clean, damp cloth to remove any residue.
- Dry: Dry the area with a clean cloth.
Important Note: Always test the paste on a small, inconspicuous area of the wall first to ensure it doesn’t damage the paint. This method works best on semi-gloss or glossy paint finishes.
Cleaning the Bottom of Your Iron
Burnt residue on the bottom of your iron can transfer to your clothes. This cleaning paste can help remove it.
- Make sure the iron is cool and unplugged: This is crucial for safety!
- Apply the paste: Apply a small amount of the salt and toothpaste paste to the cooled iron plate.
- Gently rub: Using a clean cloth, gently rub the paste onto the burnt residue in a circular motion.
- Wipe clean: Wipe the iron plate with a clean, damp cloth to remove any residue.
- Dry: Dry the iron plate with a clean cloth.
- Test the iron: Before ironing clothes, test the iron on an old cloth to ensure no residue remains.
Caution: Avoid getting any water or paste inside the iron’s vents.
Cleaning Jewelry (with Caution!)
This paste can be used to clean some types of jewelry, but it’s important to be very careful.
- Identify the type of jewelry: This method is best suited for cleaning durable metals like stainless steel or gold. Avoid using it on delicate gemstones, pearls, or plated jewelry.
- Apply the paste: Apply a very small amount of the salt and toothpaste paste to a soft-bristled toothbrush.
- Gently scrub: Gently scrub the jewelry with the toothbrush, paying attention to any areas with dirt or tarnish.
- Rinse thoroughly: Rinse the jewelry thoroughly with warm water to remove all traces of the paste.
- Dry and polish: Dry the jewelry completely with a clean, soft cloth.
Important Note: Always test the paste on a small, inconspicuous area of the jewelry first. If you’re unsure whether this method is safe for your jewelry, consult a professional jeweler.
Important Considerations
While this salt and toothpaste cleaning hack is generally safe and effective, here are a few things to keep in mind:
- Always test first: Before using the paste on any surface, always
Conclusion
So, there you have it! This simple yet surprisingly effective DIY cleaning trick using salt and toothpaste is a game-changer for tackling stubborn stains and grime around your home. We’ve explored how the abrasive nature of salt, combined with the cleaning power of toothpaste, creates a potent, budget-friendly solution that rivals many commercial cleaners. Forget harsh chemicals and expensive specialized products; this method offers a natural, readily available alternative that’s gentle on surfaces yet tough on dirt.
Why is this a must-try? Because it’s not just about cleaning; it’s about simplifying your life. It’s about using what you already have in your pantry and bathroom to achieve sparkling results. It’s about reducing your reliance on potentially harmful chemicals and embracing a more sustainable approach to home care. Think of all the money you’ll save by ditching those pricey cleaners!
But the beauty of this DIY cleaning trick lies in its versatility. While we’ve focused on specific applications like cleaning grout, polishing silverware, and removing stains from clothing, the possibilities are truly endless.
Here are a few suggestions and variations to get you started:
* For tougher stains on clothing: Create a paste of salt, toothpaste, and a little lemon juice. Apply it to the stain, let it sit for a few minutes, and then gently scrub before washing as usual.
* To clean burnt pots and pans: Sprinkle a generous amount of salt into the pot or pan, add a dollop of toothpaste, and then scrub with a non-abrasive sponge. The combination will help loosen the burnt residue.
* For cleaning your sink: Use the salt and toothpaste mixture to scrub your stainless steel or porcelain sink. Rinse thoroughly for a sparkling clean finish.
* For cleaning your iron: If your iron has a build-up of residue, apply the paste to the cool plate and gently scrub with a soft cloth. Wipe clean with a damp cloth.Remember to always test the mixture on an inconspicuous area first, especially when cleaning delicate surfaces. This will ensure that the abrasive nature of the salt doesn’t cause any damage.
We are confident that once you try this DIY cleaning trick, you’ll be amazed by the results. It’s a simple, effective, and affordable way to keep your home clean and sparkling. So, ditch the expensive cleaners and embrace the power of salt and toothpaste!
Now, we want to hear from you! Have you tried this DIY cleaning trick before? What were your results? Do you have any other creative uses for salt and toothpaste in cleaning? Share your experiences, tips, and tricks in the comments below. Let’s build a community of DIY cleaning enthusiasts and discover even more ways to make our homes shine! We encourage you to experiment and find what works best for you. Your feedback is invaluable and will help others discover the magic of this simple yet powerful cleaning solution. Let’s revolutionize the way we clean, one salt and toothpaste application at a time!
Frequently Asked Questions (FAQs)
Is this cleaning method safe for all surfaces?
No, it’s crucial to exercise caution and test the salt and toothpaste mixture on an inconspicuous area before applying it to the entire surface. The abrasive nature of salt can potentially scratch delicate materials like polished wood, certain plastics, and some types of painted surfaces. Always start with a small test area to ensure no damage occurs. For sensitive surfaces, consider using a finer grain of salt or diluting the mixture with water. If you’re unsure, it’s always best to err on the side of caution and opt for a cleaning method specifically designed for that particular material.
What type of toothpaste and salt should I use?
For toothpaste, a standard white toothpaste (not gel) is generally recommended. Avoid using highly abrasive toothpastes designed for whitening, as they may be too harsh for some surfaces. As for salt, regular table salt works well for most cleaning tasks. However, for more delicate surfaces, you can use a finer grain of salt, such as sea salt or kosher salt. The key is to find a balance between cleaning power and gentleness to avoid scratching or damaging the surface you’re cleaning. Experiment with different types of salt and toothpaste to find the combination that works best for your specific needs.
Can I use this method to clean grout?
Yes, the salt and toothpaste mixture is particularly effective for cleaning grout. The abrasive nature of the salt helps to scrub away dirt and grime, while the toothpaste helps to lift stains. To clean grout, apply the paste to the grout lines, let it sit for a few minutes, and then scrub with a grout brush or an old toothbrush. Rinse thoroughly with water. For stubborn stains, you may need to repeat the process or let the paste sit for a longer period. Remember to ventilate the area well while cleaning grout.
Will this method remove tough stains from clothing?
The salt and toothpaste mixture can be effective for removing some types of stains from clothing, especially those caused by food, dirt, or grease. However, it may not be effective for all types of stains, such as those caused by ink, dye, or blood. To remove stains from clothing, apply the paste to the stain, let it sit for a few minutes, and then gently scrub with a soft cloth or brush. Wash the garment as usual. For stubborn stains, you may need to repeat the process or try a different stain removal method. Always test the mixture on an inconspicuous area of the garment first to ensure that it doesn’t cause any discoloration or damage.
How often can I use this cleaning method?
While the salt and toothpaste mixture is a great DIY cleaning trick, it’s not recommended for daily use on all surfaces. Due to the abrasive nature of salt, frequent use can potentially cause wear and tear over time. It’s best to use this method as needed for tackling stubborn stains or grime. For regular cleaning, opt for gentler cleaning solutions that are specifically designed for the surface you’re cleaning.
Is this method environmentally friendly?
Compared to many commercial cleaning products that contain harsh chemicals, the salt and toothpaste mixture is a more environmentally friendly option. Salt and toothpaste are generally considered to be less harmful to the environment than many synthetic chemicals. However, it’s still important to use this method responsibly and avoid excessive use. Consider the environmental impact of the toothpaste you choose, opting for brands that are committed to sustainability.
Can I add other ingredients to the salt and toothpaste mixture?
Yes, you can experiment with adding other ingredients to the salt and toothpaste mixture to enhance its cleaning power or address specific cleaning needs. For example, adding a few drops of lemon juice can help to brighten surfaces and remove stains. Adding a small amount of baking soda can increase the abrasive power of the mixture. However, be sure to research the compatibility of the ingredients before mixing them, and always test the mixture on an inconspicuous area first to ensure that it doesn’t cause any damage.
What are the benefits of using this DIY cleaning method?
The benefits of using this DIY cleaning method are numerous. It’s a cost-effective alternative to expensive commercial cleaners, it’s environmentally friendly, it’s readily available (you likely already have salt and toothpaste in your home), and it’s versatile. It’s a great way to reduce your reliance on harsh chemicals and embrace a more sustainable approach to home cleaning. Plus, it’s a fun and rewarding way to get creative and experiment with different cleaning solutions.

Leave a Comment