
Concrete Corn Growing might sound like an oxymoron, but trust me, it’s a game-changer for urban gardeners and anyone facing space constraints! Have you ever dreamt of harvesting your own sweet corn, but thought your tiny balcony or patio was a hopeless case? I’m here to tell you that dream can absolutely become a reality.
Growing corn has a rich history, deeply intertwined with the development of civilizations across the Americas. From ancient Mayan terraces to the sprawling fields of the Midwest, corn has been a staple crop for centuries. But what if you don’t have access to acres of farmland? That’s where this ingenious DIY trick comes in.
In today’s world, more and more people are living in apartments and smaller homes, often without a traditional garden. This doesn’t mean you have to miss out on the joy of growing your own food! Concrete Corn Growing offers a practical and innovative solution, allowing you to cultivate delicious corn right in containers. Imagine the satisfaction of biting into a freshly picked ear of corn that you nurtured from seed to table, all within the confines of your urban oasis. This DIY guide will walk you through every step, from choosing the right container to ensuring proper pollination. Get ready to transform your concrete jungle into a mini cornfield!
Grow Corn in Concrete: A DIY Urban Gardening Adventure!
Hey there, fellow gardening enthusiasts! Ever thought about growing corn in concrete? Sounds a bit crazy, right? But trust me, it’s a fun and surprisingly effective way to bring a little bit of the farm to your urban space. This project is perfect if you’re short on yard space, dealing with poor soil, or just looking for a unique gardening challenge. I’m going to walk you through the whole process, step-by-step, so you can enjoy fresh, homegrown corn, even if you live in the middle of the city!
What You’ll Need: The Essential Supplies
Before we dive in, let’s gather our supplies. This is crucial for a smooth and successful corn-growing experience.
* Concrete Blocks: These are the foundation of our corn planters. I recommend using blocks that are at least 8 inches tall and wide. The more space you give the roots, the better. You’ll need enough to create the number of planters you want. I usually aim for at least 4 blocks per planter to create a decent-sized growing area.
* Heavy-Duty Landscape Fabric: This will line the inside of the concrete blocks, preventing soil from escaping and keeping the roots contained.
* High-Quality Potting Mix: Don’t skimp on this! Corn needs nutrient-rich soil to thrive. Look for a mix that’s well-draining and contains plenty of organic matter.
* Corn Seeds: Choose a variety that’s suitable for your climate and growing season. Sweet corn is always a popular choice! Make sure to buy from a reputable source to ensure good germination rates.
* Slow-Release Fertilizer: Corn is a heavy feeder, so a slow-release fertilizer will provide a steady supply of nutrients throughout the growing season. Look for a fertilizer specifically formulated for vegetables.
* Watering Can or Hose: Essential for keeping your corn plants hydrated.
* Gloves: Protect your hands from the concrete and soil.
* Measuring Tape: To ensure accurate spacing of the concrete blocks.
* Shovel or Trowel: For filling the concrete blocks with soil.
* Safety Glasses: To protect your eyes from dust and debris.
Building Your Concrete Corn Planters: A Step-by-Step Guide
This is where the magic happens! We’ll transform those plain concrete blocks into thriving corn planters.
1. Choose Your Location: Corn needs at least 6-8 hours of direct sunlight per day. Pick a spot that gets plenty of sunshine. Also, consider the mature height of your corn plants. You don’t want them blocking sunlight from other plants or creating an obstruction.
2. Prepare the Ground: Clear the area where you’ll be placing the concrete blocks. Level the ground as much as possible to ensure the planters are stable.
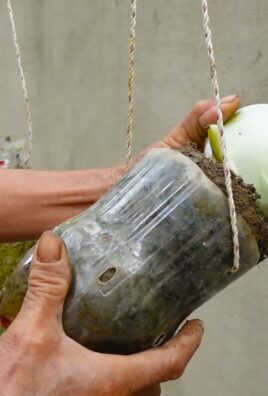
3. Arrange the Concrete Blocks: Decide on the shape and size of your planters. You can arrange the blocks in a square, rectangle, or even a circle. I prefer a rectangular shape, as it allows for good airflow between the plants. Leave a small gap between the blocks for drainage.
4. Line the Planters with Landscape Fabric: Cut the landscape fabric to size, allowing for plenty of overlap. Line the inside of each planter, making sure to cover all the concrete surfaces. This will prevent the soil from leaching out and protect the roots from direct contact with the concrete. Secure the fabric with staples or by folding it over the top edge of the blocks.
5. Fill with Potting Mix: Now it’s time to fill the planters with your high-quality potting mix. Leave a few inches of space at the top to allow for watering. Gently tamp down the soil to remove any air pockets.
6. Add Slow-Release Fertilizer: Follow the instructions on the fertilizer package to determine the correct amount to use. Mix the fertilizer thoroughly into the top few inches of the potting mix.
Planting Your Corn Seeds: From Seed to Stalk
Now for the exciting part – planting the corn!
1. Determine Planting Density: Corn needs to be planted in blocks or rows to ensure proper pollination. I usually plant my corn seeds about 6-8 inches apart within the row, and the rows about 12-18 inches apart. This allows for good airflow and sunlight penetration.
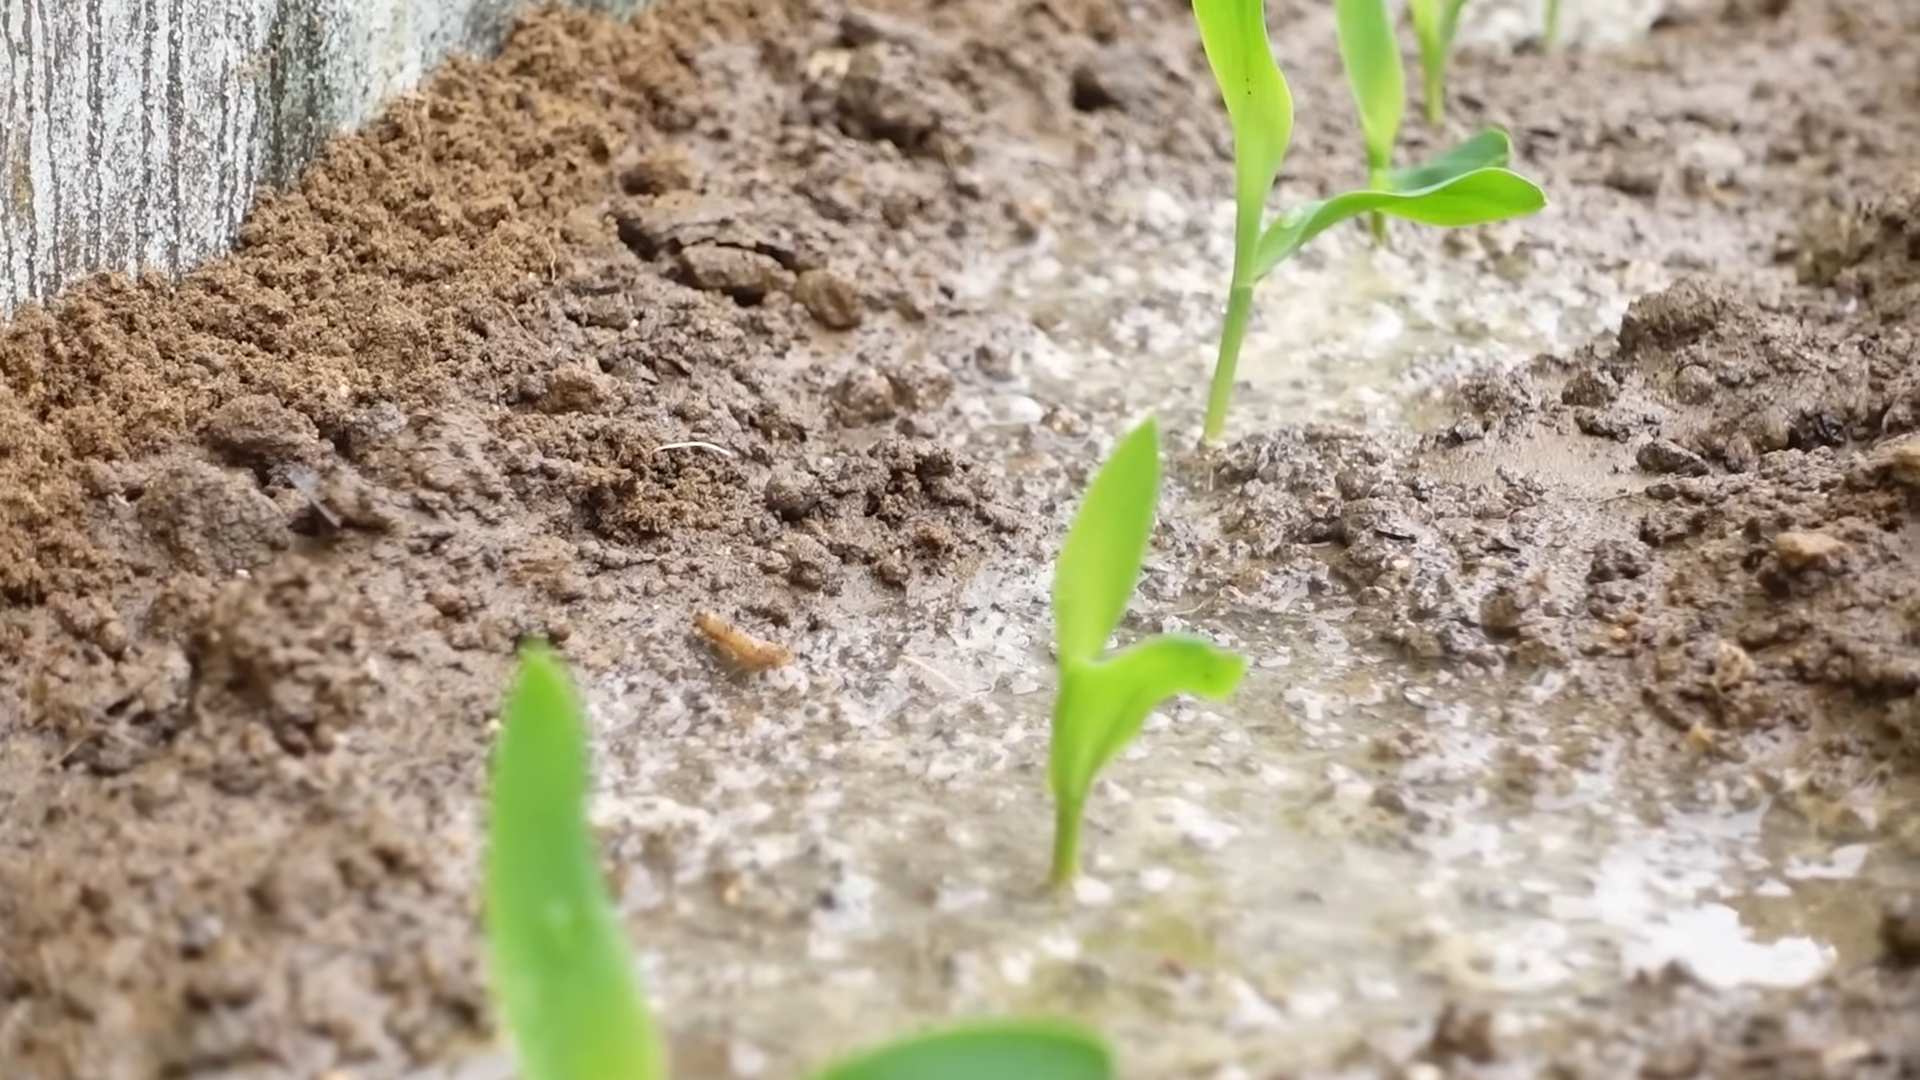
2. Plant the Seeds: Use your finger or a small trowel to create holes about 1-2 inches deep. Place 2-3 corn seeds in each hole. This increases the chances of germination.
3. Cover the Seeds: Gently cover the seeds with potting mix and lightly water the soil.
4. Label Your Planters: It’s always a good idea to label your planters with the type of corn you’re growing and the date you planted the seeds. This will help you keep track of your progress.
Caring for Your Corn Plants: Nurturing Your Crop
Consistent care is key to a bountiful corn harvest.
1. Watering: Corn needs consistent moisture, especially during germination and the early stages of growth. Water deeply whenever the top inch of soil feels dry to the touch. Avoid overwatering, as this can lead to root rot.
2. Fertilizing: Corn is a heavy feeder, so you’ll need to supplement the slow-release fertilizer with additional feedings throughout the growing season. I usually use a liquid fertilizer every 2-3 weeks, following the instructions on the package.
3. Weeding: Keep the planters free of weeds, as they can compete with the corn plants for nutrients and water. Hand-pull any weeds that appear.
4. Pollination: Corn is wind-pollinated, so it’s important to ensure good airflow around the plants. If you’re growing corn in a confined space, you may need to hand-pollinate the plants. To do this, gently shake the tassels (the male flowers at the top of the plant) to release the pollen. Then, use a small brush to transfer the pollen to the silks (the female flowers that emerge from the developing ears of corn).
5. Pest Control: Keep an eye out for common corn pests, such as corn earworms and aphids. If you notice any pests, treat them with an appropriate insecticide or organic pest control method. I prefer using organic methods whenever possible.
6. Support: As the corn plants grow taller, they may need some support to prevent them from falling over. You can use stakes or trellises to provide support.
Harvesting Your Corn: The Sweet Reward
The moment you’ve been waiting for!
1. Check for Ripeness: Corn is typically ready to harvest about 60-100 days after planting, depending on the variety. The silks will turn brown and dry, and the ears will feel plump and full.
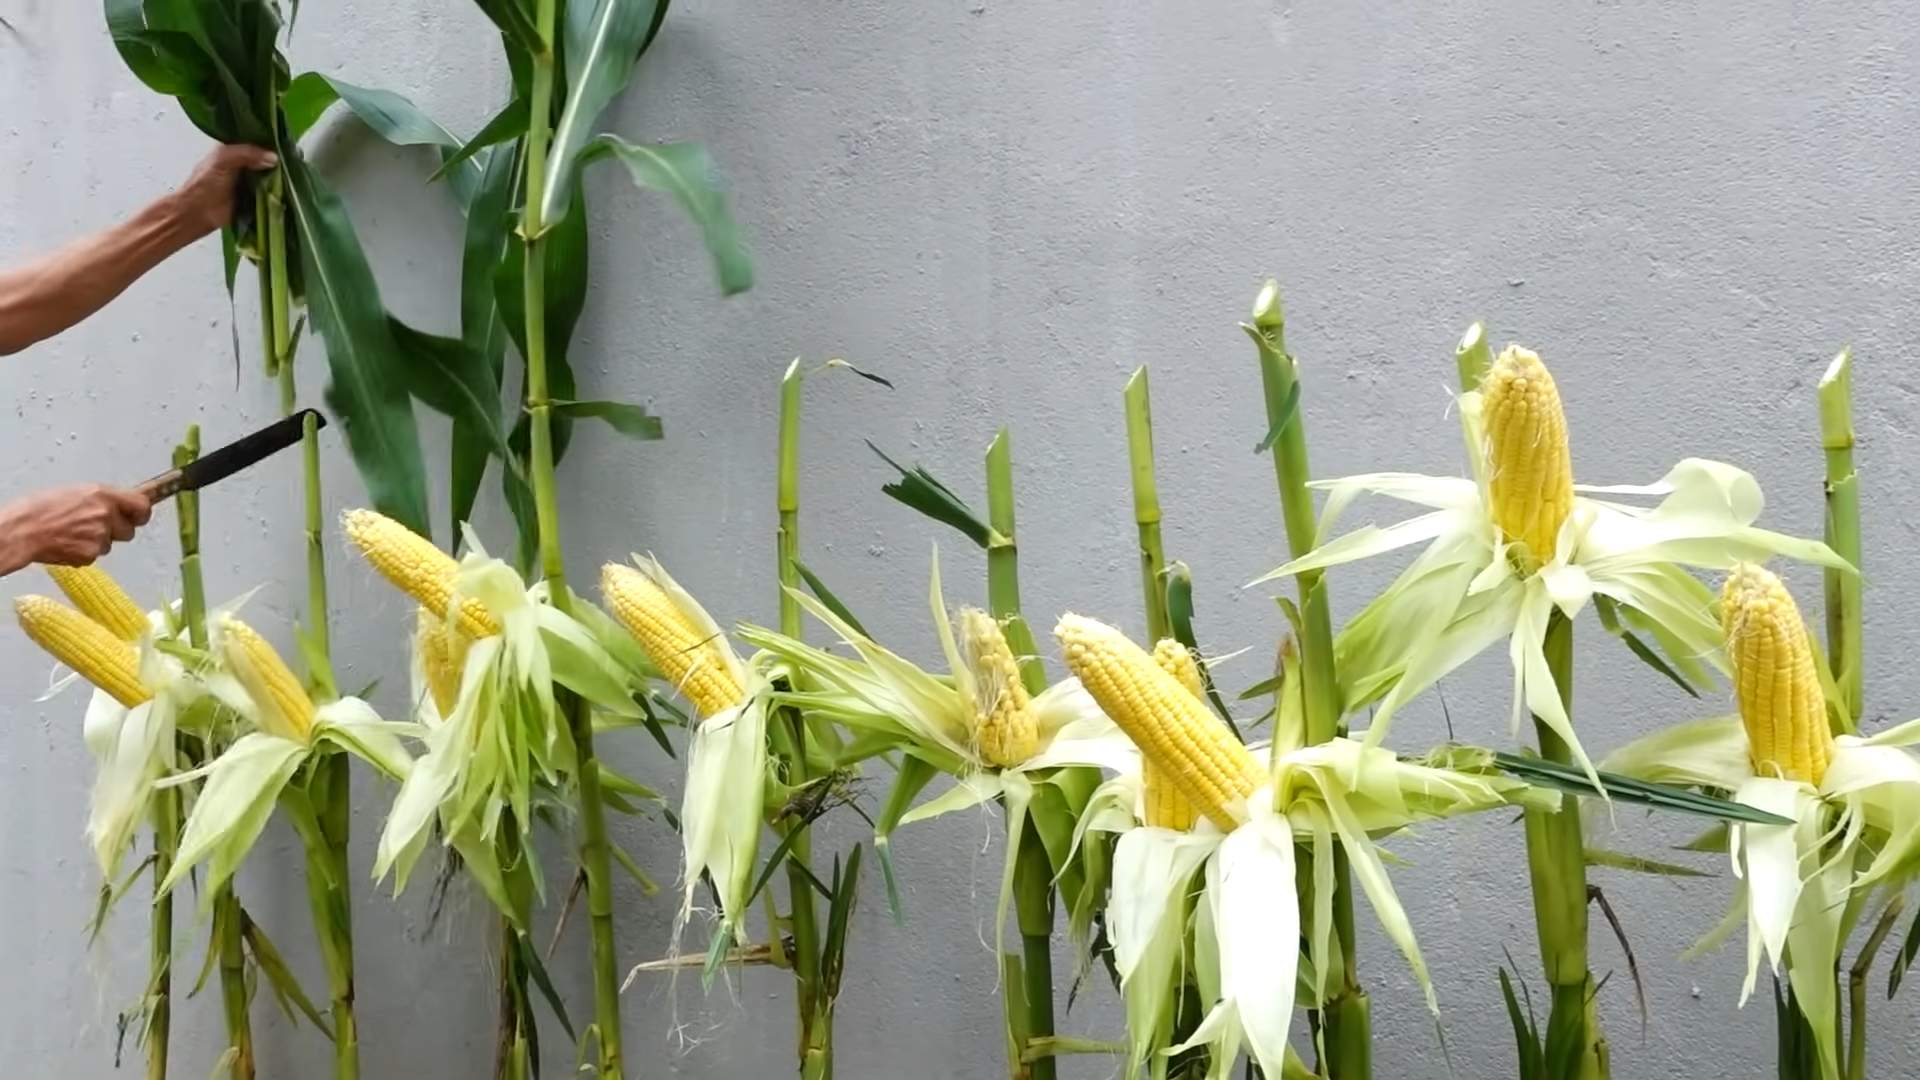
2. Harvest the Ears: To harvest the ears, gently pull them down and twist them off the stalk.
3. Enjoy Your Harvest: Freshly harvested corn is best enjoyed immediately. You can grill it, boil it, roast it, or use it in your favorite recipes.
Troubleshooting: Common Issues and Solutions
Even with the best planning, you might encounter some challenges. Here are a few common issues and how to address them:
* Poor Germination: If your corn seeds aren’t germinating, make sure the soil is warm enough (at least 60°F). You can also try soaking the seeds in water for 24 hours before planting to improve germination rates.
* Yellowing Leaves: Yellowing leaves can indicate a nutrient deficiency. Try fertilizing the plants with a balanced fertilizer.
* Stunted Growth: Stunted growth can be caused by a variety of factors, including poor soil, lack of sunlight, or pest infestations. Make sure your corn plants are getting enough sunlight, water, and nutrients.
* Poor Pollination: If your corn ears aren’t filling out properly, it could be due to poor pollination. Try hand-pollinating the plants to improve pollination rates.
Why Concrete? The Benefits of Block Gardening
You might be wondering why I chose concrete blocks in the first place. Here’s why I think it’s a great option:
* Space-Saving: Concrete blocks allow you to create raised garden beds in a small space. This is perfect for urban gardeners who don’t have a lot of yard space.
* Improved Drainage: Raised beds provide better drainage than in-ground gardens, which can be especially beneficial in areas with heavy clay soil.
* Soil Control: You have complete control over the soil in your concrete block planters. This allows you to create the perfect growing environment for your corn plants.
* Pest Control: Raised beds can help to deter some pests, such as slugs and snails.
* Aesthetic Appeal: Concrete block planters can add a touch of modern style to your garden.
Final Thoughts: Enjoy the Fruits (or Kernels!) of Your Labor
Growing corn in concrete blocks is a
Conclusion
So, there you have it! Growing corn in concrete might sound unconventional, but as we’ve explored, it’s a surprisingly effective and space-saving method, especially for urban gardeners or those with limited soil. This DIY trick offers a unique solution to common gardening challenges, allowing you to enjoy fresh, homegrown corn even if you don’t have a sprawling backyard.
The benefits are undeniable: improved drainage, better weed control, and the ability to create a controlled growing environment. Plus, the aesthetic appeal of corn stalks emerging from concrete planters adds a touch of rustic charm to any patio or balcony. It’s a conversation starter, a testament to your ingenuity, and a delicious source of fresh corn, all rolled into one.
But the real magic lies in the adaptability of this method. Feel free to experiment with different concrete container sizes to accommodate varying corn varieties. Consider adding companion plants like beans or squash around the base of your corn stalks to create a mini-Three Sisters garden within your concrete planter. You could even paint or decorate your concrete containers to match your personal style and add a pop of color to your outdoor space.
Don’t be afraid to get creative! The possibilities are endless.
This isn’t just about growing corn; it’s about embracing a sustainable and innovative approach to gardening. It’s about proving that you don’t need acres of land to enjoy the simple pleasure of harvesting your own food. It’s about taking control of your food source and connecting with nature in a meaningful way.
We understand that venturing into uncharted gardening territory can be a little daunting, but we wholeheartedly encourage you to give this DIY trick a try. The satisfaction of watching your corn stalks thrive in their concrete homes is truly rewarding. And who knows, you might just discover a new passion for urban gardening along the way.
So, grab your concrete mix, your corn seeds, and your gardening gloves, and get ready to embark on a corn-growing adventure like no other. We’re confident that you’ll be amazed by the results.
Once you’ve given it a shot, we’d love to hear about your experience! Share your photos, tips, and stories in the comments below. Let’s build a community of concrete corn growers and inspire others to embrace this innovative gardening technique. Your insights could be invaluable to fellow gardeners who are eager to try something new. Let’s cultivate a greener, more sustainable future, one concrete planter at a time. Remember, successful **concrete corn growing** is within your reach!
Frequently Asked Questions (FAQ)
Q: What type of concrete should I use for my corn planters?
A: We recommend using a standard Portland cement-based concrete mix. You can find these mixes at most home improvement stores. Look for a mix that is suitable for outdoor use and is designed for creating durable structures. Avoid using quick-setting concrete, as it may not provide enough working time for shaping your planter. Also, ensure the concrete mix is free of any additives that could be harmful to plants. A good ratio to follow is typically one part cement, two parts sand, and three parts gravel, mixed with water until you achieve a workable consistency. Remember to wear appropriate safety gear, such as gloves and a dust mask, when working with concrete.
Q: How big should my concrete planters be for growing corn?
A: The size of your concrete planters will depend on the variety of corn you plan to grow. Generally, a planter that is at least 12 inches in diameter and 18 inches deep is recommended for each corn stalk. This provides ample space for the roots to develop and allows for proper drainage. For larger corn varieties, you may need to increase the size of the planter accordingly. Consider the mature height and width of the corn variety you choose when determining the appropriate planter size. Remember that corn grows best in clusters, so you’ll want a planter large enough to accommodate several stalks planted close together.
Q: What kind of soil should I use in my concrete corn planters?
A: Use a well-draining potting mix that is rich in organic matter. Avoid using garden soil, as it can become compacted in containers and hinder root growth. A good potting mix will provide adequate drainage and aeration, which are essential for healthy corn growth. You can also amend your potting mix with compost or other organic materials to improve its fertility and water-holding capacity. Consider adding a slow-release fertilizer to the potting mix to provide your corn plants with a steady supply of nutrients throughout the growing season.
Q: How often should I water my corn plants in concrete planters?
A: Corn plants in concrete planters will need to be watered regularly, especially during hot and dry weather. Check the soil moisture level frequently and water when the top inch of soil feels dry to the touch. Avoid overwatering, as this can lead to root rot. The frequency of watering will depend on factors such as the weather, the size of the planter, and the type of potting mix you use. As a general rule, water deeply and thoroughly, allowing the excess water to drain out of the bottom of the planter. During periods of heavy rain, you may need to reduce the frequency of watering.
Q: What kind of fertilizer should I use for my concrete corn?
A: Corn is a heavy feeder, so it’s important to provide it with adequate nutrients throughout the growing season. Use a balanced fertilizer that is specifically formulated for vegetables. Look for a fertilizer with an NPK ratio (nitrogen, phosphorus, potassium) of around 10-10-10 or 14-14-14. Apply the fertilizer according to the instructions on the package. You can also supplement with organic fertilizers such as compost tea or fish emulsion. Avoid over-fertilizing, as this can damage the plants. Side-dress your corn plants with fertilizer every few weeks to provide them with a continuous supply of nutrients.
Q: How do I prevent my concrete planters from cracking in the winter?
A: Concrete is susceptible to cracking in freezing temperatures, especially when it is saturated with water. To prevent your concrete planters from cracking, take the following precautions:
* Ensure that your planters have adequate drainage holes to allow excess water to escape.
* Elevate your planters off the ground to prevent them from sitting in standing water.
* Wrap your planters with burlap or other insulating material to protect them from the cold.
* Consider moving your planters to a sheltered location, such as a garage or shed, during the winter months.
* Avoid using de-icing salts near your planters, as these can damage the concrete.
Q: Can I grow different varieties of corn in concrete planters?
A: Yes, you can grow different varieties of corn in concrete planters, but it’s important to choose varieties that are well-suited to container gardening. Look for shorter, more compact varieties that don’t require as much space. Some good options include sweet corn varieties like ‘Golden Bantam’ or ‘Jubilee’, as well as ornamental corn varieties like ‘Indian Corn’. Be sure to provide adequate spacing between plants to allow for proper air circulation and sunlight penetration.
Q: How do I harvest my corn from concrete planters?
A: Corn is typically ready to harvest when the silks turn brown and dry, and the kernels are plump and milky. To check for ripeness, peel back a portion of the husk and puncture a kernel with your fingernail. If the liquid that comes out is milky, the corn is ready to harvest. To harvest, grasp the ear firmly and twist it downward until it snaps off the stalk. Enjoy your fresh, homegrown corn!
Q: What are some common pests and diseases that affect corn grown in concrete planters, and how can I control them?
A: Common pests that can affect corn include corn earworms, aphids, and spider mites. Diseases include corn smut and rust. Regularly inspect your plants for signs of pests or diseases. You can control pests by handpicking them off the plants, using insecticidal soap, or introducing beneficial insects. Prevent diseases by providing good air circulation, avoiding overwatering, and using disease-resistant varieties. If you encounter a serious pest or disease problem, consult with your local agricultural extension office for advice on appropriate control measures.
Leave a Comment