
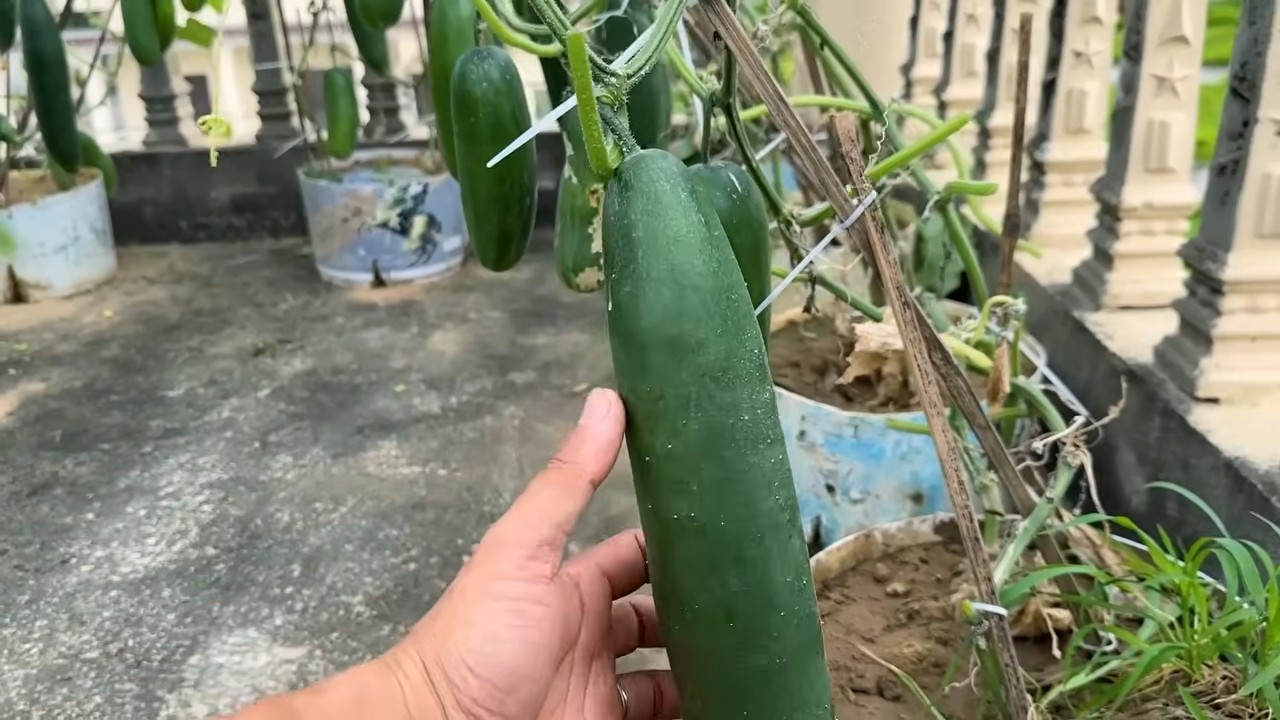
Cucumber Yield Hacks: Unlock a Bountiful Harvest! Ever dream of a garden overflowing with crisp, juicy cucumbers? I know I have! There’s nothing quite like the satisfaction of harvesting your own homegrown produce, especially when it comes to these refreshing summer staples. But let’s be honest, sometimes our cucumber plants just don’t seem to want to cooperate, leaving us with a disappointing yield.
Cucumbers have a rich history, dating back thousands of years to their origins in India. They’ve been enjoyed by cultures around the world, from ancient Romans to modern-day foodies. But regardless of the era, the desire for a plentiful cucumber harvest has always been a common goal.
That’s why I’m so excited to share these game-changing cucumber yield hacks with you! Whether you’re a seasoned gardener or just starting out, these simple DIY tricks will help you maximize your cucumber production and enjoy a truly abundant harvest. Imagine the delicious salads, pickles, and refreshing snacks you can create with all those extra cucumbers! We’ll dive into easy-to-implement strategies that address common issues like pollination, watering, and nutrient deficiencies. Get ready to transform your cucumber patch into a thriving oasis!
Growing Water Spinach (Kangkong) at Home: A DIY Guide
Hey there, fellow gardening enthusiasts! I’m so excited to share my experience with growing water spinach, also known as kangkong or ong choy, right in my backyard. It’s surprisingly easy, incredibly rewarding, and you get a constant supply of fresh, delicious greens. Trust me, once you taste homegrown kangkong, you’ll never want to buy it from the store again!
This guide will walk you through everything you need to know, from choosing the right container to harvesting your bountiful crop. Let’s get started!
What You’ll Need
Before we dive in, let’s gather all the necessary materials. This will make the whole process smoother and more enjoyable.
* **Water Spinach Seeds or Cuttings:** You can find seeds online or at your local garden center. Cuttings from mature plants also work great, especially if you have a friend who already grows kangkong.
* **A Large Container:** A plastic tub, a large pot, or even a repurposed container will do. The bigger, the better, as water spinach loves to spread. Aim for at least 12 inches deep and 18 inches wide.
* **Potting Soil:** A good quality potting mix is essential for healthy growth. You can also amend it with compost for extra nutrients.
* **Water:** Obviously! Water spinach needs plenty of water to thrive.
* **Fertilizer (Optional):** A balanced liquid fertilizer can boost growth, but it’s not strictly necessary.
* **Sunlight:** Water spinach needs at least 6 hours of direct sunlight per day.
* **Gardening Gloves:** To keep your hands clean and protected.
* **Watering Can or Hose:** For easy watering.
Choosing Your Growing Method: Seeds vs. Cuttings
You have two main options for starting your water spinach: from seeds or from cuttings. Both methods are relatively simple, but they have their own pros and cons.
* **Seeds:** Starting from seeds takes a bit longer, but it’s a great way to ensure you have a healthy, vigorous plant. You’ll also have more control over the variety you grow.
* **Cuttings:** Using cuttings is faster and easier, as you’re essentially cloning an existing plant. This is a good option if you want to quickly establish a kangkong patch.
I’ve tried both methods, and I personally prefer using cuttings because they’re so quick and easy. However, if you’re patient and want to experiment with different varieties, seeds are the way to go.
Growing Water Spinach from Seeds: A Step-by-Step Guide
If you’ve decided to start from seeds, here’s how to do it:
1. **Soak the Seeds:** Before planting, soak the water spinach seeds in warm water for 12-24 hours. This will help soften the seed coat and improve germination rates. I usually put them in a small bowl of water and leave them on the counter overnight.
2. **Prepare the Container:** Fill your container with potting soil, leaving about an inch of space at the top. Water the soil thoroughly until it’s evenly moist.
3. **Sow the Seeds:** Sprinkle the seeds evenly over the surface of the soil. You can also plant them in rows, spacing them about 1-2 inches apart. Cover the seeds with a thin layer of soil (about ¼ inch).
4. **Water Gently:** Use a watering can or hose with a gentle spray to water the seeds. Be careful not to dislodge them.
5. **Provide Sunlight:** Place the container in a sunny location where it will receive at least 6 hours of direct sunlight per day.
6. **Keep the Soil Moist:** Water spinach needs consistently moist soil to thrive. Check the soil daily and water whenever the top inch feels dry.
7. **Germination:** The seeds should germinate in about 7-14 days. Once the seedlings emerge, thin them out if necessary, leaving the strongest plants to grow.
8. **Fertilize (Optional):** Once the seedlings are a few inches tall, you can start fertilizing them with a balanced liquid fertilizer every 2-3 weeks. Follow the instructions on the fertilizer label.
Growing Water Spinach from Cuttings: A Simpler Approach
If you’re using cuttings, the process is even simpler:
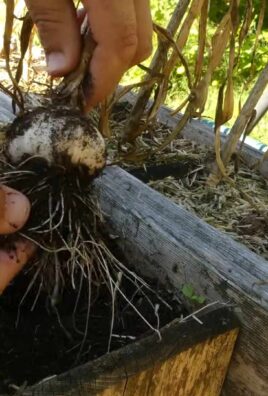
1. **Obtain Cuttings:** Ask a friend for cuttings from their water spinach plant, or purchase them from a local nursery. The cuttings should be about 6-8 inches long and have several nodes (the points where leaves grow).
2. **Prepare the Cuttings:** Remove the leaves from the bottom 2-3 inches of the cuttings. This will encourage root growth.
3. **Rooting in Water (Optional):** You can root the cuttings in water before planting them in soil. Simply place the cuttings in a glass of water, making sure the bottom nodes are submerged. Change the water every 1-2 days. Roots should start to appear in about a week.
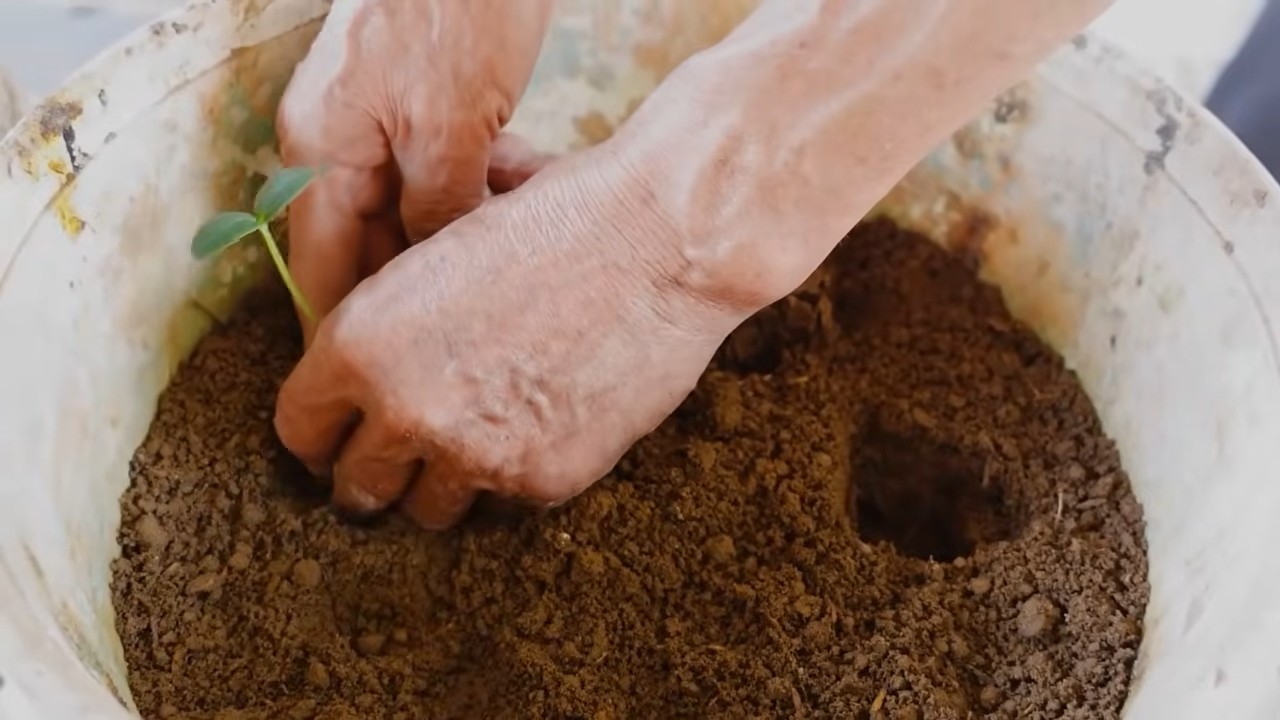
4. **Plant the Cuttings:** Fill your container with potting soil, leaving about an inch of space at the top. Water the soil thoroughly until it’s evenly moist.
5. **Insert the Cuttings:** Make small holes in the soil and insert the cuttings, spacing them about 4-6 inches apart. Make sure the bottom nodes are buried in the soil.
6. **Water Gently:** Water the cuttings gently to settle the soil around them.
7. **Provide Sunlight:** Place the container in a sunny location where it will receive at least 6 hours of direct sunlight per day.
8. **Keep the Soil Moist:** Water spinach needs consistently moist soil to thrive. Check the soil daily and water whenever the top inch feels dry.
9. **Establishment:** The cuttings should start to root and grow within a week or two. Once they’re established, you can start fertilizing them with a balanced liquid fertilizer every 2-3 weeks.
Caring for Your Water Spinach: Essential Tips
Once your water spinach is growing, here are some tips to keep it healthy and productive:
* **Watering:** Water spinach loves water, so keep the soil consistently moist. In hot weather, you may need to water it daily or even twice a day.
* **Sunlight:** Ensure your water spinach receives at least 6 hours of direct sunlight per day. If you live in a very hot climate, you may need to provide some afternoon shade to prevent the leaves from scorching.
* **Fertilizing:** Fertilize your water spinach every 2-3 weeks with a balanced liquid fertilizer. This will provide the nutrients it needs to grow quickly and produce lots of leaves.
* **Pruning:** Regular pruning encourages bushier growth and prevents the plants from becoming leggy. Simply pinch off the tips of the stems to promote branching.
* **Pest Control:** Water spinach is relatively pest-resistant, but it can occasionally be affected by aphids or spider mites. If you notice any pests, you can spray the plants with insecticidal soap or neem oil.
* **Temperature:** Water spinach thrives in warm temperatures (70-85°F). It can tolerate cooler temperatures, but growth will slow down.
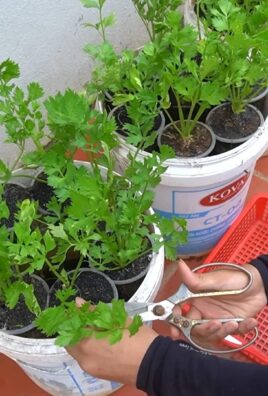
Harvesting Your Water Spinach: The Best Part!
The best part about growing water spinach is, of course, harvesting it! You can start harvesting your water spinach about 4-6 weeks after planting.
1. **Harvesting Technique:** Use scissors or a sharp knife to cut the stems about 6-8 inches from the top. This will encourage the plant to produce new shoots from the cut stems.
2. **Harvesting Frequency:** You can harvest your water spinach every 1-2 weeks, depending on how quickly it grows.
3. **Storage:** Freshly harvested water spinach is best used immediately. However, you can store it in the refrigerator for a few days. Wrap the stems in a damp paper towel and place them in a plastic bag.
Enjoying Your Homegrown Water Spinach: Delicious Recipes
Now that you have a bountiful harvest of fresh water spinach, it’s time to enjoy it! Water spinach is a versatile vegetable that can be used in a variety of dishes. Here are some of my favorite ways to cook it:
* **Stir-fries:** Water spinach is a classic ingredient in stir-fries. Simply stir-fry it with garlic, ginger, and your favorite sauce.
* **Soups:** Add water spinach to soups for a nutritious and flavorful boost.
* **Salads:** Use young, tender water spinach leaves in salads.
* **Steamed:** Steam water spinach and serve it with a dipping sauce.
* **Garlic Water Spinach:** This is my go-to recipe! Sauté garlic in oil, add the water spinach, and cook until wilted. Season with salt and pepper.
Troubleshooting: Common Problems and Solutions
Even with the best care, you may encounter some problems while growing water spinach. Here are some common issues and how to solve them:
* **Yellowing Leaves:** This can be caused by overwatering, underwatering, or nutrient deficiencies
Conclusion
So, there you have it! These simple yet effective cucumber yield hacks are your secret weapon to transforming your garden into a cucumber-producing powerhouse. We’ve covered everything from optimizing pollination to strategic pruning and nutrient management, all designed to maximize your harvest and minimize frustration.
Why is this a must-try? Because store-bought cucumbers simply can’t compare to the crisp, fresh flavor of homegrown ones. And with these techniques, you’ll be enjoying a bounty of cucumbers far exceeding what you thought possible. Imagine the endless possibilities: refreshing salads, tangy pickles, cool cucumber water, and even homemade beauty treatments. The satisfaction of harvesting your own abundant crop is truly unparalleled.
But don’t stop there! Feel free to experiment with these techniques to find what works best for your specific garden and cucumber variety. For example, if you’re growing Armenian cucumbers, which are known for their long, slender shape, you might want to focus on providing extra support to prevent them from dragging on the ground. Or, if you’re dealing with a particularly hot and dry climate, consider adding shade cloth to protect your plants from excessive sun exposure. You can also try different types of organic fertilizers to see which one gives you the best results. Some gardeners swear by compost tea, while others prefer a balanced fertilizer specifically formulated for vegetables.
Consider companion planting to further boost your cucumber yield. Marigolds can deter pests, while dill attracts beneficial insects that prey on cucumber beetles. Nasturtiums are another great option, acting as a trap crop for aphids, keeping them away from your precious cucumber plants.
The key is to observe your plants closely and adjust your approach as needed. Gardening is a learning process, and every season brings new challenges and opportunities.
We are confident that by implementing these cucumber yield hacks, you’ll be amazed at the difference they make. You’ll not only increase the quantity of your harvest but also improve the quality of your cucumbers. They’ll be crisper, more flavorful, and more nutritious.
Now it’s your turn! We encourage you to put these tips into practice and see the results for yourself. Don’t be afraid to get your hands dirty and experiment. And most importantly, share your experiences with us! We’d love to hear about your successes, your challenges, and any variations you’ve discovered. Post your photos and stories in the comments section below. Let’s create a community of cucumber-growing enthusiasts and learn from each other. Happy gardening!
Frequently Asked Questions (FAQ)
Q: How often should I water my cucumber plants?
A: Cucumber plants need consistent moisture, especially during fruiting. Aim to water deeply 2-3 times per week, ensuring the soil is moist but not waterlogged. The frequency may need to be adjusted based on your climate and soil type. Check the soil moisture by sticking your finger about an inch deep. If it feels dry, it’s time to water. Using a soaker hose or drip irrigation can help deliver water directly to the roots, minimizing water loss through evaporation and reducing the risk of fungal diseases.
Q: What are the best fertilizers for cucumbers?
A: Cucumbers are heavy feeders and benefit from regular fertilization. Start with a balanced fertilizer (e.g., 10-10-10) at planting time. Once the plants start flowering and fruiting, switch to a fertilizer higher in phosphorus and potassium (e.g., 5-10-10) to support fruit development. Organic options like compost tea, fish emulsion, and bone meal are also excellent choices. Apply fertilizer according to the package instructions, being careful not to over-fertilize, which can burn the roots.
Q: How do I deal with common cucumber pests like cucumber beetles and squash bugs?
A: Cucumber beetles and squash bugs can wreak havoc on cucumber plants. Regularly inspect your plants for signs of infestation, such as chewed leaves or clusters of eggs. Handpicking the pests is an effective method for small infestations. You can also use row covers to protect young plants from pests. Insecticidal soap and neem oil are organic options for controlling larger infestations. Companion planting with marigolds or nasturtiums can also help deter pests.
Q: Why are my cucumber flowers falling off without producing fruit?
A: This is often due to poor pollination. Cucumbers have separate male and female flowers, and the female flowers need to be pollinated by bees or other insects to produce fruit. You can encourage pollination by planting flowers that attract pollinators, such as sunflowers and zinnias. In some cases, you may need to hand-pollinate the flowers yourself. Use a small paintbrush to transfer pollen from the male flowers to the female flowers.
Q: How do I know when my cucumbers are ripe?
A: The size and color of ripe cucumbers vary depending on the variety. Generally, cucumbers are ready to harvest when they are firm, have a deep green color, and are the appropriate size for the variety. Overripe cucumbers can become yellow, soft, and bitter. Harvest cucumbers regularly to encourage continued production.
Q: Can I grow cucumbers in containers?
A: Yes, cucumbers can be successfully grown in containers, but you’ll need to choose a large container (at least 5 gallons) and provide adequate support for the vines. Bush varieties are generally better suited for containers than vining varieties. Use a well-draining potting mix and water regularly. Fertilize frequently, as nutrients can leach out of the soil more quickly in containers.
Q: What are some good companion plants for cucumbers?
A: Good companion plants for cucumbers include marigolds, nasturtiums, dill, sunflowers, and beans. Marigolds and nasturtiums deter pests, while dill attracts beneficial insects. Sunflowers provide shade and support for the vines. Beans fix nitrogen in the soil, which benefits the cucumbers. Avoid planting cucumbers near aromatic herbs like sage, as they can inhibit growth.
Q: How can I prevent my cucumbers from becoming bitter?
A: Bitterness in cucumbers is often caused by stress, such as inconsistent watering, high temperatures, or poor soil. Ensure your plants receive consistent moisture and adequate nutrients. Choose cucumber varieties that are less prone to bitterness. You can also try peeling the cucumbers before eating them, as the bitterness is often concentrated in the skin.
Q: What is the best way to store cucumbers after harvesting?
A: Store cucumbers in the refrigerator to keep them fresh. Wrap them in a paper towel to absorb excess moisture and place them in a plastic bag. Cucumbers can typically be stored for up to a week in the refrigerator. Avoid storing them near ethylene-producing fruits like bananas and tomatoes, as this can cause them to ripen too quickly.
Q: How do these cucumber yield hacks help with vertical gardening?
A: Many of these hacks directly support vertical gardening. Providing sturdy trellises or supports is crucial for vining cucumber varieties grown vertically. Pruning techniques, like removing suckers, improve airflow and light penetration, which are especially important in a vertical setup. Optimizing pollination, whether through attracting pollinators or hand-pollination, ensures fruit set even when space is limited. By maximizing space and yield, these techniques make vertical cucumber gardening a highly productive option.

Leave a Comment