
Deep cleaning shortcut: who doesn’t crave one? Let’s be honest, the thought of a top-to-bottom house cleaning can feel incredibly daunting. We all lead busy lives, and carving out entire weekends for scrubbing and scouring just isn’t realistic for most of us. But what if I told you there’s a way to achieve that sparkling clean feeling without sacrificing all your precious free time?
The desire for a clean and organized home isn’t new. Throughout history, different cultures have placed varying degrees of emphasis on cleanliness, often linking it to spiritual well-being and overall health. While the specific methods have evolved, the underlying motivation remains the same: a clean space contributes to a sense of calm and order in our lives.
That’s where this deep cleaning shortcut comes in! This isn’t about skipping steps or cutting corners; it’s about working smarter, not harder. I’m going to share a simple yet incredibly effective DIY trick that will revolutionize your cleaning routine. It will save you time, energy, and maybe even a little sanity. Ready to transform your cleaning game? Let’s dive in!

Deep Cleaning Shortcut: The One-Day Blitz That Actually Works!
Okay, let’s be honest. The words “deep cleaning” can send shivers down anyone’s spine. It sounds like a weekend-long commitment, a Herculean task that requires specialized equipment and the stamina of a marathon runner. But what if I told you there’s a way to achieve a seriously deep clean in just one day? A shortcut, if you will? Well, buckle up, because I’m about to share my secret weapon: the one-day deep cleaning blitz!
This isn’t about cutting corners; it’s about working smarter, not harder. It’s about focusing on the areas that make the biggest impact and using efficient techniques to get the job done quickly and effectively. Ready to transform your home from “slightly chaotic” to “sparkling sanctuary” in a single day? Let’s get started!
Planning Your Attack: The Pre-Cleaning Checklist
Before you even think about grabbing a sponge, a little planning goes a long way. This is where we strategize and set ourselves up for success.
* Inventory Your Supplies: Nothing is more frustrating than realizing you’re out of your favorite cleaning solution halfway through the process. Take stock of what you have and make a list of anything you need to buy. Think about all-purpose cleaner, glass cleaner, bathroom cleaner, floor cleaner, microfiber cloths, sponges, scrub brushes, a vacuum cleaner, a mop, and any specialized cleaners you might need (like stainless steel cleaner or wood polish). Don’t forget gloves!
* Create a Cleaning Schedule: This is crucial! Break down your home into manageable zones (kitchen, bathrooms, living areas, bedrooms) and estimate how long each zone will take. Be realistic! It’s better to underestimate and finish early than to overestimate and feel overwhelmed. I like to use a simple spreadsheet or even just a handwritten list.
* Declutter First: Deep cleaning is much easier when you’re not constantly tripping over clutter. Spend 15-20 minutes in each room quickly decluttering. Put away items that don’t belong, recycle junk mail, and donate anything you no longer need. This will make a huge difference in how quickly you can clean.
* Gather Your Tools: Assemble everything you’ll need in a central location. This will save you time and energy running back and forth. I use a cleaning caddy to keep everything organized.
* Enlist Help (If Possible): If you live with others, don’t be afraid to ask for help! Even a little bit of assistance can make a big difference. Assign tasks based on everyone’s strengths and preferences.
The Deep Cleaning Blitz: Step-by-Step Instructions
Alright, the planning is done, and it’s time to get our hands dirty! Remember to work systematically, room by room, following your cleaning schedule.
1. Kitchen Domination
The kitchen is often the heart of the home, but it’s also a magnet for dirt and grime. Let’s tackle it first!
1. Clear the Counters: Remove everything from your countertops – appliances, utensils, decorative items. This will give you a clear surface to work with.
2. Load the Dishwasher (or Wash Dishes): Get those dirty dishes out of the way! If you have a dishwasher, load it up and run it. If not, tackle the dishes by hand.
3. Clean the Sink: Scrub the sink thoroughly with a good cleaner. Don’t forget to clean the faucet and drain. For stainless steel sinks, use a stainless steel cleaner to remove water spots and fingerprints.
4. Wipe Down Appliances: Clean the exterior of all your appliances – refrigerator, oven, microwave, dishwasher, coffee maker, toaster. Use an all-purpose cleaner or a specialized appliance cleaner. Pay special attention to fingerprints and splatters.
5. Clean the Microwave: This is a quick and easy task that makes a big difference. Heat a cup of water with a tablespoon of vinegar in the microwave for a few minutes until it steams up. Then, carefully wipe down the interior with a damp cloth. The steam will loosen any stuck-on food.
6. Clean the Oven: This is often the most dreaded task, but it doesn’t have to be! If you have a self-cleaning oven, run the self-cleaning cycle. If not, use an oven cleaner according to the instructions on the bottle. Be sure to wear gloves and ventilate the area well.
7. Wipe Down Countertops: Clean your countertops with an appropriate cleaner for your countertop material. Be sure to get into all the corners and crevices.
8. Clean the Stovetop: Remove the grates and burners from your stovetop and soak them in hot, soapy water. Scrub the stovetop with a cleaner designed for your stovetop material.
9. Clean the Backsplash: Wipe down your backsplash with an all-purpose cleaner. Pay special attention to any grease splatters.
10. Sweep and Mop the Floor: Sweep or vacuum the floor to remove any loose dirt and debris. Then, mop the floor with a floor cleaner appropriate for your flooring type.
11. Empty the Trash: Take out the trash and replace the liner.
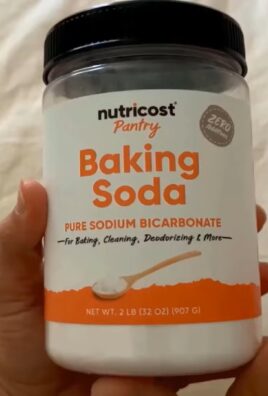
12. Clean the Inside of the Refrigerator: Toss out old food and wipe down the shelves and drawers with a damp cloth and baking soda solution.
2. Bathroom Bliss
Bathrooms can quickly become breeding grounds for germs and grime. Let’s make them sparkle!
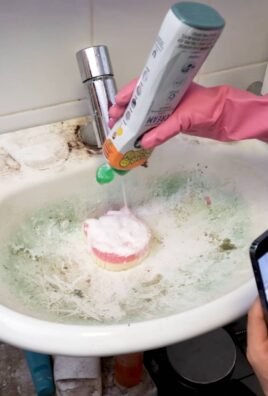
1. Spray Down the Shower/Tub: Spray the shower or tub with a bathroom cleaner and let it sit for a few minutes to loosen soap scum and grime.
2. Clean the Toilet: Clean the toilet bowl with a toilet bowl cleaner. Wipe down the exterior of the toilet with an all-purpose cleaner.
3. Scrub the Shower/Tub: Scrub the shower or tub with a scrub brush or sponge. Pay special attention to grout lines and corners. Rinse thoroughly.
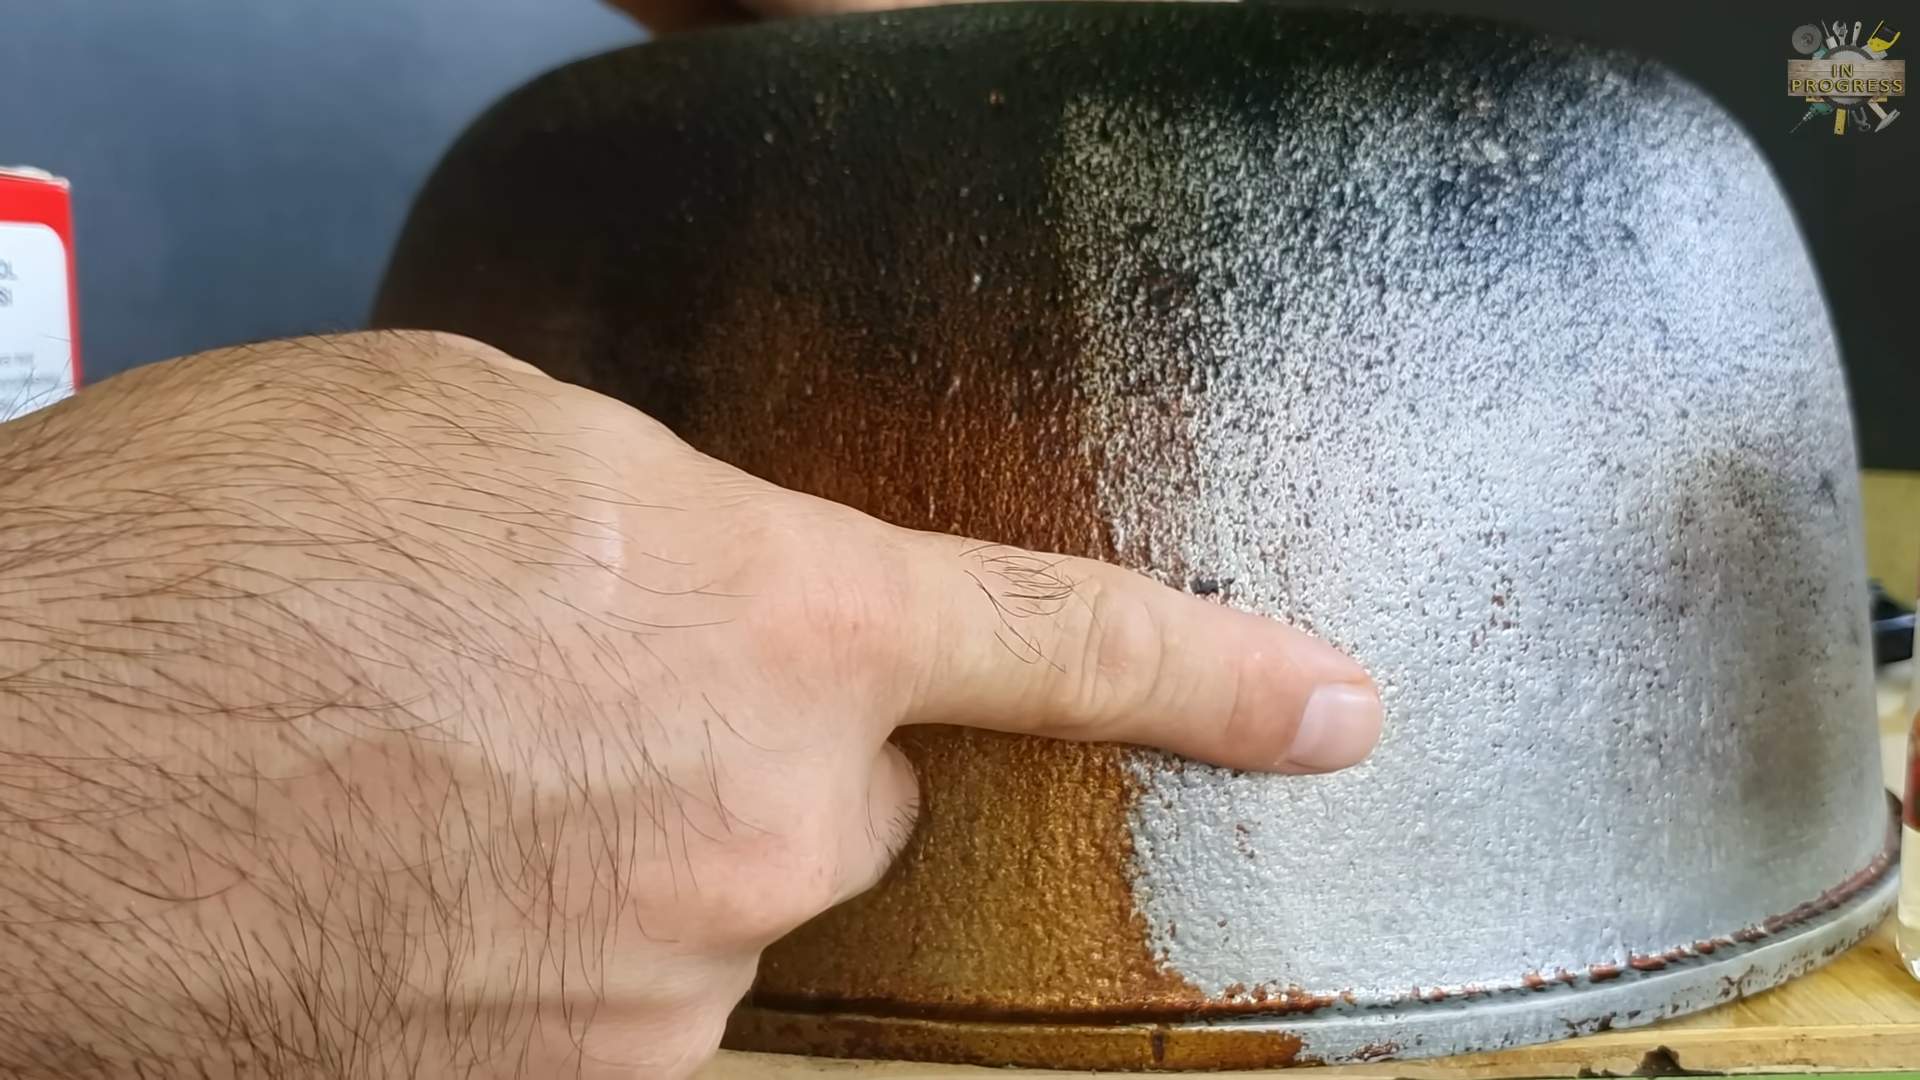
4. Clean the Showerhead: Remove mineral deposits from the showerhead by soaking it in a bag filled with vinegar for a few hours.
5. Clean the Sink and Countertop: Clean the sink and countertop with an all-purpose cleaner. Pay special attention to toothpaste splatters and water spots.
6. Clean the Mirror: Clean the mirror with a glass cleaner.
7. Sweep and Mop the Floor: Sweep or vacuum the floor to remove any loose dirt and debris. Then, mop the floor with a floor cleaner.
8. Replace Towels: Put out fresh, clean towels.
9. Empty the Trash: Take out the trash and replace the liner.
3. Living Area Liberation
The living area is where we relax and unwind, so let’s make it a clean and inviting space.
1. Dust Everything: Dust all surfaces, including furniture, shelves, picture frames, and lamps. Use a microfiber cloth to avoid scratching.
2. Vacuum or Sweep Floors: Vacuum carpets and rugs thoroughly. Sweep or mop hard floors.
3. Clean Windows and Mirrors: Clean windows and mirrors with a glass cleaner.
4. Fluff and Arrange Pillows and Throws: Make your living area look more inviting by fluffing pillows and arranging throws.
5. Straighten Up: Put away any items that are out of place.
4. Bedroom Refresh
Bedrooms should be havens of peace and tranquility. Let’s create a clean and calming atmosphere.
1. Make the Bed: This is the easiest and most impactful thing you can do to make your bedroom look cleaner.
2. Dust Everything: Dust all surfaces, including furniture, shelves, picture frames, and lamps.
3. Vacuum or Sweep Floors: Vacuum carpets and rugs thoroughly. Sweep or mop hard floors.
4. Clean Windows and Mirrors: Clean windows and mirrors with a glass cleaner.
5. Declutter Surfaces: Remove any clutter from your nightstands and dressers.
6. Straighten Up: Put away any items that are out of place.
Bonus Round: The Finishing Touches
These little details can make a big difference in the overall cleanliness of your home.
* Clean Light Fixtures: Dust or wipe down light fixtures to remove dust and grime.
* Wipe Down Doorknobs and Light Switches: These are high-touch areas that can harbor germs.
* Clean Baseboards: Wipe down baseboards with a damp cloth to remove dust and dirt.
* Freshen the Air: Open windows to air out your home or use an air freshener.
Tips and Tricks for a Speedier Clean
* Work Top to Bottom: Start cleaning at the highest point in the room and work your way down. This will prevent dust and dirt from falling onto already cleaned surfaces.
* Use Microfiber Cloths: Microfiber cloths are excellent for cleaning because they trap dust and dirt effectively.
*
Conclusion
So, there you have it! This deep cleaning shortcut isn’t just a time-saver; it’s a game-changer for maintaining a sparkling clean home without sacrificing your entire weekend. We’ve all been there, staring down a mountain of cleaning tasks and feeling overwhelmed. But with this simple yet effective method, you can tackle even the most daunting cleaning challenges with confidence and ease.
The beauty of this deep cleaning shortcut lies in its adaptability. Feel free to experiment with different cleaning solutions to find what works best for your specific needs and surfaces. For instance, if you’re dealing with stubborn hard water stains in your bathroom, consider adding a bit of white vinegar to your cleaning solution for extra cleaning power. Or, if you prefer a more natural approach, try using essential oils like lemon or tea tree for their antibacterial and deodorizing properties. Just be sure to test any new cleaning solution on a small, inconspicuous area first to ensure it doesn’t damage the surface.
Beyond the basic method, there are countless ways to customize this deep cleaning shortcut to suit your individual preferences. You can use different types of cloths or sponges depending on the task at hand. Microfiber cloths are excellent for dusting and polishing, while scrub brushes are ideal for tackling tough grime and dirt. You can also adjust the frequency of your deep cleaning sessions based on your lifestyle and cleaning habits. If you have a busy household with kids and pets, you may want to deep clean more often than someone who lives alone.
But the real magic of this deep cleaning shortcut is how it empowers you to take control of your cleaning routine. No longer do you have to dread the thought of spending hours scrubbing and scouring. With this method, you can break down your cleaning tasks into manageable chunks and tackle them with efficiency and enthusiasm. And the best part is, you’ll be left with a clean and refreshed home that you can be proud of.
We wholeheartedly encourage you to give this deep cleaning shortcut a try. We’re confident that you’ll be amazed at how much time and effort it saves you. And once you’ve experienced the joy of a sparkling clean home without the hassle, we’d love to hear about your experience. Share your tips, tricks, and variations in the comments below. Let’s create a community of cleaning enthusiasts who are dedicated to making our homes cleaner, healthier, and happier places to live.
Remember, a clean home is a happy home. And with this deep cleaning shortcut, you can achieve that happiness without breaking a sweat. So go ahead, give it a try, and see for yourself the difference it can make. You won’t regret it!
Frequently Asked Questions (FAQ)
What exactly *is* a “deep cleaning shortcut,” and how is it different from regular cleaning?
A deep cleaning shortcut focuses on efficiency and targeted cleaning to achieve a thorough clean in less time. Unlike regular cleaning, which often involves surface-level tidying, a deep cleaning shortcut tackles built-up grime, dirt, and allergens in key areas of your home. It’s about maximizing your efforts to get the most impactful results. This might involve pre-soaking surfaces, using multi-purpose cleaners strategically, and focusing on high-traffic areas that accumulate dirt quickly. The goal is to achieve a noticeably cleaner and healthier environment without spending an entire day cleaning.
How often should I use this deep cleaning shortcut?
The frequency depends on your lifestyle and the level of cleanliness you desire. For most households, a deep cleaning shortcut once a month is sufficient to maintain a good level of hygiene. However, if you have pets, children, or allergies, you may want to increase the frequency to every two weeks. Consider also the season; during allergy season or times of increased outdoor activity, more frequent deep cleaning might be beneficial. Observe your home and adjust the frequency based on your needs.
What are the essential supplies I need for this deep cleaning shortcut?
The essential supplies are relatively simple and likely already in your home:
* **Multi-purpose cleaner:** Choose a cleaner that is effective on a variety of surfaces.
* **Microfiber cloths:** These are excellent for dusting, polishing, and wiping surfaces.
* **Scrub brush:** For tackling tough grime and dirt in bathrooms and kitchens.
* **Spray bottles:** For diluting cleaning solutions and applying them evenly.
* **Vacuum cleaner:** For removing dust and debris from floors and carpets.
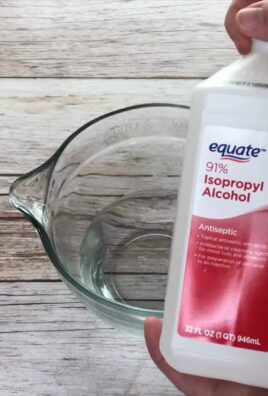
* **Optional:** White vinegar, baking soda, essential oils (for added cleaning power or natural cleaning solutions).
* **Gloves:** To protect your hands from harsh chemicals.
Can I use this deep cleaning shortcut on all surfaces?
No, not all surfaces are created equal. Always test your cleaning solution on a small, inconspicuous area first to ensure it doesn’t damage the surface. Be especially careful with delicate surfaces like wood, marble, and granite. For these surfaces, use cleaners specifically designed for them or opt for gentler solutions like diluted vinegar or mild soap and water. Avoid using abrasive cleaners or scrub brushes on delicate surfaces, as they can scratch or damage them.
What if I have stubborn stains or grime that won’t come off?
For stubborn stains or grime, try pre-soaking the area with a cleaning solution for a few minutes before scrubbing. You can also try using a paste of baking soda and water to gently scrub the stain. For hard water stains, white vinegar is an excellent solution. If all else fails, consider using a specialized stain remover designed for the specific type of stain you’re dealing with. Remember to always follow the manufacturer’s instructions and test the product on a small area first.
Is this deep cleaning shortcut safe for pets and children?
The safety of your pets and children is paramount. When using cleaning products, always follow the manufacturer’s instructions and keep them out of reach of children and pets. Ensure that the area you’re cleaning is well-ventilated to avoid inhaling harmful fumes. Consider using natural cleaning solutions like vinegar and baking soda, which are generally safer for pets and children. After cleaning, thoroughly rinse any surfaces that your pets or children may come into contact with.
How can I make this deep cleaning shortcut more eco-friendly?
There are several ways to make this deep cleaning shortcut more eco-friendly:
* **Use natural cleaning solutions:** Vinegar, baking soda, lemon juice, and essential oils are all effective and environmentally friendly cleaning agents.
* **Choose eco-friendly cleaning products:** Look for products that are biodegradable, non-toxic, and made with sustainable ingredients.
* **Reduce your use of disposable cleaning supplies:** Use reusable microfiber cloths instead of paper towels.
* **Dilute your cleaning solutions:** This not only saves money but also reduces the amount of chemicals you’re using.
* **Recycle your cleaning product containers:** Dispose of empty containers properly to minimize waste.
What are some common mistakes to avoid when using this deep cleaning shortcut?
* **Not testing cleaning solutions on a small area first:** This can lead to damage to delicate surfaces.
* **Using too much cleaning solution:** This can leave behind a sticky residue.
* **Not rinsing surfaces thoroughly:** This can also leave behind a residue and attract dirt.
* **Mixing different cleaning products:** This can create dangerous fumes.
* **Ignoring safety precautions:** Always wear gloves and ensure proper ventilation.
How can I share my experience and variations of this deep cleaning shortcut?
We encourage you to share your experience and variations in the comments section below the article. You can also share your tips and tricks on social media using relevant hashtags. Let’s create a community of cleaning enthusiasts who are dedicated to making our homes cleaner, healthier, and happier places to live! We are eager to learn from your experiences and see how you’ve adapted this deep cleaning shortcut to suit your individual needs.
Leave a Comment