
DIY Carrot Harvest: There’s nothing quite like the satisfaction of pulling a vibrant, orange carrot straight from your own garden! For centuries, cultures around the globe have cultivated these root vegetables, from their humble beginnings as wild, purple varieties to the sweet, crunchy treats we enjoy today. But let’s be honest, knowing when and how to harvest your carrots can be a bit of a mystery. Have you ever yanked a carrot out of the ground only to find it’s tiny and underdeveloped, or worse, left it too long and discovered a woody, flavorless disappointment?
I’ve been there, and trust me, it’s frustrating! That’s why I’m sharing my tried-and-true DIY tricks for a perfect DIY carrot harvest every time. This isn’t just about pulling up a vegetable; it’s about maximizing your yield, ensuring peak flavor, and enjoying the fruits (or rather, roots!) of your labor. Whether you’re a seasoned gardener or just starting out, these simple hacks will help you avoid common mistakes and unlock the secrets to a bountiful and delicious carrot crop. Get ready to impress your friends and family with the sweetest, most vibrant carrots they’ve ever tasted!
DIY Carrot Harvest: From Seed to Table with Ease!
Okay, fellow garden enthusiasts! So, you’ve nurtured those tiny carrot seeds, watched the green tops sprout, and now you’re itching to pull up some homegrown goodness. Harvesting carrots might seem straightforward, but a few tricks can make the process smoother, prevent breakage, and ensure you get the most out of your hard work. Let’s dive into my tried-and-true method for a successful carrot harvest!
When to Harvest: The Sweet Spot
Knowing when to harvest is half the battle. Carrots don’t magically shout, “I’m ready!” but there are clues to look for.
* Days to Maturity: Check your seed packet! It’ll tell you the approximate number of days from planting to harvest. This is a great starting point.
* Shoulder Size: Gently brush away the soil around the base of a few carrots. If the “shoulder” (the top part of the carrot) is the size you’re aiming for (usually around ¾ to 1 inch in diameter, depending on the variety), they’re likely ready.
* Color: The exposed shoulder should have a vibrant, deep orange color (or the color specific to your carrot variety).
* Taste Test (Optional): If you’re unsure, sacrifice one! Pull it up and give it a taste. Is it sweet and flavorful? Perfect! If not, give the rest a little more time.
* After a Frost: Carrots actually get sweeter after a light frost! The cold encourages them to convert starches to sugars. So, if you can, leave them in the ground a little longer after the first frost of the season.
Tools You’ll Need
Having the right tools makes all the difference. Here’s my go-to list:
* Garden Fork or Spading Fork: This is essential for loosening the soil around the carrots. A regular shovel can work in a pinch, but a fork is less likely to damage the carrots.
* Gloves: Protect your hands from dirt and potential irritants.
* Watering Can or Hose: Watering the soil beforehand makes harvesting much easier.
* Bucket or Basket: For collecting your beautiful carrot bounty!
* Knife (Optional): For trimming the carrot tops.
* Trowel (Optional): For gently digging around individual carrots.
The Harvesting Process: Step-by-Step
Alright, let’s get those carrots out of the ground!
1. Water the Soil Thoroughly: This is crucial! Water the area where your carrots are planted deeply the day before you plan to harvest. Moist soil is much easier to work with and reduces the risk of breaking the carrots.
2. Loosen the Soil: Insert your garden fork about 6-8 inches away from the row of carrots. Gently rock the fork back and forth to loosen the soil. Repeat this process along the entire row, being careful not to stab the carrots. If you’re using a shovel, insert it at an angle and gently lift the soil.
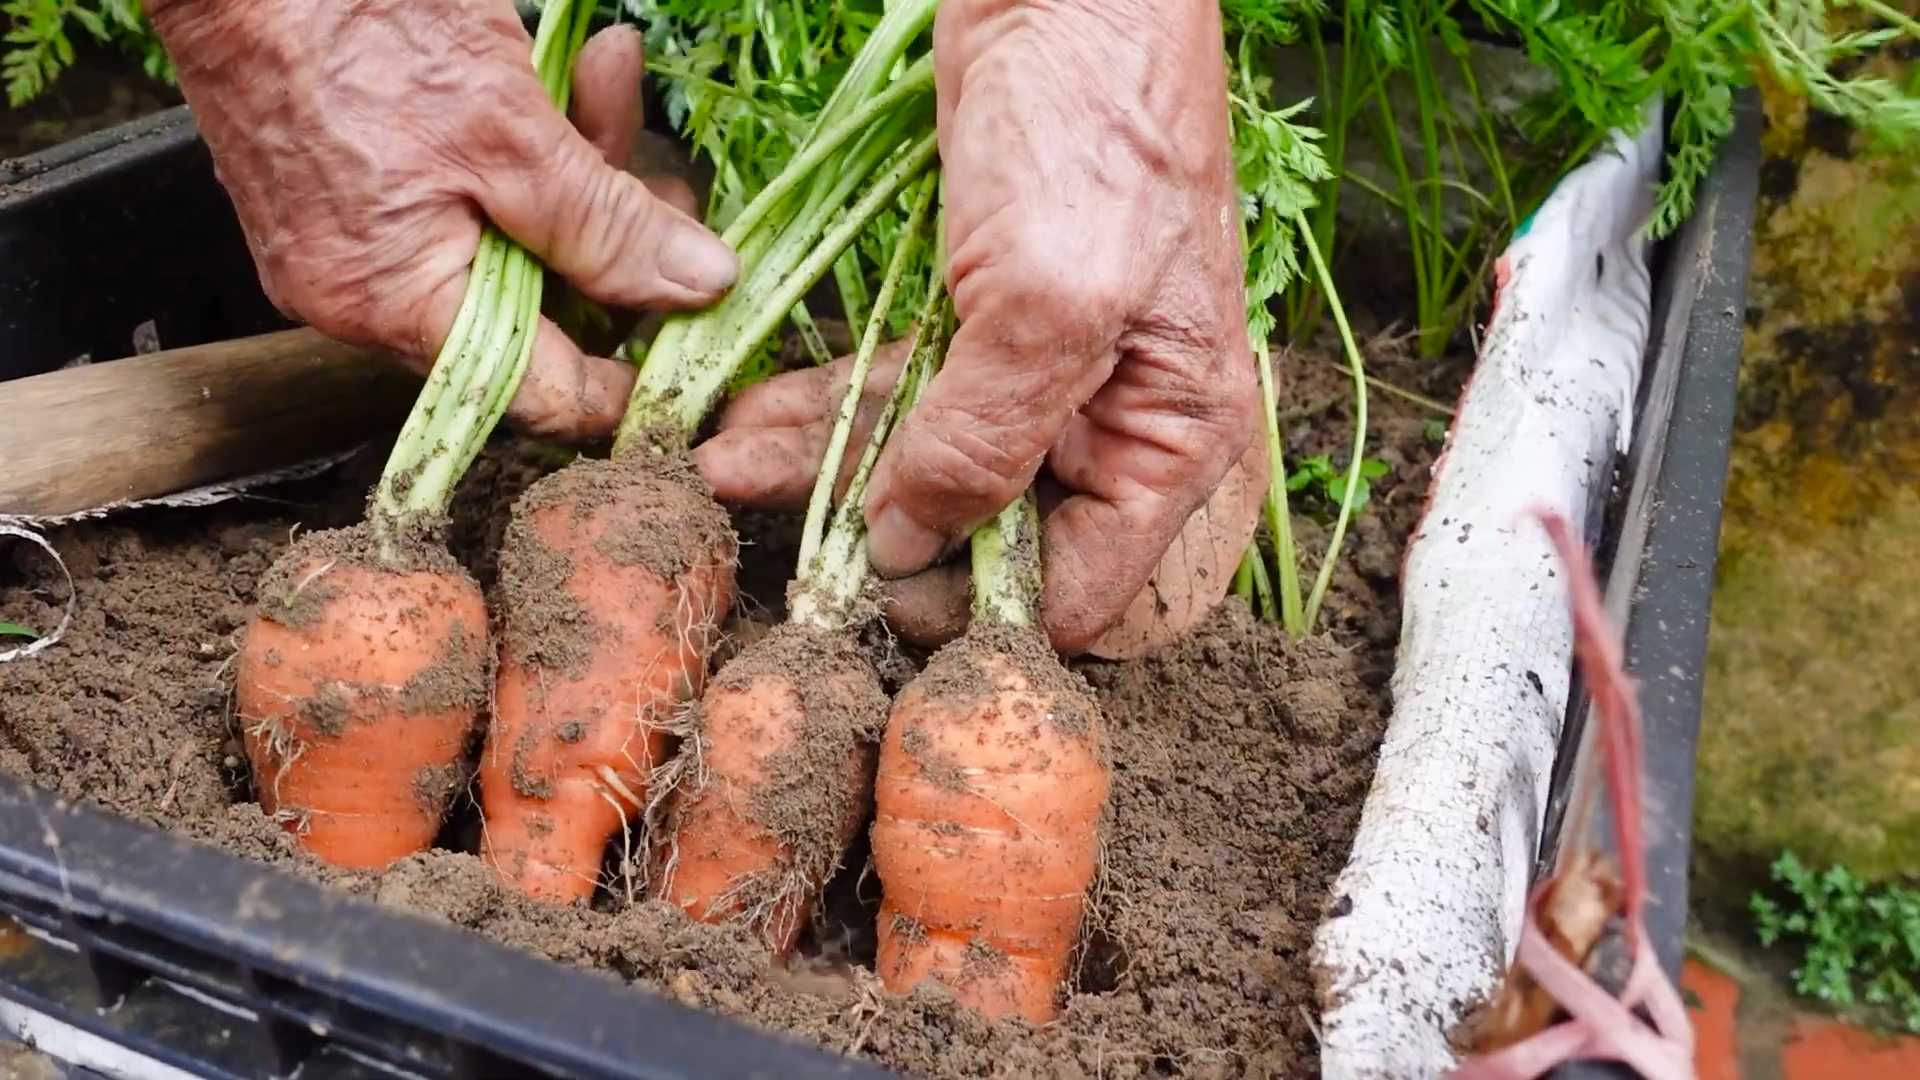
3. Gently Pull the Carrots: Now comes the fun part! Grasp the carrot tops firmly, as close to the base as possible. Gently wiggle and pull upwards with a steady, even pressure. Avoid yanking, as this can cause the carrot to break.
4. If a Carrot Resists: Don’t force it! Use your trowel to carefully dig around the carrot, loosening the soil further. Then, try pulling again. If it still won’t budge, you might need to dig a little deeper.
5. Dealing with Broken Carrots: Sometimes, despite your best efforts, a carrot will break. Don’t despair! You can still use it. Just dig out the remaining piece from the ground.
6. Clean the Carrots: Once you’ve harvested all your carrots, gently brush off any excess soil. You can also rinse them with water, but avoid scrubbing too hard, as this can damage the skin.
7. Trim the Tops: Using your knife, trim the carrot tops about ½ inch from the top of the carrot. This prevents the tops from drawing moisture from the carrots during storage. You can save the carrot tops for making pesto or adding to vegetable broth!
8. Inspect for Damage: Check each carrot for any signs of damage, such as cracks or bruises. Use these carrots first, as they won’t store as well.
Storing Your Harvest
Proper storage is key to keeping your carrots fresh and delicious for as long as possible.
* Cool and Damp Environment: Carrots thrive in cool, humid conditions. The ideal temperature is around 32-40°F (0-4°C) with high humidity (90-95%).
* Remove Excess Moisture: Before storing, make sure the carrots are relatively dry. Don’t wash them until you’re ready to use them.
* Storage Methods:
* Refrigerator (Short-Term): Store carrots in a plastic bag or container in the crisper drawer of your refrigerator. Add a slightly damp paper towel to the bag to help maintain humidity. They should last for several weeks.
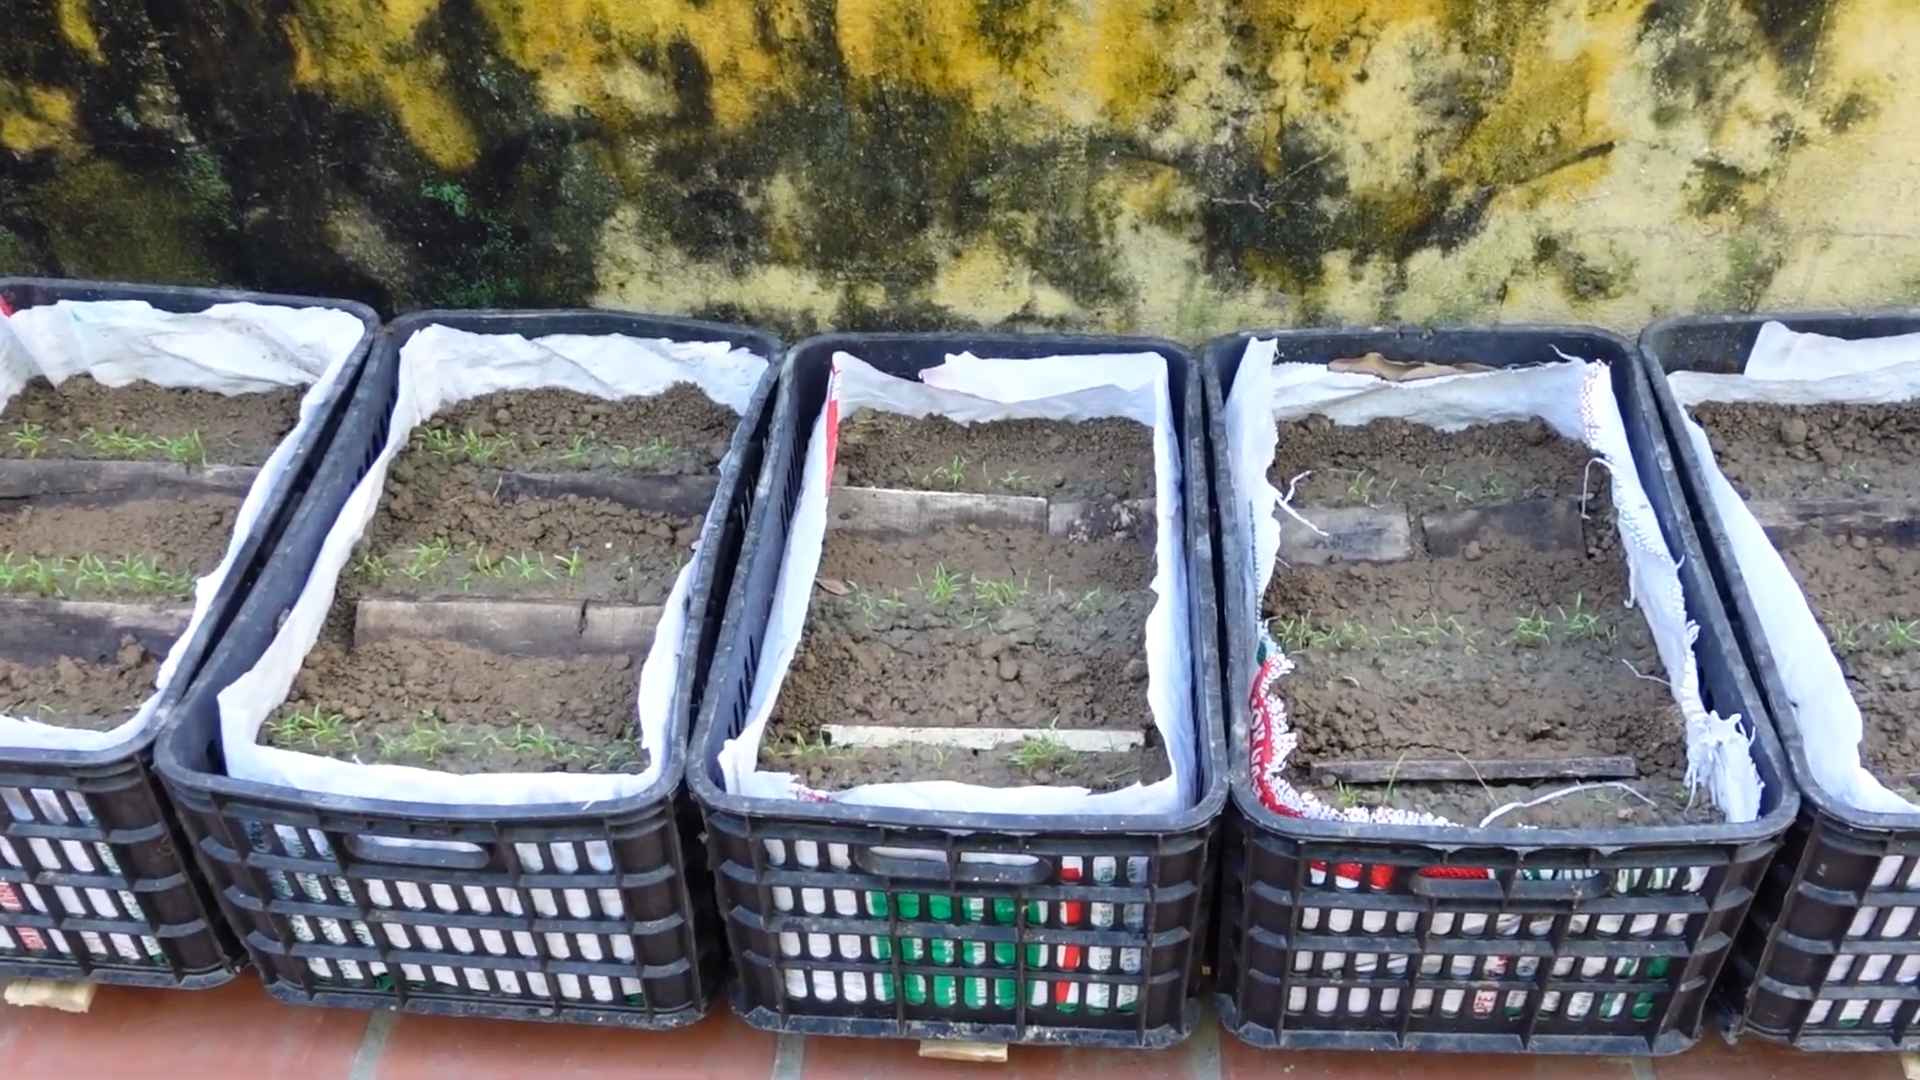
* Sand or Sawdust (Long-Term): For longer storage, you can pack carrots in a container filled with slightly damp sand or sawdust. This helps to keep them cool and moist. Store the container in a cool, dark place, such as a root cellar or unheated garage.
* Freezing: You can also freeze carrots, but they’ll need to be blanched first. Blanching involves briefly boiling the carrots and then plunging them into ice water. This helps to preserve their color and texture. After blanching, freeze them in a single layer on a baking sheet, then transfer them to a freezer bag or container.
Troubleshooting: Common Carrot Harvesting Problems
Even with the best preparation, things can sometimes go wrong. Here are some common issues and how to address them:
* Carrots Breaking: This is usually caused by dry, compacted soil. Make sure to water the soil thoroughly before harvesting and loosen it well with a garden fork.
* Small Carrots: This could be due to several factors, including overcrowding, poor soil, or insufficient sunlight. Thin your carrot seedlings early on to give them enough space to grow. Amend the soil with compost or other organic matter to improve its fertility.
* Forked Carrots: This is often caused by rocks or other obstacles in the soil. Remove any rocks or debris before planting. You can also try growing carrots in raised beds or containers filled with a well-draining potting mix.
* Bitter Carrots: This can be caused by hot weather or inconsistent watering. Provide shade for your carrots during the hottest part of the day and water them regularly to keep the soil consistently moist.
Enjoying Your Harvest
Now that you’ve successfully harvested and stored your carrots, it’s time to enjoy them! Here are just a few ideas:
* Raw: Carrots are delicious raw, either on their own or as part of a salad or crudité platter.
* Roasted: Roasting carrots brings out their natural sweetness. Toss them with olive oil, herbs, and spices, and roast them in the oven until tender.
* Steamed: Steamed carrots are a healthy and versatile side dish.
* Soups and Stews: Carrots add flavor and nutrients to soups and stews.
* Juices and Smoothies: Carrots are a great addition to juices and smoothies.
* Carrot Cake: Of course, no discussion of carrots would be complete without mentioning carrot cake!
So there you have it! My comprehensive guide to harvesting carrots. With a little patience and these helpful tips, you’ll be enjoying fresh, homegrown carrots all season long. Happy gardening!
Conclusion
So, there you have it! This simple DIY carrot harvest trick is a game-changer for any gardener, regardless of experience level. No more struggling to yank those stubborn carrots from the ground, risking breakage and frustration. This method is not only easier on you, but it’s also gentler on your precious carrots, ensuring a higher yield of intact, beautiful produce.
Why is this a must-try? Because it addresses a common gardening pain point – the difficulty of harvesting root vegetables. It’s efficient, effective, and requires minimal effort and resources. Think about it: you’re investing time and energy into nurturing your carrot crop; shouldn’t the harvest be just as rewarding? This DIY approach guarantees a more enjoyable and successful harvest, allowing you to savor the fruits (or rather, vegetables!) of your labor.
Beyond the basic technique, there’s plenty of room for personalization. If you have particularly compacted soil, consider using a garden fork to gently loosen the soil around the carrots before applying the watering method. For smaller carrot varieties, a narrow trowel might be sufficient to create the initial channel. You can also experiment with different watering methods – a gentle shower from a watering can, a soaker hose placed strategically, or even a slow drip irrigation system. The key is to saturate the soil deeply enough to make harvesting easier.
Consider this: you can even adapt this technique for other root vegetables like radishes, beets, and parsnips. The principle remains the same – softening the soil around the roots to facilitate easier extraction. Imagine the satisfaction of effortlessly harvesting a rainbow of root vegetables, all thanks to this simple yet effective DIY trick.
We wholeheartedly encourage you to give this DIY carrot harvest method a try. It’s a small change that can make a big difference in your gardening experience. And once you’ve experienced the ease and efficiency of this technique, we’re confident you’ll never go back to the old way.
Don’t just take our word for it! We’d love to hear about your experiences. Share your photos and stories on social media using #DIYCarrotHarvest and let us know how this trick worked for you. Did you adapt it in any interesting ways? Did you find it particularly helpful for a specific type of soil? Your feedback is invaluable and helps other gardeners discover the joy of effortless harvesting. Let’s build a community of happy gardeners, one perfectly harvested carrot at a time! This simple **DIY carrot harvest** method is sure to make your gardening experience more enjoyable.
Frequently Asked Questions (FAQ)
Q: What type of soil does this DIY carrot harvest trick work best on?
A: This method is beneficial for all soil types, but it’s particularly helpful for gardeners with heavy clay soil or compacted soil. These types of soil tend to grip the carrots tightly, making them difficult to pull out without breaking. The watering technique helps to loosen the soil, making the harvest much easier. Even in looser, sandy soils, this method can still be beneficial, as it minimizes the risk of damaging the carrots during extraction.
Q: How long before harvesting should I water the carrots using this method?
A: Ideally, you should water the carrots thoroughly 12-24 hours before you plan to harvest them. This allows the water to penetrate deep into the soil and soften it effectively. If you’re short on time, even a few hours of soaking can make a noticeable difference. The key is to ensure the soil is saturated around the carrots’ roots.
Q: Can I use this method if I have raised garden beds?
A: Absolutely! This DIY carrot harvest trick works just as well in raised garden beds as it does in traditional in-ground gardens. The principle is the same – saturating the soil to loosen the carrots. Just ensure that the raised bed has good drainage to prevent waterlogging.
Q: What if I accidentally break a carrot while harvesting? Is it still safe to eat?
A: Yes, absolutely! A broken carrot is perfectly safe to eat. Simply wash it thoroughly and use it as you normally would. The only reason to discard a carrot is if it shows signs of rot or decay.
Q: I’m having trouble finding the “sweet spot” for watering. How much water is too much?
A: The goal is to saturate the soil without waterlogging it. Signs of overwatering include standing water on the surface of the soil or the soil feeling excessively soggy. If you’re unsure, err on the side of slightly less water. You can always add more water if the carrots are still difficult to pull out. Using a soaker hose or drip irrigation system can help to deliver water slowly and evenly, minimizing the risk of overwatering.
Q: Can I use this method for harvesting baby carrots?
A: Yes, this method is suitable for harvesting baby carrots as well. However, since baby carrots are smaller, you may not need to water as deeply or use as much force to extract them. A gentle tug after watering should be sufficient.
Q: What tools do I need for this DIY carrot harvest trick?
A: The beauty of this method is that it requires minimal tools. You’ll need a watering can, hose, or soaker hose to saturate the soil. A small trowel or garden fork can be helpful for creating a channel around the carrots, especially in compacted soil. Gloves are optional but recommended to keep your hands clean.
Q: My carrots are planted very close together. Will this method still work?
A: Yes, this method can still work even if your carrots are planted close together. However, you may need to be extra careful when pulling them out to avoid disturbing the roots of neighboring carrots. Using a trowel to gently loosen the soil around each carrot can be particularly helpful in this situation.
Q: I tried this method, but my carrots are still difficult to pull out. What am I doing wrong?
A: There could be a few reasons why you’re still having trouble. First, ensure that you’ve watered the carrots deeply enough and allowed sufficient time for the water to penetrate the soil. Second, check the soil type. Extremely compacted soil may require additional loosening with a garden fork. Finally, consider the variety of carrots you’re growing. Some varieties are naturally more difficult to harvest than others.
Q: How does this method compare to using a carrot harvesting tool?
A: Carrot harvesting tools can be helpful, but they’re not always necessary, especially with this DIY method. This trick offers a more natural and gentle approach, minimizing the risk of damaging the carrots. It’s also a more cost-effective solution, as it doesn’t require purchasing any specialized equipment. While a harvesting tool might offer a bit more leverage, this method prioritizes soil conditioning for easier extraction.
Leave a Comment