
DIY Peroxide Cleaners at Home: Unleash the Power of Bubbles for a Sparkling Clean! Are you tired of harsh chemicals and sky-high prices for your household cleaners? I know I was! That’s why I dove headfirst into the world of DIY cleaning solutions, and let me tell you, I’ve discovered a game-changer: hydrogen peroxide.
For generations, peroxide has been a trusted antiseptic, but its cleaning prowess extends far beyond first aid. Think about it – our grandmothers likely used it to brighten laundry and disinfect surfaces. It’s a time-tested solution with a modern twist! Today, with growing concerns about environmental impact and the desire to save money, creating your own DIY Peroxide Cleaners at Home is more relevant than ever.
But why should you bother making your own cleaners? Well, for starters, you control exactly what goes into them, avoiding those mystery ingredients listed on commercial bottles. Plus, it’s incredibly budget-friendly! Imagine the satisfaction of knowing you’re creating a safe, effective, and eco-conscious cleaning arsenal with just a few simple ingredients. In this article, I’m going to share my favorite DIY peroxide cleaner recipes and hacks that will transform your cleaning routine. Get ready to ditch the chemicals and embrace the bubbly brilliance of peroxide!
DIY Peroxide Cleaners: Your Guide to a Sparkling Home
Hey there, fellow DIY enthusiasts! I’m so excited to share my favorite peroxide cleaner recipes with you. Hydrogen peroxide is a fantastic, eco-friendly alternative to harsh chemical cleaners, and it’s incredibly versatile. Plus, it’s super affordable! Let’s dive into how you can create your own powerful cleaning solutions using this wonder ingredient.
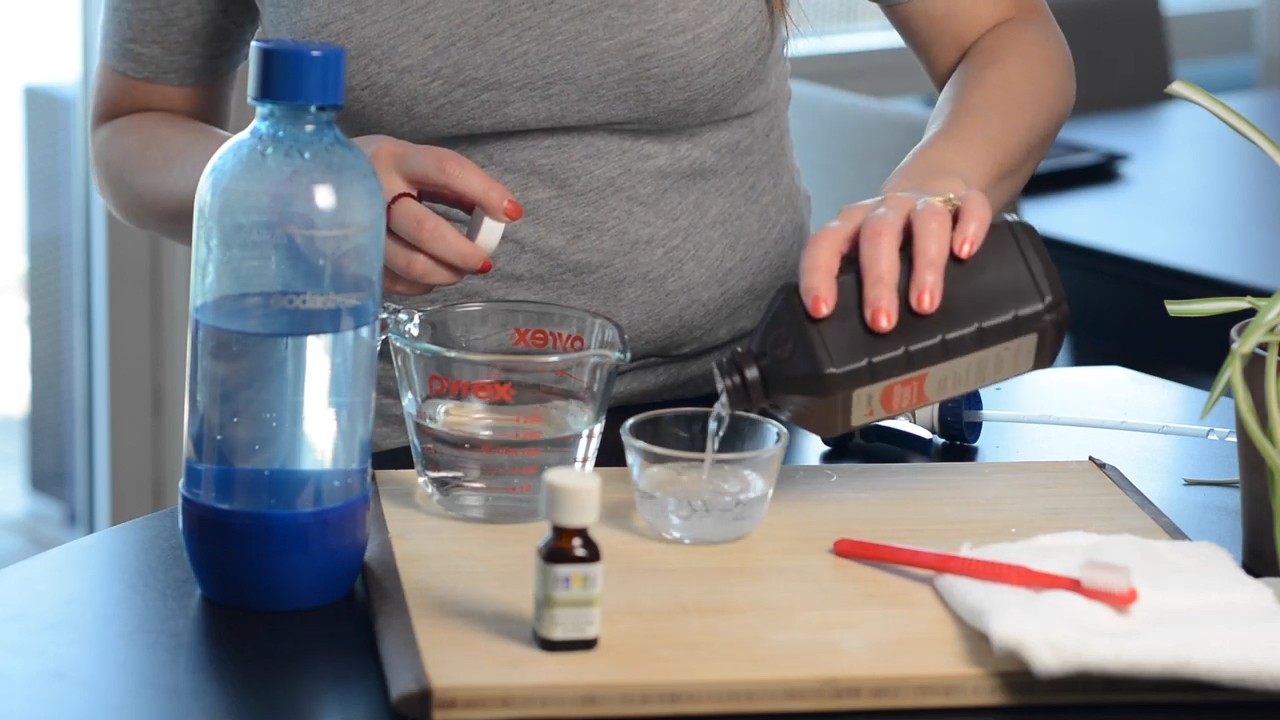
What You’ll Need (General Supplies)
Before we get started, let’s gather our supplies. Having everything on hand will make the process much smoother.
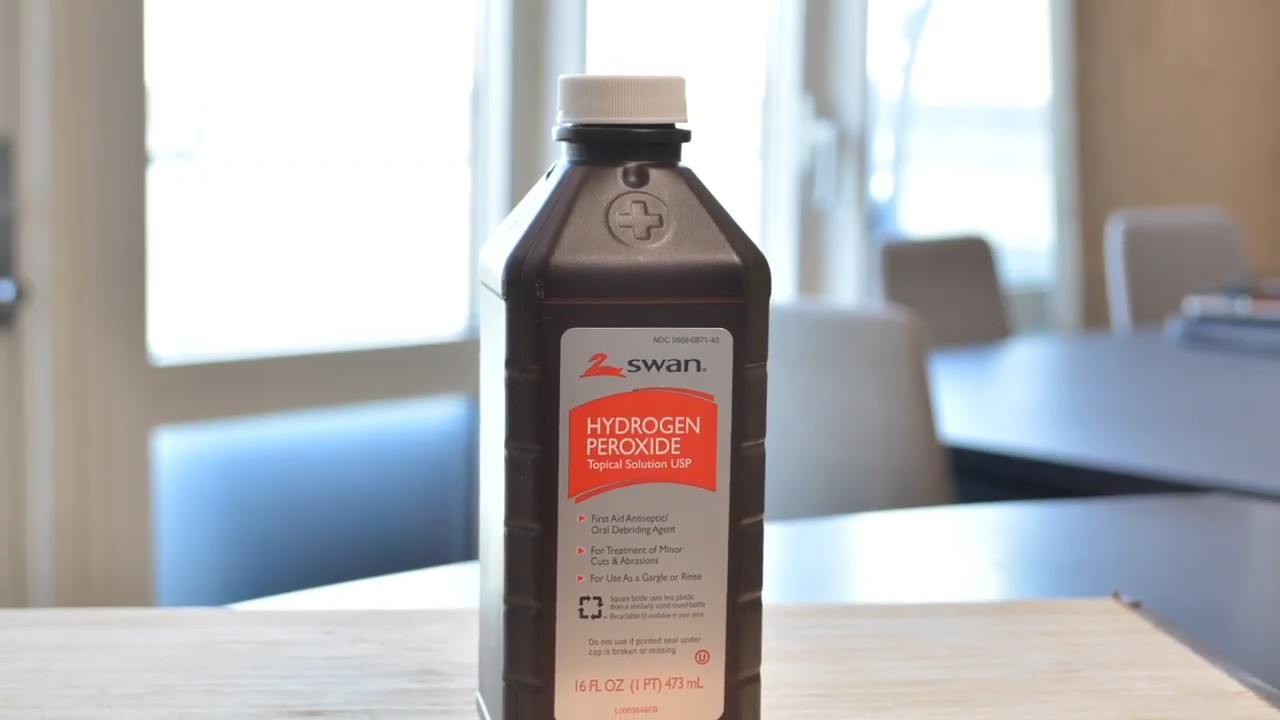
* Hydrogen Peroxide (3%): This is the standard concentration you’ll find at most drugstores.
* Spray Bottles: I recommend having a few on hand, clearly labeled. Dark-colored bottles are best for storing peroxide solutions long-term, as light can degrade it.
* Essential Oils (Optional): For fragrance and added cleaning power. Lemon, tea tree, eucalyptus, and lavender are great choices.
* Baking Soda: A natural deodorizer and mild abrasive.
* Vinegar: A powerful cleaner, but remember *never* mix it directly with peroxide in a closed container, as it can create peracetic acid, which is irritating. We’ll use them separately or in a diluted, controlled manner.
* Dish Soap: A degreaser and surfactant.
* Water: Distilled water is best to avoid mineral buildup, but tap water works fine too.
* Measuring Cups and Spoons: For accurate measurements.
* Funnel: To easily pour liquids into spray bottles.
* Gloves: To protect your hands, especially when dealing with concentrated solutions.
* Microfiber Cloths: For effective cleaning and polishing.
* Labels: To clearly identify your homemade cleaners.
General Safety Tips
Okay, before we start mixing things up, let’s talk safety. Even though hydrogen peroxide is relatively safe, it’s important to handle it with care.
* Always wear gloves to protect your skin from irritation.
* Avoid getting peroxide in your eyes. If you do, rinse immediately with plenty of water.
* Never mix peroxide with bleach. This creates toxic chlorine gas.
* Store peroxide solutions in dark, cool places to prevent degradation.
* Label all your homemade cleaners clearly to avoid confusion.
* Test any cleaner on an inconspicuous area first to ensure it doesn’t damage the surface.
* Ventilate the area well when cleaning, especially with stronger solutions.
Recipe 1: All-Purpose Peroxide Cleaner
This is my go-to cleaner for everyday messes. It’s gentle enough for most surfaces but still packs a punch.
Ingredients:
* 1 part 3% hydrogen peroxide
* 1 part water
* 5-10 drops of your favorite essential oil (optional)
Instructions:
1. Combine Ingredients: In a spray bottle, mix equal parts of 3% hydrogen peroxide and water.
2. Add Essential Oils (Optional): If you’re using essential oils, add 5-10 drops to the mixture. I love lemon for its fresh scent and antibacterial properties.
3. Shake Well: Secure the spray nozzle and shake the bottle well to combine all the ingredients.
4. Label: Label the bottle clearly as “All-Purpose Peroxide Cleaner.”
5. Use: Spray the cleaner onto the surface you want to clean, let it sit for a few minutes, and then wipe it away with a microfiber cloth.
Recipe 2: Peroxide and Baking Soda Scrub
This scrub is perfect for tackling tough stains and grime in the bathroom and kitchen.
Ingredients:
* 1/2 cup baking soda
* Enough 3% hydrogen peroxide to form a paste
Instructions:
1. Combine Ingredients: In a small bowl, mix the baking soda and hydrogen peroxide until you form a thick paste.
2. Apply: Apply the paste to the stained or grimy surface.
3. Let it Sit: Let the paste sit for 5-10 minutes. For really tough stains, you can let it sit longer.
4. Scrub: Use a scrub brush or sponge to scrub the surface.
5. Rinse: Rinse the surface thoroughly with water.
6. Dry: Wipe the surface dry with a clean cloth.
Recipe 3: Peroxide and Vinegar Disinfectant Spray (Use with Caution!)
Important Note: As I mentioned earlier, *never* mix peroxide and vinegar in a closed container. This recipe involves spraying them separately.
Ingredients:
* 3% hydrogen peroxide in a spray bottle
* White vinegar in a spray bottle
Instructions:
1. Spray Peroxide: Spray the surface with hydrogen peroxide.
2. Spray Vinegar: Immediately after, spray the same surface with white vinegar.
3. Let it Sit: Let the mixture sit for 5-10 minutes.
4. Wipe Clean: Wipe the surface clean with a microfiber cloth.
Why this works: When sprayed sequentially, the peroxide and vinegar create a powerful disinfecting action. This is great for cutting boards, countertops, and other surfaces that need extra sanitizing.
Recipe 4: Peroxide Toilet Bowl Cleaner
Keep your toilet sparkling clean with this simple recipe.
Ingredients:
* 1/2 cup 3% hydrogen peroxide
Instructions:
1. Pour Peroxide: Pour the hydrogen peroxide into the toilet bowl.
2. Let it Sit: Let it sit for 30 minutes.
3. Scrub: Scrub the bowl with a toilet brush.
4. Flush: Flush the toilet.
Recipe 5: Peroxide Laundry Booster
Brighten your whites and remove stains with this laundry booster.
Ingredients:
* 1 cup 3% hydrogen peroxide
Instructions:
1. Add to Washer: Add the hydrogen peroxide to your washing machine along with your regular detergent.
2. Wash as Usual: Wash your clothes as usual.
Important Note: Test on an inconspicuous area of colored fabrics first to ensure colorfastness.
Recipe 6: Peroxide and Dish Soap Stain Remover
This is my secret weapon for removing stubborn stains from clothing and carpets.
Ingredients:
* 1 part 3% hydrogen peroxide
* 1 part dish soap
Instructions:
1. Combine Ingredients: In a small bowl, mix equal parts of hydrogen peroxide and dish soap.
2. Apply to Stain: Apply the mixture directly to the stain.
3. Let it Sit: Let it sit for 10-15 minutes.
4. Blot: Blot the stain with a clean cloth.
5. Rinse: Rinse the area with water.
6. Dry: Blot dry with a clean cloth.
Important Note: Test on an inconspicuous area first to ensure colorfastness.
Recipe 7: Peroxide and Water for Grout Cleaning
This is a simple and effective way to brighten up your grout.
Ingredients:
* Equal parts 3% hydrogen peroxide and water
Instructions:
1. Mix Solution: Mix equal parts hydrogen peroxide and water in a spray bottle.
2. Spray Grout: Spray the grout lines with the solution.
3. Let it Sit: Let it sit for 10-15 minutes.
4. Scrub: Scrub the grout lines with a grout brush or old toothbrush.
5. Rinse: Rinse the area with water.
6. Dry: Wipe dry with a clean cloth.
Recipe 8: Peroxide for Cutting Board Sanitizing
Keep your cutting boards clean and sanitized with this simple method.
Ingredients:
* 3% hydrogen peroxide
Instructions:
1. Clean Board: Wash your cutting board with soap and water.
2. Spray Peroxide: Spray the cutting board with hydrogen peroxide.
3. Let it Sit: Let it sit for 5-10 minutes.
4. Rinse: Rinse the cutting board with water.
5. Dry: Let the cutting board air dry or wipe it dry with a clean cloth.
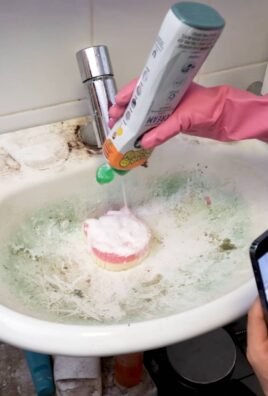
Recipe 9: Peroxide for Mold and Mildew Removal
Hydrogen peroxide can be effective in removing mold and mildew, especially in bathrooms.
Ingredients:
* 3% hydrogen peroxide
Instructions:
1. Spray Affected Area: Spray the mold or mildew-affected area with hydrogen peroxide.
2. Let it Sit: Let it sit for 10-15 minutes.
3.
Conclusion
So, there you have it! Ditching the harsh chemicals and embracing the power of DIY Peroxide Cleaners at home is not just a trend; it’s a smart, effective, and environmentally conscious choice. We’ve explored several fantastic recipes, each tailored to tackle specific cleaning challenges around your house. From disinfecting countertops to brightening laundry and even tackling stubborn bathroom grime, hydrogen peroxide proves to be a versatile and surprisingly potent cleaning agent.
Why is this a must-try? Because you’re not just cleaning; you’re creating a healthier home environment. You’re reducing your exposure to potentially harmful chemicals found in many commercial cleaners, and you’re saving money in the process. Plus, you’re contributing to a more sustainable lifestyle by reducing plastic waste from disposable bottles. It’s a win-win-win!
But the beauty of DIY lies in its adaptability. Feel free to experiment with these recipes to suit your specific needs and preferences. For instance, if you’re sensitive to scents, you can omit the essential oils altogether or opt for milder options like lavender or chamomile. If you’re dealing with particularly tough stains, consider increasing the concentration of hydrogen peroxide slightly, but always test on an inconspicuous area first to ensure it doesn’t damage the surface.
Consider adding a tablespoon of washing soda to your peroxide and baking soda mix for extra cleaning power on greasy surfaces. For a refreshing citrus scent, infuse your peroxide solution with lemon or orange peels for a few days before using it. You can even create a specialized carpet cleaner by adding a few drops of tea tree oil to your peroxide solution, which will help to disinfect and deodorize your carpets.
Remember, safety first! Always wear gloves when handling hydrogen peroxide, and avoid mixing it with vinegar or bleach, as this can create dangerous fumes. Store your DIY Peroxide Cleaners in clearly labeled spray bottles, away from direct sunlight and out of reach of children and pets.
We’re confident that once you experience the cleaning power and versatility of DIY Peroxide Cleaners, you’ll never go back to those harsh, chemical-laden alternatives. It’s a simple, effective, and rewarding way to keep your home sparkling clean and healthy.
Now, it’s your turn! We encourage you to try these recipes and discover the magic of DIY Peroxide Cleaners for yourself. Don’t be afraid to experiment and find what works best for you and your home. And most importantly, share your experiences with us! Let us know which recipes you tried, what variations you created, and how they worked for you. Your feedback will not only help us improve these recipes but also inspire others to embrace the power of DIY cleaning. Share your tips, tricks, and before-and-after photos on our social media channels using #DIYPeroxideCleaners. We can’t wait to see your sparkling results!
Frequently Asked Questions (FAQs)
Is hydrogen peroxide safe to use around children and pets?
While hydrogen peroxide is generally considered safe when used properly, it’s crucial to exercise caution around children and pets. Always store hydrogen peroxide and DIY Peroxide Cleaners out of their reach, preferably in a locked cabinet. When cleaning, ensure the area is well-ventilated and allow surfaces to dry completely before allowing children or pets to access them. Ingesting hydrogen peroxide can cause irritation and discomfort, so it’s essential to prevent accidental ingestion. If ingestion occurs, contact a medical professional or veterinarian immediately.
What surfaces can I safely clean with hydrogen peroxide?
Hydrogen peroxide is generally safe for use on a wide variety of surfaces, including countertops, sinks, toilets, showers, floors, and appliances. However, it’s always a good idea to test it on an inconspicuous area first, especially on delicate or porous surfaces like wood, fabric, or painted walls. Avoid using hydrogen peroxide on surfaces that are sensitive to bleaching, such as colored fabrics or dark-colored grout. When cleaning electronics, always unplug the device and apply the peroxide solution to a cloth rather than directly spraying it onto the device.
What is the difference between different concentrations of hydrogen peroxide?
Hydrogen peroxide is available in various concentrations, typically ranging from 3% to 35%. The 3% concentration is the most common and is generally safe for household cleaning purposes. Higher concentrations, such as 35%, are much stronger and should be handled with extreme caution. They can cause skin and eye irritation and should only be used by experienced individuals with proper safety equipment. For most DIY cleaning recipes, the 3% concentration is sufficient.
Can I mix hydrogen peroxide with other cleaning agents?
It’s crucial to avoid mixing hydrogen peroxide with certain cleaning agents, particularly vinegar and bleach. Mixing hydrogen peroxide with vinegar can create peracetic acid, which is a toxic and irritating compound. Mixing hydrogen peroxide with bleach can create chlorine gas, which is extremely dangerous and can cause respiratory problems and even death. Always use hydrogen peroxide on its own or in combination with ingredients specifically mentioned in the recipes, such as baking soda, dish soap, or essential oils.
How should I store my DIY Peroxide Cleaners?
Store your DIY Peroxide Cleaners in clearly labeled spray bottles, preferably made of dark-colored plastic to protect the hydrogen peroxide from light. Keep the bottles in a cool, dark place, away from direct sunlight and heat. This will help to preserve the effectiveness of the solution. Always store the bottles out of reach of children and pets. It’s also a good idea to label the bottles with the date of preparation, as the hydrogen peroxide may lose its potency over time.
How long do DIY Peroxide Cleaners last?
The effectiveness of DIY Peroxide Cleaners can diminish over time as the hydrogen peroxide decomposes. Generally, the solution will remain effective for about one to three months. To maximize its shelf life, store it properly in a dark, cool place. If you notice that the solution is no longer producing bubbles when sprayed or that it’s not cleaning as effectively, it’s time to make a fresh batch.
Can I use hydrogen peroxide to clean my laundry?
Yes, hydrogen peroxide is an excellent laundry booster and stain remover. Add one cup of 3% hydrogen peroxide to your washing machine along with your regular detergent to brighten whites and remove stains. For particularly stubborn stains, you can pre-treat the fabric by applying hydrogen peroxide directly to the stain and letting it sit for 10-15 minutes before washing. However, always test the peroxide on an inconspicuous area of the fabric first to ensure it doesn’t cause discoloration. Avoid using hydrogen peroxide on delicate fabrics like silk or wool.
Is hydrogen peroxide environmentally friendly?
Yes, hydrogen peroxide is considered an environmentally friendly cleaning agent. It decomposes into water and oxygen, which are harmless to the environment. This makes it a much more sustainable alternative to many commercial cleaners that contain harsh chemicals that can pollute waterways and harm aquatic life. By using DIY Peroxide Cleaners, you’re reducing your environmental footprint and contributing to a healthier planet.
Can I use hydrogen peroxide to disinfect surfaces?
Yes, hydrogen peroxide is an effective disinfectant. To disinfect surfaces, spray them with a 3% hydrogen peroxide solution and let it sit for at least 10 minutes before wiping it clean. This will kill most bacteria and viruses. Hydrogen peroxide is particularly useful for disinfecting kitchen countertops, bathroom surfaces, and cutting boards.
What if I have sensitive skin?
If you have sensitive skin, it’s essential to wear gloves when handling hydrogen peroxide and DIY Peroxide Cleaners. You can also dilute the solution further to reduce its concentration. If you experience any skin irritation, discontinue use and rinse the affected area with water. You may also want to consult with a dermatologist before using hydrogen peroxide on a regular basis.

Leave a Comment