
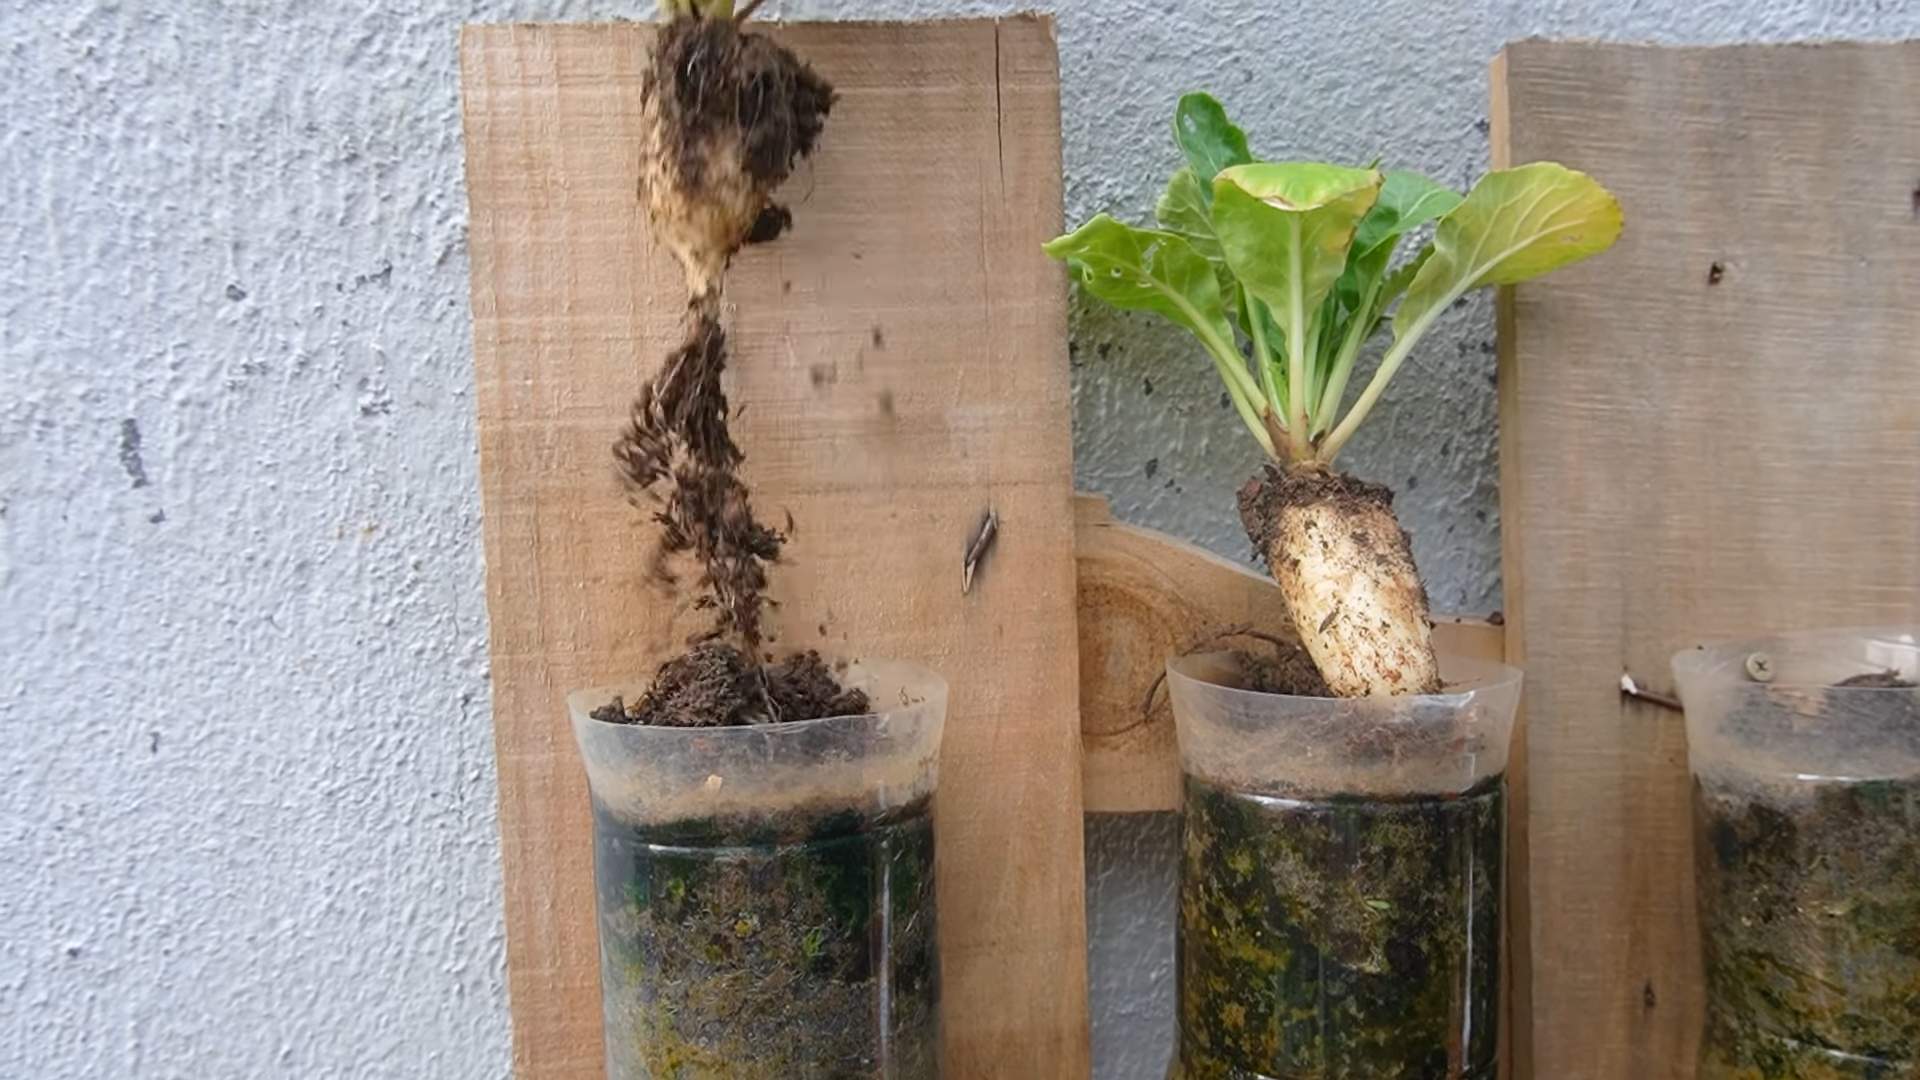
Grow White Radish Year Round? Absolutely! Imagine fresh, crisp radishes gracing your table no matter the season. It sounds like a dream, right? But with a few clever tricks and a little DIY spirit, it’s totally achievable. For centuries, cultures around the globe have cherished radishes, not just for their peppery bite, but also for their nutritional value and ease of cultivation. From ancient Egypt, where they were a staple food, to modern-day salads, radishes have proven their staying power.
But let’s face it, traditional gardening can be tricky. We’ve all been there – eagerly planting seeds only to be met with disappointment when the weather throws a curveball. That’s where these DIY hacks come in! I’m going to share some simple, effective techniques that will allow you to grow white radish year round, regardless of your climate or experience level. Think of it as unlocking the secret to a constant supply of fresh, homegrown goodness. No more sad, store-bought radishes! Get ready to roll up your sleeves and discover how to enjoy the satisfying crunch of homegrown radishes all year long.
Growing Sweet Potatoes in Containers: A Beginner’s Guide
Hey there, fellow gardening enthusiasts! I’m so excited to share my experience growing sweet potatoes in containers. It’s a surprisingly easy and rewarding project, even if you don’t have a huge garden. Trust me, there’s nothing quite like harvesting your own homegrown sweet potatoes. Let’s dive in!
Choosing the Right Sweet Potato Variety
Before we get our hands dirty, let’s talk about sweet potato varieties. Not all sweet potatoes are created equal, especially when it comes to container gardening. Some varieties are bushier and more compact, making them ideal for pots, while others are sprawling vines that need a lot of space.
Here are a few of my favorite varieties for container growing:
* ‘Bush Porto Rico’: This is a classic choice, known for its compact growth habit and delicious, orange-fleshed potatoes. It’s a reliable producer and relatively easy to find.
* ‘Georgia Jet’: If you’re looking for a faster-maturing variety, ‘Georgia Jet’ is a great option. It produces large, reddish-skinned potatoes with sweet, moist flesh.
* ‘Beauregard’: This is a widely popular variety, known for its disease resistance and high yields. It produces beautiful, copper-skinned potatoes with orange flesh.
* ‘Centennial’: Another excellent choice for containers, ‘Centennial’ produces medium-sized, orange-fleshed potatoes with a slightly drier texture.
Preparing Your Sweet Potato Slips
Okay, now for the fun part: growing sweet potato slips! Slips are basically sprouts that grow from the sweet potato itself, and they’re what you’ll plant in your container. You can either buy slips from a nursery or grow your own. I personally prefer growing my own because it’s super satisfying and saves money.
Here’s how to grow your own sweet potato slips:
1. Choose a Healthy Sweet Potato: Select a firm, healthy sweet potato from your local grocery store or farmers market. Organic sweet potatoes are preferable, as they are less likely to be treated with sprout inhibitors.
2. Prepare the Sweet Potato: There are two main methods for sprouting sweet potatoes: water propagation and soil propagation. I usually go with water propagation because I can see the roots developing.
* Water Propagation: Insert toothpicks around the middle of the sweet potato, spacing them evenly. Suspend the sweet potato in a jar or glass filled with water, ensuring that the bottom half of the sweet potato is submerged.
* Soil Propagation: Bury the sweet potato horizontally in a container filled with moist potting mix, leaving the top third exposed.
3. Provide Warmth and Light: Place the jar or container in a warm, sunny location. A temperature of around 75-85°F (24-29°C) is ideal.
4. Maintain Moisture: Change the water in the jar every few days to prevent algae growth. For soil propagation, keep the potting mix consistently moist but not soggy.
5. Wait for Slips to Grow: After a few weeks, you should start to see sprouts (slips) emerging from the sweet potato. Let the slips grow to about 6-8 inches long before harvesting them.
6. Harvest the Slips: Once the slips are ready, gently twist or cut them off the sweet potato.
7. Root the Slips (Optional): You can root the slips in water before planting them in your container. Place the slips in a glass of water, ensuring that the bottom inch or two is submerged. Roots should develop within a few days. This step isn’t strictly necessary, but it can help the slips establish themselves more quickly in the container.
Preparing Your Container and Soil
Now that you have your sweet potato slips, it’s time to prepare your container and soil.
1. Choose the Right Container: Sweet potatoes need plenty of room to grow, so choose a large container that’s at least 20 gallons in size. A half-barrel planter or a large plastic tub works well. Make sure the container has drainage holes to prevent waterlogging.
2. Select a High-Quality Potting Mix: Use a well-draining potting mix that’s rich in organic matter. Avoid using garden soil, as it can be too heavy and compact for container gardening. I like to mix equal parts of potting soil, compost, and perlite to create a light and airy growing medium.
3. Add Slow-Release Fertilizer: Sweet potatoes are heavy feeders, so it’s a good idea to add a slow-release fertilizer to the potting mix at planting time. Choose a fertilizer that’s specifically formulated for vegetables. Follow the instructions on the fertilizer package for application rates.
Planting Your Sweet Potato Slips
Alright, the moment we’ve been waiting for: planting the slips!
1. Water the Potting Mix: Before planting, thoroughly water the potting mix in your container. This will help settle the soil and provide moisture for the slips.
2. Dig Holes for the Slips: Dig holes in the potting mix that are deep enough to accommodate the roots of the slips. Space the holes about 12 inches apart.
3. Plant the Slips: Gently place the slips in the holes, making sure that the roots are covered with soil. Backfill the holes with potting mix and gently firm the soil around the slips.
4. Water Again: Water the newly planted slips thoroughly.
5. Mulch (Optional): Add a layer of mulch around the base of the plants to help retain moisture and suppress weeds. Straw, wood chips, or shredded bark work well.
Caring for Your Sweet Potato Plants
Once your sweet potato slips are planted, it’s important to provide them with the right care to ensure a bountiful harvest.
1. Sunlight: Sweet potatoes need at least 6-8 hours of direct sunlight per day. Place your container in a sunny location where it will receive plenty of light.
2. Watering: Water your sweet potato plants regularly, especially during hot, dry weather. Keep the soil consistently moist but not soggy. Check the soil moisture by sticking your finger into the soil. If the top inch of soil feels dry, it’s time to water.
3. Fertilizing: Sweet potatoes are heavy feeders, so you’ll need to fertilize them regularly throughout the growing season. Use a balanced liquid fertilizer every 2-3 weeks. Follow the instructions on the fertilizer package for application rates.
4. Pruning (Optional): Sweet potato vines can be quite vigorous, so you may need to prune them to keep them under control. You can trim the vines back to encourage bushier growth and prevent them from taking over your container.
5. Pest and Disease Control: Sweet potatoes are generally resistant to pests and diseases, but it’s still a good idea to keep an eye out for any problems. Common pests that can affect sweet potatoes include aphids, flea beetles, and sweet potato weevils. Diseases that can affect sweet potatoes include fungal diseases like fusarium wilt and black rot. If you notice any signs of pests or diseases, take action promptly to prevent them from spreading. Insecticidal soap or neem oil can be used to control many common pests. Fungicides can be used to treat fungal diseases.
Harvesting Your Sweet Potatoes
The most exciting part of growing sweet potatoes is, of course, harvesting them! Sweet potatoes are typically ready to harvest about 90-120 days after planting.
1. Knowing When to Harvest: The best time to harvest sweet potatoes is before the first frost. The leaves will start to turn yellow and die back, indicating that the potatoes are ready.
2. Harvesting Carefully: Gently dig around the base of the plant with a garden fork or shovel, being careful not to damage the potatoes. Lift the plant out of the container and carefully remove the potatoes from the soil.
3. Curing Your Sweet Potatoes: Curing is an important step in the sweet potato harvesting process. It helps to heal any wounds on the potatoes and improves their flavor and storage life. To cure sweet potatoes, place them in a warm, humid location (around 80-85°F or 27-29°C) for 7-10 days. A garage or shed works well.
4. Storing Your Sweet Potatoes: After curing, store your sweet potatoes in a cool, dry, and dark place. A temperature of around 55-60°F (13-16°C) is ideal. Sweet potatoes can be stored for several months under the right conditions.
Troubleshooting Common Problems
Even with the best care, you may encounter some problems when growing sweet potatoes in containers. Here are a few common issues and how to address them:
* Yellowing Leaves: Yellowing leaves can be a sign of nutrient deficiency, overwatering, or underwatering. Check the soil moisture and fertilize your plants if necessary.
* Slow Growth: Slow growth can be caused by insufficient sunlight, poor soil,
Conclusion
So, there you have it! Mastering the art of growing white radish year-round is not only achievable but also incredibly rewarding. We’ve walked through the essential steps, from selecting the right varieties to implementing protective measures against the elements. But why should you embark on this journey?
Firstly, imagine the satisfaction of harvesting crisp, peppery white radishes from your own garden, regardless of the season. No more relying on supermarket produce that may lack the freshness and flavor of homegrown vegetables. You’ll have access to a continuous supply of these versatile roots, ready to add a zesty kick to your salads, stir-fries, or even enjoyed as a simple, healthy snack.
Secondly, growing your own food is an empowering experience. It connects you to the natural world, reduces your carbon footprint, and allows you to control the quality of what you eat. Knowing exactly where your food comes from and how it was grown is a priceless benefit in today’s world.
Thirdly, this DIY trick for year-round radish cultivation is surprisingly simple and adaptable. While we’ve focused on white radishes, the principles can be applied to other radish varieties as well. Experiment with different types, such as French Breakfast radishes or Watermelon radishes, to add variety to your harvest. You can also adjust the timing of your plantings to suit your local climate and personal preferences.
Consider these variations to elevate your radish-growing game:
* Succession Planting on Steroids: Instead of planting every two weeks, try planting a small batch every week. This ensures a truly continuous harvest, preventing gluts and shortages.
* Companion Planting Power: Radishes are excellent companion plants. Plant them alongside carrots to deter carrot root flies, or near lettuce to attract beneficial insects.
* Container Gardening Convenience: If you’re short on space, don’t despair! White radishes thrive in containers. Choose a pot that’s at least 6 inches deep and wide, and use a well-draining potting mix.
* Spicy Sprouts: Don’t discard the radish tops! They’re edible and delicious. Add them to salads, stir-fries, or even use them to make pesto. They have a peppery bite similar to arugula.
* Winter Warmth: For those in colder climates, consider using a cold frame or greenhouse to extend the growing season even further. These structures provide extra protection from frost and wind, allowing you to harvest radishes throughout the winter months.
We’ve provided you with the knowledge and tools to succeed. Now, it’s time to put them into practice. Don’t be afraid to experiment, learn from your mistakes, and adapt the techniques to your specific circumstances. The joy of growing your own food is in the journey, not just the destination.
So, grab your seeds, prepare your soil, and get ready to enjoy a year-round harvest of delicious, homegrown white radishes. We’re confident that you’ll be amazed by the results.
Finally, we encourage you to share your experiences with us and other readers. What challenges did you encounter? What successes did you celebrate? What variations did you try? Your insights will help others on their own radish-growing adventures. Share your photos, tips, and stories in the comments section below. Let’s build a community of passionate gardeners who are dedicated to growing fresh, healthy food all year round. Let’s all become experts at growing white radish year-round!
Frequently Asked Questions (FAQ)
1. What is the best time of year to plant white radishes?
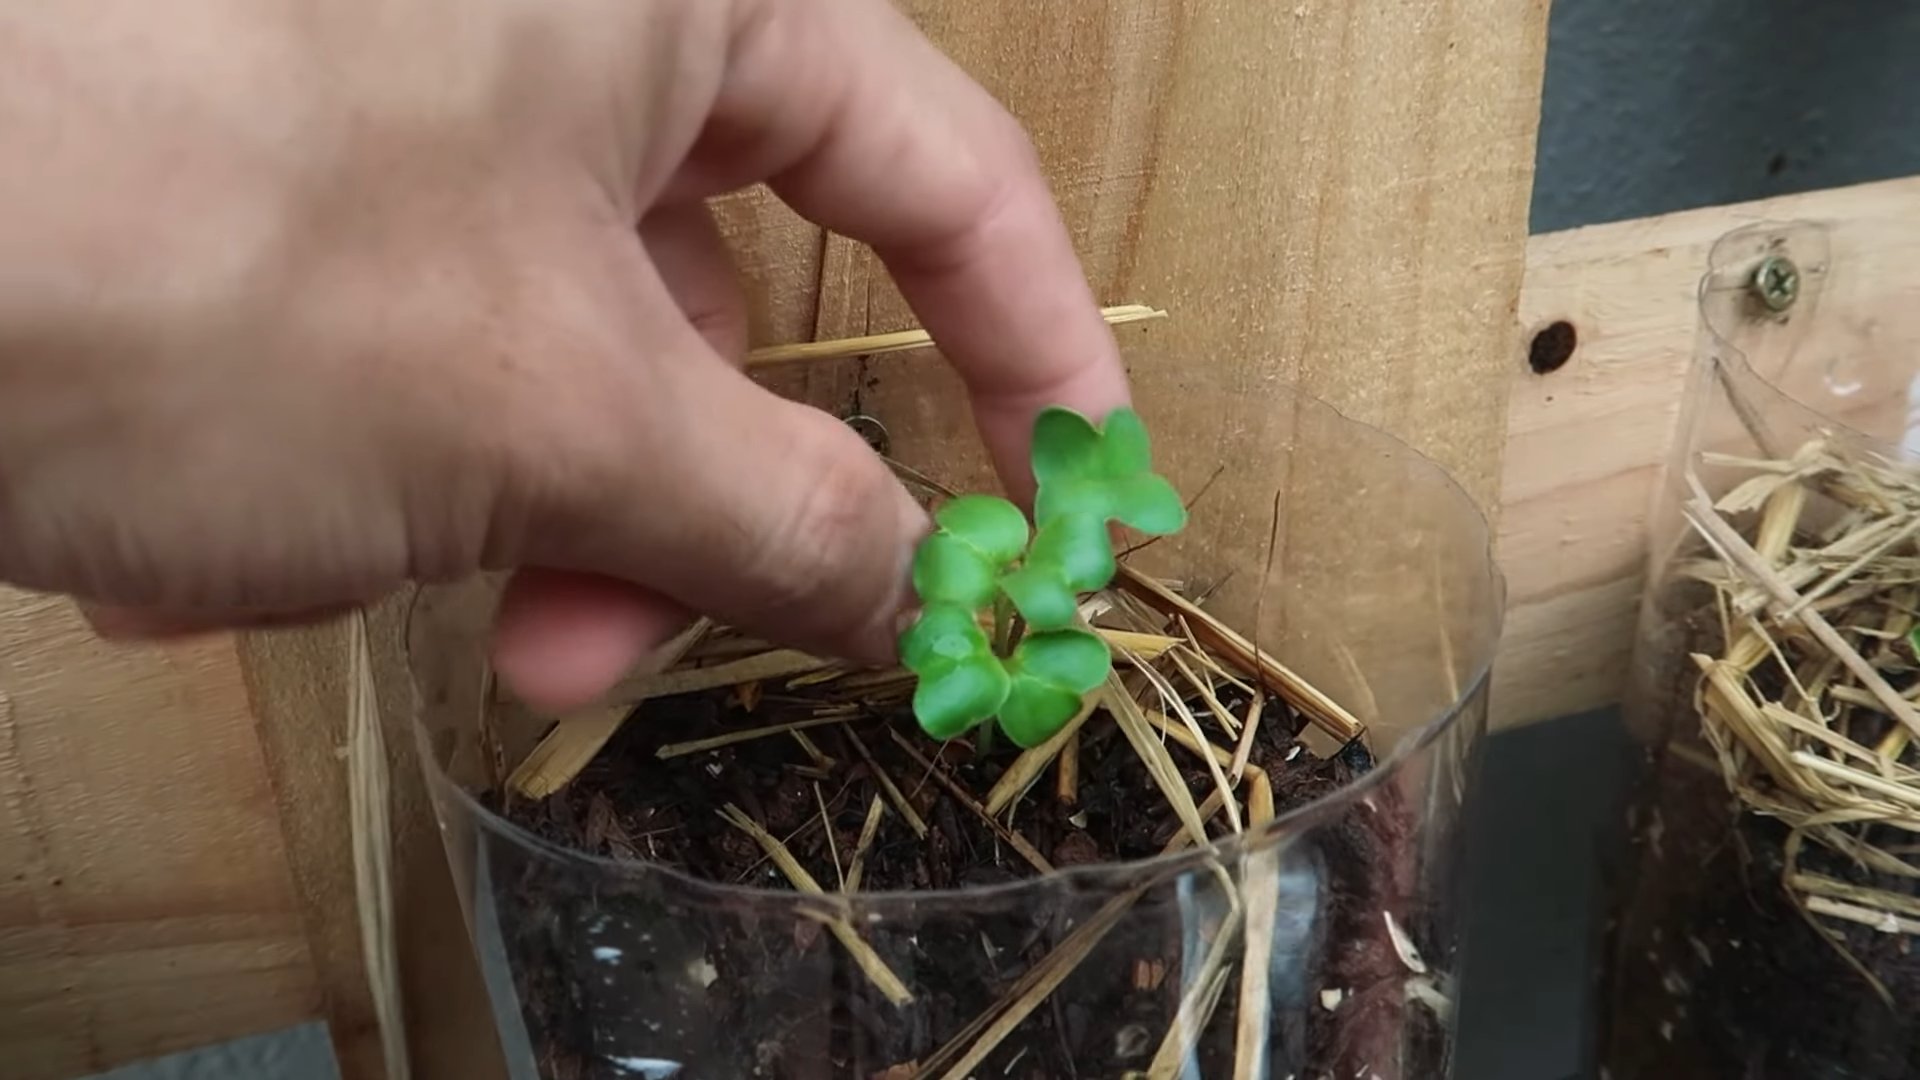
The beauty of this DIY trick is that you can plant white radishes year-round! However, the specific timing will depend on your local climate. In general, radishes prefer cool weather, so spring and fall are ideal. In warmer climates, you can plant them throughout the winter. In hot summer months, provide shade and extra watering to prevent bolting (premature flowering). Succession planting, sowing seeds every two weeks, is key to a continuous harvest.
2. What kind of soil do white radishes need?
White radishes prefer well-drained, loose soil that is rich in organic matter. Amend your soil with compost or well-rotted manure before planting. Avoid heavy clay soils, as they can hinder root development. A slightly acidic to neutral pH (6.0-7.0) is ideal. If your soil is compacted, consider adding sand or perlite to improve drainage.
3. How much sunlight do white radishes need?
White radishes need at least 6 hours of sunlight per day. However, in hot summer months, they will benefit from some afternoon shade. If you’re growing them indoors, use grow lights to supplement natural sunlight. Insufficient sunlight can result in leggy growth and poor root development.
4. How often should I water white radishes?
White radishes need consistent moisture to thrive. Water them regularly, especially during dry periods. Aim to keep the soil consistently moist but not waterlogged. Overwatering can lead to root rot. A good rule of thumb is to water deeply when the top inch of soil feels dry to the touch. Mulching around the plants can help retain moisture and suppress weeds.
5. How long does it take for white radishes to mature?
White radishes are one of the fastest-growing vegetables. They typically mature in just 3-4 weeks. This makes them a great choice for impatient gardeners! Check the seed packet for specific maturity times for the variety you are growing.
6. How do I know when my white radishes are ready to harvest?
White radishes are ready to harvest when the roots are about 1 inch in diameter. Gently loosen the soil around the radish and pull it out of the ground. Don’t let them get too large, as they can become woody and bitter.
7. What are some common problems when growing white radishes?
Some common problems when growing white radishes include:
* Bolting: This is when the radish plant prematurely flowers, resulting in a bitter-tasting root. Bolting is often caused by hot weather or inconsistent watering.
* Root maggots: These pests can tunnel into the roots, causing damage and decay. Use row covers to prevent root maggots from laying their eggs near your radishes.
* Flea beetles: These tiny beetles can chew holes in the leaves of radish plants. Use insecticidal soap or diatomaceous earth to control flea beetles.
* Cracked roots: This can be caused by inconsistent watering or nutrient deficiencies. Ensure that your radishes receive consistent moisture and are grown in fertile soil.
8. Can I grow white radishes in containers?
Yes, white radishes are well-suited to container gardening. Choose a pot that is at least 6 inches deep and wide, and use a well-draining potting mix. Water regularly and fertilize with a balanced fertilizer.
9. What are some ways to use white radishes in cooking?
White radishes are incredibly versatile in the kitchen. They can be eaten raw in salads, sliced and added to sandwiches, or pickled. They can also be cooked in stir-fries, soups, and stews. The radish greens are also edible and can be used in salads or stir-fries.
10. Can I save seeds from my white radishes?
Yes, you can save seeds from your white radishes, but it requires allowing the plants to bolt and produce seed pods. However, radishes are cross-pollinated, so the seeds may not be true to type. If you want to save seeds, isolate your radish plants from other radish varieties. Allow the seed pods to dry on the plant, then harvest them and extract the seeds. Store the seeds in a cool, dry place.
Leave a Comment