
Grow Bag Watermelon Growing Tips: Unlock the secrets to cultivating juicy, homegrown watermelons right in your own backyard, even if you’re short on space! Have you ever dreamed of biting into a perfectly ripe, sweet watermelon you grew yourself? It’s easier than you think, and this DIY guide will show you how to make that dream a reality using grow bags.
Watermelons have a rich history, dating back thousands of years to Africa, where they were prized for their hydrating properties in arid climates. Over time, different varieties were cultivated, and the fruit spread across the globe, becoming a symbol of summer and refreshment. Today, we’re bringing this ancient tradition into the modern era with a space-saving twist.
Why grow watermelons in grow bags? Well, traditional watermelon growing can be challenging, requiring a lot of space and specific soil conditions. But with grow bag watermelon growing tips, you can overcome these obstacles! Grow bags offer excellent drainage, aeration, and portability, making them ideal for small gardens, patios, or balconies. Plus, they warm up faster than the ground, giving your watermelon plants a head start. I’m excited to share these simple yet effective techniques that will empower you to enjoy the taste of summer, no matter where you live. Let’s get growing!
Grow Watermelons Like a Pro: My Guide to Thriving Watermelons in Grow Bags
Hey there, fellow gardening enthusiasts! I’m so excited to share my secrets for growing juicy, delicious watermelons right in grow bags. Forget sprawling vines taking over your entire garden – with this method, you can enjoy homegrown watermelons even if you have limited space. I’ve experimented with this for a few seasons now, and trust me, the results are amazing. Let’s dive in!
Choosing the Right Grow Bag and Variety
Before we get our hands dirty, let’s talk about the essentials: the grow bag and the watermelon variety. This is crucial for success!
* Grow Bag Size: This is non-negotiable. You need a large grow bag, at least 20 gallons, but I highly recommend 25-30 gallons for optimal growth. Watermelons have extensive root systems, and they need plenty of room to spread out. Anything smaller, and you’ll likely end up with stunted growth and disappointing fruit. I personally prefer fabric grow bags because they allow for better drainage and aeration, preventing root rot.
* Watermelon Variety: Not all watermelons are created equal, especially when it comes to grow bags. Look for bush or compact varieties. These are bred to be smaller and more manageable, perfect for container gardening. Here are a few of my favorites:
* Bush Sugar Baby: A classic choice! It produces small, sweet watermelons that are ready to harvest relatively quickly.
* Bush Jubilee: Similar to Sugar Baby, but with slightly larger fruit.
* Golden Midget: A unique variety with yellow flesh and a compact vine.
* Tiger Baby: A personal favorite! It has beautiful striped skin and incredibly sweet, crisp flesh.
Avoid large, vining varieties like Charleston Gray or Crimson Sweet. They’ll quickly outgrow your grow bag and become unmanageable.
* Soil: Watermelons are heavy feeders, so you need a rich, well-draining soil mix. I like to create my own blend using equal parts:
* Compost: Provides essential nutrients and improves soil structure.
* Coco Coir or Peat Moss: Helps retain moisture while still allowing for good drainage.
* Perlite or Vermiculite: Improves aeration and drainage.
* Slow-Release Fertilizer: This will provide a steady supply of nutrients throughout the growing season. Look for a balanced fertilizer with a ratio like 10-10-10 or 14-14-14.
Planting Your Watermelon Seedlings
Now for the fun part! Let’s get those watermelon seedlings planted.
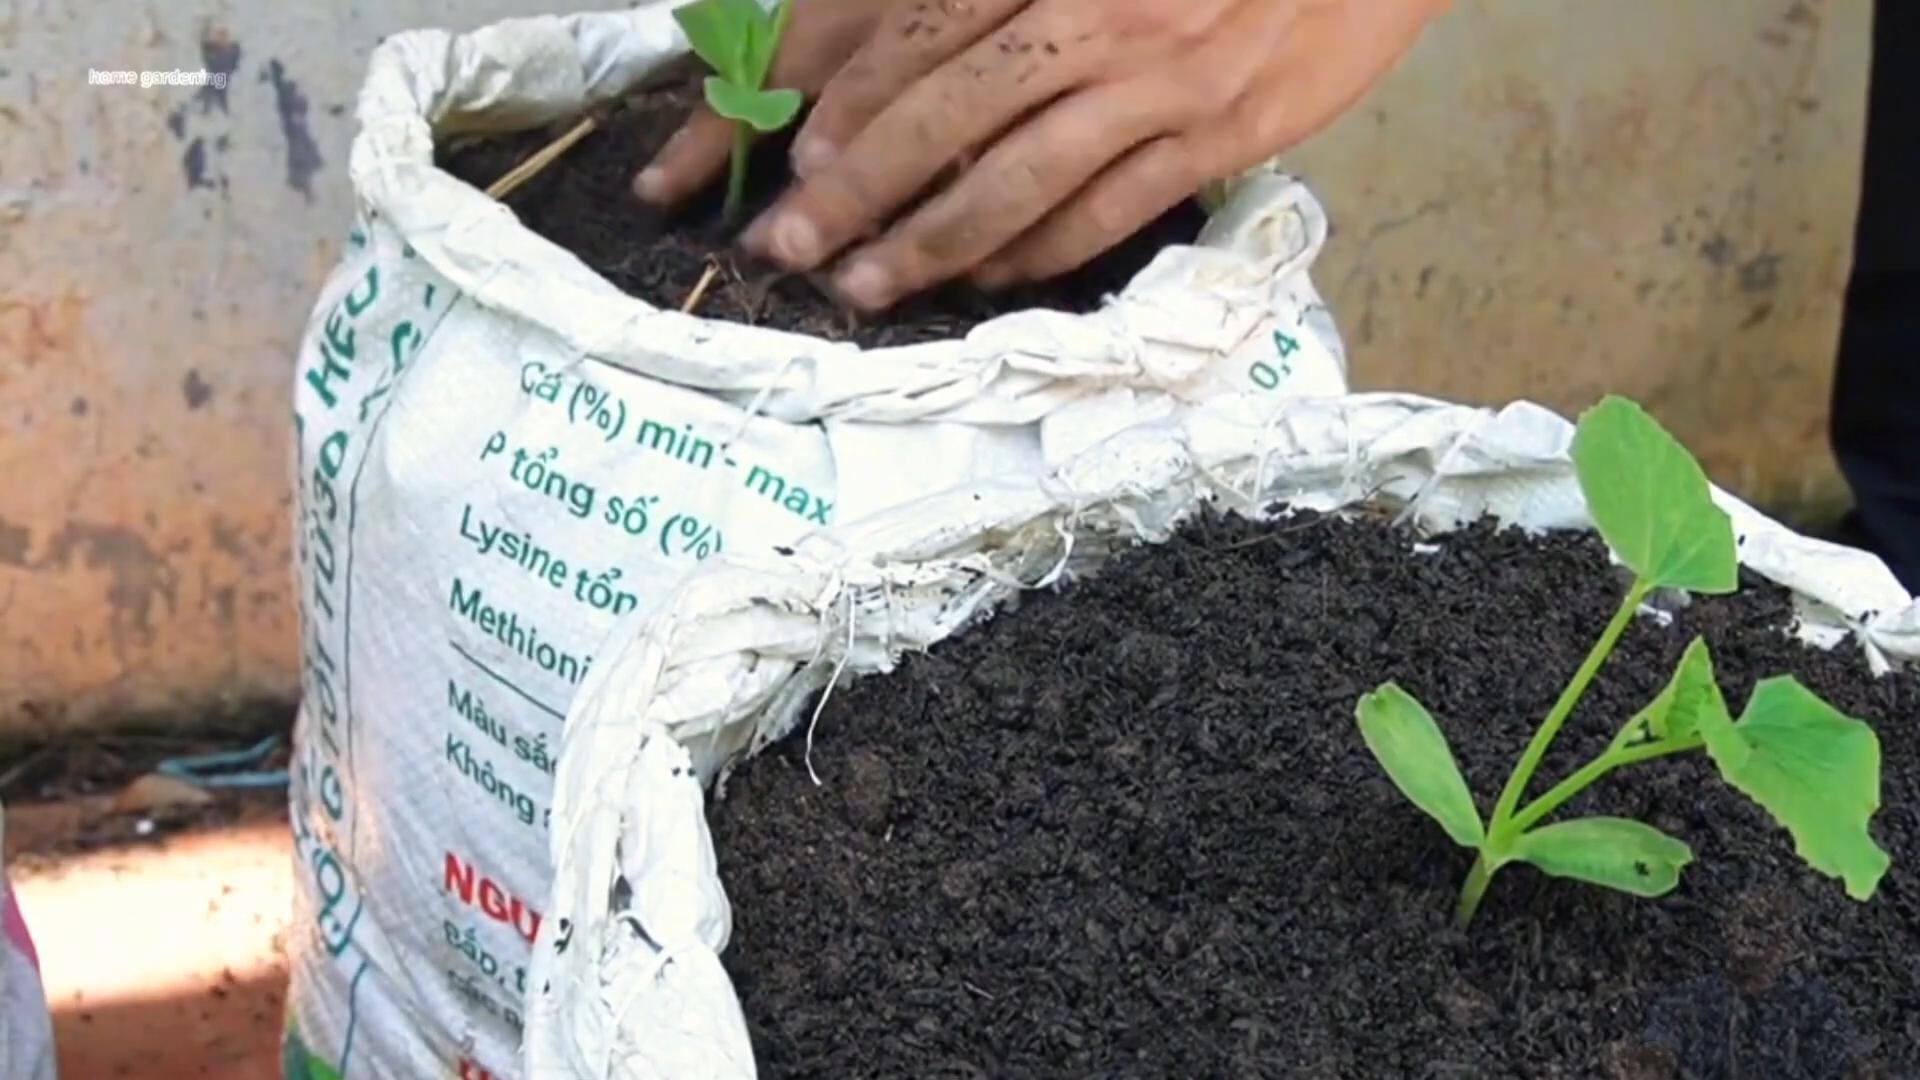
1. Prepare the Grow Bag: Fill your grow bag with your prepared soil mix, leaving about 2-3 inches of space at the top. Gently pat down the soil to remove any air pockets.
2. Water Thoroughly: Water the soil until it’s evenly moist but not soggy. This will help settle the soil and prepare it for planting.
3. Dig a Hole: Dig a hole in the center of the grow bag that’s large enough to accommodate the root ball of your watermelon seedling.
4. Carefully Remove the Seedling: Gently remove the seedling from its container, being careful not to damage the roots. If the roots are tightly bound, gently loosen them with your fingers.
5. Plant the Seedling: Place the seedling in the hole and backfill with soil, making sure the top of the root ball is level with the surrounding soil.
6. Water Again: Water the seedling thoroughly to help it establish its roots.
7. Mulch (Optional): Add a layer of mulch around the base of the plant to help retain moisture, suppress weeds, and regulate soil temperature. I like to use straw or shredded bark.
Caring for Your Watermelon Plants
Watermelons need consistent care to thrive. Here’s what you need to do:
* Watering: Watermelons need plenty of water, especially during hot weather and when the fruit is developing. Check the soil moisture regularly and water deeply whenever the top inch of soil feels dry. Avoid overhead watering, as this can lead to fungal diseases. I prefer to water at the base of the plant.
* Fertilizing: Watermelons are heavy feeders, so you’ll need to fertilize them regularly. In addition to the slow-release fertilizer you added at planting, I recommend feeding them with a liquid fertilizer every 2-3 weeks. Look for a fertilizer that’s high in phosphorus and potassium, which are essential for fruit development. I like to use a diluted seaweed emulsion or fish emulsion.
* Sunlight: Watermelons need at least 6-8 hours of direct sunlight per day. Make sure your grow bag is placed in a sunny location.
* Pruning: While you don’t need to prune bush varieties extensively, you can remove any dead or yellowing leaves to improve air circulation.
* Pollination: Watermelons need to be pollinated to produce fruit. If you’re growing your watermelons indoors or in an area with limited bee activity, you may need to hand-pollinate them. To do this, use a small paintbrush to transfer pollen from the male flowers to the female flowers. Female flowers have a small, immature watermelon at the base of the flower.
* Support: As your watermelons grow, they may need some support to prevent them from breaking the vines. You can use a sling made from pantyhose or netting to support the fruit.
Dealing with Pests and Diseases
Even in grow bags, watermelons can be susceptible to pests and diseases. Here’s how to deal with them:
* Common Pests: Aphids, squash bugs, and cucumber beetles are common pests that can attack watermelons. You can control them with insecticidal soap or neem oil.
* Common Diseases: Powdery mildew and fungal diseases are common problems, especially in humid climates. To prevent these diseases, make sure your plants have good air circulation and avoid overhead watering. You can also treat them with a fungicide.
* Prevention is Key: The best way to deal with pests and diseases is to prevent them in the first place. Keep your garden clean, water properly, and provide your plants with plenty of sunlight and nutrients.
Harvesting Your Watermelons
The moment you’ve been waiting for! Harvesting your homegrown watermelons.
* Days to Maturity: Check the seed packet or plant tag for the days to maturity for your specific variety. This will give you a general idea of when to expect your watermelons to be ripe.
* Visual Cues: Look for these signs that your watermelon is ripe:
* The tendril closest to the fruit will turn brown and dry.
* The spot where the watermelon rests on the ground (the “ground spot”) will turn from white to yellow.
* The watermelon will sound hollow when you thump it.
* The Thump Test: This is the most reliable way to tell if a watermelon is ripe. A ripe watermelon will sound deep and hollow when you thump it. An unripe watermelon will sound dull and solid.
* Harvesting: Once your watermelon is ripe, use a sharp knife to cut it from the vine, leaving a few inches of stem attached.
Troubleshooting Tips
Even with the best care, you might encounter some challenges. Here are a few common problems and how to fix them:
* Blossom End Rot: This is a common problem that causes the bottom of the watermelon to rot. It’s usually caused by calcium deficiency or inconsistent watering. To prevent blossom end rot, make sure your soil is rich in calcium and water your plants regularly. You can also add calcium to the soil by mixing in some crushed eggshells or bone meal.
* Poor Fruit Set: If your watermelon plants are producing flowers but not setting fruit, it could be due to poor pollination. Make sure there are plenty of bees in your garden, or hand-pollinate the flowers yourself.
* Yellowing Leaves: Yellowing leaves can be a sign of nutrient deficiency, overwatering, or underwatering. Check the soil moisture and fertilize your plants if necessary.
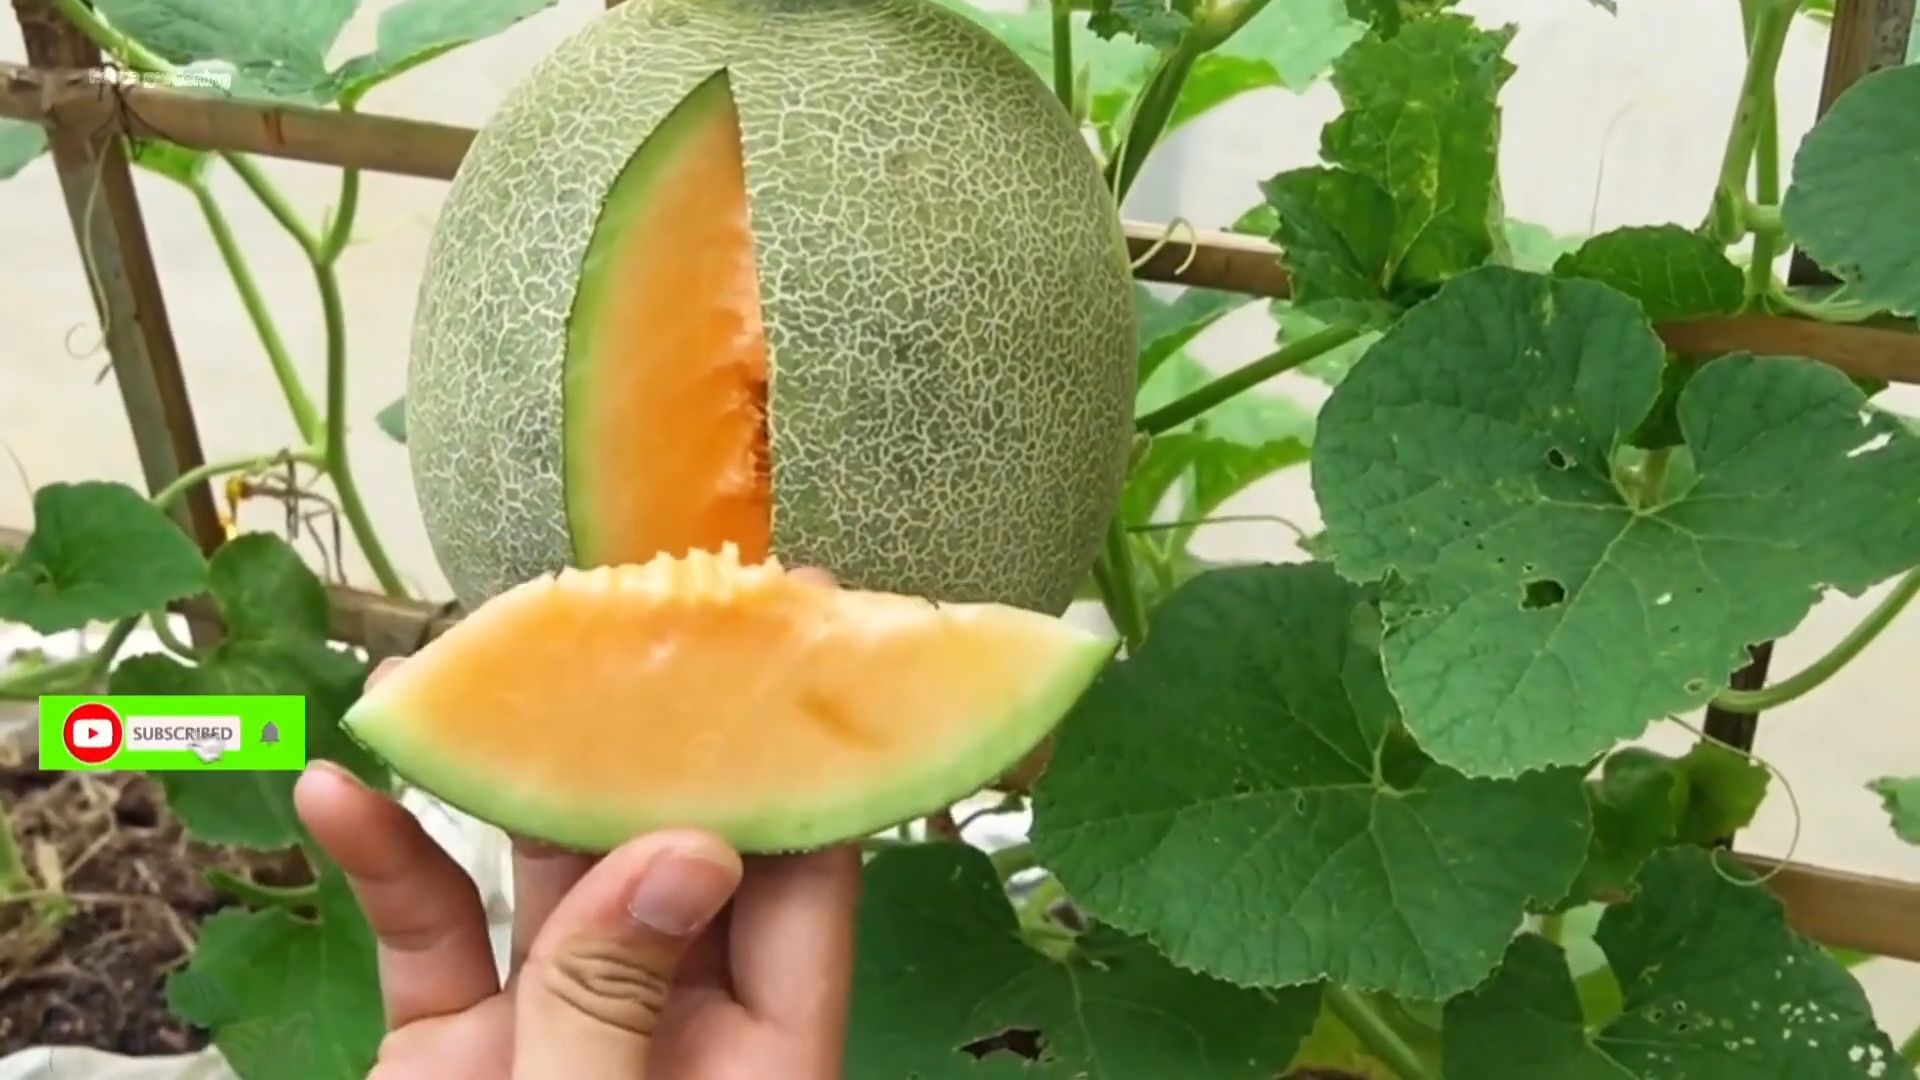
Enjoying Your Homegrown Watermelons
Congratulations! You’ve successfully grown watermelons in grow bags. Now it’s time to enjoy the fruits (literally!) of your labor. Slice them up and enjoy them fresh, or use them in your favorite recipes. There’s nothing quite like the taste of a homegrown watermelon.
I hope this guide has been helpful. Happy gardening!
Conclusion
So, there you have it! Growing watermelons in grow bags might seem unconventional, but as we’ve explored, it’s a remarkably effective and rewarding method, especially for those with limited garden space or challenging soil conditions. This DIY trick isn’t just about convenience; it’s about unlocking the potential for a bountiful harvest of sweet, juicy watermelons right on your patio, balcony, or small backyard.
Why is this a must-try? Because it democratizes watermelon growing! No longer is this summer fruit reserved for those with sprawling gardens. Grow bags provide the perfect microclimate, allowing you to control the soil composition, drainage, and even the temperature around your watermelon plants. This level of control translates to healthier plants, fewer pests, and ultimately, bigger, sweeter watermelons.
But the benefits don’t stop there. Grow bags are incredibly portable. Need to move your watermelon plant to chase the sun? No problem! Facing an unexpected frost? Simply move the grow bag indoors. This flexibility is a game-changer, especially for those living in regions with unpredictable weather patterns.
Looking for variations? Absolutely! Consider experimenting with different grow bag sizes. While a 20-gallon bag is a good starting point, larger varieties like ‘Charleston Gray’ might benefit from a 25 or even 30-gallon bag to accommodate their extensive root systems. You can also explore different soil mixes. While the recommended blend of potting mix, compost, and perlite works wonders, you might want to add a slow-release fertilizer or incorporate some worm castings for an extra boost of nutrients.
Another exciting variation is to try growing different watermelon varieties. While the tips provided are generally applicable, some varieties, like ‘Sugar Baby’ or ‘Bush Sugar Baby’, are particularly well-suited for container growing due to their smaller size and shorter vines. Don’t be afraid to experiment and find the varieties that thrive best in your specific climate and grow bag setup.
Finally, remember the importance of proper watering and fertilization. Watermelons are heavy feeders and drinkers, so consistent moisture and regular feeding are crucial for optimal growth and fruit production. Monitor your plants closely and adjust your watering and fertilization schedule as needed.
We wholeheartedly encourage you to give this DIY trick a try. Growing watermelons in grow bags is a fun, rewarding, and surprisingly easy way to enjoy the taste of summer, no matter where you live. We are confident that you will be amazed by the results.
But don’t just take our word for it! We want to hear about your experiences. Share your photos, tips, and challenges in the comments below. Let’s create a community of grow bag watermelon enthusiasts and learn from each other’s successes and failures. Together, we can unlock the secrets to growing the most delicious watermelons imaginable, all within the confines of a simple grow bag. So, grab your grow bags, seeds, and soil, and get ready to embark on a watermelon-growing adventure! Happy growing!
Frequently Asked Questions (FAQ)
What size grow bag is best for growing watermelons?
The ideal size grow bag for watermelons is generally between 20 and 30 gallons. A 20-gallon bag is a good starting point for most standard-sized watermelon varieties. However, larger varieties, such as ‘Charleston Gray’ or ‘Black Diamond’, may benefit from a 25 or even 30-gallon bag to provide ample space for their extensive root systems. Smaller, bush-type varieties like ‘Bush Sugar Baby’ can thrive in slightly smaller bags, around 15-20 gallons. The key is to ensure the bag is large enough to accommodate the mature root system of the specific watermelon variety you are growing. Insufficient space can lead to stunted growth and reduced fruit production.
What type of soil mix should I use in my grow bag?
A well-draining and nutrient-rich soil mix is crucial for successful watermelon growing in grow bags. A recommended mix consists of equal parts high-quality potting mix, compost, and perlite. The potting mix provides a good base for root development, the compost adds essential nutrients and improves water retention, and the perlite enhances drainage and aeration. You can also amend the mix with a slow-release fertilizer or worm castings to provide a sustained release of nutrients throughout the growing season. Avoid using garden soil directly in grow bags, as it tends to compact and doesn’t provide adequate drainage.
How often should I water my watermelon plants in grow bags?
Watermelons are heavy drinkers, especially when grown in grow bags, which tend to dry out more quickly than traditional garden beds. The frequency of watering will depend on factors such as the weather, the size of the grow bag, and the stage of plant growth. Generally, you should water your watermelon plants deeply whenever the top inch of soil feels dry to the touch. During hot, sunny weather, this may mean watering daily or even twice a day. Use a watering can or a hose with a gentle spray nozzle to avoid disturbing the soil and damaging the plants. Ensure that the water drains freely from the bottom of the grow bag to prevent waterlogging.
How often should I fertilize my watermelon plants in grow bags?
Watermelons are also heavy feeders and require regular fertilization to support their rapid growth and fruit production. Start fertilizing your plants about two weeks after transplanting them into the grow bags. Use a balanced fertilizer with an NPK ratio of 10-10-10 or 14-14-14, following the instructions on the fertilizer packaging. As the plants begin to flower and set fruit, switch to a fertilizer with a higher phosphorus and potassium content (e.g., 5-10-10) to promote fruit development. Fertilize every two to three weeks throughout the growing season. You can also supplement with foliar feeding using a seaweed extract or fish emulsion.
How do I prevent pests and diseases from affecting my watermelon plants in grow bags?
While grow bags can help reduce the risk of soilborne diseases, watermelon plants are still susceptible to various pests and diseases. To prevent problems, start with healthy, disease-resistant seedlings. Inspect your plants regularly for signs of pests, such as aphids, squash bugs, or vine borers. Handpick pests or use insecticidal soap or neem oil to control infestations. To prevent fungal diseases, such as powdery mildew or anthracnose, ensure good air circulation around the plants and avoid overhead watering. You can also apply a fungicide preventatively. Rotate your crops each year to prevent the buildup of soilborne pathogens.
Can I grow watermelons in grow bags in a small space, like a balcony?
Absolutely! One of the biggest advantages of growing watermelons in grow bags is that it allows you to grow them in small spaces, such as balconies, patios, or small backyards. Choose a compact or bush-type watermelon variety, such as ‘Bush Sugar Baby’, which is specifically bred for container growing. Provide adequate sunlight (at least 6-8 hours per day) and ensure that the grow bag is placed in a location where the vines can trail or be supported by a trellis. Water and fertilize regularly, and you’ll be able to enjoy homegrown watermelons even in the smallest of spaces.
How do I know when my watermelon is ripe?
Determining when a watermelon is ripe can be tricky, but there are several indicators to look for. First, check the tendril closest to the fruit stem. When this tendril turns brown and dries out, it’s a good sign that the watermelon is nearing ripeness. Second, examine the underside of the watermelon where it rests on the ground (the “ground spot”). When the ground spot turns from white to a creamy yellow color, it indicates that the watermelon is ripe. Finally, give the watermelon a gentle thump. A ripe watermelon will produce a deep, hollow sound, while an unripe watermelon will sound dull and solid. With practice, you’ll be able to tell when your watermelons are perfectly ripe and ready to harvest.
Leave a Comment