
Grow Chives Indoors? Absolutely! Imagine snipping fresh, flavorful chives right from your kitchen windowsill, adding a burst of oniony goodness to your meals year-round. No more sad, wilted herbs from the grocery store 鈥?just vibrant, homegrown flavor at your fingertips. For centuries, chives have been a staple in cuisines around the world, from European soups and salads to Asian stir-fries. Their delicate flavor and ease of cultivation have made them a beloved herb for both novice and experienced gardeners alike.
But what if you don’t have a sprawling garden or the perfect outdoor climate? That’s where this DIY guide comes in! I’m going to show you how incredibly simple it is to grow chives indoors, regardless of your living situation or gardening experience. We’ll cover everything from choosing the right container and soil to providing the perfect amount of light and water.
In today’s busy world, having access to fresh, healthy ingredients is more important than ever. Growing your own chives indoors not only provides you with delicious herbs but also offers a therapeutic and rewarding experience. Plus, it’s a fantastic way to reduce your carbon footprint and save money on groceries. So, let’s get started and transform your home into a thriving indoor herb garden!
Growing Chives Indoors: A Beginner’s Guide
Hey there, fellow plant enthusiasts! Ever dreamt of snipping fresh chives right from your kitchen windowsill? Well, dream no more! Growing chives indoors is surprisingly easy, even if you don’t have a green thumb. I’m going to walk you through everything you need to know, from choosing the right pot to harvesting your flavorful bounty. Let’s get started!
What You’ll Need
Before we dive into the nitty-gritty, let’s gather our supplies. Here’s a checklist of everything you’ll need to successfully grow chives indoors:
- Chive Seeds or a Chive Plant: You can start from seeds, which is more budget-friendly, or buy a small established plant for quicker results.
- A Pot with Drainage Holes: Drainage is crucial to prevent root rot. Choose a pot that’s at least 6 inches in diameter and 6 inches deep.
- Well-Draining Potting Mix: Regular garden soil is too heavy for indoor containers. Opt for a potting mix specifically designed for containers.
- Watering Can or Spray Bottle: For gentle watering.
- A Sunny Location: Chives need at least 6 hours of sunlight per day. A south-facing window is ideal.
- Grow Light (Optional): If you don’t have enough natural light, a grow light can supplement.
- Scissors or Kitchen Shears: For harvesting.
- Fertilizer (Optional): A balanced liquid fertilizer can boost growth, but it’s not essential.
Starting from Seeds: A Step-by-Step Guide
Starting from seeds is a rewarding experience, although it requires a bit more patience. Here’s how I do it:
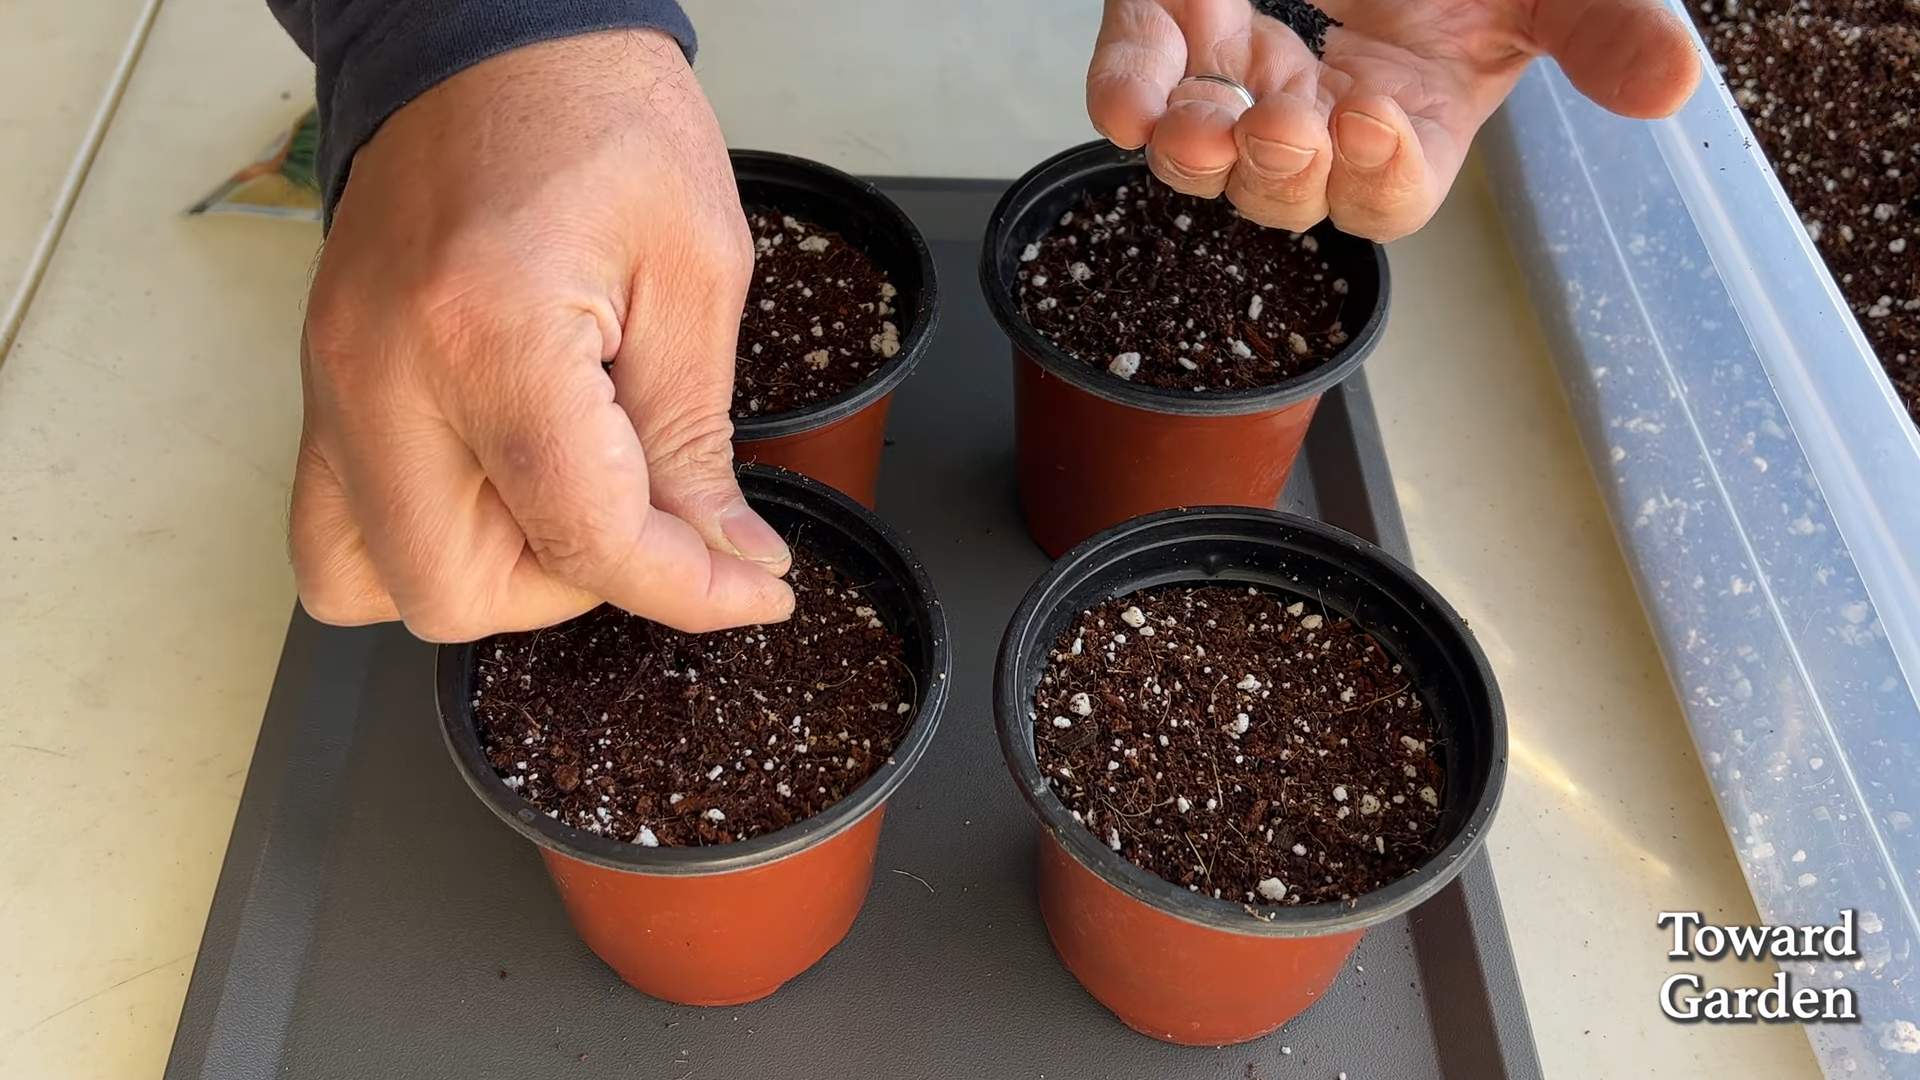
- Prepare the Pot: Fill your pot with well-draining potting mix, leaving about an inch of space at the top. Gently pat down the soil to remove any air pockets.
- Sow the Seeds: Sprinkle the chive seeds evenly over the surface of the soil. You don’t need to bury them too deep; about 录 inch is perfect.
- Cover the Seeds: Lightly cover the seeds with a thin layer of potting mix.
- Water Gently: Use a spray bottle or watering can with a gentle nozzle to moisten the soil. Be careful not to dislodge the seeds.
- Create a Humid Environment: Cover the pot with plastic wrap or a clear plastic bag to create a mini-greenhouse. This will help retain moisture and promote germination.
- Place in a Warm Location: Keep the pot in a warm spot, around 70-75掳F (21-24掳C).
- Monitor Germination: Check the pot daily for signs of germination. Chive seeds typically germinate in 7-14 days.
- Remove the Plastic Wrap: Once the seedlings emerge, remove the plastic wrap to allow for air circulation.
- Provide Adequate Light: Place the pot in a sunny location or under a grow light.
- Water Regularly: Keep the soil consistently moist, but not soggy. Water when the top inch of soil feels dry to the touch.
- Thin the Seedlings (Optional): If the seedlings are too crowded, thin them out by snipping off the weaker ones at the soil line. This will give the remaining seedlings more room to grow.
Transplanting a Chive Plant: A Quick Start
If you’re eager to start harvesting chives sooner, buying a small established plant is the way to go. Here’s how to transplant it:
- Prepare the Pot: Fill your pot with well-draining potting mix, leaving about an inch of space at the top.
- Gently Remove the Plant: Carefully remove the chive plant from its original container. Gently loosen the roots if they are tightly bound.
- Place the Plant in the Pot: Position the chive plant in the center of the pot, ensuring that the top of the root ball is level with the soil surface.
- Fill with Potting Mix: Fill in the remaining space around the plant with potting mix. Gently pat down the soil to secure the plant.
- Water Thoroughly: Water the plant thoroughly until water drains out of the drainage holes.
- Place in a Sunny Location: Place the pot in a sunny location or under a grow light.
Caring for Your Indoor Chives
Once your chives are established, proper care is essential for healthy growth and abundant harvests. Here’s what I do to keep my chives thriving:
- Watering: Water your chives regularly, keeping the soil consistently moist but not soggy. Overwatering can lead to root rot, so be sure to let the top inch of soil dry out between waterings. I usually check the soil moisture every other day.
- Light: Chives need at least 6 hours of sunlight per day. If you don’t have a sunny window, supplement with a grow light. I use a full-spectrum LED grow light for about 12 hours a day during the winter months.
- Fertilizing (Optional): If you want to boost growth, you can fertilize your chives every 2-4 weeks with a balanced liquid fertilizer diluted to half strength. I prefer using an organic fertilizer.
- Temperature: Chives prefer temperatures between 60-70掳F (15-21掳C). Avoid placing them near drafts or heat sources.
- Humidity: Chives appreciate moderate humidity. If your home is dry, you can increase humidity by placing a tray of water near the plant or using a humidifier.
- Pruning: Regular pruning encourages bushier growth and prevents the chives from flowering. Flowering chives tend to have a less desirable flavor.
Harvesting Your Chives
The best part of growing chives is, of course, harvesting them! Here’s how to do it:
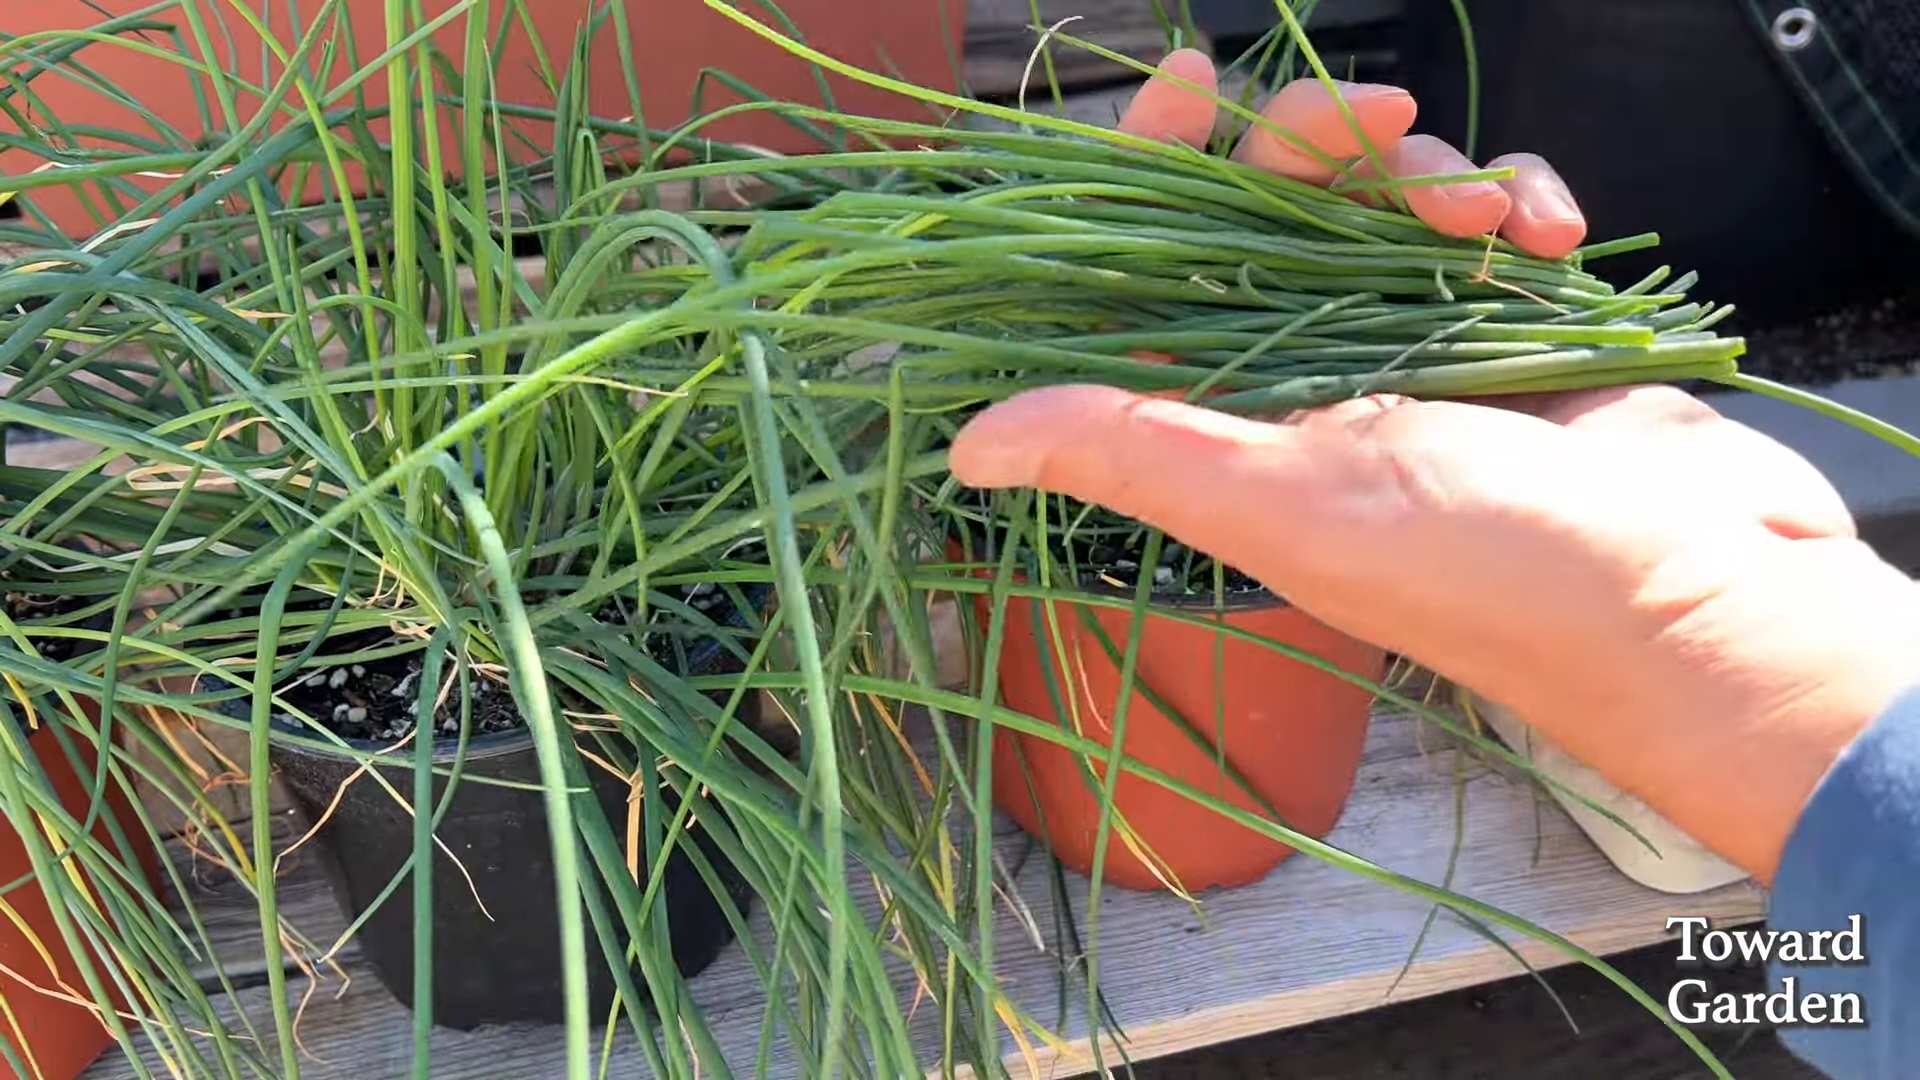
- Wait Until Mature: Allow your chives to grow to at least 6 inches tall before harvesting.
- Use Sharp Scissors: Use sharp scissors or kitchen shears to snip the chives about 1-2 inches above the soil line.
- Harvest Regularly: Harvest chives regularly to encourage new growth. You can harvest up to one-third of the plant at a time.
- Use Fresh or Freeze: Use your freshly harvested chives immediately for the best flavor. You can also freeze them for later use. To freeze, chop the chives and place them in a freezer bag or ice cube tray with a little water.
Troubleshooting Common Problems
Even with the best care, you might encounter some problems while growing chives indoors. Here are some common issues and how to address them:
- Yellowing Leaves: Yellowing leaves can be caused by overwatering, underwatering, or nutrient deficiencies. Adjust your watering schedule and consider fertilizing your chives.
- Leggy Growth: Leggy growth (long, spindly stems) is usually a sign of insufficient light. Move your chives to a sunnier location or provide supplemental light.
- Pests: Chives are generally pest-resistant, but they can occasionally be affected by aphids or spider mites. If you notice pests, try spraying the plants with insecticidal soap or neem oil.
- Root Rot: Root rot is caused by overwatering and poor drainage. Make sure your pot has drainage holes and that you’re not overwatering your chives. If you suspect root rot, repot the plant in fresh potting mix.
Propagating Chives
Once your chives are thriving, you can easily propagate them to create new plants. Here’s how I propagate mine:
- Divide the Plant: Carefully remove the chive plant from its pot. Gently separate the plant into smaller clumps, ensuring that each clump has roots attached.
- Repot the Clumps: Plant each clump in its own pot filled with well-draining potting mix.
- Water Thoroughly: Water the newly potted clumps thoroughly.
- Place in a Sunny Location: Place the pots in a sunny location or under a grow light.
Enjoy Your Homegrown Chives!
Growing chives indoors is a simple and rewarding way to add fresh flavor to your meals. With a little care and attention, you can enjoy a continuous supply of homegrown chives year-round. Happy gardening!
Conclusion
So, there you have it! Growing chives indoors is not only achievable, it’s downright rewarding. Imagine having fresh, flavorful chives at your fingertips, ready to elevate your culinary creations any time of year. No more sad, wilted bunches from the grocery store 鈥?just vibrant, snipped-to-order goodness.
This DIY trick is a must-try for several compelling reasons. First, it’s incredibly easy and cost-effective. You don’t need a green thumb or fancy equipment to succeed. A sunny windowsill, a pot, some soil, and a handful of chive seeds (or a transplanted clump from your garden) are all you need to embark on this flavorful adventure. Second, it provides a continuous supply of fresh herbs, enhancing your meals with their delicate oniony flavor. Think of the possibilities: sprinkled on baked potatoes, stirred into scrambled eggs, added to soups and salads, or used as a garnish for your favorite dishes. The possibilities are endless! Third, growing chives indoors is a fantastic way to bring a touch of nature into your home, especially during the colder months when outdoor gardening is limited. It’s a small but meaningful way to connect with the natural world and enjoy the beauty of fresh greenery.
But the benefits don’t stop there. You can also experiment with different varieties of chives to discover your favorite flavor profiles. Common chives are the standard, but garlic chives offer a milder garlic flavor, while Siberian chives boast a bolder, more intense taste. Consider planting a mix of varieties for a diverse and exciting herb garden.
Another variation to consider is using different types of containers. While a standard pot works perfectly well, you could also repurpose old teacups, mason jars, or even create a vertical garden using stacked planters. Get creative and let your personality shine through! You can also try companion planting. Chives are known to deter certain pests, so consider planting them alongside other herbs like basil or rosemary to create a thriving and pest-free indoor garden.
Don’t be intimidated by the idea of indoor gardening. Growing chives indoors is a simple and satisfying project that anyone can undertake. It’s a wonderful way to add fresh flavor to your meals, brighten up your home, and connect with nature.
We wholeheartedly encourage you to give this DIY trick a try. We are confident that you will be delighted with the results. Once you’ve experienced the joy of harvesting your own fresh chives, you’ll never want to go back to store-bought herbs again.
And most importantly, we want to hear about your experience! Share your tips, tricks, and photos with us in the comments below. Let us know what varieties you’re growing, what containers you’re using, and what delicious dishes you’re creating with your homegrown chives. Your feedback will not only inspire others to try this DIY trick but also help us improve our guide and provide even more helpful information. So, grab your seeds, pots, and soil, and get ready to enjoy the fresh, flavorful goodness of homegrown chives! Let’s cultivate a community of indoor herb gardeners and share the joy of fresh, homegrown flavor.
FAQ
What kind of soil should I use for growing chives indoors?
The best soil for growing chives indoors is a well-draining potting mix. Avoid using garden soil, as it can be too heavy and may not drain properly, leading to root rot. Look for a potting mix that contains ingredients like peat moss, perlite, and vermiculite, which will help to retain moisture while also providing good drainage. You can also amend your potting mix with compost to add nutrients and improve its overall quality. A slightly acidic to neutral pH (around 6.0 to 7.0) is ideal for chives.
How much sunlight do chives need when grown indoors?
Chives thrive in bright, indirect sunlight. Aim for at least 6 hours of sunlight per day. A south-facing window is typically the best option, but an east- or west-facing window can also work well. If you don’t have access to enough natural light, you can supplement with a grow light. Place the grow light a few inches above the chives and keep it on for 12-14 hours per day. Insufficient light can lead to leggy growth and a weaker flavor.
How often should I water my indoor chives?
Water your chives regularly, keeping the soil consistently moist but not waterlogged. Check the soil moisture by sticking your finger about an inch into the soil. If it feels dry, it’s time to water. Water thoroughly until water drains out of the bottom of the pot. Avoid overwatering, as this can lead to root rot. During the winter months, when growth slows down, you may need to water less frequently.
How do I harvest chives without damaging the plant?
The best way to harvest chives is to use sharp scissors or kitchen shears to snip the leaves about an inch above the soil line. Avoid pulling the leaves, as this can damage the roots. Harvest from the outer leaves first, allowing the inner leaves to continue growing. Regular harvesting will encourage the plant to produce more leaves. You can harvest chives as needed throughout the growing season.
Can I grow chives from seed or should I transplant them?
You can grow chives from either seed or transplants. Growing from seed is a more economical option, but it takes longer to establish a mature plant. Sow the seeds indoors 6-8 weeks before the last expected frost. Keep the soil moist and warm, and the seeds should germinate in about 1-2 weeks. Transplants, on the other hand, will give you a head start and allow you to harvest sooner. You can purchase chive transplants from a garden center or nursery.
Do I need to fertilize my indoor chives?
Yes, fertilizing your indoor chives will help them to grow strong and healthy. Use a balanced liquid fertilizer diluted to half strength every 2-4 weeks during the growing season (spring and summer). Avoid over-fertilizing, as this can burn the roots. You can also amend the soil with compost or worm castings to provide a slow-release source of nutrients.
How do I deal with pests on my indoor chives?
Indoor chives are generally pest-resistant, but they can occasionally be affected by aphids, spider mites, or whiteflies. If you notice any pests, try washing them off with a strong stream of water. You can also use insecticidal soap or neem oil to control pests. Be sure to follow the instructions on the product label carefully. Regularly inspect your chives for pests to catch infestations early.
Can I freeze or dry chives for later use?
Yes, you can freeze or dry chives to preserve them for later use. To freeze chives, wash and dry them thoroughly, then chop them into small pieces. Spread the chopped chives on a baking sheet and freeze for a few hours until solid. Transfer the frozen chives to a freezer bag or container. To dry chives, spread them out on a baking sheet and dry them in a low oven (170掳F) or a dehydrator until they are brittle. Store the dried chives in an airtight container.
How long will my indoor chive plant last?
With proper care, your indoor chive plant can last for several years. Chives are perennials, which means they will come back year after year. To keep your chive plant healthy, divide it every 2-3 years to prevent overcrowding. Simply dig up the plant and separate it into smaller clumps, then replant the clumps in fresh potting mix.
What are some creative ways to use my homegrown chives?
The possibilities are endless! Sprinkle them on baked potatoes, stir them into scrambled eggs, add them to soups and salads, use them as a garnish for your favorite dishes, or blend them into dips and sauces. You can also use chives to make flavored butter or vinegar. Get creative and experiment with different ways to incorporate your homegrown chives into your cooking.


Leave a Comment