
Grow Cucumbers Easily, even if you think you don’t have a green thumb! Have you ever dreamed of biting into a crisp, refreshing cucumber straight from your own backyard? Imagine the satisfaction of knowing you nurtured that deliciousness from a tiny seed to a thriving vine. Well, dream no more! This isn’t just another gardening article; it’s your personal guide to unlocking the secrets of abundant cucumber harvests, using simple, DIY tricks and hacks that anyone can master.
Cucumbers have a rich history, dating back over 3,000 years to their origins in India. They’ve been enjoyed by emperors and commoners alike, prized for their cooling properties and versatility. But let’s be honest, sometimes growing them can feel like a royal pain! Pests, diseases, and just plain finicky plants can leave you feeling defeated. That’s where these DIY tricks come in.
I understand the frustration of struggling with your garden. I’ve been there! That’s why I’m sharing my tried-and-true methods to help you grow cucumbers easily and avoid common pitfalls. Whether you’re dealing with limited space, pesky bugs, or just want to boost your yield, these hacks will empower you to create a thriving cucumber patch. Get ready to impress your friends and family with your homegrown bounty!
Grow Cucumbers Like a Pro: My Foolproof DIY Guide
Hey there, fellow gardening enthusiasts! I’m so excited to share my tried-and-true method for growing cucumbers that practically guarantees a bumper crop. Forget those spindly, bitter cucumbers you sometimes get from the store. With this DIY guide, you’ll be harvesting crisp, delicious cucumbers all season long. I’ve learned a few tricks over the years, and I’m ready to spill all my secrets!
Choosing the Right Cucumber Variety
Before we even think about planting, let’s talk about cucumber varieties. This is crucial because different types are suited for different purposes and growing conditions.
* **Slicing Cucumbers:** These are your classic cucumbers, perfect for salads and sandwiches. Think ‘Marketmore’ or ‘Straight Eight’. They usually have smooth, dark green skin.
* **Pickling Cucumbers:** Smaller and stubbier than slicing cucumbers, these are ideal for making pickles. ‘National Pickling’ and ‘Boston Pickling’ are popular choices. They often have bumpy skin.
* **Burpless Cucumbers:** If you’re sensitive to cucumbers, these are the way to go. They’re bred to have lower levels of cucurbitacin, the compound that can cause bitterness and digestive upset. ‘Sweet Success’ and ‘Armenian’ are great options.
* **Bush Varieties:** If you’re short on space, consider bush cucumbers. They’re compact and perfect for containers. ‘Spacemaster’ and ‘Bush Champion’ are good choices.
I always recommend choosing a variety that’s well-suited to your local climate and growing conditions. Check with your local nursery for recommendations.
Preparing the Soil: The Foundation for Success
Cucumbers are heavy feeders, meaning they need nutrient-rich soil to thrive. Here’s how I prepare my cucumber patch:
* **Sunlight:** Cucumbers need at least 6-8 hours of direct sunlight per day. Choose a sunny spot in your garden.
* **Soil Type:** They prefer well-drained, loamy soil with a pH between 6.0 and 7.0.
* **Amendments:** I always amend my soil with plenty of organic matter, such as compost or well-rotted manure. This improves drainage, adds nutrients, and helps retain moisture.
* **Raised Beds (Optional):** If you have heavy clay soil, consider growing cucumbers in raised beds. This improves drainage and warms the soil faster in the spring.
Step-by-Step Soil Preparation:
1. **Clear the Area:** Remove any weeds, rocks, or debris from the planting area.
2. **Dig Deep:** Dig down at least 12 inches to loosen the soil.
3. **Add Amendments:** Mix in a generous amount of compost or well-rotted manure. I usually aim for about 2-3 inches of compost worked into the top 12 inches of soil.
4. **Test the pH (Optional):** If you’re unsure about your soil’s pH, you can test it with a soil testing kit. Amend with lime to raise the pH or sulfur to lower it, if necessary.
5. **Rake Smooth:** Rake the soil smooth and level.
Starting Cucumber Seeds: Indoors or Out?
You can start cucumber seeds indoors or direct sow them in the garden. I prefer to direct sow because cucumbers don’t always transplant well. However, if you live in a colder climate with a short growing season, starting them indoors can give you a head start.
* **Direct Sowing:** Wait until the soil has warmed to at least 60°F (16°C). Sow seeds about 1 inch deep and 2-3 inches apart. Thin seedlings to 12-18 inches apart once they have a few true leaves.
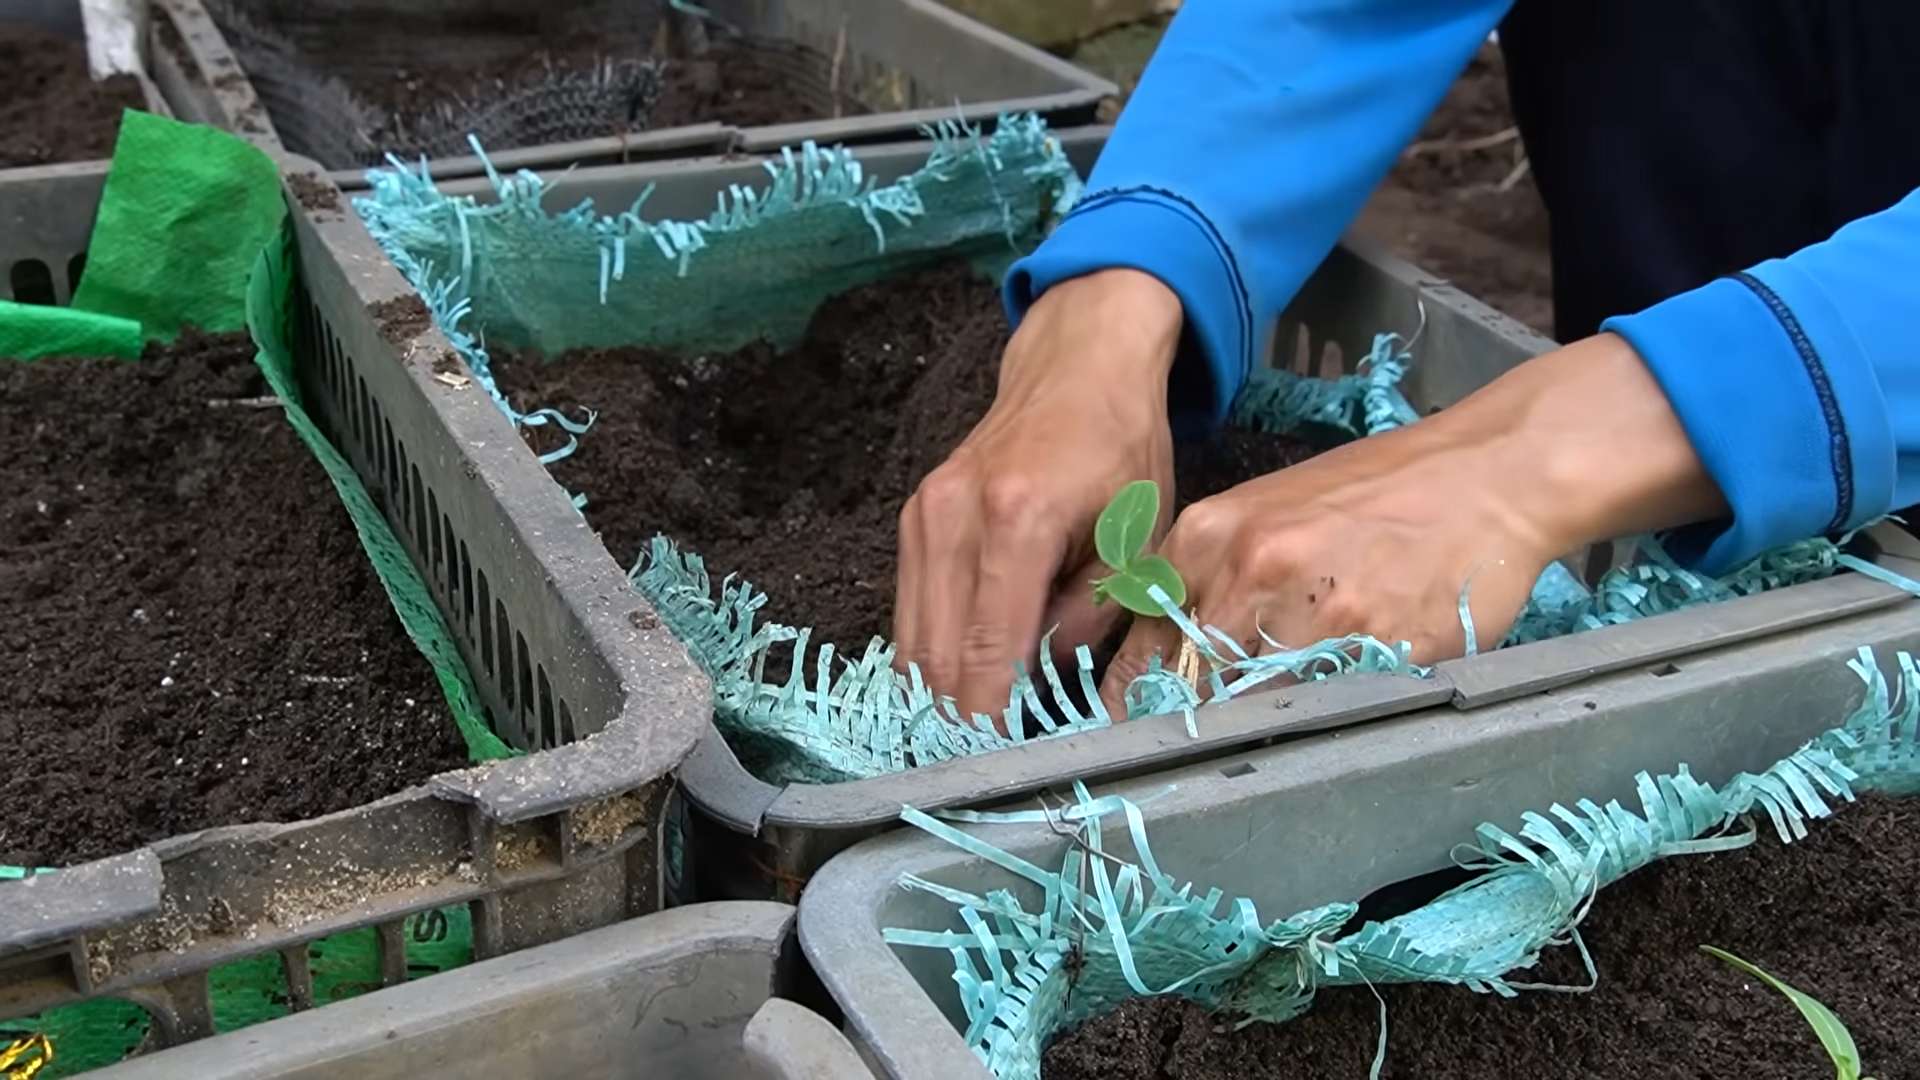
* **Starting Indoors:** Start seeds 3-4 weeks before the last expected frost. Sow seeds in peat pots or biodegradable pots to minimize root disturbance when transplanting. Keep the soil moist and warm. Harden off seedlings gradually before transplanting them outdoors.
Step-by-Step Direct Sowing:
1. **Choose Your Location:** Select the prepared garden bed where you want to grow your cucumbers.
2. **Create Small Holes:** Use your finger or a small tool to create holes about 1 inch deep and spaced 2-3 inches apart.
3. **Sow the Seeds:** Place 2-3 seeds in each hole. This increases the chances of at least one seed germinating.
4. **Cover the Seeds:** Gently cover the seeds with soil and pat it down lightly.
5. **Water Thoroughly:** Water the area gently but thoroughly. Keep the soil moist until the seeds germinate.
6. **Thin Seedlings:** Once the seedlings have a few true leaves, thin them to 12-18 inches apart, selecting the strongest seedlings.
Step-by-Step Starting Seeds Indoors:
1. **Prepare Your Pots:** Fill peat pots or biodegradable pots with seed-starting mix.
2. **Sow the Seeds:** Sow 2-3 seeds per pot, about 1/2 inch deep.
3. **Water Gently:** Water the pots gently until the soil is moist but not soggy.
4. **Provide Warmth:** Place the pots in a warm location, such as on a heat mat or near a sunny window.
5. **Provide Light:** Once the seeds germinate, provide them with plenty of light. A grow light is ideal, but a sunny window can also work.
6. **Harden Off:** Before transplanting the seedlings outdoors, gradually acclimate them to outdoor conditions by exposing them to increasing amounts of sunlight and wind over a period of 7-10 days.
7. **Transplant Carefully:** Transplant the seedlings into the prepared garden bed, spacing them 12-18 inches apart. Be careful not to disturb the roots too much.
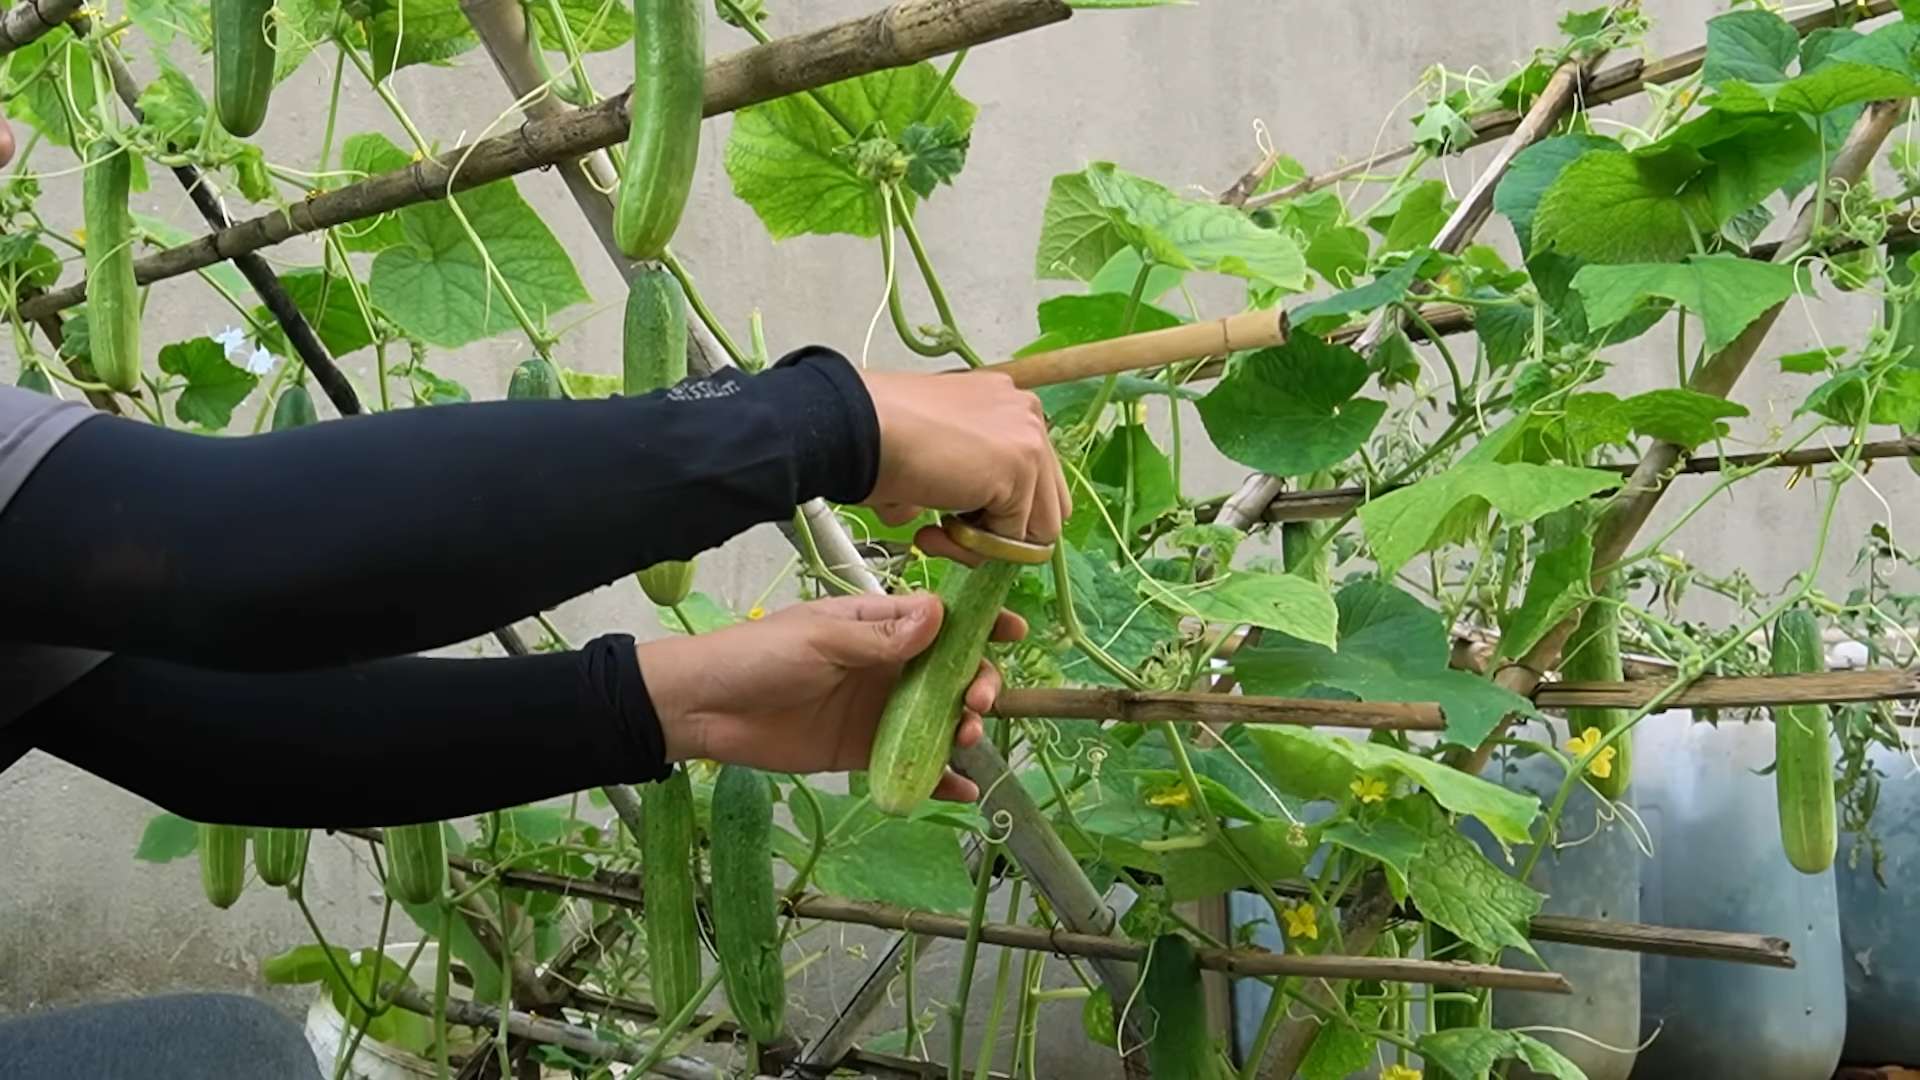
Trellising: Giving Cucumbers a Helping Hand
Cucumbers are natural climbers, and trellising them offers several benefits:
* **Improved Air Circulation:** This helps prevent fungal diseases.
* **Easier Harvesting:** It’s much easier to spot and pick cucumbers when they’re hanging on a trellis.
* **Space Saving:** Trellising allows you to grow more cucumbers in a smaller space.
* **Cleaner Fruit:** Cucumbers that grow on a trellis are less likely to rot or get damaged by pests.
Types of Trellises:
* **A-Frame Trellis:** Easy to build and provides plenty of support.
* **Vertical Trellis:** Simple and space-saving.
* **Cattle Panel Trellis:** Sturdy and durable.
Step-by-Step Trellis Installation:
1. **Choose Your Trellis:** Select the type of trellis that best suits your needs and space.
2. **Install the Trellis:** Install the trellis before or shortly after planting the cucumber seedlings. Make sure it’s sturdy and well-anchored in the ground.
3. **Guide the Vines:** As the cucumber vines grow, gently guide them onto the trellis. You may need to tie them to the trellis with twine or plant clips.
Watering and Fertilizing: Keeping Cucumbers Happy
Cucumbers need consistent moisture and regular feeding to produce a good crop.
* **Watering:** Water deeply and regularly, especially during hot, dry weather. Aim for about 1 inch of water per week.
* **Fertilizing:** Fertilize every 2-3 weeks with a balanced fertilizer or compost tea.
Step-by-Step Watering and Fertilizing:
1. **Water Deeply:** Water the cucumber plants deeply, allowing the water to soak into the soil. Avoid watering the foliage, as this can promote fungal diseases.
2. **Check Soil Moisture:** Check the soil moisture regularly by sticking your finger into the soil. If the top inch of soil is dry, it’s time to water.
3. **Fertilize Regularly:** Fertilize the cucumber plants every 2-3 weeks with a balanced fertilizer or compost tea. Follow the instructions on the fertilizer package.
4. **Mulch:** Apply a layer of mulch around the base of the plants to help retain moisture and suppress weeds.
Pest and Disease Control: Protecting Your Crop
Cucumbers are susceptible to a few common pests and diseases. Here’s how I deal with them:
* **Cucumber Beetles:** These pests can damage foliage and spread diseases. Handpick them off the plants or use insecticidal soap.
* **Squash Bugs:** Similar to cucumber beetles, these pests can suck the sap from the plants. Handpick them off the plants or use insecticidal soap.
* **Powdery Mildew:** This fungal disease causes a white, powdery coating on the leaves. Improve air circulation and use a fungicide if necessary.
* **Downy Mildew:** Another fungal disease that can cause yellow spots on the leaves. Improve air circulation and use a fungicide if necessary.
My Pest and Disease Control Strategies:
* **Regular Inspection:** I inspect my cucumber plants regularly for signs of pests or diseases.
Conclusion
So, there you have it! Growing cucumbers doesn’t have to be a daunting task reserved for seasoned gardeners. With this simple, yet effective DIY trick, you can unlock a bountiful harvest of crisp, delicious cucumbers right in your own backyard, or even on your balcony. We’ve shown you how to bypass common pitfalls and create an environment where your cucumber plants can truly thrive.
This method isn’t just about ease; it’s about maximizing your yield and minimizing waste. By providing the right support and optimizing growing conditions, you’ll be amazed at the difference it makes. Forget struggling with sprawling vines and ground-level rot. Embrace a cleaner, more efficient, and ultimately more rewarding cucumber-growing experience.
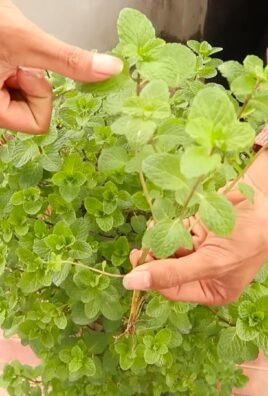
But don’t just take our word for it. The real magic happens when you try it yourself. Feel free to experiment with variations to suit your specific needs and preferences. Perhaps you want to try different types of trellises, or maybe you’d like to incorporate companion planting to further enhance growth. Consider adding marigolds near your cucumber plants to deter pests, or basil to improve flavor. The possibilities are endless!
Remember, the key to successful gardening is observation and adaptation. Pay attention to your plants, learn from your experiences, and don’t be afraid to tweak the method to find what works best for you.
We are confident that this DIY trick will revolutionize the way you grow cucumbers easily. It’s a game-changer for both beginner and experienced gardeners alike.
Now, it’s your turn! We encourage you to give this method a try and share your results with us. Post pictures of your thriving cucumber plants, tell us about any variations you’ve tried, and let us know what worked best for you. Your feedback is invaluable and helps us all learn and grow together. Let’s create a community of cucumber-growing enthusiasts! Happy gardening!
Frequently Asked Questions (FAQs)
Q: What type of cucumbers are best suited for this DIY growing method?
A: This method works well for most cucumber varieties, especially those that are vining types. Slicing cucumbers, pickling cucumbers, and even some bush varieties can benefit from the support and improved air circulation provided by this technique. However, for bush varieties, you might need to adapt the support system to be more of a cage than a trellis. Consider the mature size of the cucumber variety when choosing your trellis or support structure. Smaller pickling cucumbers might require a finer mesh trellis than larger slicing cucumbers. Ultimately, the best cucumber variety depends on your personal preference and intended use.
Q: How often should I water my cucumber plants grown using this method?
A: Watering frequency depends on several factors, including your climate, soil type, and the stage of growth of your cucumber plants. Generally, you should aim to keep the soil consistently moist, but not waterlogged. Check the soil moisture level regularly by sticking your finger about an inch into the soil. If it feels dry, it’s time to water. During hot, dry weather, you may need to water daily, while in cooler, wetter weather, you may only need to water every few days. Using a soaker hose or drip irrigation can help deliver water directly to the roots, minimizing water waste and reducing the risk of fungal diseases. Mulching around the base of the plants can also help retain moisture in the soil.
Q: What kind of fertilizer should I use for my cucumber plants?
A: Cucumbers are heavy feeders and benefit from regular fertilization. A balanced fertilizer with an NPK ratio (nitrogen, phosphorus, potassium) of 10-10-10 or 14-14-14 is a good starting point. You can also use a fertilizer specifically formulated for vegetables. Apply fertilizer according to the package directions, typically every 2-3 weeks. In addition to granular fertilizer, you can also use liquid fertilizers or compost tea to provide a boost of nutrients. Be careful not to over-fertilize, as this can lead to excessive foliage growth at the expense of fruit production. Soil testing can help you determine the specific nutrient needs of your soil and adjust your fertilization accordingly.
Q: How do I prevent pests and diseases from affecting my cucumber plants?
A: Prevention is key when it comes to pests and diseases. Start by choosing disease-resistant cucumber varieties. Ensure good air circulation around your plants by spacing them properly and pruning any overcrowded foliage. Regularly inspect your plants for signs of pests or diseases, such as aphids, cucumber beetles, powdery mildew, or downy mildew. If you spot any problems, take action immediately. You can use organic pest control methods, such as insecticidal soap, neem oil, or diatomaceous earth, to control pests. For fungal diseases, you can use copper fungicide or baking soda spray. Crop rotation can also help prevent soilborne diseases from building up.
Q: My cucumber plants are producing flowers, but no fruit. What could be the problem?
A: There are several reasons why your cucumber plants might be producing flowers but no fruit. One common reason is lack of pollination. Cucumbers are typically pollinated by bees and other insects. If you’re not seeing many pollinators in your garden, you can try hand-pollinating the flowers yourself. Use a small paintbrush to transfer pollen from the male flowers (those with a long, slender stem) to the female flowers (those with a small cucumber-like structure behind the flower). Other possible causes include nutrient deficiencies, stress from heat or drought, or imbalanced soil pH. Ensure your plants are getting adequate water and fertilizer, and that your soil pH is between 6.0 and 7.0.
Q: How do I know when my cucumbers are ripe and ready to harvest?
A: The best time to harvest cucumbers depends on the variety and your personal preference. Generally, cucumbers are ready to harvest when they are firm, green, and have reached the desired size for their variety. Overripe cucumbers will turn yellow or orange and become bitter. Check the seed packet or plant tag for specific harvesting instructions for your cucumber variety. Regularly harvesting cucumbers encourages the plant to produce more fruit. Use a sharp knife or pruning shears to cut the cucumbers from the vine, leaving a small stem attached.
Q: Can I grow cucumbers in containers using this DIY method?
A: Yes, you can absolutely grow cucumbers in containers using this DIY method! Choose a large container, at least 12 inches in diameter, to provide enough space for the roots to grow. Use a well-draining potting mix and provide a trellis or other support structure for the vines to climb. Container-grown cucumbers may require more frequent watering and fertilization than those grown in the ground. Be sure to place the container in a sunny location that receives at least 6-8 hours of sunlight per day.
Q: What are some good companion plants for cucumbers?
A: Companion planting can help improve the health and productivity of your cucumber plants. Some good companion plants for cucumbers include marigolds (to deter pests), basil (to improve flavor and repel insects), dill (to attract beneficial insects), and nasturtiums (to attract aphids away from the cucumbers). Avoid planting cucumbers near aromatic herbs like sage, as they can inhibit growth.
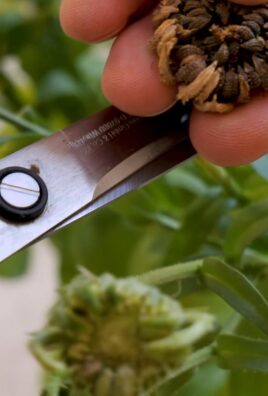
Q: How can I save seeds from my cucumber plants for next year?
A: Saving seeds from cucumbers can be a rewarding way to preserve your favorite varieties. However, it’s important to note that hybrid cucumber varieties will not produce true-to-type seeds. To save seeds, allow a few cucumbers to fully ripen on the vine until they turn yellow or orange. Scoop out the seeds and pulp, and rinse them thoroughly. Spread the seeds out on a paper towel to dry completely. Store the dried seeds in an airtight container in a cool, dark, and dry place. Be sure to label the container with the cucumber variety and the date the seeds were collected.
Leave a Comment