
Grow Garlic at Home – and unlock a world of flavor and satisfaction right in your backyard (or even on your windowsill!). Have you ever imagined the joy of harvesting your own pungent, flavorful garlic, knowing exactly where it came from and how it was grown? It’s easier than you think, and this DIY guide will show you how!
Garlic has a rich history, dating back thousands of years. From ancient Egypt, where it was used to fuel the pyramid builders, to traditional medicine across cultures, garlic has always been revered for its potent properties. Growing your own connects you to this long and fascinating lineage. I think it’s pretty cool!
But beyond the historical significance, why should *you* grow garlic at home? Well, store-bought garlic can often lack the robust flavor of homegrown varieties. Plus, you have complete control over the growing process, ensuring it’s free from harmful pesticides and chemicals. In today’s world, where we’re all becoming more conscious of what we consume, that peace of mind is invaluable. This DIY trick will save you money, provide you with fresher, more flavorful garlic, and give you a rewarding connection to nature. Let’s get started!
Grow Your Own Garlic: A Beginner’s Guide to a Bountiful Harvest
Okay, garlic lovers, listen up! Are you tired of buying garlic from the store that’s either bland or already sprouting? I’m here to tell you that growing your own garlic is surprisingly easy and incredibly rewarding. Plus, the flavor of homegrown garlic is simply unmatched. Trust me, once you taste it, you’ll never go back to store-bought! This guide will walk you through everything you need to know to successfully grow garlic in your own backyard (or even in containers!).
Choosing Your Garlic Variety
First things first, you need to decide what kind of garlic you want to grow. There are two main types: hardneck and softneck.
* **Hardneck Garlic:** This type is generally more flavorful and cold-hardy. It produces a flower stalk called a scape, which you can harvest and eat (they’re delicious!). Hardneck varieties are better suited for colder climates. Some popular hardneck varieties include ‘German Extra Hardy’, ‘Music’, and ‘Chesnok Red’.
* **Softneck Garlic:** Softneck garlic is what you typically find in grocery stores. It’s easier to braid and stores for a longer period. Softneck varieties are better suited for milder climates. Some popular softneck varieties include ‘California Early’, ‘Silverskin’, and ‘Inchelium Red’.
When choosing your garlic, make sure to buy it from a reputable source. You want to ensure you’re getting disease-free bulbs that are suitable for your climate. Avoid using garlic from the grocery store, as it may have been treated to prevent sprouting.
Preparing for Planting
Before you even think about sticking those cloves in the ground, you need to get your soil ready. Garlic loves well-drained soil that’s rich in organic matter.
* **Soil Preparation:** Choose a sunny spot in your garden that gets at least 6 hours of sunlight per day. Amend the soil with compost or well-rotted manure to improve drainage and fertility. Garlic prefers a slightly acidic to neutral soil pH (around 6.0 to 7.0).
* **Timing is Key:** The best time to plant garlic is in the fall, about 4-6 weeks before the ground freezes. This allows the cloves to establish roots before winter sets in. In warmer climates, you can plant in late winter or early spring.
* **Spacing:** Space your garlic cloves about 6-8 inches apart in rows that are 12-18 inches apart. This gives them enough room to grow and prevents overcrowding.
Planting Your Garlic
Alright, now for the fun part! Let’s get those cloves in the ground.
1. **Separate the Cloves:** Gently separate the cloves from the bulb, being careful not to damage them. Plant only the largest, healthiest cloves, as these will produce the biggest bulbs.
2. **Planting Depth:** Plant the cloves about 2-3 inches deep, with the pointed end facing up.
3. **Cover and Water:** Cover the cloves with soil and water thoroughly.
4. **Mulch:** Apply a layer of mulch, such as straw or shredded leaves, to help retain moisture, suppress weeds, and protect the cloves from extreme temperatures.
Caring for Your Garlic
Once your garlic is planted, it’s important to provide it with the care it needs to thrive.
* **Watering:** Water regularly, especially during dry periods. Garlic needs consistent moisture to develop healthy bulbs.
* **Weeding:** Keep the area around your garlic free of weeds, as they can compete for nutrients and water.
* **Fertilizing:** Fertilize your garlic in the spring with a balanced fertilizer or compost tea. This will provide it with the nutrients it needs to grow strong and produce large bulbs.
* **Scape Removal (Hardneck Varieties):** If you’re growing hardneck garlic, you’ll need to remove the scapes when they start to curl. This will redirect the plant’s energy into bulb development. Don’t throw those scapes away! They’re delicious grilled, sautéed, or used in pesto.
Harvesting Your Garlic
The moment you’ve been waiting for! Harvesting your own garlic is incredibly satisfying.
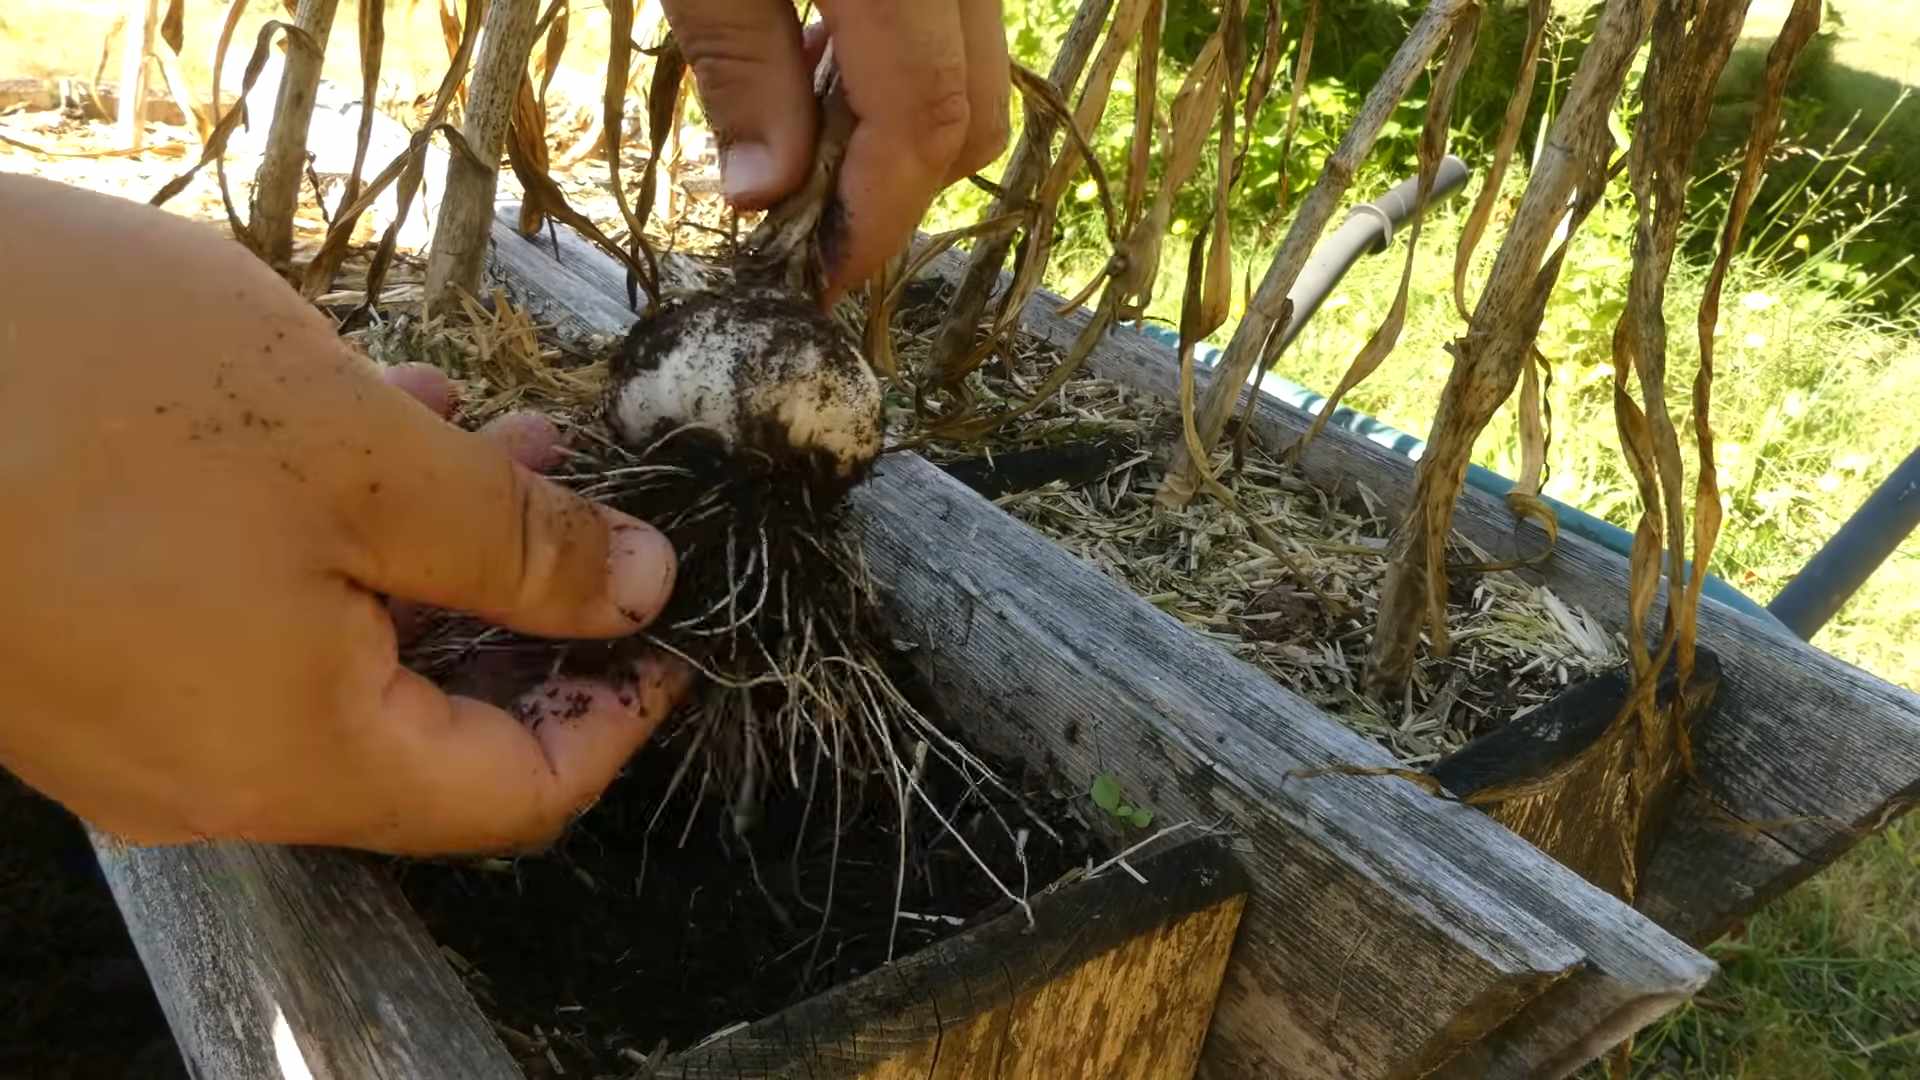
* **When to Harvest:** Garlic is typically ready to harvest in mid-summer, when the lower leaves start to turn yellow and brown.
* **How to Harvest:** Gently loosen the soil around the bulbs with a garden fork and carefully lift them out of the ground.
* **Curing:** Cure your garlic in a well-ventilated area for 2-3 weeks. This allows the bulbs to dry and develop their flavor. Hang the bulbs in bunches or spread them out on screens.
* **Storing:** Once the garlic is cured, you can store it in a cool, dry place for several months. Softneck garlic can be braided and hung, while hardneck garlic is best stored loose in a mesh bag.
Troubleshooting
Even with the best care, you might encounter some problems while growing garlic. Here are a few common issues and how to deal with them:
* **Pests:** Garlic is generally pest-resistant, but it can be susceptible to onion maggots and nematodes. Use row covers to protect your plants from pests.
* **Diseases:** Garlic can be affected by fungal diseases such as white rot and downy mildew. Ensure good air circulation and avoid overwatering to prevent these diseases.
* **Yellowing Leaves:** Yellowing leaves can be a sign of nutrient deficiency, overwatering, or disease. Check your soil pH and nutrient levels, and adjust your watering schedule accordingly.
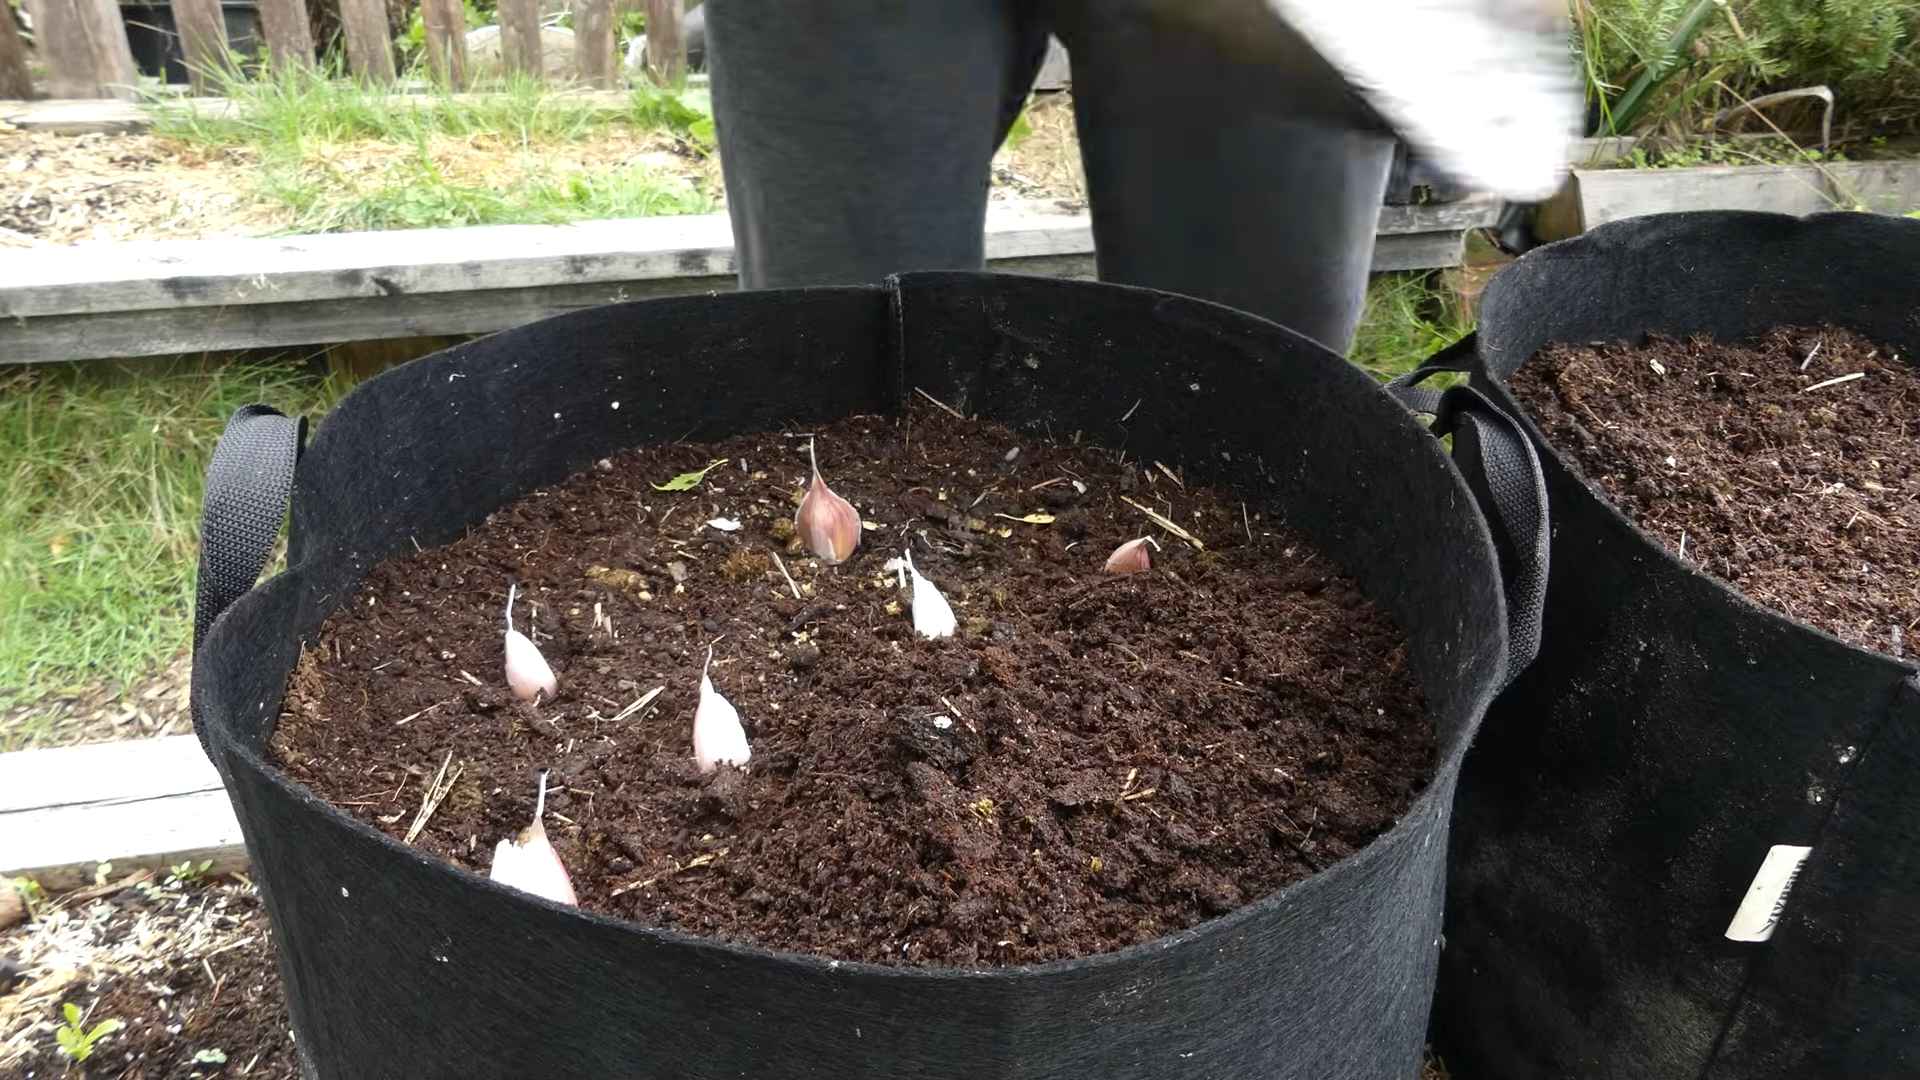
Growing Garlic in Containers
Don’t have a garden? No problem! You can still grow garlic in containers.
1. **Choose the Right Container:** Select a container that is at least 8 inches deep and wide. Make sure it has drainage holes.
2. **Use a Good Quality Potting Mix:** Avoid using garden soil in containers, as it can become compacted and poorly drained. Use a well-draining potting mix instead.
3. **Planting:** Plant the garlic cloves as described above, spacing them about 4 inches apart.
4. **Watering and Fertilizing:** Water regularly and fertilize with a balanced fertilizer every few weeks.
5. **Sunlight:** Place the container in a sunny location that gets at least 6 hours of sunlight per day.
Enjoying Your Homegrown Garlic
Now that you’ve harvested your own garlic, it’s time to enjoy the fruits (or rather, bulbs) of your labor! Use it in all your favorite recipes, from garlic bread to stir-fries to roasted vegetables. You can also preserve it by pickling, roasting, or making garlic confit.
Growing your own garlic is a rewarding experience that will provide you with delicious, flavorful garlic for months to come. So, what are you waiting for? Get out there and start planting! You’ll be amazed at how easy it is to grow your own garlic and how much better it tastes than store-bought. Happy gardening!
Conclusion
So, there you have it! Growing garlic at home is not only surprisingly simple, but it’s also incredibly rewarding. Imagine the satisfaction of harvesting your own plump, flavorful bulbs, knowing exactly where they came from and how they were grown. Forget those bland, imported cloves from the supermarket – with this DIY trick, you’ll have access to the freshest, most potent garlic imaginable, ready to elevate your culinary creations.
This isn’t just about saving a few dollars; it’s about connecting with your food, embracing a more sustainable lifestyle, and experiencing the pure joy of nurturing something from seed (or clove!) to harvest. The flavor difference alone is worth the effort. Homegrown garlic boasts a richer, more complex taste that will transform your favorite dishes. Think of the intense garlic aroma infusing your homemade pasta sauce, the subtle sweetness enhancing your roasted vegetables, or the pungent kick adding depth to your garlic bread.
But the benefits don’t stop there. Growing your own garlic allows you to experiment with different varieties. Why settle for standard supermarket garlic when you can explore the world of Rocambole, Porcelain, or Artichoke garlic? Each variety offers a unique flavor profile and growing characteristics, adding a whole new dimension to your culinary adventures. Consider planting a few different types to discover your personal favorite.
And speaking of variations, don’t be afraid to get creative! If you’re short on space, try growing garlic in containers on your balcony or patio. Just ensure they have adequate drainage and are placed in a sunny location. You can also interplant garlic with other vegetables in your garden to deter pests and improve soil health. Companion planting with strawberries, tomatoes, and even roses can yield fantastic results.
Another fun variation is to experiment with different planting times. While fall planting is generally recommended for most climates, you can also try planting garlic in early spring for a smaller, but still delicious, harvest. Just be sure to choose a variety that is well-suited to your climate and growing conditions.
Ultimately, the best way to learn is by doing. So, grab a few cloves of garlic, follow these simple steps, and embark on your own garlic-growing journey. You might be surprised at how easy and enjoyable it is. And once you’ve tasted the difference between homegrown and store-bought garlic, you’ll never go back.
We wholeheartedly encourage you to try this DIY trick for **growing garlic at home**. It’s a fantastic way to add fresh, flavorful ingredients to your meals, connect with nature, and enjoy the satisfaction of growing your own food.
Don’t forget to share your experiences with us! We’d love to hear about your successes, your challenges, and any tips or tricks you’ve discovered along the way. Post photos of your garlic plants, share your favorite garlic recipes, and let us know what varieties you’re growing. Together, we can create a community of garlic enthusiasts and inspire others to embrace the joys of homegrown goodness. So, get planting and let the garlic-growing adventure begin!
Frequently Asked Questions (FAQ)
Q: What kind of garlic should I plant?
A: The best type of garlic to plant depends on your climate. There are two main types: hardneck and softneck. Hardneck varieties are more cold-hardy and produce a flower stalk called a scape. They are generally recommended for colder climates. Softneck varieties are better suited for warmer climates and don’t typically produce a scape. They are also known for their longer storage life. Your local nursery or garden center can advise you on the best varieties for your specific region. Experimenting with different types is also a great way to find your favorite!
Q: When is the best time to plant garlic?
A: The ideal time to plant garlic is in the fall, about 4-6 weeks before the ground freezes. This allows the cloves to establish roots before winter sets in. In colder climates, planting in late September or early October is usually best. In warmer climates, you can plant later, around November or December. If you miss the fall planting window, you can also try planting in early spring as soon as the ground is workable, but the bulbs may be smaller.
Q: How do I prepare the soil for planting garlic?
A: Garlic prefers well-drained soil that is rich in organic matter. Before planting, amend the soil with compost or well-rotted manure. This will provide essential nutrients and improve drainage. Avoid planting garlic in areas where water tends to pool, as this can lead to rot. A slightly acidic to neutral soil pH (around 6.0-7.0) is ideal.
Q: How deep and how far apart should I plant the garlic cloves?
A: Plant garlic cloves about 2 inches deep, with the pointed end facing up. Space the cloves about 6-8 inches apart in rows that are 12-18 inches apart. This will give the plants enough room to grow and develop healthy bulbs.
Q: How much sunlight does garlic need?
A: Garlic needs at least 6 hours of sunlight per day to thrive. Choose a sunny location in your garden or on your balcony for optimal growth.
Q: How often should I water garlic?
A: Water garlic regularly, especially during dry periods. Keep the soil consistently moist, but avoid overwatering, which can lead to rot. A good rule of thumb is to water deeply once a week, or more often if the soil dries out quickly.
Q: Do I need to fertilize garlic?
A: Garlic benefits from regular fertilization. Apply a balanced fertilizer in the spring, when the plants are actively growing. You can also side-dress with compost or well-rotted manure. Avoid over-fertilizing, as this can lead to excessive foliage growth at the expense of bulb development.
Q: What are scapes, and what should I do with them?
A: Scapes are the flower stalks that hardneck garlic varieties produce in the spring. They are edible and have a mild garlic flavor. Removing the scapes encourages the plant to put more energy into bulb development, resulting in larger bulbs. You can harvest the scapes when they start to curl and use them in stir-fries, pesto, or other dishes.
Q: How do I know when the garlic is ready to harvest?
A: Garlic is typically ready to harvest in mid-summer, when the lower leaves start to turn yellow and brown. The tops of the plants may also start to fall over. To check if the bulbs are ready, carefully dig up a few plants and examine the bulbs. They should be plump and well-formed, with papery skins.
Q: How do I cure garlic after harvesting?
A: Curing garlic is essential for long-term storage. After harvesting, gently brush off any excess soil and allow the bulbs to dry in a well-ventilated place for 2-3 weeks. You can hang the plants upside down in bunches or spread them out on screens or racks. Once the necks are dry and the outer skins are papery, you can trim the roots and stalks and store the bulbs in a cool, dry place.
Q: Can I grow garlic in containers?
A: Yes, you can grow garlic in containers! Choose a large container with good drainage and fill it with well-draining potting mix. Plant the cloves as you would in the ground, spacing them about 4-6 inches apart. Water regularly and fertilize as needed. Container-grown garlic may not produce as large bulbs as garlic grown in the ground, but it’s still a great way to enjoy fresh, homegrown garlic.
Q: What are some common pests and diseases that affect garlic?
A: Common pests that affect garlic include aphids, thrips, and nematodes. Diseases include white rot, bulb rot, and downy mildew. To prevent pests and diseases, choose disease-resistant varieties, practice good sanitation, and avoid overwatering. If you encounter pests or diseases, treat them promptly with appropriate organic or chemical controls.
Q: Can I save my own garlic cloves for planting next year?
A: Yes, you can save your own garlic cloves for planting next year! Choose the largest, healthiest bulbs from your harvest and set them aside for planting. Store them in a cool, dry place until planting time. This is a great way to save money and ensure that you have a continuous supply of homegrown garlic.
Leave a Comment