
Grow Microgreens at Home – sounds intimidating, right? But trust me, it’s easier than you think, and way more rewarding than buying them at the store! Forget those sad, wilted greens in plastic containers. Imagine snipping fresh, vibrant, nutrient-packed microgreens right from your kitchen counter. That’s the magic we’re unlocking today with some simple DIY tricks.
Microgreens, those tiny edible seedlings, have actually been around for quite a while. While their recent surge in popularity might make them seem like a trendy health food, they’ve been used in various cuisines for centuries, adding a burst of flavor and visual appeal. Think of them as the sophisticated cousins of sprouts! But beyond their culinary charm, they’re nutritional powerhouses, often boasting higher concentrations of vitamins and minerals than their mature counterparts.
So, why should you bother learning to grow microgreens at home? Well, for starters, it’s incredibly cost-effective. Those little containers at the grocery store can be pricey! Plus, you have complete control over what goes into your greens – no pesticides, no questionable growing practices. But perhaps the biggest reason is the sheer satisfaction of nurturing something from seed to plate. It’s a little bit of nature, a little bit of self-sufficiency, and a whole lot of deliciousness, all rolled into one tiny plant. Let’s dive into some easy DIY tricks to get you started!
Grow Your Own Delicious Microgreens: A Beginner’s Guide
Hey there, fellow foodies and green thumbs! I’m so excited to share my experience with growing microgreens at home. It’s seriously one of the easiest and most rewarding DIY projects I’ve ever tackled. Not only do you get a constant supply of fresh, nutrient-packed greens, but it’s also incredibly satisfying to watch them sprout and flourish. Trust me, once you start, you’ll be hooked!
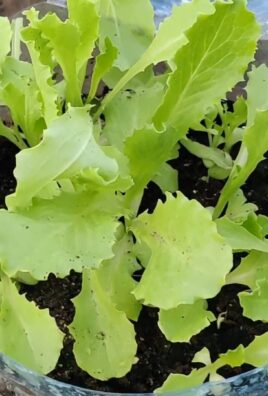
Microgreens are basically baby vegetable greens, harvested just after the cotyledon leaves (the first leaves to emerge from the seed) have developed. They’re packed with flavor and nutrients, often containing higher concentrations of vitamins and minerals than their mature counterparts. Plus, they add a beautiful pop of color and texture to salads, sandwiches, soups, and just about anything else you can think of!
So, are you ready to dive in? Let’s get started!
What You’ll Need
Before we get our hands dirty, let’s gather all the necessary supplies. Don’t worry, you probably already have some of these items lying around!
* Seeds: This is the most important part! Choose seeds specifically intended for microgreens. Some popular options include broccoli, radish, sunflower, pea shoots, kale, arugula, and mustard. You can find these at most garden centers or online. Pro Tip: Start with a single variety to get the hang of things, then experiment with different blends later.
* Growing Trays: You’ll need two trays: one with drainage holes and one without. The tray with drainage holes will hold your growing medium and seeds, while the tray without holes will act as a water reservoir. You can find these at garden centers or even repurpose plastic containers (just make sure they’re clean and food-safe).
* Growing Medium: I prefer using coconut coir (also known as coco coir) because it’s sustainable, holds moisture well, and is relatively inexpensive. You can also use seed starting mix or potting soil, but make sure it’s fine-textured and doesn’t contain large chunks of bark or other debris.
* Spray Bottle: This is essential for keeping your seeds and seedlings moist.
* Weight (Optional): A small weight, like a book or a brick wrapped in plastic, can help ensure even germination.
* Light Source: While microgreens can grow indoors with indirect sunlight, a grow light will significantly improve their growth and color. A simple fluorescent shop light works great.
* Scissors or Knife: For harvesting your microgreens.
* Water: Use filtered water if possible, as tap water can sometimes contain chemicals that can inhibit germination.
Step-by-Step Instructions: Planting Your Microgreens
Okay, now for the fun part! Let’s get those seeds planted.
1. Prepare Your Growing Medium: If you’re using coconut coir, you’ll need to rehydrate it. Place the coir in a large bowl or bucket and add water according to the package instructions. It should expand and become fluffy. If you’re using seed starting mix or potting soil, simply moisten it with water until it’s damp but not soggy.
2. Fill the Tray: Fill the tray with drainage holes with your moistened growing medium. Spread it evenly and gently press it down to create a firm surface. Leave about half an inch of space at the top of the tray.
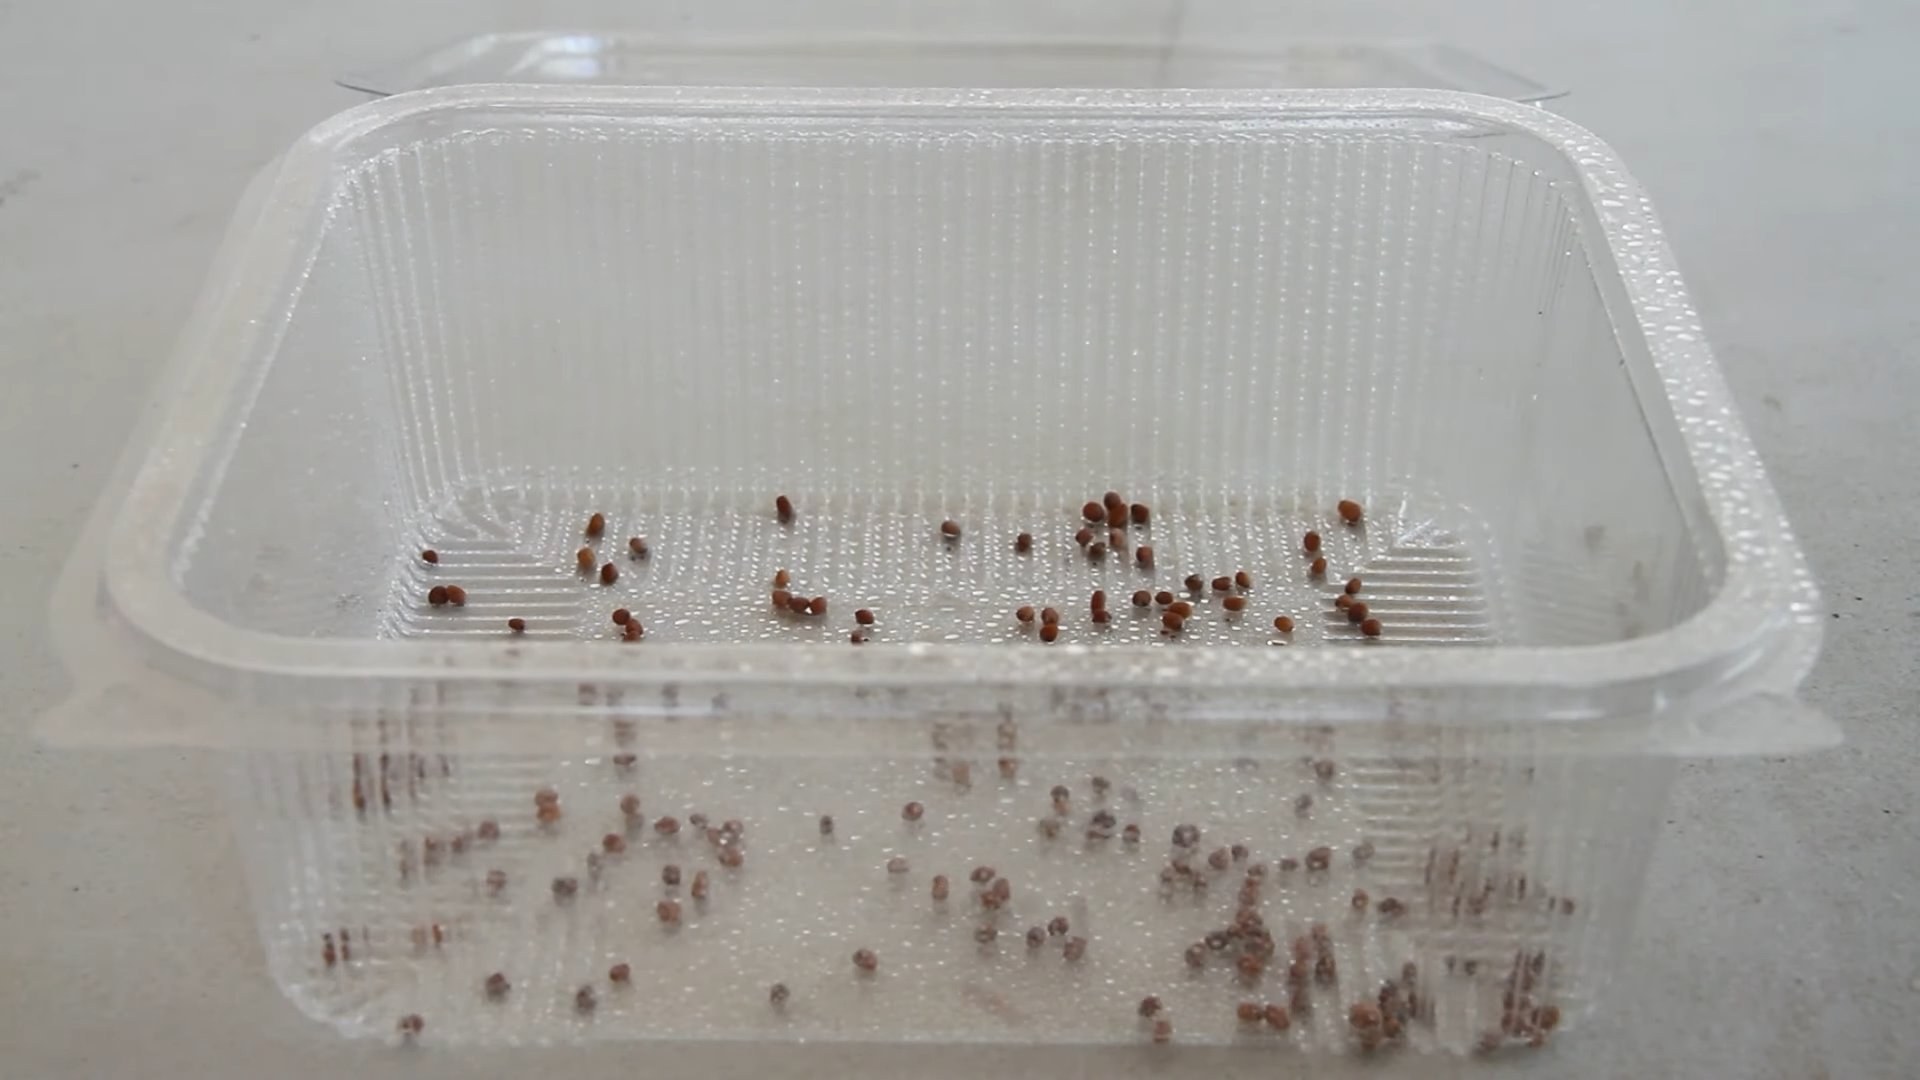
3. Sow the Seeds: This is where things get a little tricky, but don’t worry, you’ll get the hang of it. The key is to sow the seeds densely but not too densely. You want them to be close enough together to create a thick mat of greens, but not so close that they’re competing for resources. Sprinkle the seeds evenly over the surface of the growing medium. For smaller seeds like broccoli or radish, you can use a shaker or your fingers to distribute them. For larger seeds like sunflower or pea shoots, you may need to place them individually.
4. Mist the Seeds: Gently mist the seeds with water using your spray bottle. You want to moisten them thoroughly without dislodging them.
5. Cover and Weigh (Optional): Cover the tray with a lid or another tray to create a dark, humid environment. This will help the seeds germinate more quickly and evenly. If desired, place a small weight on top of the lid to ensure good seed-to-soil contact.
6. Wait for Germination: Place the tray in a dark, warm location (around 70-75°F is ideal). Check the tray daily and mist the seeds as needed to keep them moist. Germination times vary depending on the type of seed, but most microgreens will start to sprout within 2-5 days.
Caring for Your Microgreens
Once your seeds have germinated, it’s time to give them some light and air!
1. Remove the Cover: Once you see the first signs of sprouting, remove the cover and place the tray under your grow light or in a location with bright, indirect sunlight.
2. Water from the Bottom: This is crucial for preventing mold and mildew. Pour water into the tray without drainage holes (the water reservoir) and place the tray with drainage holes inside. The growing medium will absorb water from the bottom. Make sure the water level is high enough to reach the bottom of the growing medium, but not so high that it’s submerging the seedlings.
3. Maintain Moisture: Check the moisture level of the growing medium daily. It should be consistently moist but not soggy. Water as needed by adding water to the bottom tray. You may also need to mist the seedlings occasionally, especially if the air is dry.
4. Provide Adequate Light: If you’re using a grow light, position it a few inches above the seedlings. Adjust the height as the seedlings grow to prevent them from burning. If you’re using natural light, rotate the tray regularly to ensure even growth.
5. Air Circulation: Good air circulation is important for preventing mold and mildew. If you’re growing your microgreens in a closed space, consider using a small fan to circulate the air.
Harvesting and Enjoying Your Microgreens
The moment you’ve been waiting for!
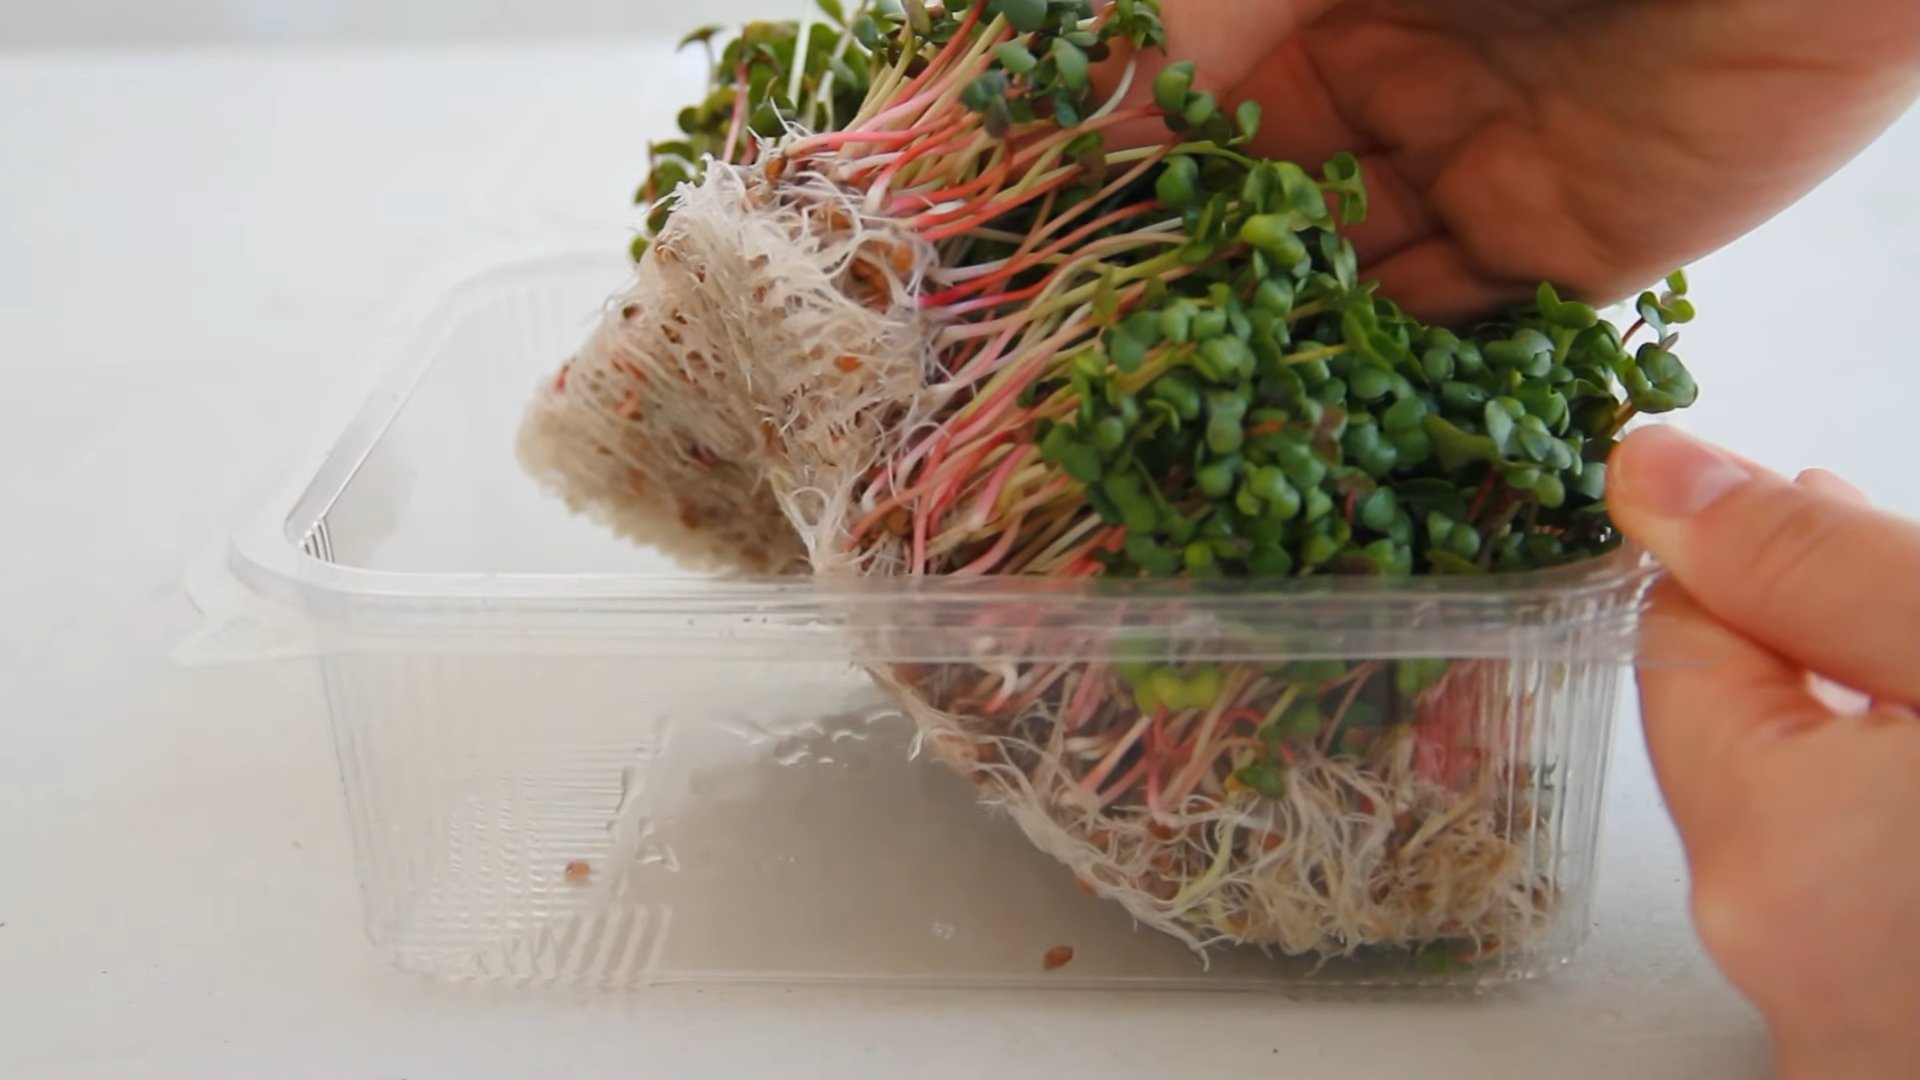
1. Harvest Time: Your microgreens are ready to harvest when they have developed their cotyledon leaves and the first set of true leaves (the leaves that look like miniature versions of the mature plant) are starting to emerge. This usually takes about 7-14 days, depending on the type of seed.
2. Harvesting Technique: Use sharp scissors or a knife to cut the microgreens just above the soil line. Harvest only what you need, as they’re best when freshly cut.
3. Washing (Optional): If desired, you can gently wash the microgreens in cool water before using them. However, I usually skip this step unless they’re visibly dirty.
4. Storage: Store harvested microgreens in a sealed container in the refrigerator. They’ll stay fresh for several days.
5. Enjoy! Now for the best part! Add your microgreens to salads, sandwiches, soups, smoothies, or use them as a garnish for any dish. Get creative and experiment with different flavors and textures!
Troubleshooting Tips
Even with the best intentions, things can sometimes go wrong. Here are a few common problems and how to fix them:
* Mold or Mildew: This is usually caused by excessive moisture and poor air circulation. Make sure you’re not overwatering your microgreens and provide adequate ventilation. You can also try spraying them with a diluted solution of hydrogen peroxide and water (1 part hydrogen peroxide to 10 parts water).
* Leggy Seedlings: This means your seedlings aren’t getting enough light. Move them closer to your grow light or to a brighter location.
* Uneven Germination: This can be caused by uneven watering or poor seed-to-soil contact. Make sure you’re watering evenly and that the seeds are in good contact with the growing medium.
* Slow Growth: This can be caused by a variety of factors, including low temperatures, poor soil quality, or insufficient light. Make sure your microgreens are getting adequate warmth, nutrients, and light.
Seed Density Guide
This is a general guide, and you may need to adjust the seed density based on your specific growing conditions and preferences.
* Broccoli: 12-14 grams per 10×20 tray
* Radish: 10-12 grams per 10×20 tray
* Sunflower: 40-50 grams per 10×20 tray
* Pea Shoots: 60-70 grams per 10×20 tray
* Kale: 8-10 grams per 10×20 tray
* Arugula: 6-8 grams per 10×20 tray
* Mustard:
Conclusion
So, there you have it! Growing microgreens at home is not only surprisingly simple, but it’s also an incredibly rewarding experience that brings a burst of fresh flavor and vital nutrients right to your kitchen counter. Forget those expensive, pre-packaged containers from the grocery store. With minimal effort and readily available materials, you can cultivate your own vibrant, nutrient-packed microgreens, tailored to your exact taste preferences.
This DIY trick is a must-try for several compelling reasons. First and foremost, it empowers you to take control of your food source. You know exactly what you’re eating – no hidden pesticides or questionable growing practices. Secondly, it’s a fantastic way to reduce your environmental footprint. By growing your own microgreens, you’re minimizing transportation costs and packaging waste. And finally, it’s simply a fun and engaging project that connects you with the natural world, even in the heart of the city.
But the beauty of this method lies in its adaptability. Feel free to experiment with different types of seeds. Radish microgreens offer a peppery kick, while broccoli microgreens are packed with antioxidants. Sunflower microgreens provide a nutty flavor and satisfying crunch. You can even create your own custom blends to suit your culinary creations.
Consider using different growing mediums as well. While soil is a classic choice, you can also explore alternatives like coconut coir or hydroponic mats. Each medium offers its own unique benefits in terms of water retention and nutrient delivery.
For those seeking an even more streamlined approach, explore self-watering systems designed specifically for microgreens. These systems automate the watering process, ensuring consistent moisture levels and minimizing the risk of over or under-watering.
And don’t be afraid to get creative with your containers! While plastic trays are a practical option, you can also repurpose items like yogurt containers, takeout boxes, or even egg cartons. Just be sure to provide adequate drainage to prevent waterlogging.
Ultimately, the key to success with this DIY trick is experimentation and observation. Pay attention to how your microgreens respond to different conditions and adjust your approach accordingly. With a little practice, you’ll be harvesting a bountiful crop of delicious and nutritious microgreens in no time.
We wholeheartedly encourage you to give this DIY trick a try. It’s a simple, affordable, and incredibly rewarding way to enhance your diet and connect with the natural world. And most importantly, we want to hear about your experience! Share your photos, tips, and variations in the comments below. Let’s build a community of home microgreen growers and inspire others to embrace the joys of homegrown goodness. What are you waiting for? Start growing your own microgreens at home today!
Frequently Asked Questions (FAQ)
What exactly are microgreens?
Microgreens are essentially young vegetable greens that are harvested just after the cotyledon leaves (the first leaves that emerge from the seed) have developed, and often after the first true leaves have appeared. They are larger than sprouts but smaller than baby greens, typically measuring 1-3 inches in height. They are packed with flavor and nutrients, often containing higher concentrations of vitamins and minerals than their mature counterparts.
What types of seeds can I use to grow microgreens?
The possibilities are vast! Some popular choices include:
* **Brassicas:** Broccoli, cauliflower, kale, radish, arugula, mustard
* **Legumes:** Peas, lentils, chickpeas
* **Cereals:** Wheatgrass, barley, oats, rice
* **Amaranthaceae:** Amaranth, quinoa, beet, spinach, chard
* **Asteraceae:** Sunflower, lettuce, endive, chicory
* **Apiaceae:** Carrot, celery, dill, fennel, parsley
However, it’s crucial to use seeds specifically intended for sprouting or microgreen production. Avoid using seeds that have been treated with fungicides or other chemicals, as these can be harmful to your health.
How long does it take to grow microgreens?
The growing time varies depending on the type of seed, but most microgreens are ready to harvest within 7-14 days. Radish microgreens, for example, tend to grow relatively quickly, while sunflower microgreens may take a bit longer.
What kind of light do microgreens need?
Microgreens need adequate light to thrive. Indirect sunlight is often sufficient, especially if you’re growing them near a bright window. However, if you don’t have access to enough natural light, you can supplement with artificial lighting, such as LED grow lights. Position the lights a few inches above the microgreens and provide them with 12-16 hours of light per day.
How often should I water my microgreens?
The frequency of watering depends on the growing medium and the environmental conditions. Generally, you should keep the growing medium consistently moist but not waterlogged. Check the moisture level daily and water as needed. A spray bottle is ideal for gently misting the microgreens without disturbing the delicate seedlings.
How do I harvest microgreens?
Harvesting microgreens is easy! Simply use a pair of scissors or a sharp knife to cut the stems just above the soil line. Rinse the microgreens gently with water and pat them dry before using them.
How long do microgreens last after harvesting?
Microgreens are best consumed fresh, but they can be stored in the refrigerator for up to a week. To prolong their shelf life, store them in an airtight container lined with a paper towel to absorb excess moisture.
Can I reuse the soil after harvesting microgreens?
It’s generally not recommended to reuse the soil after harvesting microgreens, as it may contain residual roots and seeds, as well as potential pathogens. It’s best to start with fresh soil for each new batch of microgreens.
Are there any microgreens that I should avoid growing?
Yes, some plants have toxic leaves and should not be grown as microgreens. Avoid growing microgreens from the nightshade family (tomatoes, potatoes, eggplants, peppers) as their leaves contain solanine, which can be harmful. Also, avoid growing rhubarb leaves as microgreens, as they contain oxalic acid.
My microgreens are growing mold. What should I do?
Mold growth can be a common problem when growing microgreens, especially in humid environments. To prevent mold, ensure adequate ventilation and avoid overwatering. If you notice mold, remove the affected areas immediately. You can also try spraying the microgreens with a diluted solution of hydrogen peroxide (1 part hydrogen peroxide to 10 parts water).
Can I grow microgreens outdoors?
Yes, you can grow microgreens outdoors, but you’ll need to protect them from extreme weather conditions, such as direct sunlight, heavy rain, and frost. A shaded patio or balcony is an ideal location.
What are the nutritional benefits of eating microgreens?
Microgreens are packed with vitamins, minerals, and antioxidants. Studies have shown that they can contain significantly higher levels of nutrients than their mature counterparts. They are a great source of vitamins A, C, E, and K, as well as minerals like iron, calcium, and magnesium.
How can I use microgreens in my cooking?
Microgreens are incredibly versatile and can be used in a variety of dishes. They can be added to salads, sandwiches, wraps, soups, and smoothies. They can also be used as a garnish for entrees or as a flavorful topping for pizzas and tacos.
Is growing microgreens at home cost-effective?
Absolutely! Growing microgreens at home is significantly more cost-effective than buying them from the store. A small packet of seeds can yield multiple harvests of microgreens, providing you with a continuous supply of fresh, nutritious greens at a fraction of the cost.
Leave a Comment