
Grow peanuts backyard? Absolutely! Imagine harvesting your own homegrown peanuts, roasted to perfection and enjoyed fresh from your garden. It’s easier than you think, and this guide will show you how to transform your backyard into a peanut paradise.
Peanuts, despite their name, aren’t actually nuts! They’re legumes, and their journey from South America to global snack staple is fascinating. Cultivated for centuries, peanuts have been a vital food source and a symbol of prosperity in many cultures. Now, you can bring that history to your own backyard!
Why should you learn to grow peanuts backyard? Well, store-bought peanuts can be expensive, and often contain preservatives. Growing your own ensures you have access to fresh, organic peanuts whenever you crave them. Plus, it’s an incredibly rewarding experience to nurture a plant from seed to harvest. I’m excited to share these simple DIY tricks and hacks that will make growing peanuts in your backyard a breeze, even if you’re a beginner gardener. Let’s get started and unlock the secrets to a bountiful peanut harvest!
Growing Peanuts in Your Backyard: A Beginner’s Guide
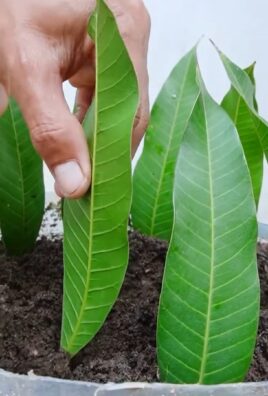
Okay, so you want to grow peanuts in your backyard? Awesome! It’s a surprisingly rewarding experience, and nothing beats the taste of freshly harvested, homegrown peanuts. Don’t worry if you’ve never done it before; I’m here to guide you through the whole process. It’s easier than you might think!
Choosing the Right Peanut Variety
Before we get our hands dirty, let’s talk about peanut varieties. Not all peanuts are created equal, and some are better suited for certain climates and growing conditions than others. Here’s a quick rundown:
* Virginia Peanuts: These are the large, elongated peanuts you often see roasted in the shell. They need a long growing season (120-150 days) and are best suited for warmer climates.
* Spanish Peanuts: These are smaller, rounder peanuts with a reddish skin. They have a shorter growing season (100-120 days) and are more tolerant of cooler temperatures. They’re often used in candies and peanut butter.
* Runner Peanuts: These are the most commonly grown type in the United States. They have a uniform size and shape, making them ideal for processing into peanut butter. They also need a fairly long growing season (120-140 days).
* Valencia Peanuts: These peanuts typically have three or four kernels per shell and are known for their sweet flavor. They have a shorter growing season (90-110 days) and are a good choice for cooler climates.
My Recommendation: If you’re a beginner, I’d suggest starting with Spanish or Valencia peanuts. They’re more forgiving and have a shorter growing season, which means you’ll see results sooner! Check your local nursery or online seed supplier for availability.
Preparing Your Peanut Patch
Peanuts need well-drained, sandy loam soil to thrive. They also need plenty of sunlight – at least 6-8 hours per day. Here’s how to prepare your peanut patch:
1. Choose a Sunny Location: As I mentioned, peanuts love sunshine. Pick a spot in your backyard that gets plenty of direct sunlight throughout the day.
2. Test Your Soil: Peanuts prefer a slightly acidic soil pH (around 6.0 to 6.5). You can purchase a soil testing kit at your local garden center or send a sample to your local agricultural extension office for analysis.
3. Amend the Soil: If your soil is heavy clay or compacted, you’ll need to amend it with organic matter like compost, well-rotted manure, or peat moss. This will improve drainage and aeration. Work the amendments into the soil to a depth of at least 12 inches.
4. Loosen the Soil: Use a garden fork or tiller to loosen the soil to a depth of at least 8 inches. This will make it easier for the peanut pegs (the stems that grow from the flowers and bury themselves in the ground to form the peanuts) to penetrate the soil.
5. Level the Soil: Rake the soil smooth to create a level planting surface.
Planting Your Peanuts
Now for the fun part – planting! Here’s how to do it:
1. Timing is Key: Peanuts are warm-season crops, so you’ll need to wait until the soil has warmed up to at least 65°F (18°C) before planting. This is usually a couple of weeks after the last frost in your area.
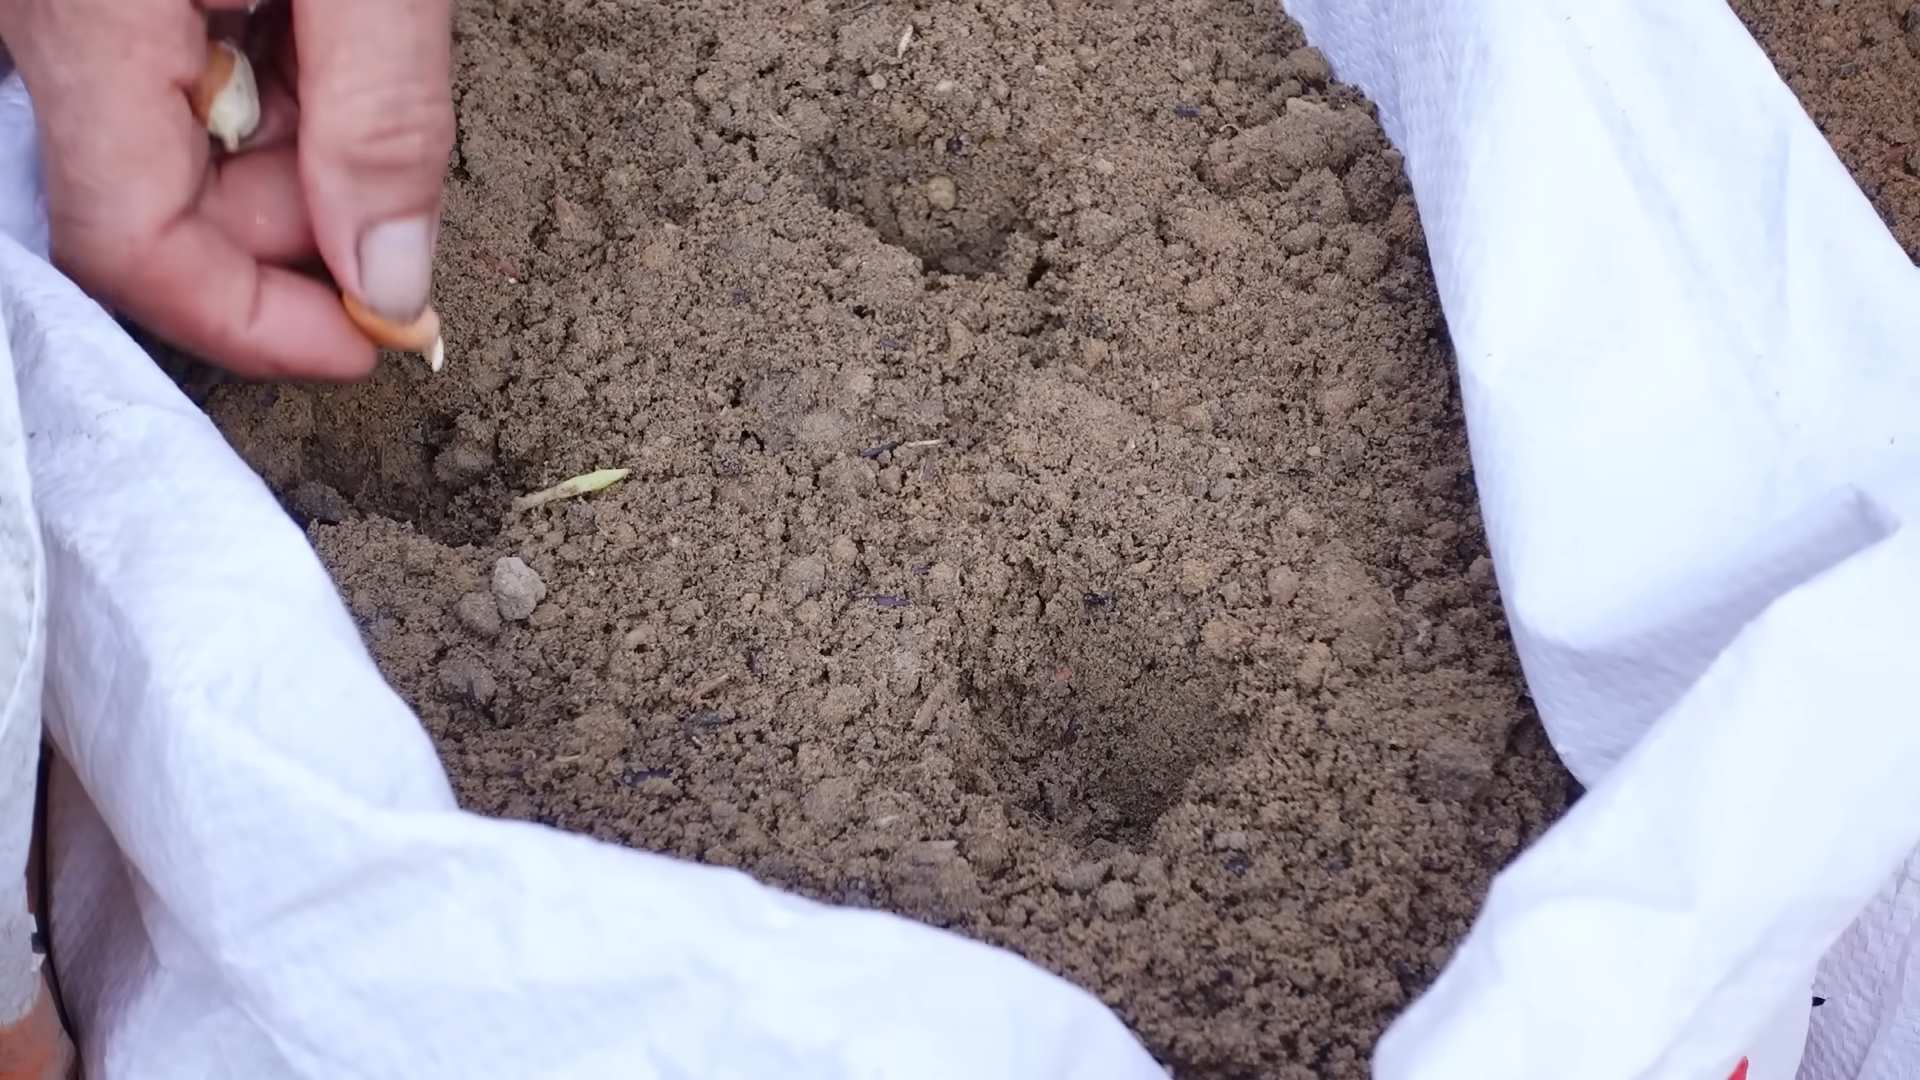
2. Prepare the Seeds: You can plant peanuts in the shell or shelled. If you’re planting in the shell, crack the shells gently to expose the peanuts inside. Be careful not to damage the peanuts themselves. Soaking the peanuts in water for a few hours before planting can help speed up germination.
3. Planting Depth and Spacing: Plant the peanuts about 2 inches deep and 6-8 inches apart in rows that are 2-3 feet apart.
4. Water Thoroughly: After planting, water the soil thoroughly to help the peanuts germinate.
Caring for Your Peanut Plants
Peanuts are relatively low-maintenance plants, but they do need some care to thrive.
1. Watering: Water your peanut plants regularly, especially during dry spells. Aim to keep the soil consistently moist, but not waterlogged.
2. Weeding: Keep your peanut patch free of weeds. Weeds can compete with the peanut plants for nutrients and water. Hand-pull weeds or use a hoe to remove them. Be careful not to damage the peanut plants’ roots.
3. Fertilizing: Peanuts are legumes, which means they can fix nitrogen from the air. However, they still benefit from a balanced fertilizer. Apply a fertilizer with a ratio of 5-10-10 (nitrogen-phosphorus-potassium) about a month after planting. Follow the instructions on the fertilizer package.
4. Hilling: As the peanut plants grow, you’ll notice small yellow flowers appearing. After the flowers are pollinated, they will produce pegs that grow downwards into the soil. These pegs are what will eventually become the peanuts. To help the pegs penetrate the soil, you can hill the soil around the base of the plants. This involves mounding up the soil around the plants’ stems.
5. Pest and Disease Control: Peanuts are generally resistant to pests and diseases, but they can be susceptible to certain problems, such as aphids, spider mites, and leaf spot. Inspect your plants regularly for signs of pests or diseases. If you find any problems, treat them with an appropriate insecticide or fungicide. Always follow the instructions on the product label.
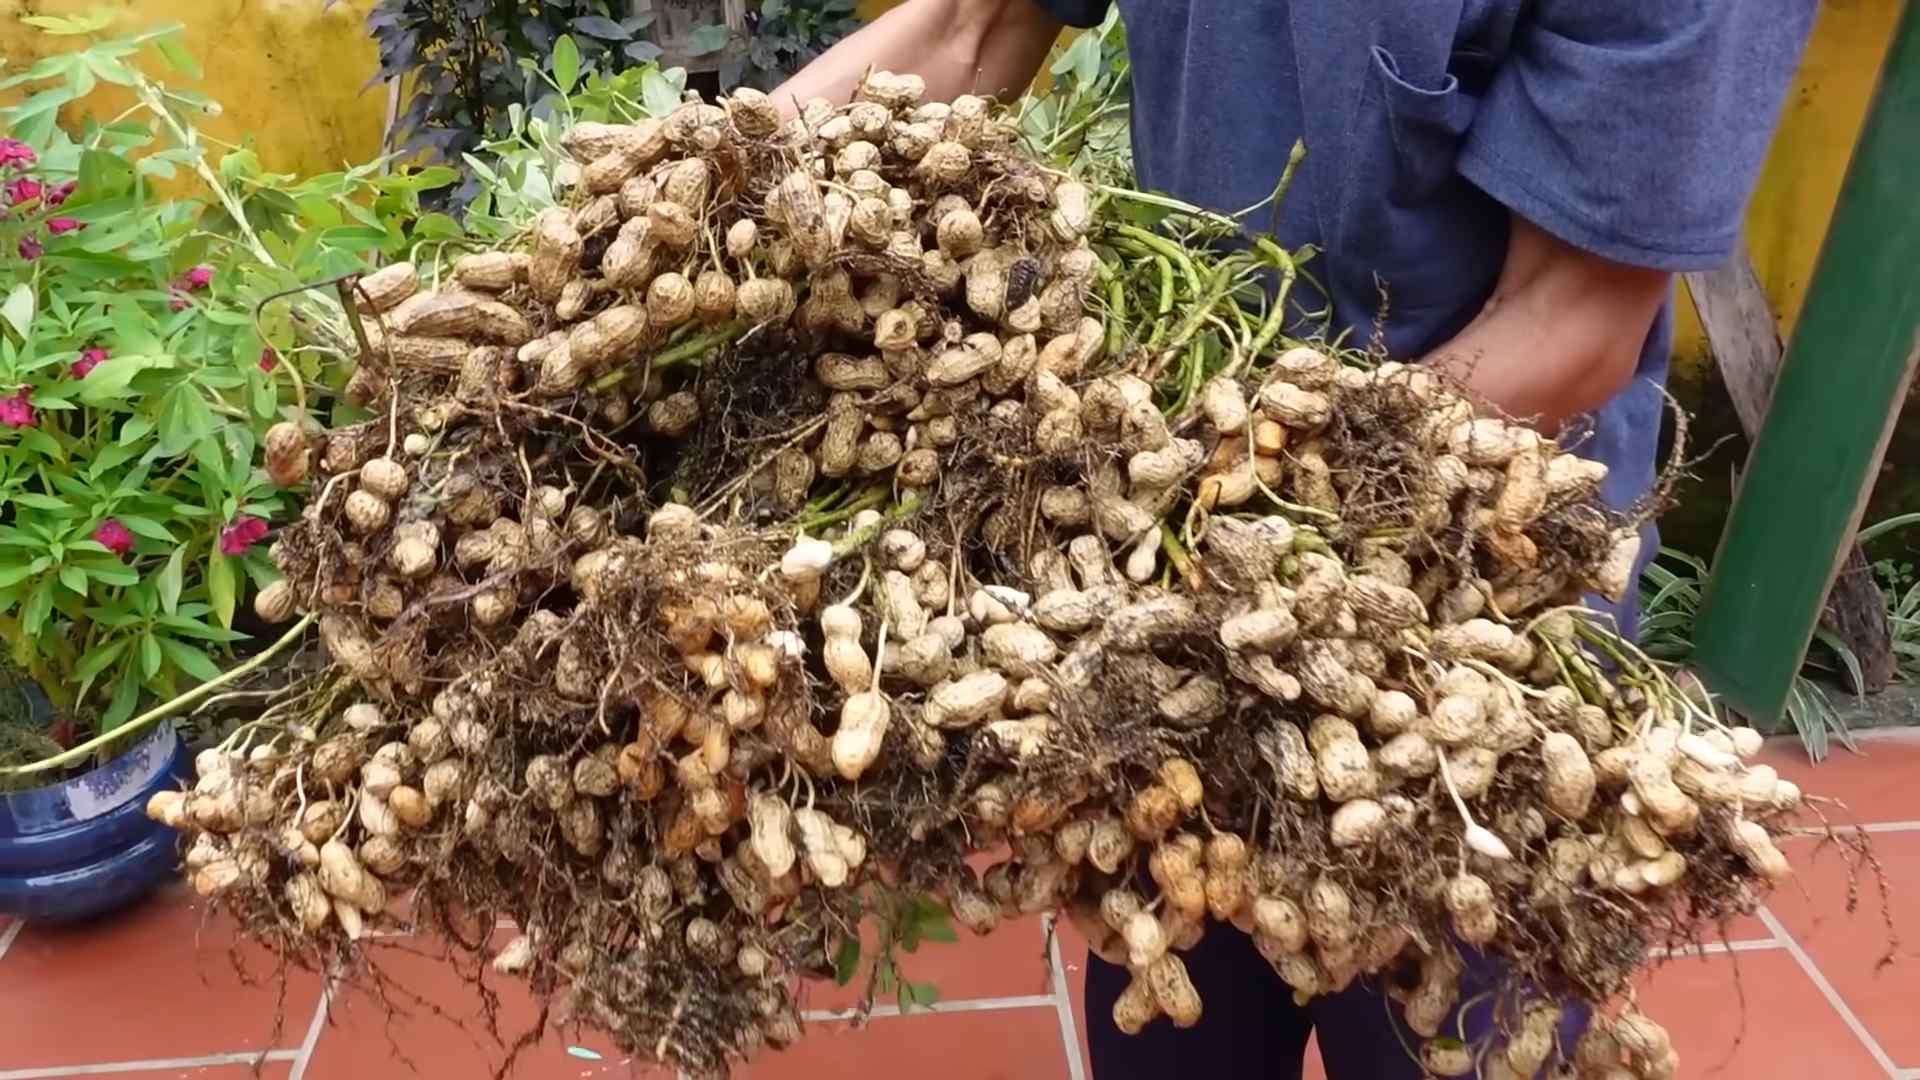
Harvesting Your Peanuts
Harvesting is the most exciting part! Here’s how to know when your peanuts are ready and how to harvest them:
1. Timing is Everything: The timing of the harvest is crucial. If you harvest too early, the peanuts will be immature and small. If you harvest too late, the peanuts will start to sprout in the ground. The best time to harvest is when the leaves of the peanut plants start to turn yellow and the inside of the peanut shells are dark brown. This is usually about 120-150 days after planting, depending on the variety.
2. Digging Up the Plants: Use a garden fork or shovel to carefully dig up the peanut plants. Be sure to dig deep enough to get all of the peanuts.
3. Shaking Off the Soil: Gently shake off the excess soil from the plants.
4. Curing the Peanuts: The peanuts need to be cured before you can eat them. Curing involves drying the peanuts to reduce their moisture content. There are two ways to cure peanuts:
* Air Drying: Hang the peanut plants upside down in a well-ventilated area for 2-4 weeks. Make sure the peanuts are not exposed to direct sunlight or rain.
* Oven Drying: Spread the peanuts in a single layer on a baking sheet and bake them in a preheated oven at 100°F (38°C) for 6-8 hours.
5. Storing Your Peanuts: Once the peanuts are cured, you can store them in an airtight container in a cool, dry place. They will keep for several months.
Roasting Your Homegrown Peanuts
Now for the best part – enjoying your homegrown peanuts! Here’s how to roast them:
1. Preheat Your Oven: Preheat your oven to 350°F (175°C).
2. Prepare the Peanuts: Spread the peanuts in a single layer on a baking sheet. You can roast them in the shell or shelled.
3. Roast the Peanuts: Roast the peanuts for 15-20 minutes, or until they are golden brown and fragrant. Stir them occasionally to ensure even roasting.
4. Cool the Peanuts: Remove the peanuts from the oven and let them cool completely.
5. Enjoy! Enjoy your freshly roasted, homegrown peanuts! You can eat them plain, add them to salads, or use them to make peanut butter.
Troubleshooting Common Peanut Growing Problems
Even with the best care, you might encounter some problems while growing peanuts. Here are a few common issues and how to address them:
* Poor Germination: If your peanuts aren’t germinating, it could be due to cold soil, poor soil drainage, or planting too deep. Make sure the soil is warm enough before planting, improve soil drainage by adding organic matter, and plant the peanuts at the correct depth (2 inches).
* Yellowing Leaves: Yellowing leaves can be a sign of nutrient deficiency, especially nitrogen. Apply a balanced fertilizer to provide the plants with the nutrients they need.
* Small Peanuts: Small peanuts can be caused by a short growing season, poor soil fertility, or insufficient watering. Choose a peanut variety that is suited for your climate, amend the soil with organic matter, and
Conclusion
So, there you have it! Growing peanuts in your own backyard isn’t just a fun gardening project; it’s a rewarding experience that brings you closer to nature and provides you with fresh, delicious, and homegrown snacks. Forget the store-bought peanuts filled with preservatives and unknown origins. Imagine the satisfaction of harvesting your own crop, knowing exactly where it came from and how it was grown. This DIY trick is a must-try for anyone who enjoys gardening, loves fresh food, or simply wants to add a unique and educational element to their outdoor space.
But why is this DIY peanut growing trick so compelling? It’s about more than just the peanuts themselves. It’s about the process. It’s about the connection to the earth. It’s about the joy of nurturing something from a tiny seed to a bountiful harvest. It’s about the surprise of digging up those hidden treasures beneath the soil. And, of course, it’s about the incredible flavor of freshly harvested peanuts, roasted to perfection in your own kitchen.
Why You Should Absolutely Try Growing Peanuts at Home
This isn’t just another gardening fad; it’s a sustainable and enjoyable way to supplement your food supply and connect with nature. Plus, it’s a fantastic project for families, teaching children about plant life cycles, responsibility, and the origins of their food.
Variations and Suggestions for Your Peanut Patch
Don’t be afraid to experiment! Try different varieties of peanuts to see which ones thrive best in your climate and soil. Virginia peanuts are known for their large size, while Spanish peanuts are smaller and sweeter. Runner peanuts are commonly used for peanut butter. Consider companion planting to enhance growth and deter pests. Marigolds, for example, are known to repel nematodes, which can damage peanut roots.
Think about the presentation too! Once harvested, you can roast your peanuts with different seasonings. Try a spicy chili-lime blend, a savory garlic-herb mix, or a sweet cinnamon-sugar coating. You can even use your homegrown peanuts to make your own peanut butter – the possibilities are endless!
Share Your Peanut Growing Journey!
We encourage you to give this DIY peanut growing trick a try. It’s easier than you might think, and the rewards are well worth the effort. Once you’ve harvested your first crop, be sure to share your experience with us! Post photos of your peanut plants, your harvest, and your delicious peanut creations on social media using #HomegrownPeanuts and #BackyardGardening. We can’t wait to see what you create! Let’s build a community of peanut-growing enthusiasts and share tips, tricks, and inspiration. Your success story could inspire others to embark on their own peanut-growing adventure.
Ready to get started?
Don’t delay! Order your peanut seeds or raw peanuts today and start planning your peanut patch. With a little bit of effort and the right conditions, you’ll be enjoying homegrown peanuts in no time. Happy gardening!
Frequently Asked Questions (FAQ)
Here are some frequently asked questions about growing peanuts in your backyard:
What is the best time to plant peanuts?
The ideal time to plant peanuts is after the last frost, when the soil temperature has warmed to at least 65 degrees Fahrenheit (around 18 degrees Celsius). This typically falls in late spring or early summer, depending on your climate. Planting too early can result in poor germination and stunted growth. Check your local weather forecasts and soil temperature before planting to ensure optimal conditions.
What kind of soil do peanuts need?
Peanuts thrive in well-drained, sandy loam soil. This type of soil allows for good aeration and drainage, which is essential for healthy root development and pod formation. Avoid heavy clay soils, as they can become waterlogged and hinder peanut growth. If you have clay soil, amend it with organic matter, such as compost or peat moss, to improve drainage and aeration. A slightly acidic to neutral soil pH (around 6.0 to 7.0) is also ideal.
How much sunlight do peanuts need?
Peanuts require at least 6-8 hours of direct sunlight per day to thrive. Choose a location in your backyard that receives ample sunlight throughout the day. Insufficient sunlight can lead to weak growth, reduced yields, and increased susceptibility to diseases.
How often should I water my peanut plants?
Peanuts need consistent moisture, especially during flowering and pod development. Water deeply and regularly, ensuring that the soil remains consistently moist but not waterlogged. Avoid overhead watering, as it can promote fungal diseases. Drip irrigation or soaker hoses are excellent options for delivering water directly to the roots. Reduce watering as the plants mature and the pods begin to ripen.
How long does it take for peanuts to mature?
Peanuts typically take 120-150 days to mature, depending on the variety and growing conditions. You’ll know they’re ready to harvest when the foliage begins to yellow and the pods feel plump and full. To test for maturity, dig up a few plants and check the inside of the pods. The veins inside the shell should be dark and prominent, and the kernels should be fully developed.
What are common pests and diseases that affect peanuts?
Some common pests that can affect peanuts include aphids, spider mites, and nematodes. Diseases such as leaf spot and white mold can also be problematic. Monitor your plants regularly for signs of pests or diseases and take appropriate action if necessary. Organic pest control methods, such as insecticidal soap or neem oil, can be effective for controlling aphids and spider mites. Crop rotation and proper sanitation can help prevent diseases.
How do I harvest peanuts?
To harvest peanuts, carefully dig up the entire plant, being sure to loosen the soil around the roots to avoid damaging the pods. Gently shake off any excess soil and allow the plants to dry in the sun for a few days. Once the plants are dry, you can remove the peanuts from the vines.
How do I cure peanuts?
Curing peanuts is essential for developing their flavor and preventing spoilage. After harvesting, spread the peanuts in a single layer on a screen or rack in a well-ventilated area. Allow them to dry for 2-3 weeks, or until the shells are brittle and the kernels are loose inside.
How do I store peanuts?
Store cured peanuts in an airtight container in a cool, dry place. Properly stored peanuts can last for several months. You can also freeze peanuts for longer storage.
Can I grow peanuts in containers?
Yes, you can grow peanuts in containers, but you’ll need to choose a large container (at least 18 inches in diameter) with good drainage. Use a well-draining potting mix and provide plenty of sunlight and water. Container-grown peanuts may not produce as many pods as those grown in the ground, but they can still provide a rewarding harvest.
Are there any specific peanut varieties that are better for backyard growing?
Several peanut varieties are well-suited for backyard growing. Virginia peanuts are known for their large size and are a popular choice for roasting. Spanish peanuts are smaller and sweeter, making them ideal for snacking. Runner peanuts are commonly used for peanut butter. Consider your climate and personal preferences when choosing a variety.
What are the benefits of growing my own peanuts?
Growing your own peanuts offers several benefits, including:
* Fresh, flavorful peanuts: Homegrown peanuts taste significantly better than store-bought peanuts.
* Control over growing practices: You can avoid using harmful pesticides and herbicides.
* Educational experience: Growing peanuts is a fun and educational activity for all ages.
* Sustainable food source: You can reduce your reliance on commercially grown peanuts.
* Unique gardening project: Growing peanuts is a unique and rewarding gardening experience.
Leave a Comment