
French Bean Planting Guide: Your Path to a Bountiful Harvest
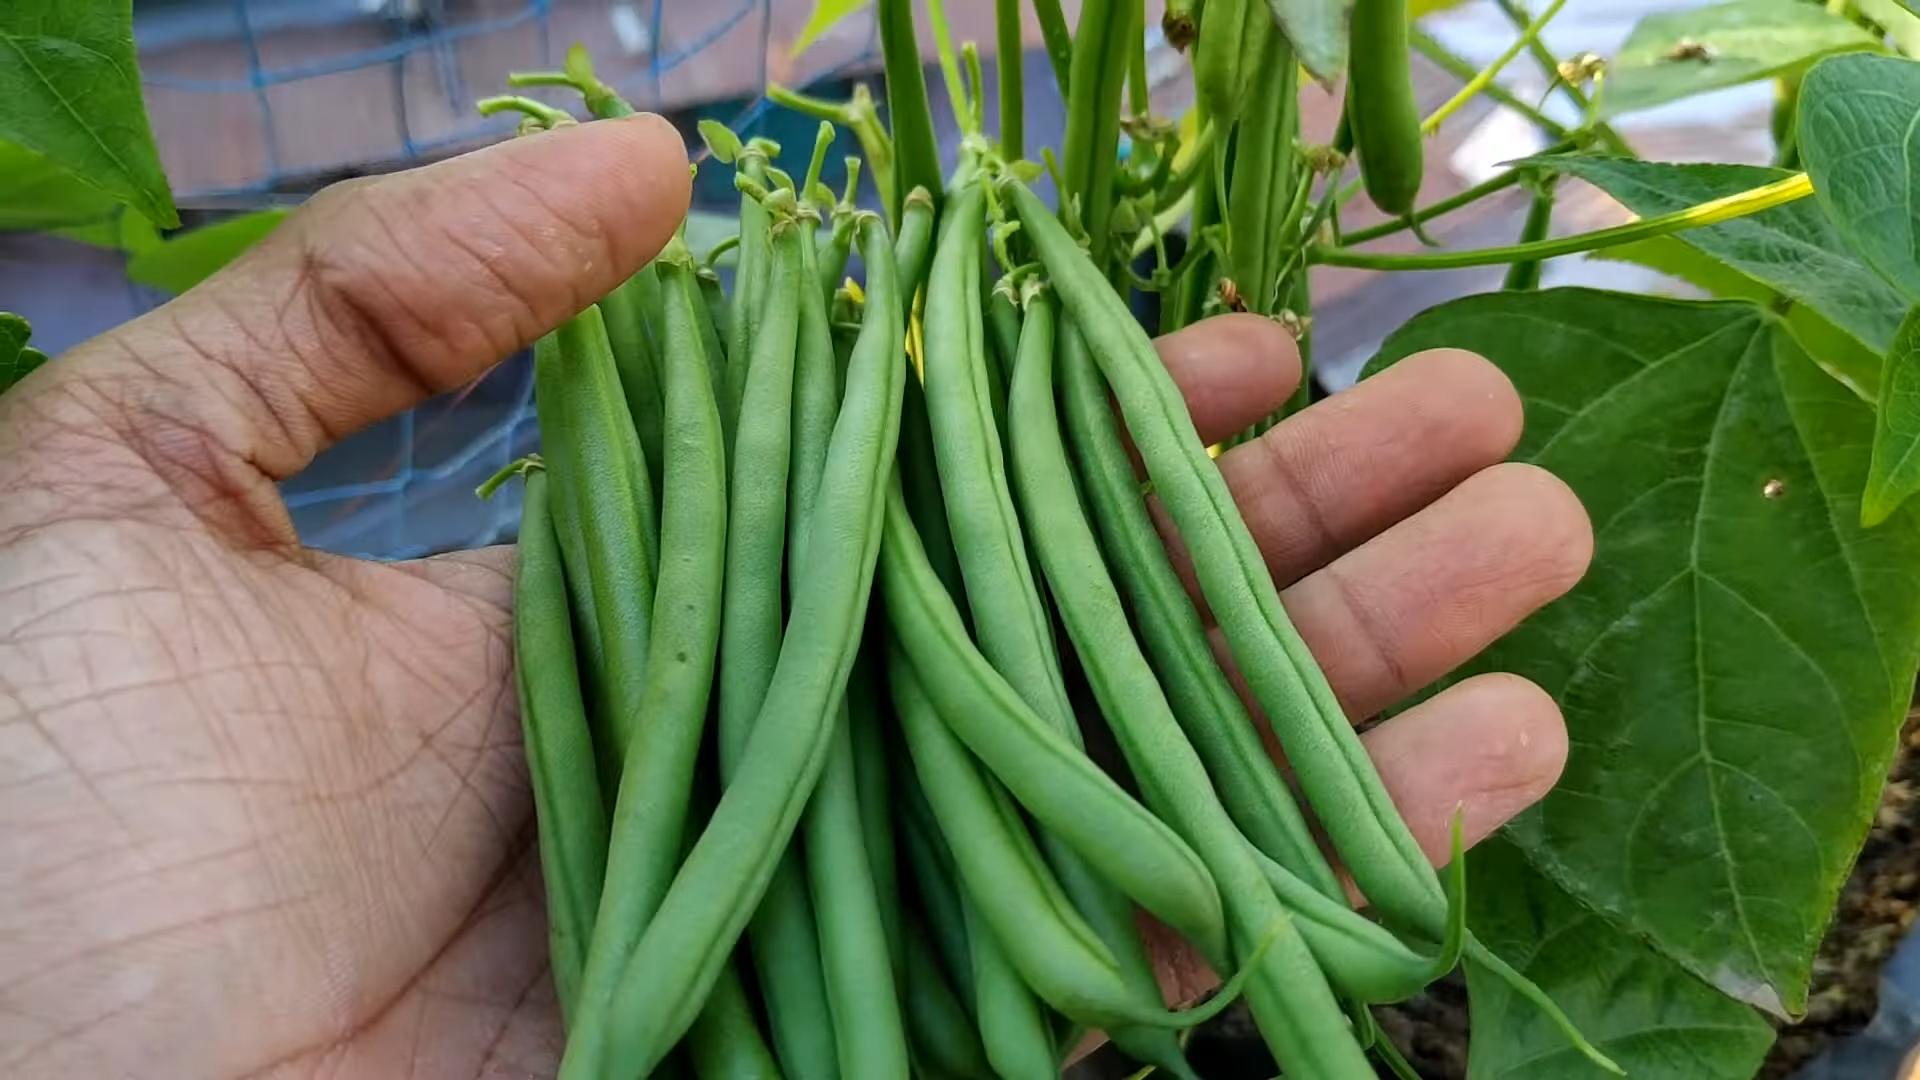
French Bean Planting Guide – I’ve always loved the simple joy of homegrown vegetables, and nothing beats the taste of freshly picked French beans. This guide isn’t just about planting; it’s about unlocking the secrets to a truly abundant harvest right in your own backyard. Forget expensive grocery store beans – let’s explore how you can cultivate your own delicious, healthy crop with easy-to-follow, DIY techniques.
The cultivation of French beans, or Phaseolus vulgaris, boasts a rich history, spanning centuries and continents. From ancient civilizations in the Americas to modern-day gardens, these versatile legumes have consistently provided sustenance and flavor. Their adaptability makes them a perfect choice for beginner gardeners, and mastering their cultivation is incredibly rewarding.
Why This Guide Matters
In today’s fast-paced world, many of us crave a connection to nature and a healthier lifestyle. This French Bean Planting Guide empowers you to take control of your food source, ensuring you know exactly where your beans come from and how they were grown. Beyond the deliciousness, homegrown beans are often more nutritious and flavorful than store-bought varieties. Plus, there’s an undeniable satisfaction in nurturing a plant from seed to harvest – a truly fulfilling experience.
This guide will walk you through every step, from selecting the right seeds and preparing your soil to dealing with common pests and harvesting your bounty. We’ll cover essential DIY techniques to maximize your yield and ensure healthy, vibrant plants. Get ready to transform your garden into a thriving haven of delicious French beans! So, let’s get started on your journey to mastering this French Bean Planting Guide and enjoying the fruits (or should I say, vegetables!) of your labor.
Unleash the Power of Vinegar: My Favorite Cleaning Hacks
Vinegar. It’s not just for salad dressings anymore! This humble kitchen staple is a cleaning powerhouse, and I’m going to share my favorite vinegar cleaning hacks with you. Get ready to ditch the harsh chemicals and embrace the natural cleaning power of vinegar.
Getting Started: What You’ll Need
- White distilled vinegar (the cheapest kind works best!)
- Spray bottles (various sizes are helpful)
- Microfiber cloths (these are super absorbent and gentle)
- Rubber gloves (optional, but recommended for sensitive skin)
- Baking soda (for some cleaning combinations)
- Soft-bristled brush (for scrubbing)
Phase 1: Tackling the Kitchen
- Cleaning the Microwave: Pour 1 cup of vinegar into a microwave-safe bowl and add 1 cup of water. Microwave on high for 5 minutes. The steam will loosen stuck-on food. Let it sit for a few minutes, then wipe clean with a microfiber cloth. For extra stubborn messes, let the vinegar mixture sit for longer.
- De-scaling Your Kettle: Fill your kettle halfway with vinegar and let it sit for 30 minutes to an hour. Boil the mixture, then let it cool. Rinse thoroughly with water several times. You’ll be amazed at how much scale is removed!
- Cleaning the Dishwasher: Pour 2 cups of vinegar into the bottom of your empty dishwasher. Run a full cycle on the hottest setting. This will help remove food residue and eliminate odors. For a deeper clean, sprinkle baking soda on the bottom of the dishwasher before adding the vinegar.
- Removing Coffee/Tea Stains from Mugs: Fill your stained mugs with a mixture of equal parts water and vinegar. Let them soak for at least 30 minutes, or even overnight for stubborn stains. Scrub gently with a soft-bristled brush and rinse thoroughly. This works wonders on those persistent tea rings!
- Cleaning the Garbage Disposal: Pour 1 cup of vinegar down the garbage disposal, followed by 1 cup of baking soda. Let it fizz for a few minutes, then flush with cold water. This will help neutralize odors and remove grime.
- Shine Stainless Steel Sinks: Mix equal parts water and vinegar in a spray bottle. Spray onto your stainless steel sink and wipe clean with a microfiber cloth. For extra shine, buff with a dry cloth afterwards. This will leave your sink sparkling!
Phase 2: Bathroom Bliss
- Cleaning the Showerhead: Fill a plastic bag with vinegar and secure it around your showerhead using a rubber band. Let it soak for at least an hour, or overnight for heavily mineral-deposited showerheads. Remove the bag and wipe clean. The vinegar will dissolve mineral buildup, leaving your showerhead sparkling.
- Cleaning the Toilet Bowl: Pour 1 cup of vinegar into the toilet bowl. Let it sit for 30 minutes, then scrub with a toilet brush. Flush the toilet. For extra cleaning power, add a ½ cup of baking soda before the vinegar. The fizzing action will help loosen grime.
- Removing Soap Scum: Mix equal parts water and vinegar in a spray bottle. Spray onto soap scum buildup in your shower or bathtub. Let it sit for a few minutes, then scrub with a soft-bristled brush or sponge. Rinse thoroughly. This is a much gentler alternative to harsh chemical cleaners.
- Cleaning Mirrors and Glass: Mix equal parts water and vinegar in a spray bottle. Spray onto mirrors and glass surfaces. Wipe clean with a microfiber cloth or newspaper (newspaper works surprisingly well!). This will leave your mirrors streak-free and sparkling.
- Cleaning Grout: For lightly soiled grout, spray a mixture of equal parts water and vinegar onto the grout. Let it sit for a few minutes, then scrub with a grout brush. Rinse thoroughly. For heavily soiled grout, you may need to repeat the process or use a stronger cleaning solution. Always test a small, inconspicuous area first.
Phase 3: Beyond the Kitchen and Bathroom
- Cleaning Windows: Mix equal parts water and vinegar in a spray bottle. Spray onto windows and wipe clean with a microfiber cloth or newspaper. This will leave your windows sparkling clean and streak-free. I find this method far superior to commercial window cleaners.
- Washing Walls: For washable walls, mix equal parts water and vinegar in a spray bottle. Spray onto the walls and wipe clean with a microfiber cloth. This is a great way to remove light dirt and grime. Always test a small, inconspicuous area first to ensure it doesn’t damage the paint.
- Removing Odors from Fabrics: Vinegar can help neutralize odors in fabrics. For example, you can add ½ cup of vinegar to your washing machine along with your laundry detergent to help freshen up your clothes and remove lingering smells. Just be sure to rinse thoroughly.
- Cleaning Wood Furniture: Mix 1 tablespoon of vinegar with 1 cup of warm water. Dampen a soft cloth with the solution and gently wipe down your wood furniture. Always test a small, inconspicuous area first. This is a great way to clean and polish wood without damaging the finish.
- Removing Sticky Residue: Vinegar can help remove sticky residue from surfaces. Simply apply vinegar to the sticky area, let it sit for a few minutes, then wipe clean. This works well on things like sticker residue or spilled sugary drinks.
Important Note:
Always test any cleaning solution on a small, inconspicuous area first to ensure it doesn’t damage the surface. Avoid using vinegar on marble, granite, or other sensitive surfaces. Also, remember that vinegar has a strong smell, so ensure adequate ventilation when using it.

Conclusion
So there you have it – your comprehensive guide to successfully planting French beans! This DIY approach to growing your own French beans offers a rewarding experience that goes beyond simply harvesting delicious vegetables. It connects you directly to the source of your food, allowing you to control the quality and freshness from seed to plate. This method is a must-try for anyone looking to enhance their gardening skills, enjoy fresher-than-fresh produce, and experience the immense satisfaction of nurturing a plant from its humble beginnings to a bountiful harvest. The relatively low cost and minimal space requirements make it accessible to even the most novice gardener, while the potential for a plentiful yield makes it incredibly worthwhile. Beyond the simple pleasure of homegrown food, you’ll also find yourself appreciating the natural world and the cyclical processes of life in a new and engaging way.
Beyond the basic method outlined, there are numerous ways to personalize your French bean planting experience. Experiment with different varieties of French beans – from the classic green beans to the vibrant yellow or even the intriguing purple varieties. Each offers a unique flavor profile and growing characteristic, allowing you to tailor your garden to your specific preferences. Consider companion planting – incorporating other plants that benefit from growing alongside French beans, such as basil or marigolds. These companion plants can help deter pests and improve the overall health of your bean plants. You can also explore different planting methods, such as using trellises or stakes to support climbing bean varieties, maximizing space and yield. For those with limited space, consider growing French beans in containers or raised beds. The possibilities are truly endless!
We strongly encourage you to try this DIY French bean planting guide and embark on this rewarding gardening journey. Share your experiences, successes, and even your challenges with us and the wider gardening community. Post pictures of your thriving bean plants and delicious harvests on social media using #FrenchBeanPlantingGuide. Let’s build a supportive network of home gardeners, sharing tips, tricks, and the joy of growing our own food. Your feedback is invaluable in helping others succeed in their own French bean planting endeavors. Remember, even small successes are significant steps towards a more self-sufficient and fulfilling life. So grab your seeds, get your hands dirty, and experience the magic of growing your own French beans! You won’t regret it.
Frequently Asked Questions
What type of soil is best for planting French beans?
French beans thrive in well-drained, fertile soil with a slightly acidic to neutral pH (6.0-7.0). Amend heavy clay soils with compost or other organic matter to improve drainage. Sandy soils may benefit from the addition of organic matter to retain moisture. A soil test can help determine your soil’s pH and nutrient levels, allowing you to make necessary adjustments. Proper soil preparation is crucial for successful French bean cultivation.
How much sunlight do French beans need?
French beans are sun-loving plants and require at least six to eight hours of direct sunlight per day for optimal growth. Choose a location in your garden that receives ample sunlight throughout the day. Insufficient sunlight can lead to poor growth, reduced yields, and increased susceptibility to diseases. Consider the sun’s path throughout the day when selecting a planting site.
When is the best time to plant French beans?
The best time to plant French beans depends on your climate. In warmer climates, you can plant them directly outdoors after the last frost. In cooler climates, it’s often best to start seeds indoors several weeks before the last expected frost and then transplant them outdoors once the weather warms up. Check your local frost dates to determine the optimal planting time for your region. Always refer to seed packet instructions for specific planting guidelines.
How often should I water my French beans?
Consistent watering is essential for healthy French bean growth. Aim to keep the soil consistently moist but not waterlogged. Water deeply and less frequently rather than shallowly and often. The frequency of watering will depend on your climate, soil type, and weather conditions. During hot, dry periods, you may need to water more frequently. Observe the soil moisture level and adjust your watering schedule accordingly. Mulching around the plants can help retain soil moisture and reduce the need for frequent watering.
What are some common problems when growing French beans and how can I address them?
Common problems include pests like aphids, bean beetles, and spider mites, as well as diseases such as anthracnose and bacterial blight. Regularly inspect your plants for signs of pests or diseases. Use organic pest control methods such as insecticidal soap or neem oil to address pest infestations. Ensure good air circulation to prevent fungal diseases. Rotate your crops annually to prevent the buildup of diseases in the soil. Choosing disease-resistant varieties can also help minimize problems. Early detection and prompt action are key to managing these issues effectively.
Can I save seeds from my French bean harvest for planting next year?
Yes, you can save seeds from your French bean harvest for planting the following year. Allow the bean pods to fully mature and dry on the plant until they turn brown and brittle. Then, carefully remove the seeds from the pods and allow them to dry further in a cool, dry place. Store the dried seeds in airtight containers in a cool, dark, and dry location. Proper seed saving ensures you have a supply of seeds for future plantings, continuing your DIY French bean journey. Remember to label your seeds with the variety and year of harvest.

Leave a Comment