
Grow radishes quickly? Absolutely! Imagine plucking crisp, peppery radishes from your own garden just weeks after planting. Sounds like a dream, right? Well, it doesn’t have to be! This DIY guide is packed with simple yet effective tricks to help you achieve a radish harvest in record time.
Radishes have been cultivated for centuries, with evidence suggesting their presence in ancient Egypt and Greece. They were valued not only for their unique flavor but also for their medicinal properties. Today, they remain a popular and versatile vegetable enjoyed worldwide.
But let’s be honest, waiting for your garden goodies to mature can be agonizing! That’s where these DIY hacks come in. Whether you’re a seasoned gardener or just starting out, these tips will empower you to grow radishes quickly and efficiently. We’ll cover everything from soil preparation and seed selection to watering techniques and pest control, ensuring you get the most out of your radish-growing experience. I’m excited to share these secrets with you, so let’s get started and turn your garden into a radish-producing powerhouse!
Grow Radishes in Just 3 Weeks: A DIY Guide for Speedy Harvests
Hey there, fellow gardening enthusiasts! Are you impatient like me and crave fresh, homegrown veggies without the long wait? Then you’re in the right place! I’m going to share my secrets for growing radishes – those peppery little gems – in a mere three weeks. Yes, you read that right! Forget months of waiting; with this guide, you’ll be enjoying crisp, delicious radishes in no time.
Why Radishes Are Perfect for the Impatient Gardener
Radishes are fantastic for a few key reasons:
* Fast Germination: They sprout quickly, often within just a few days.
* Short Growing Season: Most varieties mature in 21-30 days.
* Easy to Grow: They’re relatively low-maintenance and forgiving.
* Succession Planting: You can sow seeds every week or two for a continuous harvest.
* Great for Beginners: If you’re new to gardening, radishes are a confidence booster!
Choosing the Right Radish Variety
Not all radishes are created equal! Some varieties are faster-growing than others. Here are a few of my favorites for quick harvests:
* Cherry Belle: A classic, round, red radish that matures in about 22 days.
* French Breakfast: Oblong, red with a white tip, and ready in around 23 days.
* Sparkler White Tip: Similar to French Breakfast, but slightly faster, maturing in about 20 days.
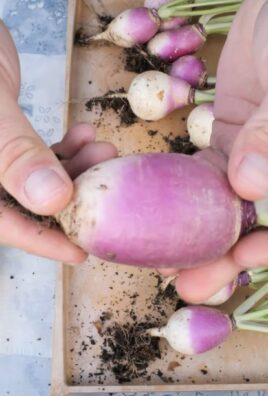
* Easter Egg: A mix of red, pink, purple, and white radishes that mature at slightly different rates, providing a colorful harvest.
* Champion: A larger, round, red radish that still matures relatively quickly, around 28 days.
Preparing Your Radish Growing Space
Radishes aren’t picky, but they do appreciate a little TLC. Here’s how to get your growing space ready:
* Sunlight: Radishes need at least 6 hours of sunlight per day.
* Soil: Loose, well-drained soil is crucial. Compacted soil can lead to misshapen radishes.
* Soil pH: Aim for a pH of 6.0 to 7.0.
* Fertilizer: Radishes don’t need a lot of fertilizer. Too much nitrogen can result in lush foliage but small roots. A light application of compost or a balanced fertilizer (like 10-10-10) at planting time is usually sufficient.
Step-by-Step Guide to Growing Radishes in 3 Weeks
Okay, let’s get down to the nitty-gritty! Here’s my foolproof method for growing radishes quickly:
1. Prepare the Soil:
* Loosen the soil to a depth of at least 6 inches. Remove any rocks, clumps, or debris.
* Incorporate compost or well-rotted manure to improve soil fertility and drainage. I usually add a couple of inches of compost and mix it in thoroughly.
* Rake the soil smooth to create a level planting surface.
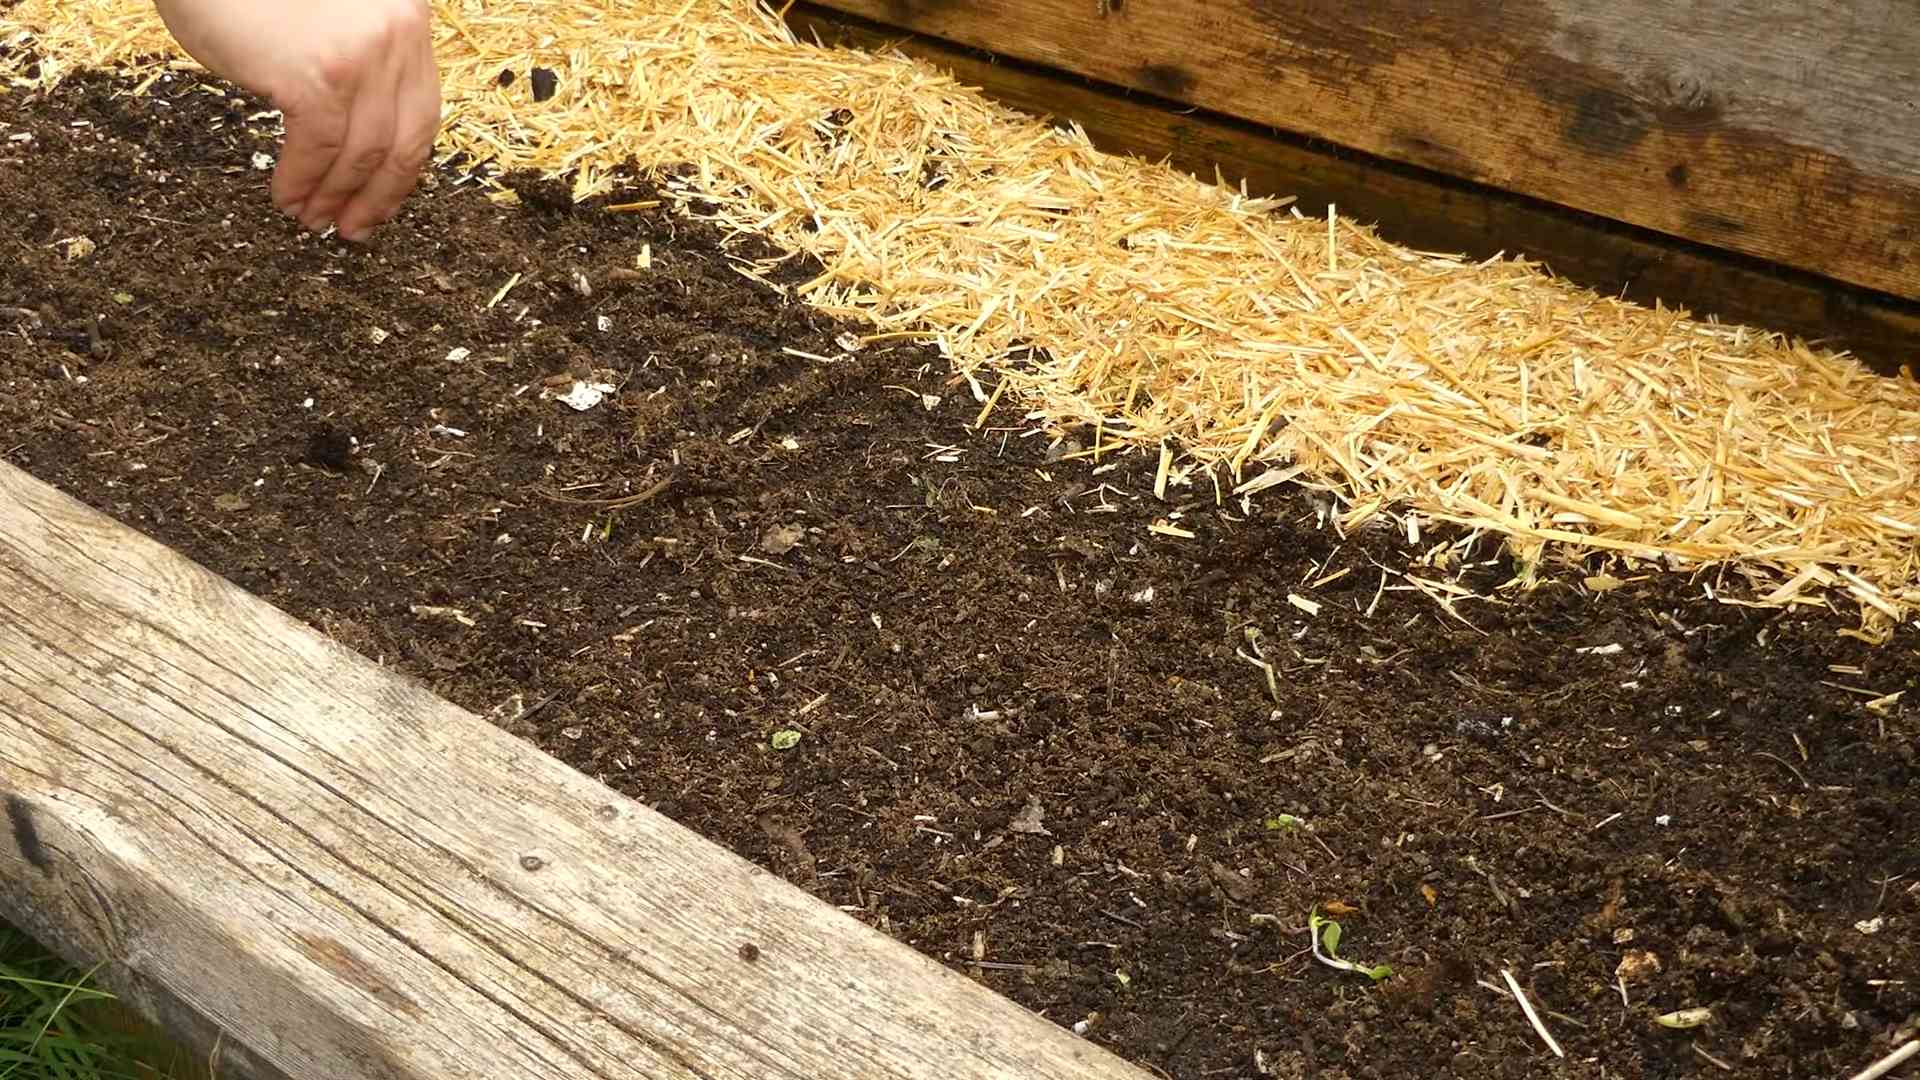
2. Sow the Seeds:
* Radish seeds are small, so handle them carefully.
* Create shallow furrows about ½ inch deep and 1 inch apart. You can use your finger or a garden tool to make the furrows.
* Sow the seeds thinly in the furrows, spacing them about ½ to 1 inch apart. Overcrowding can lead to smaller radishes.
* Cover the seeds with a thin layer of soil and gently pat it down.
3. Water Thoroughly:
* Water the planting area gently but thoroughly after sowing the seeds.
* Keep the soil consistently moist but not waterlogged until the seeds germinate. I usually water every day or two, depending on the weather.
4. Thin Seedlings (If Necessary):
* Once the seedlings emerge (usually within 3-7 days), thin them to about 1-2 inches apart. This will give the radishes enough room to grow.
* To thin, gently pull out the extra seedlings, being careful not to disturb the roots of the remaining plants.
5. Water Regularly:
* Radishes need consistent moisture to grow quickly and develop crisp roots.
* Water deeply whenever the top inch of soil feels dry. Avoid letting the soil dry out completely, as this can cause the radishes to become tough and bitter.
* I prefer to water in the morning to allow the foliage to dry before nightfall, which helps prevent fungal diseases.
6. Weed Carefully:
* Keep the planting area free of weeds, which can compete with the radishes for nutrients and water.
* Weed by hand, being careful not to disturb the radish roots.
* Mulching around the plants can help suppress weed growth and retain moisture. I like to use straw or shredded leaves as mulch.
7. Monitor for Pests and Diseases:
* Radishes are generally pest-resistant, but they can be susceptible to flea beetles and root maggots.
* Flea beetles can chew small holes in the leaves. Cover the plants with row covers to prevent flea beetle damage.
* Root maggots can tunnel into the roots, causing them to become distorted and unmarketable. Rotate your crops to prevent root maggot infestations.
* If you notice any signs of pests or diseases, take action promptly to prevent them from spreading.
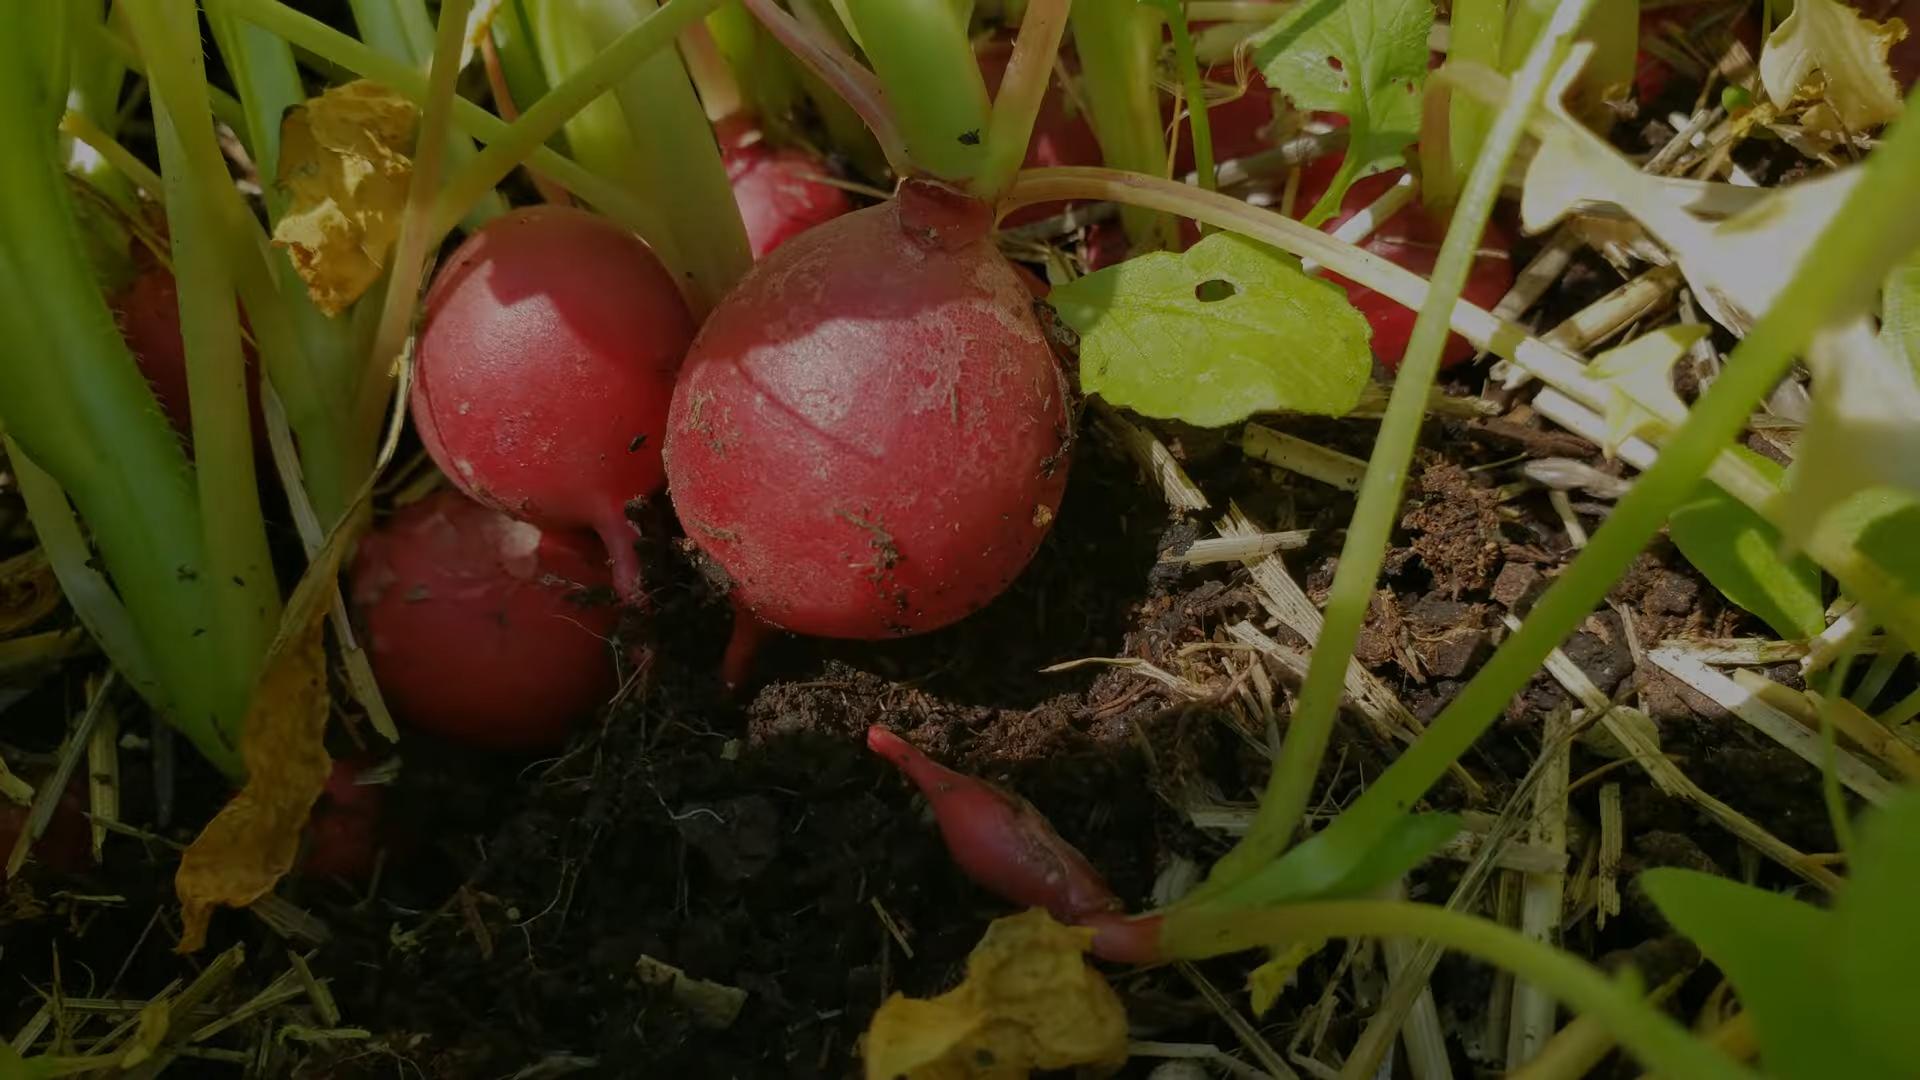
8. Harvest Your Radishes:
* Radishes are ready to harvest when the roots are about 1 inch in diameter. Check the seed packet for the specific maturity date for your variety.
* To harvest, gently pull the radishes from the soil. If the soil is dry, water it beforehand to make harvesting easier.
* Brush off any excess soil and trim the tops, leaving about ½ inch of stem.
9. Enjoy Your Harvest:
* Radishes are best eaten fresh.
* Store them in the refrigerator in a plastic bag for up to a week.
* Enjoy them raw in salads, as a snack with dip, or pickled. You can even roast them for a sweeter flavor.
Troubleshooting Common Radish Problems
Even with the best planning, things can sometimes go wrong. Here are a few common radish problems and how to fix them:
* Radishes are too small: This could be due to overcrowding, lack of sunlight, or poor soil. Thin the seedlings, ensure they’re getting enough sunlight, and amend the soil with compost.
* Radishes are tough and bitter: This is often caused by inconsistent watering or hot weather. Water regularly and provide shade during the hottest part of the day.
* Radishes are cracked: This can be caused by uneven watering. Water deeply and consistently.
* Radishes have lots of leaves but small roots: This is usually due to too much nitrogen in the soil. Avoid over-fertilizing with nitrogen-rich fertilizers.
Succession Planting for a Continuous Harvest
To enjoy a continuous supply of radishes throughout the growing season, practice succession planting. Sow a new batch of seeds every week or two. This will ensure that you always have radishes ready to harvest. I usually mark my calendar to remind me when to sow the next batch.
Growing Radishes in Containers
If you don’t have a garden, you can still grow radishes in containers. Choose a container that is at least 6 inches deep and has drainage holes. Use a good-quality potting mix and follow the same planting and care instructions as for growing radishes in the ground. Container-grown radishes may need more frequent watering than those grown in the ground.
Extra Tips for Radish Growing Success
* Choose the right time of year: Radishes are a cool-season crop and grow best in spring and fall. Avoid planting them in the heat of summer, as they can bolt (go to seed) and become bitter.
* Rotate your crops: Avoid planting radishes in the same spot year after year, as this can increase the risk of pests and diseases.
* Companion planting: Radishes are good companions for carrots, lettuce, and spinach. They can help deter pests and improve soil health.
* Don’t forget to enjoy the greens! Radish greens are edible and can be used in salads, soups, and stir-fries. They have a peppery flavor similar to the roots.
Harvesting and Storing Your Radishes
Harvesting at the right time is key to getting the best flavor and texture from your radishes. As I mentioned earlier, they’re usually ready to harvest about 3 weeks after planting, but it’s always a good idea to check the seed packet for specific instructions.
When you harvest, gently pull the radishes from the soil. If the soil is dry, water it
Conclusion
So, there you have it! Growing radishes quickly doesn’t have to be a gardening gamble. By implementing these simple yet effective DIY tricks, you’re setting yourself up for a harvest of crisp, peppery radishes in record time. We’ve covered everything from soil preparation and seed spacing to optimal watering and sunlight exposure. Remember, the key to success lies in providing your radishes with the ideal environment to thrive.
But why is this DIY approach a must-try? Because it empowers you to take control of your radish-growing journey. No more relying solely on luck or pre-packaged solutions. You’re actively participating in the process, understanding the needs of your plants, and tailoring your approach to maximize results. Plus, the satisfaction of harvesting radishes you’ve nurtured from seed to table using your own ingenuity is simply unmatched.
Beyond the basics, feel free to experiment! Try different radish varieties to discover your favorites. Consider companion planting with carrots or lettuce to optimize space and deter pests. You could even explore vertical gardening techniques if you’re short on ground space. The possibilities are endless!
And don’t forget about variations on the core techniques. If you live in a particularly hot climate, consider providing afternoon shade to prevent bolting. If your soil is heavy clay, amend it generously with compost and sand to improve drainage. Adapt these tricks to suit your specific growing conditions and watch your radishes flourish.
We’re confident that these DIY tricks will transform your radish-growing experience. But the real magic happens when you put them into practice. So, grab your seeds, prepare your soil, and get ready to enjoy a bounty of homegrown radishes sooner than you ever thought possible.
We’re eager to hear about your experiences! Did these tricks work for you? Did you discover any variations that yielded even better results? Share your stories, tips, and photos in the comments below. Let’s create a community of radish-growing enthusiasts and learn from each other’s successes (and even our failures!). Your feedback will not only help other readers but also inspire us to continue exploring innovative gardening techniques. Happy growing!
Frequently Asked Questions (FAQs)
What is the best time of year to grow radishes quickly?
Radishes are cool-season crops, meaning they thrive in cooler temperatures. The best time to plant them is in early spring or late summer/early fall. Avoid planting during the hottest months of summer, as high temperatures can cause them to bolt (go to seed) and become bitter. In spring, plant as soon as the soil can be worked. For a fall harvest, plant about 4-6 weeks before the first expected frost. Successive planting every 1-2 weeks will ensure a continuous supply of fresh radishes.
How much sunlight do radishes need to grow quickly?
Radishes need at least 6 hours of direct sunlight per day to grow quickly and develop properly. While they can tolerate some shade, insufficient sunlight can result in leggy growth and smaller, less flavorful radishes. Choose a planting location that receives ample sunlight throughout the day. If you’re growing radishes indoors, use grow lights to supplement natural sunlight.
What type of soil is best for growing radishes quickly?
Radishes prefer loose, well-drained soil that is rich in organic matter. Heavy clay soil can hinder root development and result in misshapen radishes. Before planting, amend the soil with compost, aged manure, or other organic materials to improve drainage and fertility. A slightly acidic to neutral soil pH (around 6.0 to 7.0) is ideal. You can test your soil pH using a soil testing kit and adjust it accordingly.
How often should I water radishes to ensure quick growth?
Consistent moisture is crucial for quick radish growth. Water radishes regularly, especially during dry periods. Aim to keep the soil consistently moist but not waterlogged. Overwatering can lead to root rot, while underwatering can cause the radishes to become tough and bitter. A good rule of thumb is to water deeply whenever the top inch of soil feels dry to the touch. Mulching around the plants can help retain moisture and suppress weeds.
How far apart should I space radish seeds for optimal growth?
Proper spacing is essential for allowing radishes to develop fully. Sow radish seeds about 1/2 inch deep and 1 inch apart in rows that are 6-12 inches apart. Thin the seedlings to 2-3 inches apart once they emerge. Overcrowding can result in smaller radishes and increased competition for resources.
How long does it take for radishes to mature?
One of the great things about radishes is their quick maturity. Most varieties are ready to harvest in just 3-4 weeks from planting. Check the seed packet for the specific maturity time of the variety you’re growing. Harvest radishes when they reach the desired size, typically about 1 inch in diameter. Leaving them in the ground too long can cause them to become woody and bitter.
What are some common pests and diseases that affect radishes, and how can I prevent them?
Radishes are generally pest-resistant, but they can be susceptible to certain pests and diseases, such as flea beetles, root maggots, and fungal diseases. To prevent these problems, practice good garden hygiene, such as removing plant debris and weeds. Use row covers to protect plants from pests. Ensure proper soil drainage to prevent fungal diseases. If pests or diseases do occur, treat them promptly with appropriate organic or chemical controls.
Can I grow radishes in containers?
Yes, radishes are well-suited for container gardening. Choose a container that is at least 6 inches deep and has drainage holes. Use a well-draining potting mix and follow the same planting and care instructions as for growing radishes in the ground. Container-grown radishes may require more frequent watering than those grown in the ground.
What are some different varieties of radishes I can try?
There are many different varieties of radishes to choose from, each with its own unique flavor, color, and shape. Some popular varieties include Cherry Belle, French Breakfast, Easter Egg, and Daikon. Experiment with different varieties to find your favorites. Consider growing a mix of varieties for a colorful and flavorful harvest.
How do I know when my radishes are ready to harvest?
Radishes are ready to harvest when they reach the desired size, typically about 1 inch in diameter. Gently pull one radish from the ground to check its size and maturity. If it’s the right size, harvest the rest of the radishes. Don’t leave them in the ground too long, as they can become woody and bitter.
What can I do with my harvested radishes?
Radishes can be eaten raw, cooked, or pickled. They add a peppery bite to salads, sandwiches, and other dishes. You can also roast, sauté, or grill them. Radish greens are also edible and can be used in salads or cooked like spinach. Store harvested radishes in the refrigerator for up to a week.
How can I prevent my radishes from becoming too spicy?
The spiciness of radishes can vary depending on the variety, growing conditions, and maturity. To reduce the spiciness, water radishes regularly and harvest them when they are young and tender. Avoid growing them in hot, dry conditions, as this can increase their spiciness.
My radishes are all tops and no bottoms. What went wrong?
This is a common problem with radishes and is usually caused by one or more of the following factors: insufficient sunlight, overcrowding, poor soil, or lack of water. Make sure your radishes are getting at least 6 hours of direct sunlight per day, thin the seedlings to 2-3 inches apart, amend the soil with compost, and water regularly.
Can I save radish seeds for next year?
Yes, you can save radish seeds, but it requires allowing the plants to bolt (go to seed). This means leaving some radishes in the ground after they mature and allowing them to flower and produce seed pods. Once the seed pods are dry and brown, harvest them and extract the seeds. Store the seeds in a cool, dry place until next planting season. Be aware that radishes are cross-pollinated, so if you grow multiple varieties, the seeds may not come true to type.
Leave a Comment