
Grow Sweet Potatoes at Home and unlock the secrets to a bountiful harvest right in your backyard! Imagine sinking your teeth into a delicious, homegrown sweet potato, knowing you nurtured it from sprout to supper. It’s a rewarding experience that’s easier than you might think, and this DIY guide is your key to success.
Sweet potatoes have a rich history, dating back thousands of years in Central and South America. They were a staple food for indigenous populations and eventually spread across the globe, becoming a beloved ingredient in countless cuisines. Beyond their culinary appeal, sweet potatoes are packed with nutrients, making them a healthy and delicious addition to your diet.
Why should you learn to grow sweet potatoes at home? Well, for starters, you’ll have access to fresher, more flavorful sweet potatoes than you can find in most grocery stores. Plus, you’ll know exactly what went into growing them, avoiding potentially harmful pesticides and chemicals. In today’s world, where sustainability and healthy eating are more important than ever, cultivating your own food is a powerful and fulfilling act. I’m excited to share these simple, yet effective, DIY tricks and hacks that will empower you to grow your own sweet potatoes, regardless of your gardening experience. Let’s get started and transform your garden into a sweet potato paradise!
Grow Your Own Sweet Potatoes: A Beginner’s Guide
Hey there, fellow gardening enthusiasts! I’m so excited to share my experience with growing sweet potatoes at home. It’s surprisingly easy and incredibly rewarding. Imagine harvesting your own delicious, homegrown sweet potatoes – the taste is just unbeatable! This guide will walk you through every step, from sprouting slips to harvesting your bounty. Let’s get started!
Getting Started: Sprouting Sweet Potato Slips
The first step in growing sweet potatoes isn’t planting the potato itself, but rather growing “slips.” Slips are the leafy sprouts that emerge from the sweet potato, and these are what you’ll actually plant in the ground. Don’t worry, it’s easier than it sounds!
* What are Sweet Potato Slips? Slips are essentially baby sweet potato plants that grow from the mother sweet potato. They’re the key to successful sweet potato cultivation.
* Why Grow Slips? Sweet potatoes are typically grown from slips because planting the whole potato directly into the ground often results in rot before it can sprout. Slips give you a head start and a much higher success rate.
* Timing is Key: Start sprouting your slips about 6-8 weeks before the last expected frost in your area. This will give them plenty of time to develop before planting season.
Step-by-Step Instructions for Sprouting Slips:
1. Choose Your Sweet Potatoes: Select organic sweet potatoes from your local grocery store or farmer’s market. Organic is important because non-organic potatoes may be treated with sprout inhibitors. Look for firm, healthy potatoes without any soft spots or blemishes. I prefer using several potatoes to increase my chances of getting a good number of slips.
2. Prepare Your Container: You have two main options here: water or soil. I’ve had success with both, but I personally prefer the water method because it’s easier to monitor the progress.
* Water Method: Find a jar or glass that’s wide enough to hold the sweet potato without it falling in. You can use toothpicks to suspend the potato, with the bottom half submerged in water.
* Soil Method: Fill a container with moist potting soil. Bury the sweet potato halfway in the soil, leaving the top half exposed.
3. Submerge or Bury:
* Water Method: Insert toothpicks around the middle of the sweet potato, spacing them evenly. Rest the toothpicks on the rim of the jar so that the bottom half of the potato is submerged in water.
* Soil Method: Ensure the soil is consistently moist but not waterlogged.
4. Find a Warm, Sunny Spot: Place your jar or container in a warm location that receives plenty of sunlight. A windowsill is usually a good choice. The ideal temperature is around 75-85°F (24-29°C).
5. Maintain Moisture:
* Water Method: Change the water every few days to prevent algae growth and keep it fresh.
* Soil Method: Check the soil moisture regularly and water as needed to keep it consistently moist.
6. Wait Patiently: It will take a few weeks for the slips to start sprouting. Be patient! You should start seeing small sprouts emerging from the sweet potato in 2-4 weeks.
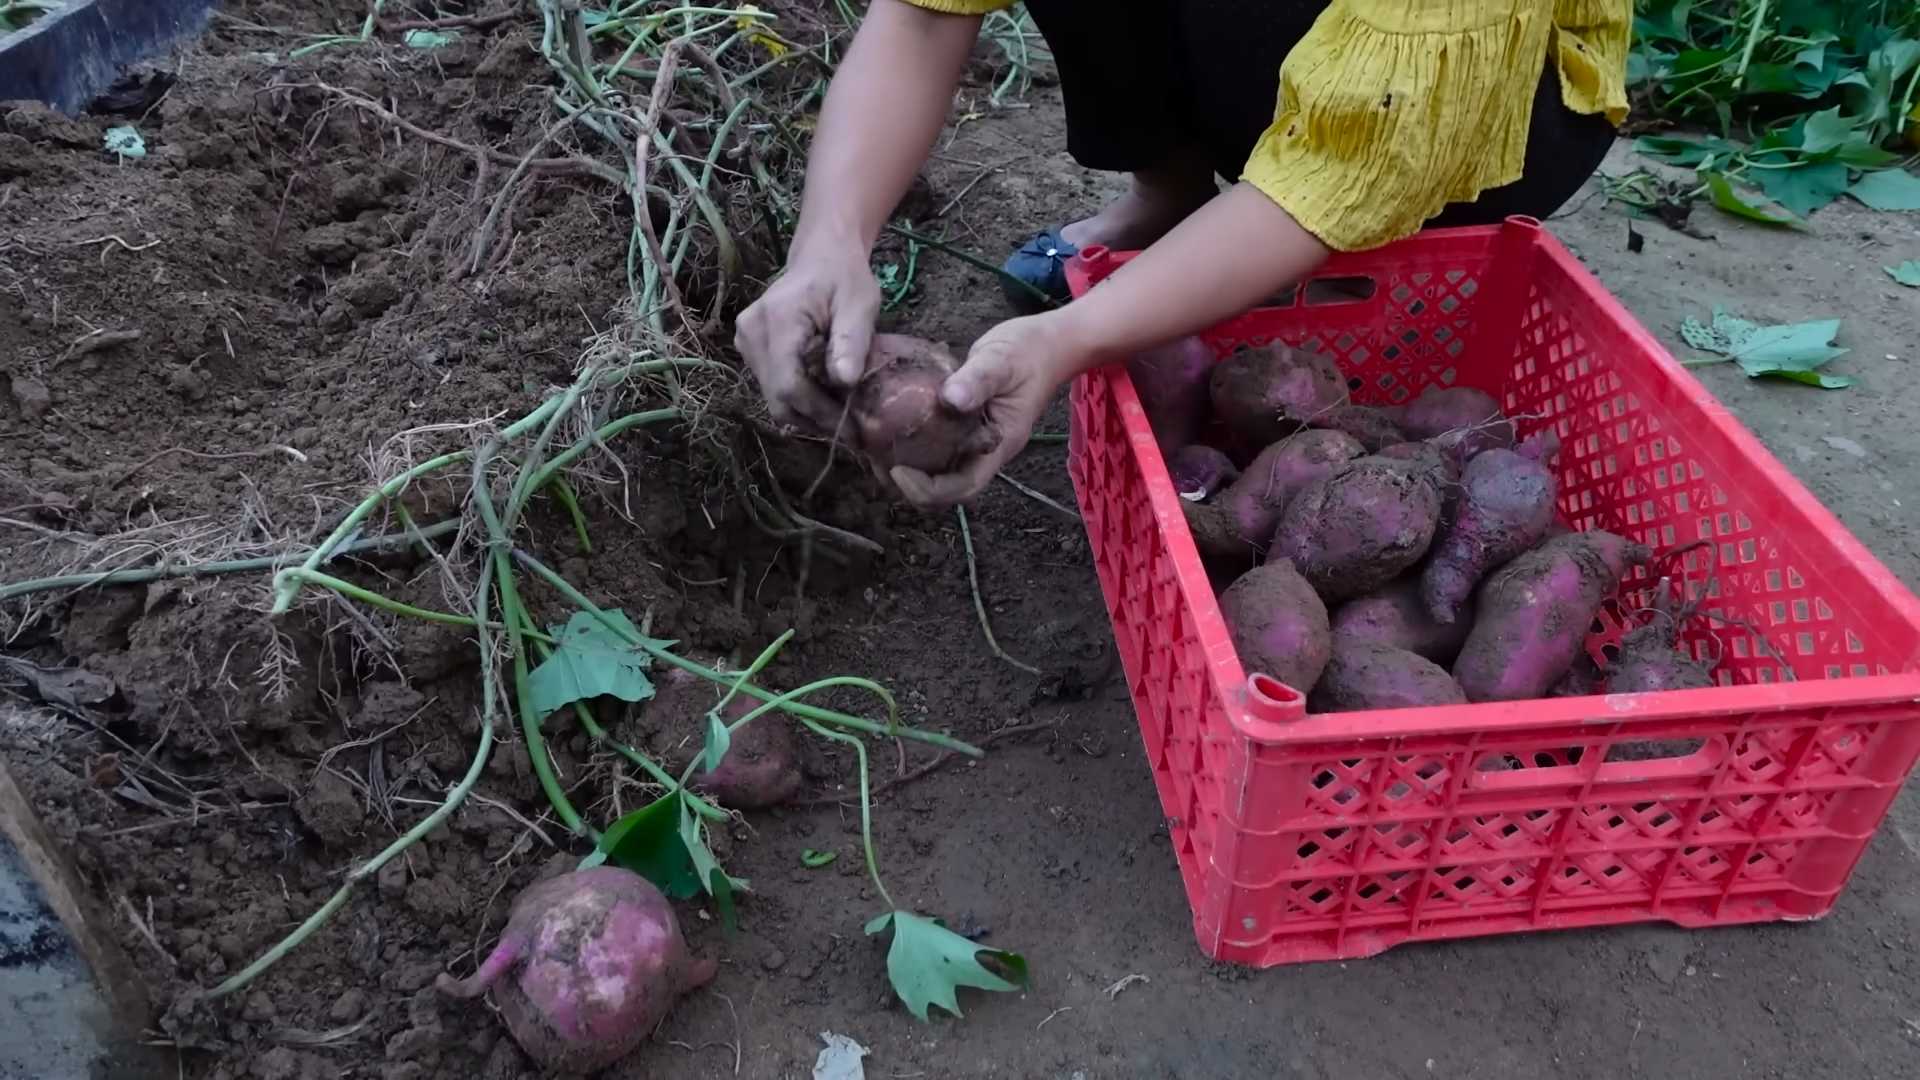
7. Harvesting the Slips: Once the slips are about 6-8 inches long, they’re ready to be harvested. Gently twist or cut them off the sweet potato, being careful not to damage the remaining sprouts. I like to leave about an inch of stem on the slip.
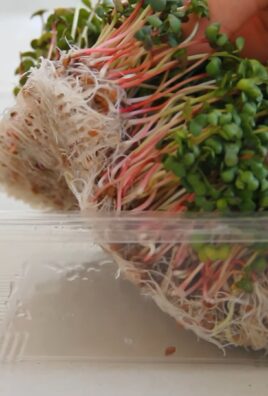
8. Rooting the Slips: Place the harvested slips in a jar of water, making sure the bottom inch or two of the stem is submerged. Change the water every day or two. Within a few days, you should see roots starting to grow.
9. Hardening Off: Before planting your rooted slips in the garden, you’ll need to “harden them off.” This process gradually acclimates them to outdoor conditions. Start by placing them outside in a sheltered location for a few hours each day, gradually increasing the amount of time they spend outdoors over the course of a week. This will help them adjust to the sun, wind, and temperature changes.
Preparing Your Garden Bed
Sweet potatoes need plenty of space and well-drained soil to thrive. Here’s how to prepare your garden bed for planting:
* Sunlight is Essential: Sweet potatoes need at least 6-8 hours of direct sunlight per day. Choose a location in your garden that receives plenty of sun.
* Well-Drained Soil: Sweet potatoes prefer loose, well-drained soil. Heavy clay soil can lead to rot. If your soil is heavy, amend it with compost, sand, or other organic matter to improve drainage.
* Soil pH: The ideal soil pH for sweet potatoes is between 5.5 and 6.5. You can test your soil pH with a soil testing kit and amend it as needed.
* Nutrient-Rich Soil: While sweet potatoes don’t need overly rich soil, they do benefit from some added nutrients. Incorporate compost or well-rotted manure into the soil before planting.
Step-by-Step Instructions for Preparing Your Garden Bed:
1. Clear the Area: Remove any weeds, rocks, or debris from the planting area.
2. Till or Dig: Till the soil to a depth of at least 12 inches. This will help loosen the soil and improve drainage. If you don’t have a tiller, you can use a shovel or garden fork to dig and turn the soil.
3. Amend the Soil: Incorporate compost, well-rotted manure, or other organic matter into the soil. This will improve drainage, add nutrients, and help retain moisture. I usually add a generous layer of compost, about 2-3 inches thick.
4. Create Ridges or Hills: Sweet potatoes grow best when planted on ridges or hills. This helps improve drainage and allows the roots to expand. Create ridges that are about 8-12 inches high and 3-4 feet apart.
5. Water the Soil: Water the soil thoroughly before planting. This will help settle the soil and provide moisture for the newly planted slips.
Planting Your Sweet Potato Slips
Now comes the fun part – planting your sweet potato slips!
* Timing is Crucial: Plant your slips after the last expected frost and when the soil has warmed up to at least 60°F (16°C).
* Spacing is Important: Space the slips about 12-18 inches apart on the ridges or hills. This will give them enough room to grow and develop.
* Handle with Care: Sweet potato slips are delicate, so handle them with care when planting.
Step-by-Step Instructions for Planting:
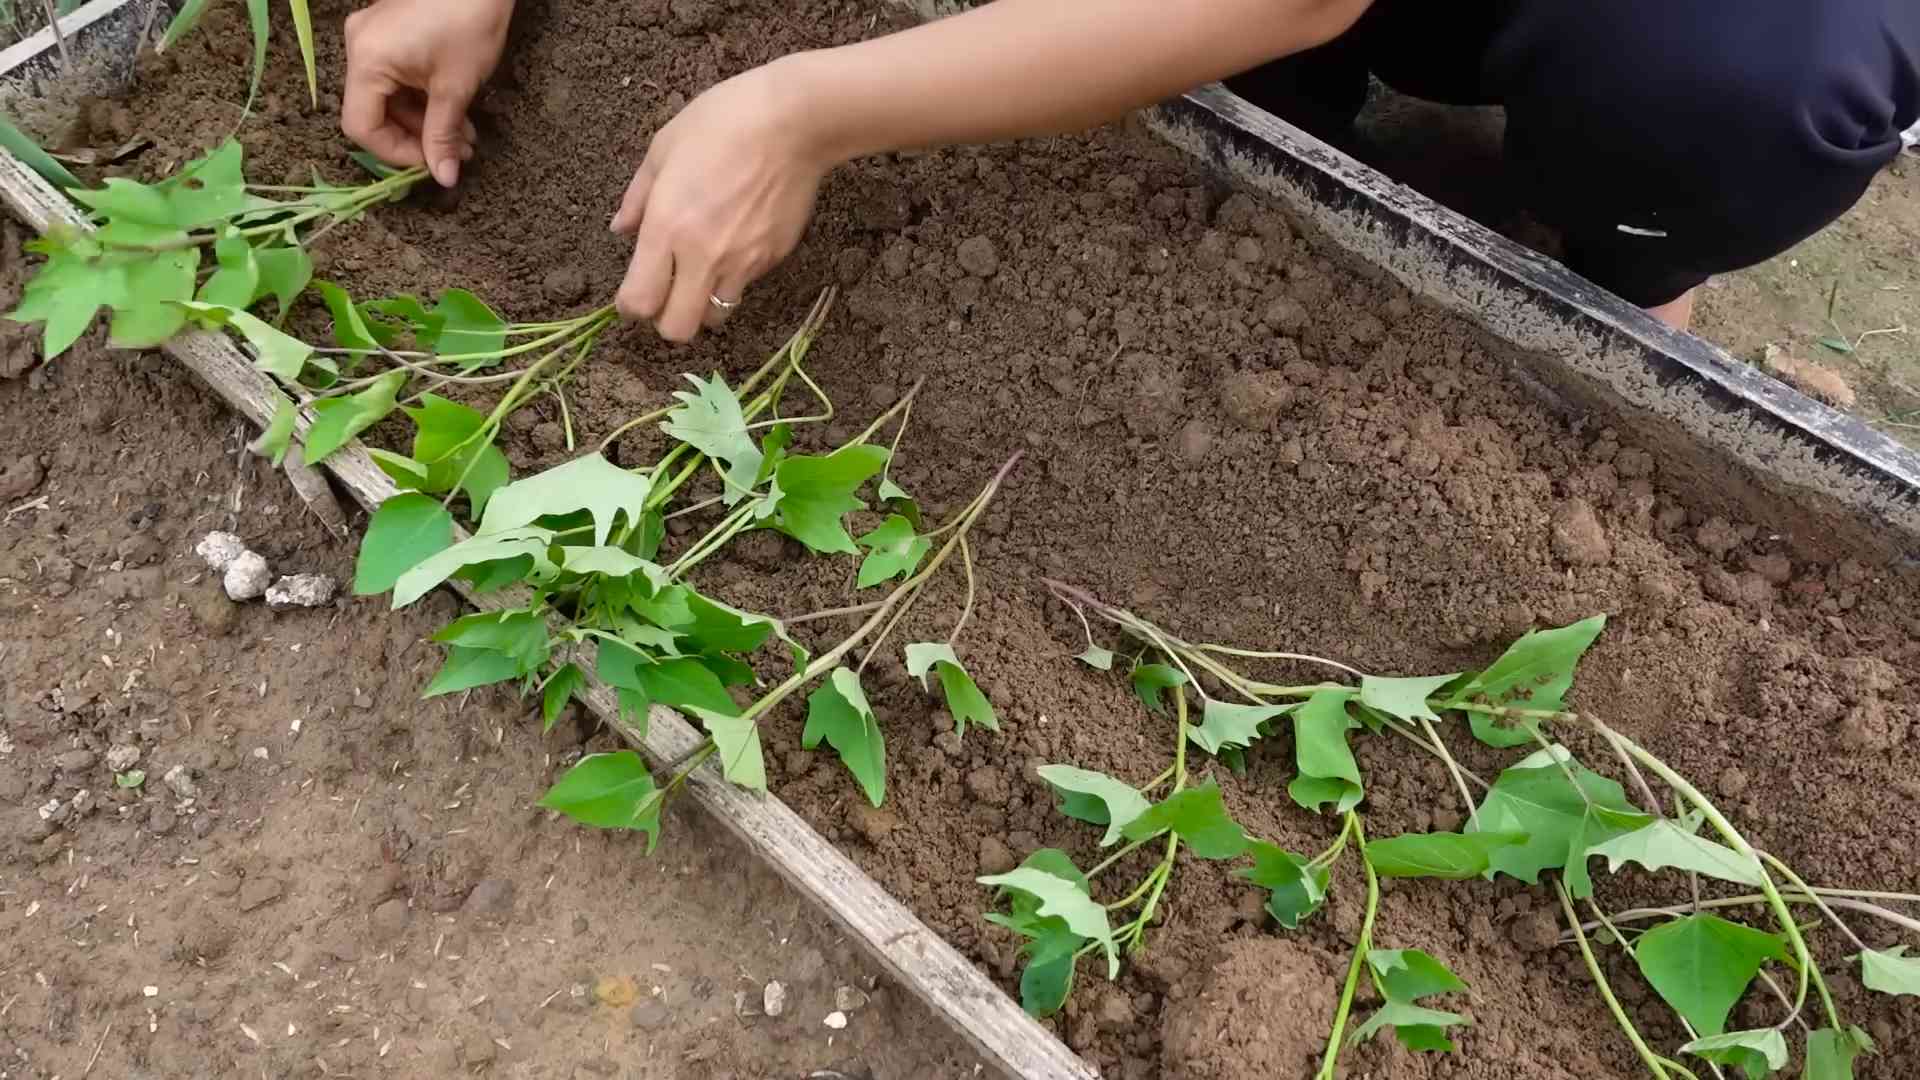
1. Dig a Hole: Dig a small hole in the top of the ridge or hill, deep enough to accommodate the roots of the slip.
2. Plant the Slip: Gently place the slip in the hole, making sure the roots are spread out. Bury the stem up to the first set of leaves.
3. Water Thoroughly: Water the newly planted slip thoroughly. This will help settle the soil and provide moisture for the roots.
4. Protect from Pests: Young sweet potato slips are vulnerable to pests like flea beetles and aphids. Consider using row covers or insecticidal soap to protect them. I’ve found that covering them with a lightweight fabric for the first few weeks really helps.
5. Mulch (Optional): Mulching around the plants can help retain moisture, suppress weeds, and regulate soil temperature. Use organic mulch like straw, hay, or wood chips.
Caring for Your Sweet Potato Plants
Once your sweet potato slips are planted, it’s important to provide them with proper care to ensure a bountiful harvest.
* Watering: Water your sweet potato plants regularly, especially during dry periods. They need about 1 inch of water per week.
* Weeding: Keep the area around your sweet potato plants free of weeds. Weeds can compete with the plants for nutrients and water.
* Fertilizing: Sweet potatoes don’t need a lot of fertilizer, but a light feeding of a balanced fertilizer can help boost growth. Avoid using fertilizers that are high in nitrogen, as this can promote excessive vine growth at the expense of tuber development.
* Vine Management: Sweet potato vines can spread quite a bit. If they start to take over your garden, you can prune them back. However, avoid cutting them back too severely, as this can reduce your yield.
* Pest and Disease Control: Keep an eye out for pests and diseases. Common pests include flea beetles, aphids, and sweet potato weevils. Common diseases include fungal diseases like stem rot and leaf spot. Treat any problems promptly with appropriate organic pest control methods.
Step-by-Step Instructions for Caring
Conclusion
So, there you have it! Growing sweet potatoes at home is not only achievable, but it’s also a deeply rewarding experience. Forget the store-bought varieties that often lack the vibrant flavor and freshness of homegrown produce. This DIY trick unlocks the potential to cultivate your own supply of these nutritious and delicious tubers, right in your backyard or even on your balcony.
Why is this a must-try? Because it puts you in control. You dictate the growing conditions, ensuring your sweet potatoes are free from unwanted chemicals and pesticides. You get to witness the entire life cycle of the plant, from the initial sprouting to the bountiful harvest. And, perhaps most importantly, you get to savor the unparalleled taste of freshly dug sweet potatoes, a flavor that simply can’t be replicated by commercially grown alternatives.
Beyond the basic method outlined, there’s plenty of room for experimentation. Consider trying different varieties of sweet potatoes, each with its unique color, texture, and sweetness profile. Beauregard, with its classic orange flesh, is always a reliable choice. But don’t be afraid to venture into the world of Japanese sweet potatoes (with their purple skin and creamy white flesh) or even the Covington variety, known for its disease resistance.
You can also adapt the growing medium to suit your preferences and resources. While we’ve focused on using water to sprout the slips, you can also try starting them in a bed of moist sand or vermiculite. For the final planting, consider enriching your soil with compost or well-rotted manure to provide your sweet potatoes with the nutrients they need to thrive.
And speaking of thriving, remember that sweet potatoes are sun-loving plants. Ensure they receive at least six hours of direct sunlight each day for optimal growth. Consistent watering is also crucial, especially during dry spells.
But the real magic of this DIY trick lies in its simplicity and accessibility. You don’t need a sprawling farm or specialized equipment to grow your own sweet potatoes. A sunny spot, a few containers, and a little bit of patience are all you need to embark on this exciting horticultural adventure.
We wholeheartedly encourage you to give this DIY trick a try. Experience the joy of nurturing your own sweet potato plants and the satisfaction of harvesting your own homegrown bounty. And most importantly, don’t forget to share your experiences with us! We’d love to hear about your successes, your challenges, and any variations you’ve discovered along the way. Share your photos, your tips, and your stories in the comments below. Let’s build a community of home gardeners who are passionate about growing their own food and sharing their knowledge with others. Let’s all learn how to grow sweet potatoes at home together!
Frequently Asked Questions (FAQ)
What is the best time of year to start growing sweet potatoes?
The ideal time to start growing sweet potatoes is in the late spring or early summer, after the last frost has passed. Sweet potatoes are warm-weather crops and require consistent temperatures above 60°F (15°C) to thrive. Starting them too early in the season can result in stunted growth or even death of the plants. If you live in a region with a short growing season, you can start the slips indoors a few weeks before the last expected frost to give them a head start.
How long does it take for sweet potatoes to mature?
Sweet potatoes typically take between 90 and 120 days to mature, depending on the variety and growing conditions. You’ll know they’re ready to harvest when the vines start to yellow and die back. You can also gently dig around the base of a plant to check the size of the tubers. If they’re large enough for your liking, it’s time to harvest.
What kind of soil is best for growing sweet potatoes?
Sweet potatoes prefer well-drained, sandy loam soil with a pH between 6.0 and 6.5. Avoid heavy clay soils, as they can become waterlogged and inhibit tuber development. Before planting, amend your soil with compost or well-rotted manure to improve drainage and fertility. Raised beds are also a great option for growing sweet potatoes, as they provide excellent drainage and allow the soil to warm up quickly in the spring.
How often should I water my sweet potato plants?
Sweet potatoes need consistent moisture, especially during the first few weeks after planting. Water deeply and regularly, ensuring the soil remains moist but not waterlogged. Once the plants are established, you can reduce watering frequency, but be sure to water during dry spells. Avoid overhead watering, as it can promote fungal diseases. Drip irrigation is an excellent way to water sweet potatoes, as it delivers water directly to the roots and minimizes water loss through evaporation.
What are some common pests and diseases that affect sweet potatoes?
Sweet potatoes can be susceptible to a variety of pests and diseases, including sweet potato weevils, wireworms, flea beetles, and fungal diseases like fusarium wilt and black rot. To prevent pest and disease problems, choose disease-resistant varieties, practice crop rotation, and maintain good soil drainage. Inspect your plants regularly for signs of pests or diseases and take appropriate action if necessary. Organic pest control methods, such as neem oil and insecticidal soap, can be effective for controlling many common pests.
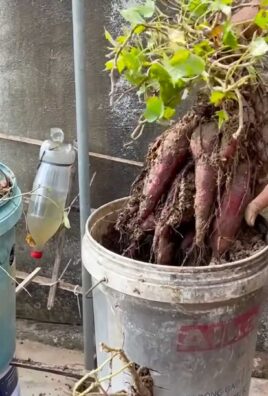
Can I grow sweet potatoes in containers?
Yes, you can absolutely grow sweet potatoes in containers! Choose large containers that are at least 12 inches deep and wide to allow the tubers to develop properly. Fill the containers with a well-draining potting mix and plant the slips as described above. Container-grown sweet potatoes may require more frequent watering and fertilization than those grown in the ground. Be sure to provide them with plenty of sunlight and support the vines as they grow.
How do I cure sweet potatoes after harvesting?
Curing sweet potatoes is essential for improving their flavor and storage life. After harvesting, gently brush off any excess soil and allow the sweet potatoes to dry in a warm, humid place (80-85°F or 27-29°C) for 7-10 days. This process allows the skins to harden and heal any minor cuts or bruises, preventing rot and improving the sweetness of the tubers. After curing, store the sweet potatoes in a cool, dry, and well-ventilated place (55-60°F or 13-16°C). Avoid storing them in the refrigerator, as this can cause them to develop a hard core.
How do I store sweet potatoes long-term?
Proper storage is key to enjoying your homegrown sweet potatoes throughout the winter months. After curing, store them in a single layer in a well-ventilated container, such as a cardboard box or basket. Avoid stacking them on top of each other, as this can promote rot. Store them in a cool, dry, and dark place, such as a basement or root cellar. With proper storage, sweet potatoes can last for several months. Check them periodically for signs of spoilage and discard any that are soft or moldy.
Can I eat the sweet potato leaves?
Yes, sweet potato leaves are edible and nutritious! They can be eaten raw in salads or cooked like spinach. They have a mild, slightly sweet flavor and are a good source of vitamins A and C. Harvest the leaves when they are young and tender, and avoid harvesting too many leaves from a single plant, as this can reduce tuber production.
What are some creative ways to use homegrown sweet potatoes?
The possibilities are endless! Of course, you can roast, bake, or mash them as a side dish. But you can also use them in sweet potato fries, sweet potato pie, sweet potato soup, sweet potato casserole, and even sweet potato bread. Get creative and experiment with different recipes to discover your favorite ways to enjoy your homegrown sweet potatoes. You can even use them to make sweet potato chips or sweet potato ice cream!
Leave a Comment