
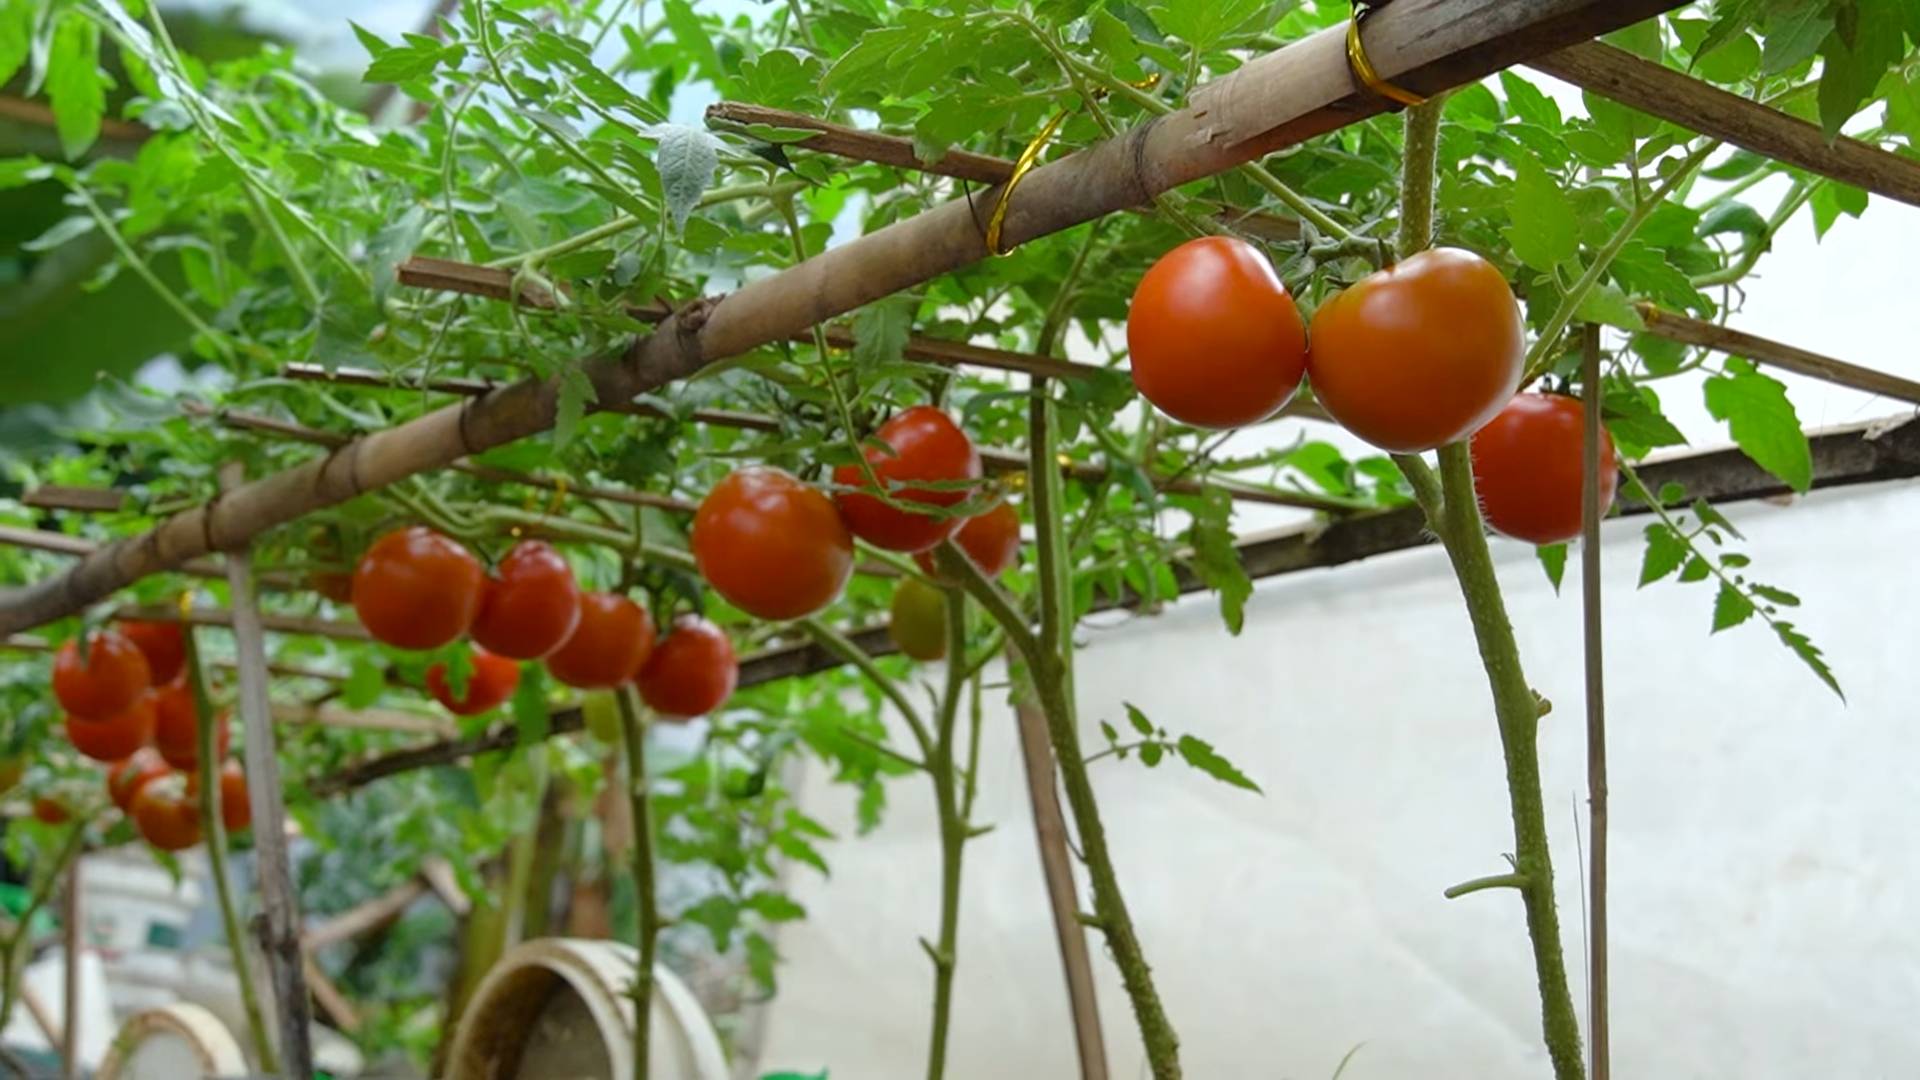
Unlimited Tomato Harvest – sounds like a gardener’s dream, right? I know I’ve certainly dreamt of it! Imagine baskets overflowing with juicy, sun-ripened tomatoes, enough for salads, sauces, and sharing with friends and neighbors. Forget those tiny, expensive supermarket tomatoes; we’re talking about a homegrown abundance that will make you the envy of the neighborhood.
For centuries, cultivating tomatoes has been a cherished tradition. Originating in South America, these vibrant fruits have journeyed across continents, becoming a staple in cuisines worldwide. From Italian pasta sauces to Spanish gazpacho, the tomato’s versatility is undeniable. But let’s face it, achieving that “unlimited tomato harvest” can sometimes feel like an uphill battle. Pests, diseases, and unpredictable weather can all conspire to thwart our gardening ambitions.
That’s where this DIY guide comes in! I’m going to share some simple yet incredibly effective tricks and hacks that will help you maximize your tomato yield. These aren’t complicated techniques requiring fancy equipment; they’re practical, easy-to-implement strategies that anyone can use, regardless of their gardening experience. Whether you’re a seasoned gardener or just starting out, these tips will empower you to achieve that unlimited tomato harvest you’ve always wanted. Get ready to transform your tomato plants into prolific producers and enjoy a summer filled with delicious, homegrown goodness!
Creating a Stunning DIY Plastic Bottle Garden
Hey there, fellow garden enthusiasts! I’m so excited to share this incredibly fun and eco-friendly project with you: building a beautiful garden using recycled plastic bottles. Not only is it a fantastic way to reduce waste, but it also allows you to get creative and personalize your outdoor space. Trust me, once you see how easy and rewarding this is, you’ll be hooked!
Materials You’ll Need
Before we dive in, let’s gather all the necessary materials. Don’t worry, most of these are probably already lying around your house!
* Plastic Bottles: The star of the show! Collect as many plastic bottles as you can. Different sizes and shapes will add visual interest. Think water bottles, soda bottles, juice containers – the more, the merrier! Make sure they are clean and dry.
* Scissors or Utility Knife: For cutting the plastic bottles. Be careful and always use appropriate safety measures.
* Soil: Choose a good quality potting mix suitable for the plants you intend to grow.
* Seeds or Seedlings: Select your favorite flowers, herbs, or vegetables. Consider the amount of sunlight your garden will receive when choosing plants.
* String, Wire, or Zip Ties: For hanging or connecting the bottles.
* Drill or Awl (Optional): For creating drainage holes and hanging points.
* Paint and Brushes (Optional): To decorate your bottles and add a personal touch. Acrylic paint works best.
* Gloves: To protect your hands from dirt and sharp edges.
* Measuring Tape or Ruler: To ensure even spacing and alignment.
* Watering Can or Hose: To keep your plants hydrated.
* Safety Glasses: To protect your eyes when cutting or drilling.
Planning Your Plastic Bottle Garden
Before you start cutting and planting, take some time to plan your garden’s layout. This will help you visualize the final result and ensure a cohesive design.
* Choose a Location: Consider the amount of sunlight your chosen plants need. A sunny balcony, a shaded patio, or even a windowsill can work.
* Decide on a Design: Will you create a vertical garden, a hanging garden, or a traditional garden bed using plastic bottles as planters? There are endless possibilities!
* Sketch Your Idea: Draw a rough sketch of your garden layout. This will help you determine how many bottles you need and how to arrange them.
* Consider Drainage: Ensure your bottles have adequate drainage to prevent waterlogging.
Creating Different Types of Plastic Bottle Gardens
Here are a few ideas to get your creative juices flowing:
* Vertical Garden: Cut bottles in half lengthwise and attach them to a wall or fence using screws or nails.
* Hanging Garden: Cut bottles in half horizontally and hang them from a balcony railing or ceiling using string or wire.
* Bottle Tower: Stack bottles on top of each other, creating a tower-like structure.
* Traditional Garden Bed: Bury the bottom halves of bottles in the ground to create raised garden beds.
Step-by-Step Instructions: Building a Hanging Plastic Bottle Garden
I’m going to walk you through creating a simple yet stunning hanging garden. This is a great option for small spaces and adds a touch of whimsy to any outdoor area.
1. Prepare the Bottles:
* Thoroughly clean and dry all your plastic bottles. Remove any labels or sticky residue.
* Decide how you want to cut the bottles. For a hanging garden, I recommend cutting them in half horizontally. This will create two separate planters from each bottle.
* Using your scissors or utility knife, carefully cut the bottles along your marked line. Be extra cautious and use a cutting board or stable surface.
* Smooth out any sharp edges with sandpaper or a file to prevent injuries.
2. Create Drainage Holes:
* Using your drill or awl, carefully create drainage holes in the bottom of each bottle half. I recommend 3-4 small holes per planter.
* This will allow excess water to drain out and prevent root rot.
3. Decorate the Bottles (Optional):
* This is where you can let your creativity shine! Use acrylic paint to decorate the bottles with colorful patterns, designs, or even plant names.
* Allow the paint to dry completely before moving on to the next step.
* You can also use other materials like fabric scraps, beads, or stickers to personalize your planters.
4. Attach Hanging String or Wire:
* Using your drill or awl, create two small holes on opposite sides of each bottle half, near the top edge.
* Thread your string, wire, or zip ties through the holes, creating a loop for hanging.
* Make sure the loops are secure and strong enough to support the weight of the soil and plants.
* Adjust the length of the string or wire to create a staggered effect when hanging the bottles.
5. Fill with Soil:
* Now it’s time to add the soil! Carefully fill each bottle half with your chosen potting mix.
* Leave about an inch of space at the top to prevent soil from spilling out when watering.
* Gently pat down the soil to create a firm base for your plants.
6. Plant Your Seeds or Seedlings:
* Carefully plant your seeds or seedlings in the prepared soil.
* Follow the instructions on the seed packet or plant label for proper spacing and depth.
* Water the plants gently after planting to help them settle in.
7. Hang Your Garden:
* Find a suitable location to hang your plastic bottle garden. A balcony railing, a porch ceiling, or even a sturdy tree branch can work.
* Make sure the location receives adequate sunlight for your chosen plants.
* Hang the bottles securely, ensuring they are evenly spaced and balanced.
8. Water and Maintain Your Garden:
* Water your plants regularly, keeping the soil moist but not waterlogged.
* Check the soil moisture by sticking your finger into the soil. If it feels dry, it’s time to water.
* Fertilize your plants as needed, following the instructions on the fertilizer label.
* Remove any dead or yellowing leaves to keep your garden looking healthy and vibrant.
* Protect your plants from extreme weather conditions, such as frost or excessive heat.
Tips and Tricks for a Thriving Plastic Bottle Garden
Here are a few extra tips to help you create a successful and beautiful plastic bottle garden:
* Choose the Right Plants: Select plants that are well-suited to the size of the bottles and the amount of sunlight your garden receives. Herbs, succulents, and small flowering plants are great options.
* Use Good Quality Soil: Invest in a good quality potting mix that provides adequate drainage and nutrients for your plants.
* Don’t Overwater: Overwatering is a common mistake that can lead to root rot. Allow the soil to dry out slightly between waterings.
* Fertilize Regularly: Fertilize your plants regularly to provide them with the nutrients they need to thrive.
* Protect from Pests: Keep an eye out for pests and take action to control them if necessary.
* Get Creative with Decoration: Don’t be afraid to experiment with different colors, patterns, and materials to decorate your bottles.
* Repurpose Other Materials: Use other recycled materials, such as old tires or wooden pallets, to create a unique and eco-friendly garden.
* Involve the Kids: This is a great project to do with kids! They’ll love helping to collect bottles, decorate them, and plant the seeds.
* Experiment with Different Designs: Try different layouts and arrangements to find what works best for your space.
* Enjoy the Process: Gardening should be a relaxing and enjoyable experience. Don’t stress too much about perfection, and have fun!
Troubleshooting Common Issues
Even with the best planning, you might encounter a few challenges along the way. Here are some common issues and how to address them:
* Yellowing Leaves: This could be a sign of overwatering, underwatering, or nutrient deficiency. Adjust your watering schedule and fertilize your plants as needed.
* Root Rot: This is caused by overwatering and poor drainage. Ensure your bottles have adequate drainage holes and allow the soil to dry out between waterings.
* Pests: Inspect your plants regularly for pests and take action to control them if necessary. You can use organic pesticides or insecticidal soap.
* Slow Growth: This could be a sign of insufficient sunlight or nutrient deficiency. Move your garden to a sunnier location and fertilize your plants regularly.
* Bottles Tipping Over: Make sure your bottles are securely attached to their hanging points and that the soil is evenly distributed.
Conclusion
So, there you have it! The secret to an unlimited tomato harvest, right at your fingertips. This simple, yet incredibly effective DIY trick isn’t just about saving money; it’s about empowering you to take control of your garden and witness the sheer abundance that nature can provide with a little nudge in the right direction. Forget relying solely on expensive fertilizers or crossing your fingers for a good season. This method offers a sustainable, organic, and deeply satisfying way to cultivate a thriving tomato patch.
Why is this a must-try? Because it works! Imagine baskets overflowing with juicy, sun-ripened tomatoes, enough for salads, sauces, canning, and sharing with friends and neighbors. This isn’t just a pipe dream; it’s the reality that awaits you when you implement this simple technique. The increased yield is undeniable, and the improved health and resilience of your tomato plants will be evident in their vibrant green foliage and robust growth.
But the beauty of this DIY trick lies in its adaptability. Feel free to experiment with variations to suit your specific needs and preferences. For instance, if you’re dealing with particularly acidic soil, consider adding a small amount of lime to the planting hole to balance the pH. Or, if you’re growing heirloom varieties, which tend to be more susceptible to disease, you might want to incorporate a natural fungicide like neem oil into your regular care routine. You can also adjust the amount of organic matter you add based on your soil type – sandy soils will benefit from more, while clay soils may need less.
Don’t be afraid to get creative! Try different combinations of organic materials to see what works best for your garden. Perhaps you’ll discover that adding a handful of bone meal to the planting hole gives your tomatoes an extra boost of phosphorus, promoting strong root development and abundant flowering. Or maybe you’ll find that incorporating coffee grounds into the soil helps to deter slugs and snails. The possibilities are endless!
Ultimately, the goal is to create a thriving ecosystem in your garden, where your tomato plants have everything they need to flourish. This DIY trick is a powerful tool in achieving that goal, but it’s just one piece of the puzzle. Remember to provide your plants with plenty of sunlight, water, and support, and to monitor them regularly for signs of pests or diseases.
We are confident that this method will revolutionize your tomato growing experience. But don’t just take our word for it. We wholeheartedly encourage you to try this DIY trick for yourself and witness the incredible results firsthand. Plant your tomatoes, implement the technique, and then sit back and watch them thrive.
And most importantly, we want to hear about your experience! Share your photos, stories, and tips in the comments section below. Let us know what worked for you, what challenges you faced, and what variations you tried. Together, we can create a community of tomato-growing enthusiasts who are passionate about sharing their knowledge and helping each other achieve an unlimited tomato harvest. So, get your hands dirty, embrace the joy of gardening, and prepare to be amazed by the abundance that awaits you!
Frequently Asked Questions (FAQ)
What exactly is the DIY trick for an unlimited tomato harvest?
The core of the trick involves enriching the planting hole with a potent mix of organic materials. This typically includes compost, aged manure, and other nutrient-rich amendments. The specific recipe can vary, but the goal is to create a fertile and well-draining environment that provides your tomato plants with a sustained release of nutrients throughout the growing season. This eliminates the need for frequent fertilization and promotes strong, healthy growth, leading to a significantly larger yield. It’s about creating a micro-ecosystem that supports the plant from the very beginning.
What kind of compost and manure should I use?
For compost, aim for a well-decomposed, dark, and crumbly material. Homemade compost is ideal, as you have complete control over the ingredients. However, store-bought compost is also perfectly acceptable. Look for compost that is labeled as “organic” or “garden compost.” As for manure, aged manure is crucial. Fresh manure can be too “hot” and burn the roots of your tomato plants. Composted cow manure, horse manure, or chicken manure are all excellent choices. Make sure the manure is well-aged and doesn’t have a strong ammonia smell.
How much of each ingredient should I use in the planting hole?
A good starting point is to use approximately one-third compost, one-third aged manure, and one-third native soil. However, this can be adjusted based on your soil type. If you have sandy soil, you may want to use a higher proportion of compost and manure to improve water retention. If you have clay soil, you may want to add some perlite or vermiculite to improve drainage. A general guideline is to aim for a planting hole that is approximately twice the size of the tomato plant’s root ball.
When is the best time to plant my tomatoes using this method?
The best time to plant your tomatoes is after the last frost in your area. Tomatoes are warm-season crops and are sensitive to frost. Before planting, harden off your tomato seedlings by gradually exposing them to outdoor conditions for a week or two. This will help them to acclimate to the sun, wind, and temperature changes. Choose a sunny location that receives at least six to eight hours of direct sunlight per day.
What if I don’t have access to compost or aged manure?
If you don’t have access to compost or aged manure, there are other organic amendments you can use. Worm castings are an excellent alternative, as they are rich in nutrients and beneficial microbes. You can also use well-rotted leaves, grass clippings, or other organic matter. Just make sure that the materials are fully decomposed before adding them to the planting hole. You can also purchase organic fertilizers specifically formulated for tomatoes.
Will this DIY trick work for all types of tomatoes?
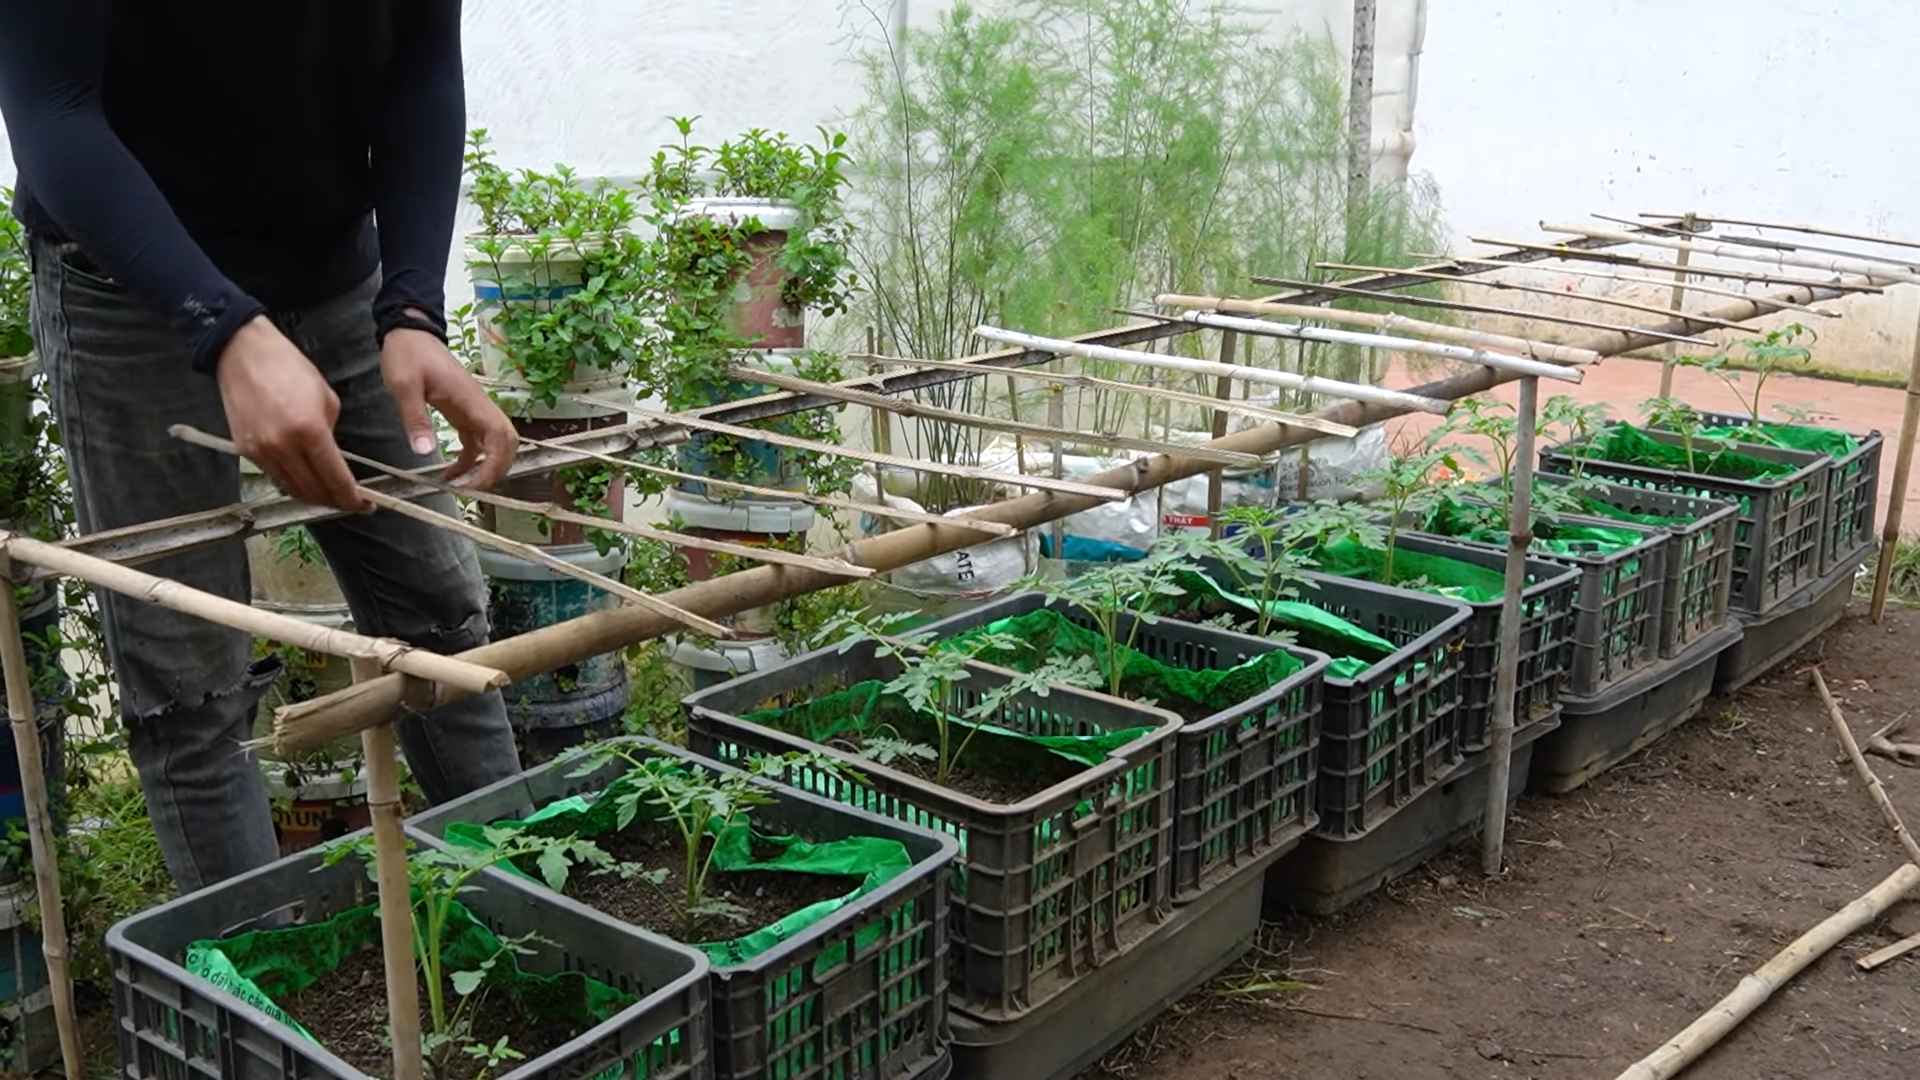
Yes, this DIY trick will work for all types of tomatoes, including determinate, indeterminate, heirloom, and hybrid varieties. However, some varieties may benefit from additional support, such as staking or caging. Indeterminate tomatoes, which continue to grow and produce fruit throughout the season, will require more support than determinate tomatoes, which grow to a certain size and then stop producing.
How often should I water my tomatoes after planting?
Water your tomatoes deeply and regularly, especially during hot, dry weather. Aim to water at the base of the plant to avoid wetting the foliage, which can increase the risk of disease. A good rule of thumb is to water when the top inch of soil feels dry to the touch. Mulching around the base of the plants can help to retain moisture and suppress weeds.
Are there any other tips for maximizing my tomato harvest?
Yes, there are several other things you can do to maximize your tomato harvest. Pruning your tomato plants can help to improve air circulation and reduce the risk of disease. Removing suckers (the small shoots that grow between the main stem and the branches) can also help to direct the plant’s energy towards fruit production. Fertilizing your tomatoes with a balanced organic fertilizer every few weeks can also help to boost growth and yield. Finally, be sure to monitor your plants regularly for signs of pests or diseases and take action promptly if you notice any problems. Remember, a healthy plant is a productive plant, and this DIY trick is a great foundation for achieving an unlimited tomato harvest.


Leave a Comment