
Growing Celery at Home might seem like a challenge reserved for seasoned gardeners, but I’m here to tell you it’s totally achievable, even if you’re a beginner! Forget those bland, expensive stalks from the grocery store. Imagine crisp, flavorful celery, bursting with freshness, right from your own backyard (or even your windowsill!).
Celery has a fascinating history, dating back to ancient times where it was used more for medicinal purposes than culinary delight. The ancient Greeks and Romans valued it for its healing properties, and it wasn’t until the Middle Ages that it began to appear regularly on dinner tables. Now, it’s a staple in soups, salads, and as a healthy snack.
But why bother with the effort of growing your own? Well, for starters, homegrown celery tastes infinitely better than store-bought. Plus, you have complete control over what goes into your plants, ensuring they’re free from harmful pesticides. And let’s be honest, there’s a certain satisfaction that comes from nurturing something from seed to harvest. In this article, I’ll share some simple yet effective DIY tricks and hacks that will make growing celery at home a breeze. Get ready to impress your friends and family with your green thumb!
Growing Celery From Kitchen Scraps: A Beginner’s Guide
Hey there, fellow gardening enthusiasts! Ever thought about growing your own celery? It’s easier than you might think, and the best part is, you can start with the celery you already buy from the grocery store! I’m going to walk you through the whole process, from rescuing that celery base to harvesting your own crunchy stalks. Let’s get started!
Rescuing and Regrowing the Celery Base
This is where the magic begins! Instead of tossing that celery base into the compost bin (though composting is great too!), we’re going to give it a new lease on life.
- What you’ll need: A celery base (about 2 inches from the bottom), a shallow dish or glass, water, and a sunny windowsill.
- The Goal: To encourage root growth from the celery base.
- Prepare the Celery Base: After you’ve used the celery stalks, carefully cut off the base, leaving about 2 inches of the bottom intact. Make sure the cut is clean and even.
- Place in Water: Put the celery base in your shallow dish or glass. Add enough water to cover the bottom inch of the base. You don’t want to submerge the entire thing, just the bottom where the roots will emerge.
- Find a Sunny Spot: Place the dish on a sunny windowsill. Celery loves light, so the more sunlight it gets, the better. A south-facing window is ideal, but any window that gets several hours of direct sunlight will work.
- Change the Water Regularly: This is crucial! Change the water every 1-2 days to prevent bacteria growth and keep the water fresh. This will encourage healthy root development.
- Observe and Wait: Over the next few days, you should start to see small roots emerging from the bottom of the celery base. You might also notice new growth sprouting from the top. This is a good sign!
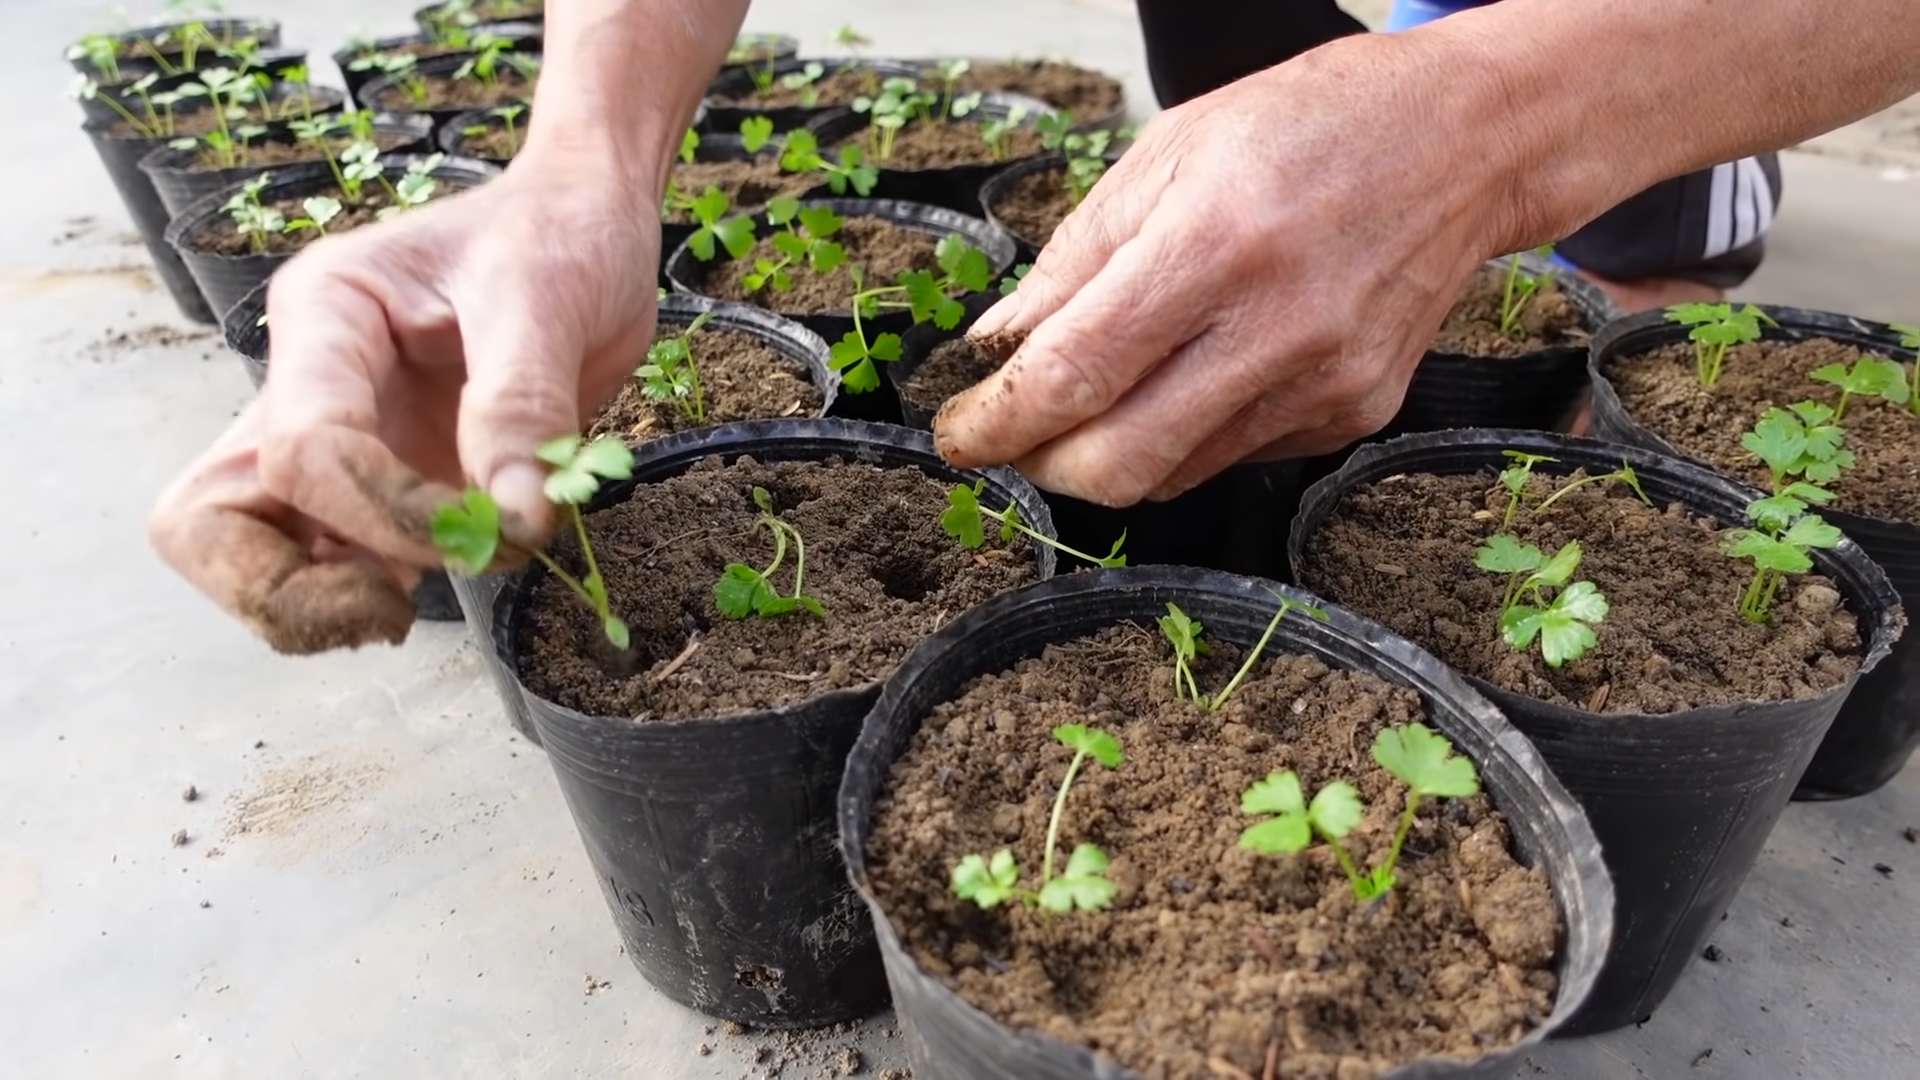
Transplanting to Soil
Once your celery base has developed a good root system (about an inch or two long), it’s time to move it to soil. This is where it will really start to grow.
- What you’ll need: A small pot (6-8 inches in diameter), potting soil, and a trowel.
- The Goal: To provide the celery with the nutrients and space it needs to grow into a full plant.
- Prepare the Pot: Fill your pot with good-quality potting soil. Make sure the soil is loose and well-draining. Celery doesn’t like to sit in soggy soil.
- Create a Hole: Use your trowel to create a hole in the center of the pot, large enough to accommodate the celery base and its roots.
- Carefully Transplant: Gently remove the celery base from the water. Be careful not to damage the delicate roots. Place the base in the hole, making sure the top of the base is level with the soil surface.
- Fill and Water: Fill in the hole with potting soil, gently patting it down around the base of the celery. Water thoroughly until the soil is moist but not waterlogged.
- Choose a Sunny Location: Place the pot in a sunny location, similar to where it was when it was in water.
Caring for Your Growing Celery
Now that your celery is in soil, it needs regular care to thrive. This includes watering, fertilizing, and protecting it from pests.
- What you’ll need: Water, fertilizer (optional), and pest control measures (if needed).
- The Goal: To provide the celery with the optimal conditions for growth.
- Watering: Celery needs consistent moisture. Water regularly, keeping the soil moist but not soggy. Check the soil moisture by sticking your finger into the soil. If the top inch feels dry, it’s time to water. Water deeply, allowing the water to drain out of the bottom of the pot.
- Fertilizing (Optional): Celery is a heavy feeder, meaning it benefits from regular fertilization. You can use a balanced liquid fertilizer diluted to half strength every 2-3 weeks. Alternatively, you can amend the soil with compost or other organic matter.
- Sunlight: Continue to provide your celery with plenty of sunlight. At least 6 hours of direct sunlight per day is ideal.
- Pest Control: Keep an eye out for pests such as aphids, slugs, and snails. If you notice any pests, you can try spraying them with insecticidal soap or hand-picking them off the plant.
- Blanching (Optional): Blanching is a technique used to make celery stalks more tender and less bitter. To blanch your celery, you can wrap the stalks with newspaper or cardboard a few weeks before harvesting. This will block sunlight from reaching the stalks, resulting in a lighter color and milder flavor.
Harvesting Your Celery
After a few months of care, your celery should be ready to harvest! This is the most rewarding part of the process.
- What you’ll need: A sharp knife.
- The Goal: To harvest your celery at the peak of its flavor and tenderness.
- When to Harvest: Celery is typically ready to harvest when the stalks are about 6-8 inches long and thick enough to eat. The exact time will depend on the variety of celery and the growing conditions.
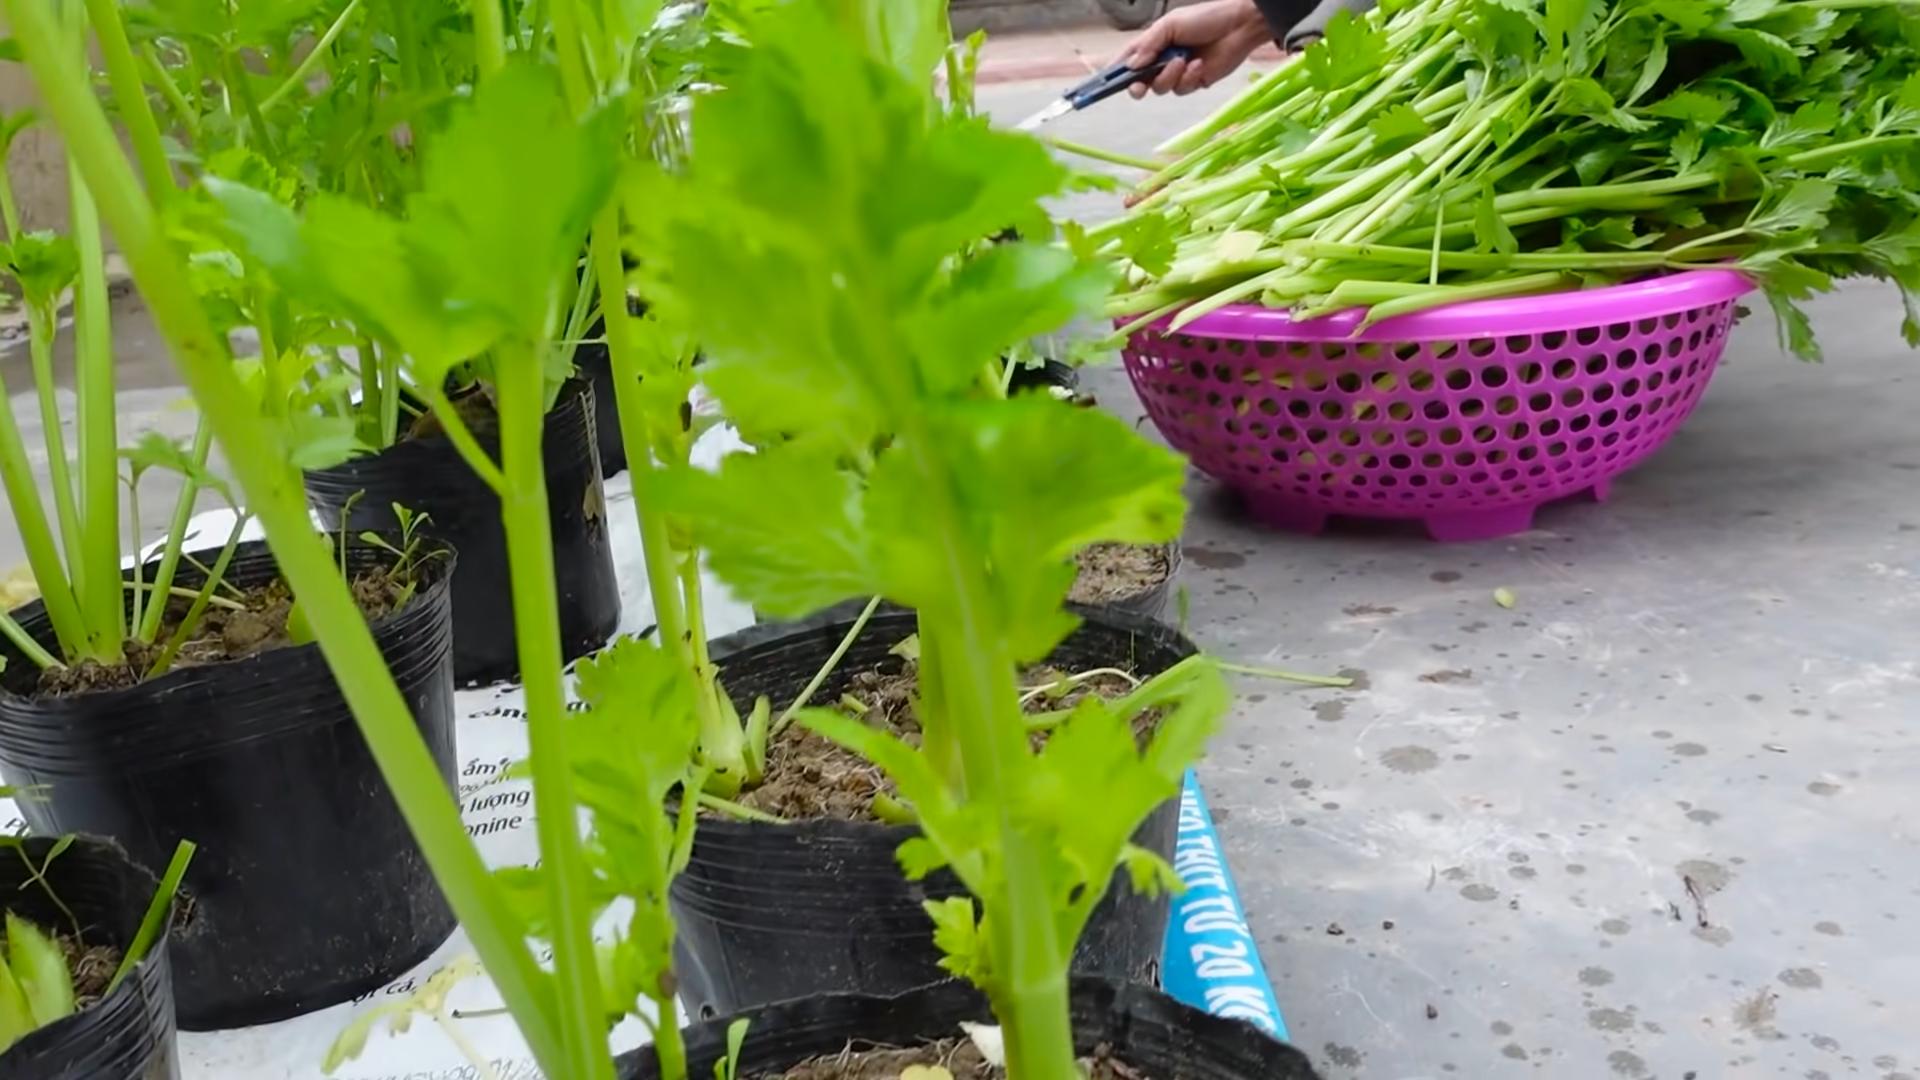
- How to Harvest: Use a sharp knife to cut the stalks at the base of the plant. You can harvest the entire plant at once, or you can harvest individual stalks as needed.
- Storing Your Celery: After harvesting, store your celery in the refrigerator. Wrap the stalks in a damp paper towel and place them in a plastic bag. This will help keep them fresh and crisp.
Troubleshooting
Sometimes, things don’t go exactly as planned. Here are a few common problems you might encounter and how to fix them:
- Problem: Celery base doesn’t sprout roots.
- Solution: Make sure you’re changing the water regularly and that the celery base is getting enough sunlight. Sometimes, it just takes a little longer for roots to emerge. You can also try using a rooting hormone to encourage root growth.
- Problem: Celery stalks are thin and weak.
- Solution: This could be due to a lack of nutrients or sunlight. Make sure you’re fertilizing your celery regularly and that it’s getting enough sunlight.
- Problem: Celery stalks are bitter.
- Solution: This could be due to a lack of water or blanching. Make sure you’re watering your celery regularly and consider blanching the stalks a few weeks before harvesting.
- Problem: Pests are attacking my celery.
- Solution: Identify the pest and take appropriate action. Insecticidal soap is a good option for many common pests. You can also try using organic pest control methods, such as introducing beneficial insects.
Tips for Success
Here are a few extra tips to help you grow the best celery possible:
- Start with a healthy celery base: Choose a celery base that is firm and free from blemishes.
- Use good-quality potting soil: This will provide your celery with the nutrients it needs to grow.
- Water regularly: Celery needs consistent moisture.
- Fertilize regularly: Celery is a heavy feeder.
- Provide plenty of sunlight: Celery loves sunlight.
- Protect from pests: Keep an eye out for pests and take action if needed.
- Be patient: Growing celery takes time and effort, but it’s well worth it!
Growing celery from kitchen scraps is a fun and rewarding project. It’s a great way to reduce waste, save money, and enjoy fresh, homegrown celery. So, give it a try! I’m sure you’ll be surprised at how easy it is. Happy gardening!
Conclusion
So, there you have it! Growing celery at home isn’t just a quirky gardening experiment; it’s a genuinely rewarding experience that puts fresh, crisp, and flavorful celery right at your fingertips. Forget those limp, store-bought stalks that have traveled miles and lost their vibrancy. With a little patience and these simple steps, you can cultivate celery that bursts with flavor and nutrients, elevating your salads, soups, and snacks to a whole new level.
Why is this DIY trick a must-try? Because it empowers you to control the quality of your food, reduces your reliance on grocery stores, and connects you with the natural world in a tangible way. Imagine the satisfaction of harvesting your own celery, knowing exactly where it came from and how it was grown. Plus, home-grown celery often boasts a more intense flavor than its commercially grown counterpart, making it a true culinary delight.
But the benefits don’t stop there. Growing celery at home is also a fantastic way to reduce food waste. Instead of tossing the celery base after using the stalks, you can give it a new lease on life by regrowing it. It’s a sustainable practice that aligns with a more eco-conscious lifestyle.
Looking for variations? Consider experimenting with different celery varieties. ‘Utah Tall’ is a classic choice, known for its crisp stalks and robust flavor. ‘Golden Self-Blanching’ is another popular option, offering a milder taste and a beautiful golden hue. You can also try growing celery in containers if you have limited garden space. Just make sure to choose a pot that’s at least 12 inches deep to accommodate the celery’s root system.
Another fun variation is to try growing celery from seed. While it requires a bit more patience and attention, starting from seed allows you to explore a wider range of celery varieties and tailor your growing conditions to your specific climate. Remember to start the seeds indoors about 10-12 weeks before the last expected frost.
Don’t be intimidated by the prospect of growing celery at home. It’s a surprisingly straightforward process that yields impressive results. Follow the steps outlined in this guide, and you’ll be well on your way to enjoying a bountiful harvest of fresh, flavorful celery.
We wholeheartedly encourage you to give this DIY trick a try. It’s a rewarding experience that will transform the way you think about celery. And once you’ve tasted the difference between home-grown and store-bought, you’ll never go back.
So, grab a celery base, a pot of soil, and get ready to embark on a gardening adventure. We’re confident that you’ll be amazed by the results. And don’t forget to share your experience with us! We’d love to hear about your successes, challenges, and any tips or tricks you discover along the way. Share your photos and stories on social media using #HomeGrownCelery, and let’s inspire others to embrace the joy of growing their own food. Let’s all learn how to grow celery together!
Frequently Asked Questions (FAQ)
Why is my celery bitter?
Bitterness in celery can be caused by several factors. One common reason is insufficient watering. Celery needs consistent moisture to thrive, and if it dries out, it can develop a bitter taste. Make sure to water your celery regularly, especially during hot, dry weather. Another factor is excessive heat. Celery prefers cooler temperatures, and if it’s exposed to prolonged periods of high heat, it can become bitter. Providing shade during the hottest part of the day can help prevent this. Finally, some celery varieties are naturally more prone to bitterness than others. Consider trying a different variety if you consistently experience bitterness.
How often should I water my celery?
Celery needs consistent moisture to thrive. Aim to water your celery deeply at least two to three times per week, or more often during hot, dry weather. The soil should be consistently moist but not waterlogged. A good way to check is to stick your finger into the soil about an inch deep. If it feels dry, it’s time to water. Using a soaker hose or drip irrigation can help ensure that the celery receives a consistent supply of water.
What kind of soil is best for growing celery?
Celery prefers rich, well-drained soil that is high in organic matter. Amend your soil with compost or well-rotted manure before planting to improve its fertility and drainage. The ideal soil pH for celery is between 6.0 and 6.8. You can test your soil pH using a soil testing kit and adjust it accordingly.
How much sunlight does celery need?
Celery needs at least six hours of sunlight per day to thrive. However, it also benefits from some afternoon shade, especially in hot climates. If you’re growing celery in a container, you can easily move it to a location that provides the right amount of sunlight.
When is the best time to harvest celery?
Celery is typically ready to harvest about 80-100 days after planting. The stalks should be at least 6-8 inches long and firm to the touch. You can harvest the entire plant at once, or you can harvest individual stalks as needed. To harvest, simply cut the stalks at the base of the plant with a sharp knife.
Can I grow celery in a container?
Yes, you can absolutely grow celery in a container. Choose a pot that is at least 12 inches deep and wide to accommodate the celery’s root system. Use a high-quality potting mix that is well-draining and rich in organic matter. Water regularly and fertilize every few weeks with a balanced fertilizer.
What are some common pests and diseases that affect celery?
Celery can be susceptible to several pests and diseases, including aphids, celery leaf tier, and early blight. Aphids can be controlled with insecticidal soap or neem oil. Celery leaf tier can be handpicked or treated with Bacillus thuringiensis (Bt). Early blight is a fungal disease that can be prevented by providing good air circulation and avoiding overhead watering.
How do I blanch celery?
Blanching celery involves excluding light from the stalks to make them more tender and less bitter. You can blanch celery by mounding soil around the stalks, wrapping them in newspaper, or using blanching collars. Start blanching about two weeks before you plan to harvest.
Can I regrow celery from the base?
Yes, you can regrow celery from the base. Cut off the stalks, leaving about 2 inches of the base intact. Place the base in a shallow dish of water, and set it in a sunny location. Change the water every day. After a few days, you should see new roots and leaves starting to grow. Once the roots are well-established, you can transplant the celery base into a pot of soil or directly into your garden.
What are the benefits of growing celery at home?
Growing celery at home offers several benefits, including fresher, more flavorful celery, reduced reliance on grocery stores, and a connection with the natural world. Home-grown celery often boasts a more intense flavor than its commercially grown counterpart, and you can control the quality of your food by growing it yourself. Plus, it’s a sustainable practice that reduces food waste.


Leave a Comment