
Grow Microgreens at Home and unlock a world of flavor and nutrition right on your windowsill! Imagine adding vibrant, peppery radish sprouts to your salad, or sprinkling delicate, sweet pea shoots onto your avocado toast – all harvested just moments before you eat them. Sounds delicious, right? Forget those bland, store-bought greens; we’re diving into the exciting world of DIY microgreens!
For centuries, various cultures have recognized the power of sprouts and young greens. From ancient Chinese medicine utilizing sprouted grains to European traditions of cultivating cress, the idea of harnessing the concentrated goodness of young plants is nothing new. But now, with our busy lives, the convenience and speed of growing microgreens at home makes it more appealing than ever.
Why should you bother with this DIY project? Well, for starters, microgreens are nutritional powerhouses, often packing more vitamins and minerals than their mature counterparts. Plus, they’re incredibly easy and quick to grow, even if you don’t have a green thumb or a large garden. I’m going to show you simple, effective tricks and hacks that will have you harvesting your own delicious and healthy microgreens in as little as a week. Ready to grow microgreens at home and transform your meals? Let’s get started!
Butternut Squash Growing Hacks: From Seed to Supper!
Hey there, fellow gardeners! I’m so excited to share my tried-and-true butternut squash growing hacks with you. Growing these delicious, versatile veggies can be incredibly rewarding, but it can also be a bit tricky. Don’t worry, though! With these tips and tricks, you’ll be harvesting a bumper crop of butternut squash in no time. Let’s dive in!
Choosing the Right Variety and Starting Seeds
Before we even get our hands dirty, let’s talk about variety selection and seed starting. This is a crucial first step!
* Variety Matters: Consider your climate and growing space. Some varieties are more compact and earlier maturing, perfect for shorter growing seasons. ‘Waltham Butternut’ is a classic choice, known for its reliability and excellent flavor. ‘Butterscotch PMR’ is a good option if you’re concerned about powdery mildew.
* Starting Seeds Indoors (Recommended): Butternut squash thrives with a head start. Starting seeds indoors gives them a jump on the season, especially in cooler climates.
* Timing is Key: Start seeds about 3-4 weeks before the last expected frost.
* Direct Sowing (Alternative): If you have a long growing season, you can direct sow seeds after the last frost, when the soil has warmed up to at least 60°F (15°C).
Step-by-Step Seed Starting Guide:
1. Gather Your Supplies: You’ll need seed starting trays or small pots, seed starting mix (not garden soil!), butternut squash seeds, a spray bottle, and a warm, sunny location or grow lights.
2. Prepare the Seed Starting Mix: Moisten the seed starting mix with water until it’s damp but not soggy.
3. Sow the Seeds: Plant 1-2 seeds per cell or pot, about 1 inch deep.
4. Cover and Water: Gently cover the seeds with the seed starting mix and water lightly with a spray bottle.
5. Provide Warmth: Butternut squash seeds need warmth to germinate. Aim for a soil temperature of 70-80°F (21-27°C). You can use a heat mat to speed up germination.
6. Provide Light: Once the seedlings emerge, provide them with plenty of light. A sunny windowsill might work, but grow lights are ideal for consistent growth.
7. Water Regularly: Keep the soil consistently moist, but not waterlogged.
8. Thin if Necessary: If you planted two seeds per cell and both germinate, thin to one seedling per cell by snipping off the weaker seedling at the soil line.
9. Harden Off: About a week before transplanting, gradually acclimate the seedlings to outdoor conditions. Start by placing them outside for a few hours each day in a sheltered location, gradually increasing the amount of time they spend outdoors.
Preparing the Garden Bed
Butternut squash are heavy feeders, so preparing the garden bed is essential for a successful harvest.
* Sunlight is Crucial: Choose a location that receives at least 6-8 hours of direct sunlight per day.
* Soil Preparation: Butternut squash prefers well-drained, fertile soil. Amend the soil with plenty of compost or well-rotted manure. This will improve drainage, add nutrients, and help retain moisture.
* Soil pH: Aim for a soil pH of 6.0-7.0.
* Raised Beds (Optional): Raised beds can improve drainage and soil warming, especially in areas with heavy clay soil.
* Spacing: Give butternut squash plants plenty of room to spread. Space plants 2-3 feet apart in rows that are 4-6 feet apart.
Step-by-Step Garden Bed Preparation:
1. Clear the Area: Remove any weeds, rocks, or debris from the planting area.
2. Amend the Soil: Spread a 2-4 inch layer of compost or well-rotted manure over the soil surface.
3. Till or Dig: Till the compost into the soil to a depth of 6-8 inches. If you prefer not to till, you can dig the compost into the soil with a shovel or garden fork.
4. Create Mounds or Rows: You can plant butternut squash on mounds or in rows. Mounds can improve drainage, while rows make it easier to water and weed.
5. Water Thoroughly: Water the prepared garden bed thoroughly before transplanting the seedlings.
Transplanting and Early Care
Now for the exciting part – getting those seedlings into the ground!
* Timing is Everything: Transplant seedlings after the last frost, when the soil has warmed up to at least 60°F (15°C).
* Handle with Care: Gently remove the seedlings from their pots, being careful not to damage the roots.
* Planting Depth: Plant the seedlings at the same depth they were growing in their pots.
* Water Immediately: Water the seedlings thoroughly after transplanting.
* Mulch: Apply a layer of mulch around the plants to help retain moisture, suppress weeds, and regulate soil temperature. Straw, hay, or wood chips are good options.
* Protect from Pests: Young butternut squash plants are vulnerable to pests like squash bugs and squash vine borers. Keep an eye out for these pests and take action if necessary.
Step-by-Step Transplanting Guide:
1. Dig Holes: Dig holes in the prepared garden bed, spacing them 2-3 feet apart.
2. Remove Seedlings: Gently remove the seedlings from their pots by squeezing the bottom of the pot and tapping it lightly.
3. Loosen Roots: Gently loosen the roots of the seedlings before planting.
4. Plant Seedlings: Place the seedlings in the holes and backfill with soil.
5. Water Thoroughly: Water the seedlings thoroughly after planting.
6. Mulch: Apply a layer of mulch around the plants.
7. Protect from Pests: Consider using row covers to protect young plants from pests.
Watering and Fertilizing
Consistent watering and proper fertilization are key to a bountiful butternut squash harvest.
* Watering: Butternut squash needs consistent moisture, especially during fruit development. Water deeply and regularly, especially during dry spells. Aim for about 1 inch of water per week.
* Avoid Overhead Watering: Water at the base of the plants to avoid wetting the foliage, which can lead to fungal diseases.
* Fertilizing: Butternut squash are heavy feeders and benefit from regular fertilization.
* Side-Dressing: Side-dress plants with compost or a balanced fertilizer every 3-4 weeks.
* Foliar Feeding (Optional): You can also foliar feed plants with a seaweed extract or fish emulsion to provide them with micronutrients.
Watering and Fertilizing Schedule:
* At Planting: Water thoroughly after transplanting.
* Weekly Watering: Water deeply once a week, or more often during dry spells.
* Side-Dressing: Side-dress with compost or fertilizer every 3-4 weeks.
* Foliar Feeding (Optional): Foliar feed every 2-3 weeks.
Pest and Disease Management
Unfortunately, butternut squash can be susceptible to various pests and diseases. Early detection and prevention are crucial.
* Squash Bugs: These pests can suck the sap from leaves and stems, weakening the plants. Handpick them off the plants or use insecticidal soap.
* Squash Vine Borers: These pests bore into the stems of the plants, causing them to wilt and die. Wrap the stems with aluminum foil or use row covers to prevent them from laying eggs.
* Powdery Mildew: This fungal disease can cause a white, powdery coating on the leaves. Improve air circulation, avoid overhead watering, and use a fungicide if necessary.
* Cucumber Beetles: These beetles can transmit diseases and damage the foliage. Use row covers or insecticidal soap to control them.
Pest and Disease Prevention Tips:
* Crop Rotation: Rotate crops each year to prevent the buildup of pests and diseases in the soil.
* Good Air Circulation: Provide good air circulation around the plants by spacing them properly and pruning if necessary.
* Water at the Base: Water at the base of the plants to avoid wetting the foliage.
* Remove Infected Leaves: Remove any infected leaves promptly to prevent the spread of disease.
* Use Resistant Varieties: Choose varieties that are resistant to common pests and diseases.
* Monitor Regularly: Monitor plants regularly for signs of pests and diseases.
Pollination
Butternut squash requires pollination to produce fruit. If you’re not seeing fruit set, you may need to hand-
Conclusion
So, there you have it! Growing microgreens at home is not only surprisingly simple, but it’s also an incredibly rewarding experience that brings fresh, vibrant flavors and a nutritional powerhouse right to your kitchen counter. We’ve walked you through the process, demystified the steps, and hopefully, inspired you to ditch the expensive grocery store prices and embrace the joy of cultivating your own tiny, edible garden.
Why is this DIY trick a must-try? Because it’s a game-changer for anyone looking to boost their health, elevate their culinary creations, and connect with the natural world, even in a small way. Think about it: you’re getting access to incredibly nutrient-dense greens, often packed with more vitamins and minerals than their mature counterparts, all without the need for a sprawling garden or extensive gardening knowledge. Plus, the satisfaction of harvesting something you’ve nurtured from seed to sprout is truly unparalleled.
But the beauty of growing microgreens at home lies in its adaptability. Feel free to experiment with different seed varieties. Radish microgreens offer a peppery kick, while broccoli microgreens are mild and slightly sweet. Sunflower microgreens provide a nutty flavor, and pea shoots bring a delightful sweetness. You can even create your own custom blends to tailor the taste to your preferences.
Consider also experimenting with different growing mediums. While we’ve focused on soil, you can also use hydroponic methods with coconut coir or even just paper towels. Each medium will offer slightly different results, so don’t be afraid to explore and find what works best for you.
Don’t be intimidated if your first attempt isn’t perfect. Growing microgreens is a learning process, and every batch will teach you something new. The key is to be patient, observant, and willing to adjust your approach as needed.
We wholeheartedly encourage you to give this DIY project a try. It’s a fantastic way to add fresh, healthy ingredients to your diet, reduce your grocery bill, and discover the simple pleasure of growing your own food. And most importantly, we want to hear about your experiences! Share your photos, tips, and challenges in the comments below. Let’s build a community of microgreen enthusiasts and learn from each other. What varieties did you try? What growing medium did you prefer? What delicious dishes did you create with your homegrown microgreens? Your insights could inspire others to embark on their own microgreen adventures. So, get those seeds soaking, and let the growing begin! Embrace the journey of growing microgreens at home and discover the incredible benefits they offer.
Frequently Asked Questions (FAQs)
What exactly are microgreens?
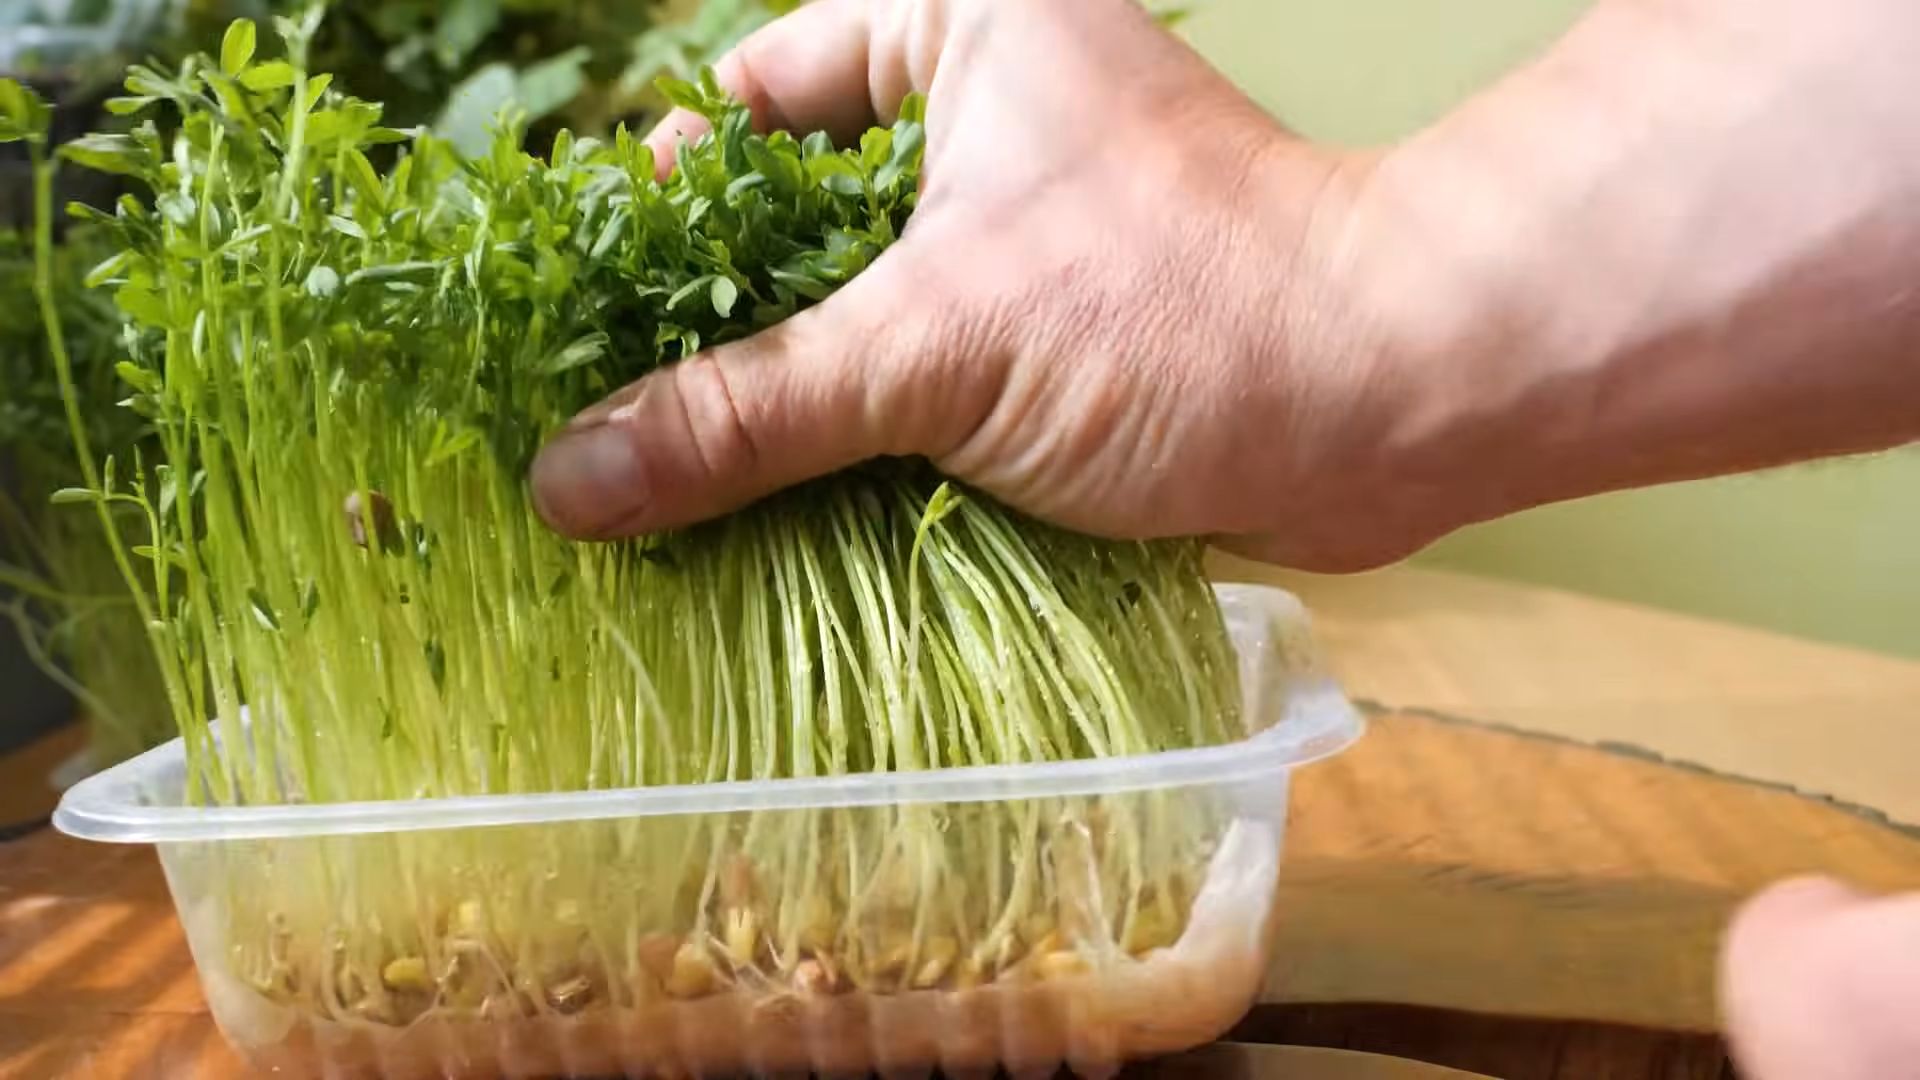
Microgreens are young vegetable greens that are harvested just after the cotyledon leaves (the first leaves to emerge from the seed) have developed, and often after the first true leaves have appeared. They are typically about 1-3 inches tall and are packed with flavor and nutrients. They are different from sprouts, which are germinated seeds eaten whole, including the root, seed, and stem. Microgreens are grown in soil or a soil substitute and only the stems and leaves are eaten.
What kind of seeds can I use to grow microgreens?
A wide variety of seeds can be used to grow microgreens, including:
* Vegetables: Broccoli, kale, radish, peas, spinach, arugula, mustard greens, beets, carrots
* Herbs: Basil, cilantro, dill, parsley
* Grains: Wheatgrass, barley, oats
* Flowers: Sunflower, amaranth
It’s important to use seeds that are specifically labeled for sprouting or microgreen production to ensure they are free from harmful pathogens. Avoid using seeds that have been treated with fungicides or other chemicals.
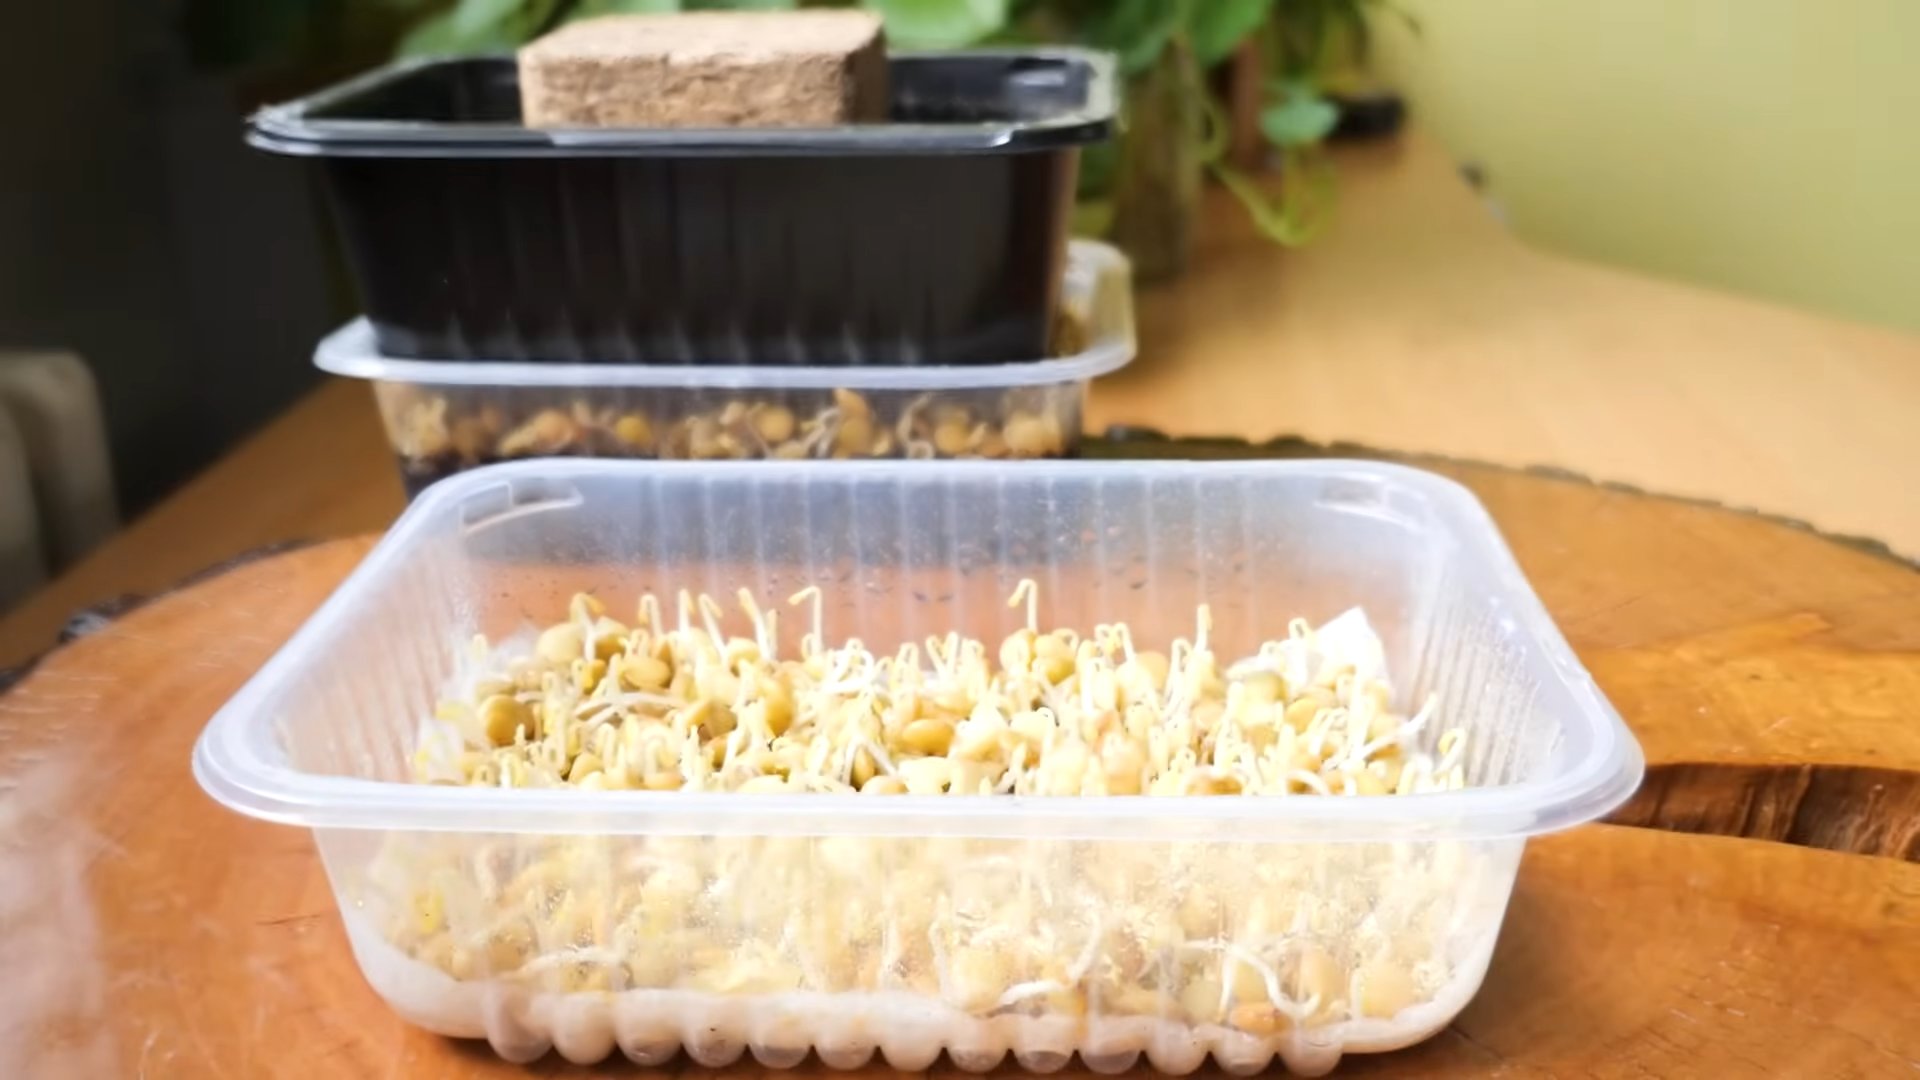
How long does it take to grow microgreens?
The growing time for microgreens varies depending on the variety, but it typically takes between 7 and 21 days from seeding to harvest. Radish microgreens, for example, are among the fastest to grow, while some herbs may take a bit longer.
What kind of light do microgreens need?
Microgreens need adequate light to grow properly. While they can be grown indoors near a sunny window, supplemental lighting is often necessary, especially in areas with limited sunlight. LED grow lights are a great option because they are energy-efficient and provide the right spectrum of light for plant growth. Aim for 12-16 hours of light per day.
How often should I water my microgreens?
Microgreens need to be kept consistently moist, but not waterlogged. Water them gently once or twice a day, using a spray bottle or a watering can with a fine rose. The goal is to keep the soil moist without overwatering, which can lead to mold or fungal growth. Check the moisture level of the soil regularly by feeling it with your finger.
How do I prevent mold from growing on my microgreens?
Mold can be a common problem when growing microgreens, but there are several things you can do to prevent it:
* Use clean containers and growing medium.
* Ensure good air circulation. A small fan can help.
* Avoid overwatering.
* Use a hydrogen peroxide solution (1 part hydrogen peroxide to 10 parts water) to spray the microgreens if you notice any mold growth.
* Remove any affected areas immediately.
How do I harvest microgreens?
Microgreens are ready to harvest when they have developed their cotyledon leaves and often their first true leaves. Use sharp scissors or a knife to cut the stems just above the soil surface. Rinse the microgreens gently before using them.
How long do microgreens last after harvesting?
Microgreens are best used immediately after harvesting, but they can be stored in the refrigerator for up to a week. To store them, rinse them gently, pat them dry with a paper towel, and store them in a sealed container or plastic bag in the refrigerator.
Can I reuse the soil after harvesting microgreens?
It’s generally not recommended to reuse the soil after harvesting microgreens, as it may contain pathogens or depleted nutrients. It’s best to start with fresh soil for each batch.
Are microgreens safe to eat?
Yes, microgreens are generally safe to eat, but it’s important to follow proper hygiene practices to minimize the risk of contamination. Use clean containers and growing medium, wash your hands thoroughly before handling the seeds and microgreens, and rinse the microgreens before eating them.
What are the nutritional benefits of microgreens?
Microgreens are packed with vitamins, minerals, and antioxidants. They often contain higher concentrations of these nutrients than their mature counterparts. The specific nutritional content varies depending on the variety of microgreen.
Can I grow microgreens without soil?
Yes, you can grow microgreens without soil using hydroponic methods. Coconut coir, hemp mats, and even paper towels can be used as growing mediums. These methods require careful monitoring of moisture levels and nutrient solutions.
What are some creative ways to use microgreens?
Microgreens can be used in a variety of dishes, including:
* Salads
* Sandwiches and wraps
* Soups and stews
* Smoothies
* Garnishes for entrees
* Toppings for pizzas and tacos
Their vibrant colors and intense flavors make them a versatile and nutritious addition to any meal.
Leave a Comment